


![How to Build an AI Assistant with Keith Moehring [MAICON 2025 Speaker Series]](https://www.marketingaiinstitute.com/hubfs/MAICON-Speaker_Series%20%281%29.png)


![[The AI Show Episode 156]: AI Answers - Data Privacy, AI Roadmaps, Regulated Industries, Selling AI to the C-Suite & Change Management](https://www.marketingaiinstitute.com/hubfs/ep%20156%20cover.png)
![[The AI Show Episode 155]: The New Jobs AI Will Create, Amazon CEO: AI Will Cut Jobs, Your Brain on ChatGPT, Possible OpenAI-Microsoft Breakup & Veo 3 IP Issues](https://www.marketingaiinstitute.com/hubfs/ep%20155%20cover.png)


_incamerastock_Alamy.jpg?width=1280&auto=webp&quality=80&disable=upscale#)
_Brain_light_Alamy.jpg?width=1280&auto=webp&quality=80&disable=upscale#)


![Nothing Phone (3) has a 50MP ‘periscope’ telephoto lens – here are the first samples [Gallery]](https://i0.wp.com/9to5google.com/wp-content/uploads/sites/4/2025/06/nothing-phone-3-telephoto.jpg?resize=1200%2C628&quality=82&strip=all&ssl=1)


The Ultimate Guide to Flutter Lists with Bloc : Part 3
Part 3 : Powerful Filtering for Your Flutter Listings Welcome back to our Flutter listing series! In Parts 1 and 2, we built a powerful Pokémon listing with pagination and infinite scrolling. Now it's time to introduce another essential feature of any good listing: filtering. Effective filtering transforms a simple list into a powerful tool that helps users find exactly what they're looking for, without extra effort and with less time needed. Whether you're filtering Pokémon by type, searching products by category, or sorting messages by date, the principles remain the same. In this third blog, we'll implement a complete filtering system for our Pokédex app. We'll create a simple FilterBloc that communicates seamlessly with our ListingBloc, apply filters efficiently without sacrificing performance, and ensure a smooth UX throughout the process. Let's explore how to build a filtering system that's both powerful and maintainable, all while keeping our Pokémon list running smoothly. Let's talk about the Filters The filtering system of a listing is a complex feature. It needs to combine multiple filter criteria while ensuring the UI responds appropriately throughout the application. This complexity requires the filter to maintain its own state. And that's where our beloved friend Bloc comes to the rescue. Creating the Filters State First, we need to consider that we don't need multiple filter states. The PokemonFilterState is singular, and only its values change as users select different filtering options. We can start with a simple implementation: final class PokemonFilterState extends Equatable { final Map selectedFilters; const PokemonFilterState({this.selectedFilters = const {}}); PokemonFilterState copyWith({Map? selectedFilters}) { return PokemonFilterState( selectedFilters: selectedFilters ?? this.selectedFilters, ); } @override List get props => [selectedFilters]; } I chose Map for the selected filters because it gives us flexibility to store different types of filter values. For example, we might need to store string values for Pokemon types, numeric ranges for stats, or boolean values for availability filters—all within the same state object. What makes this approach powerful is that I can track every filter change reliably by using consistent key values as identifiers. By centralizing these keys—either fetching them from an API or storing them as static constants—I ensure my UI and business logic remain perfectly aligned. This prevents filter-related bugs and makes the codebase more maintainable as the filtering system grows in complexity. Apply filter changes with Events Moving on, now that we initialized our state with an empty value, we need to figure out a way to add some values. That's where the events step up. But, what are the actual events that we need? Let's figure out first how to add a value. For this example, we will cover only two types of filters with the first one being the favorite pokemons, and the second one is based on the type of each pokemon. Let's make it! Toggling the filters sealed class PokemonFilterEvent extends Equatable { const PokemonFilterEvent(); @override List get props => []; } class ToggleFilter extends PokemonFilterEvent { final bool? showFavorites; final Set? types; const ToggleFilter({this.showFavorites, this.types}); } With this approach, we separate the logic of each filter by providing its own dedicated variable. This gives us clearer code and more flexibility when handling different filter types: For favorite Pokémon, we simply need a boolean flag (showFavorites) - either we want to see favorites only (true) or we don't (false). Nothing more complex is required here. For Pokémon types, we use a Set instead of a List. Why? Because each type should only appear once in our filter criteria (there's no scenario where we'd need to apply "Water" type twice). Sets inherently prevent duplicates and offer performance benefits when checking if a value exists.
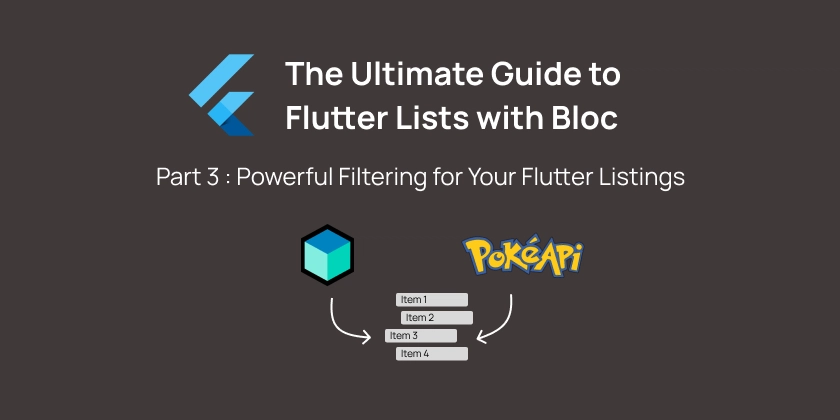
Part 3 : Powerful Filtering for Your Flutter Listings
Welcome back to our Flutter listing series! In Parts 1 and 2, we built a powerful Pokémon listing with pagination and infinite scrolling. Now it's time to introduce another essential feature of any good listing: filtering.
Effective filtering transforms a simple list into a powerful tool that helps users find exactly what they're looking for, without extra effort and with less time needed. Whether you're filtering Pokémon by type, searching products by category, or sorting messages by date, the principles remain the same.
In this third blog, we'll implement a complete filtering system for our Pokédex app. We'll create a simple FilterBloc that communicates seamlessly with our ListingBloc, apply filters efficiently without sacrificing performance, and ensure a smooth UX throughout the process.
Let's explore how to build a filtering system that's both powerful and maintainable, all while keeping our Pokémon list running smoothly.
Let's talk about the Filters
The filtering system of a listing is a complex feature. It needs to combine multiple filter criteria while ensuring the UI responds appropriately throughout the application. This complexity requires the filter to maintain its own state. And that's where our beloved friend Bloc comes to the rescue.
Creating the Filters State
First, we need to consider that we don't need multiple filter states. The PokemonFilterState is singular, and only its values change as users select different filtering options. We can start with a simple implementation:
final class PokemonFilterState extends Equatable {
  final Map<String, dynamic> selectedFilters;

  const PokemonFilterState({this.selectedFilters = const {}});

  PokemonFilterState copyWith({Map<String, dynamic>? selectedFilters}) {
    return PokemonFilterState(
      selectedFilters: selectedFilters ?? this.selectedFilters,
    );
  }

  @override
  List<Object> get props => [selectedFilters];
}
I chose Map for the selected filters because it gives us flexibility to store different types of filter values. For example, we might need to store string values for Pokemon types, numeric ranges for stats, or boolean values for availability filters—all within the same state object.
What makes this approach powerful is that I can track every filter change reliably by using consistent key values as identifiers. By centralizing these keys—either fetching them from an API or storing them as static constants—I ensure my UI and business logic remain perfectly aligned. This prevents filter-related bugs and makes the codebase more maintainable as the filtering system grows in complexity.
Apply filter changes with Events
Moving on, now that we initialized our state with an empty value, we need to figure out a way to add some values. That's where the events step up. But, what are the actual events that we need? Let's figure out first how to add a value. For this example, we will cover only two types of filters with the first one being the favorite pokemons, and the second one is based on the type of each pokemon. Let's make it!
Toggling the filters
sealed class PokemonFilterEvent extends Equatable {
  const PokemonFilterEvent();

  @override
  List<Object> get props => [];
}

class ToggleFilter extends PokemonFilterEvent {
  final bool? showFavorites;
  final Set<String>? types;

  const ToggleFilter({this.showFavorites, this.types});
}
With this approach, we separate the logic of each filter by providing its own dedicated variable. This gives us clearer code and more flexibility when handling different filter types:
- For favorite Pokémon, we simply need a boolean flag
(showFavorites)- either we want to see favorites only (true) or we don't (false). Nothing more complex is required here. - For Pokémon types, we use a
Setinstead of a List. Why? Because each type should only appear once in our filter criteria (there's no scenario where we'd need to apply "Water" type twice). Sets inherently prevent duplicates and offer performance benefits when checking if a value exists.