


![How to Build an AI Assistant with Keith Moehring [MAICON 2025 Speaker Series]](https://www.marketingaiinstitute.com/hubfs/MAICON-Speaker_Series%20%281%29.png)


![[The AI Show Episode 156]: AI Answers - Data Privacy, AI Roadmaps, Regulated Industries, Selling AI to the C-Suite & Change Management](https://www.marketingaiinstitute.com/hubfs/ep%20156%20cover.png)
![[The AI Show Episode 155]: The New Jobs AI Will Create, Amazon CEO: AI Will Cut Jobs, Your Brain on ChatGPT, Possible OpenAI-Microsoft Breakup & Veo 3 IP Issues](https://www.marketingaiinstitute.com/hubfs/ep%20155%20cover.png)


_incamerastock_Alamy.jpg?width=1280&auto=webp&quality=80&disable=upscale#)
_Brain_light_Alamy.jpg?width=1280&auto=webp&quality=80&disable=upscale#)


![Nothing Phone (3) has a 50MP ‘periscope’ telephoto lens – here are the first samples [Gallery]](https://i0.wp.com/9to5google.com/wp-content/uploads/sites/4/2025/06/nothing-phone-3-telephoto.jpg?resize=1200%2C628&quality=82&strip=all&ssl=1)


Easy Steps to Deploying Windows 11 VM on Microsoft Azure
Easy Steps to Deploying Windows 11 VM on Microsoft Azure Deploying A VM on Azure has to be one of the most seamless ways to get a VM in modern times and I’ll be showing you how to do so in no time. First, log on to the Azure portal at portal.azure.com Then, search for virtual machine resource from the search bar. This would open the virtual machines page, select create, then Azure virtual machine. By default, for free Azure accounts, a subscription would already be active, You can then go ahead and create a new resource group or select an existing one. Then name your VM, select a region, and availability option based on vertical or horizontal redundancy requirements for your VM. If the VM doesn’t need one, No Infrastructure redundancy require is selected. The security type is set to standard. For accounts using free subscriptions, some images won’t be available to you. I’m also on the free account, the image available is Windows 11 Enterprise, click on see all images Then click on select, and select the image. The VM architecture is set to x64 by default, since ARM64 is primarily used in mobile and embedded devices, while x64 (or x86–64) is dominant in desktop and server PCs. Then VM size is selected based on workload type and usage, which in turn affects the cost of running it. An administrator account must be created for the VM, which would be used to access the VM once it’s deployed. Next is the Disk options. By default, these are already setup for optimal performances, but can be modified to taste. Next is the Networking options, A virtual network is created by default, but the Public IP address might need to be modified to be dynamic as shown in the image below. Click on create new under the Public IP option. From here, you can simply click review + create to continue with this case of a simple VM. The VM settings are then checked and validated. Once validation is passed, you get this overview page of all your settings before proceeding to create the VM. Once the Deployment is complete, click go to resource. This overview page opens, click connect to connect to the VM. Then download the RDP file. Open the RDP file from your downloads folder. On windows, the RDP file opens in The Remote Desktop App by default. But on MacOS, I had to install the new Windows App, which opens the Remote desktop tool once I open the RDP file. A connection is established to the VM, then It asks for the Admin credentials we created whilst creating the VM. The VM then opens successfully. And that’s how to successfully deploy a Windows 11 VM on Microsoft Azure.
Easy Steps to Deploying Windows 11 VM on Microsoft Azure
Deploying A VM on Azure has to be one of the most seamless ways to get a VM in modern times and I’ll be showing you how to do so in no time.
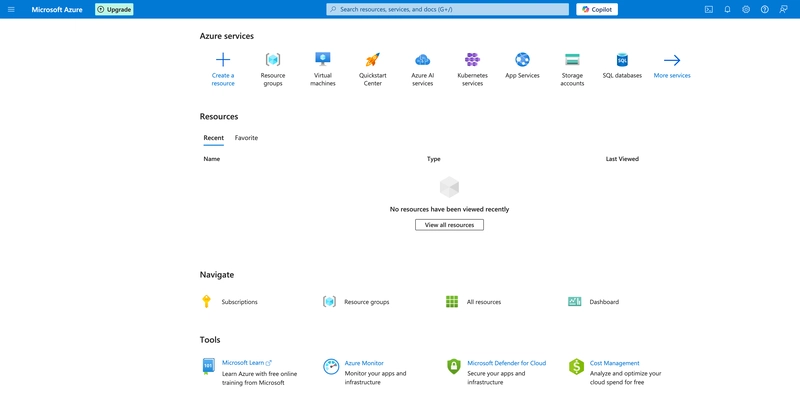
First, log on to the Azure portal at portal.azure.com
Then, search for virtual machine resource from the search bar.
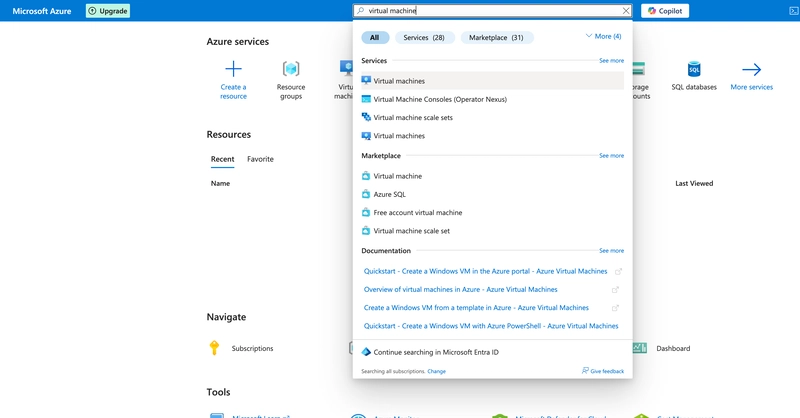
This would open the virtual machines page, select create, then Azure virtual machine.

By default, for free Azure accounts, a subscription would already be active, You can then go ahead and create a new resource group or select an existing one.

Then name your VM, select a region, and availability option based on vertical or horizontal redundancy requirements for your VM. If the VM doesn’t need one, No Infrastructure redundancy require is selected. The security type is set to standard.

For accounts using free subscriptions, some images won’t be available to you. I’m also on the free account, the image available is Windows 11 Enterprise, click on see all images

Then click on select, and select the image.

The VM architecture is set to x64 by default, since ARM64 is primarily used in mobile and embedded devices, while x64 (or x86–64) is dominant in desktop and server PCs.
Then VM size is selected based on workload type and usage, which in turn affects the cost of running it.
An administrator account must be created for the VM, which would be used to access the VM once it’s deployed. Next is the Disk options.

By default, these are already setup for optimal performances, but can be modified to taste.

Next is the Networking options, A virtual network is created by default, but the Public IP address might need to be modified to be dynamic as shown in the image below. Click on create new under the Public IP option.
From here, you can simply click review + create to continue with this case of a simple VM.

The VM settings are then checked and validated.
Once validation is passed, you get this overview page of all your settings before proceeding to create the VM.

Once the Deployment is complete, click go to resource.

This overview page opens, click connect to connect to the VM.

Then download the RDP file.

Open the RDP file from your downloads folder.

On windows, the RDP file opens in The Remote Desktop App by default.
But on MacOS, I had to install the new Windows App, which opens the Remote desktop tool once I open the RDP file.

A connection is established to the VM, then It asks for the Admin credentials we created whilst creating the VM.
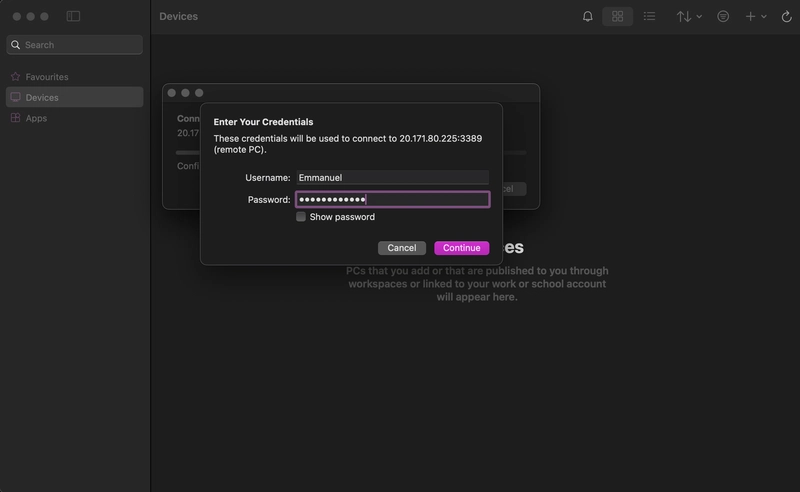
The VM then opens successfully.

And that’s how to successfully deploy a Windows 11 VM on Microsoft Azure.