


![[The AI Show Episode 150]: AI Answers: AI Roadmaps, Which Tools to Use, Making the Case for AI, Training, and Building GPTs](https://www.marketingaiinstitute.com/hubfs/ep%20150%20cover.png)
![[The AI Show Episode 149]: Google I/O, Claude 4, White Collar Jobs Automated in 5 Years, Jony Ive Joins OpenAI, and AI’s Impact on the Environment](https://www.marketingaiinstitute.com/hubfs/ep%20149%20cover.png)


![How to Survive in Tech When Everything's Changing w/ 21-year Veteran Dev Joe Attardi [Podcast #174]](https://cdn.hashnode.com/res/hashnode/image/upload/v1748483423794/0848ad8d-1381-474f-94ea-a196ad4723a4.png?#)


.jpg?#)


_ArtemisDiana_Alamy.jpg?width=1280&auto=webp&quality=80&disable=upscale#)


![Apple 15-inch M4 MacBook Air On Sale for $1023.86 [Lowest Price Ever]](https://www.iclarified.com/images/news/97468/97468/97468-640.jpg)


The Smart Way to Host a Minecraft Server: Port Forwarding Essentials
Hosting your own Minecraft server is one of the most rewarding ways to experience the game. Whether you're playing with friends or building a public world, one of the key steps to getting your server online is configuring port forwarding. This guide walks you through what port forwarding is, why it’s required for Minecraft servers, how to set it up in 2025, and what to do if it’s not an option due to internet service provider (ISP) restrictions. It also covers modern tunneling tools like Pinggy that serve as alternatives when port forwarding is not possible. What is Port Forwarding? Port forwarding is a network configuration that allows external devices to access services on a private network. When you set up port forwarding, you tell your router to direct incoming traffic on a specific port (used by Minecraft) to your server’s local IP address inside your network. Minecraft servers use TCP port 25565 by default. Without port forwarding, only devices connected to your local network can join the server. With it, others on the internet can connect to your server using your public IP address. Why Minecraft Requires Port Forwarding If you’re hosting a Minecraft server from your own machine and want others to join from outside your local network, port forwarding is essential. It enables: Access to the server from any location A direct connection using your public IP and Minecraft's port Full control over game settings, mods, and server policies Hosting without relying on third-party services How to Set Up Minecraft Port Forwarding 1. Set Up the Minecraft Server Download and run the official Minecraft server file (server.jar) from the Minecraft website. Make sure the server is configured and working locally. 2. Find Your Local IP Address You’ll need your device’s local IP to forward traffic correctly. Windows: Open Command Prompt and run ipconfig. Look for the IPv4 address. macOS/Linux: Use ifconfig or ip addr in the terminal. 3. Access Your Router's Admin Interface Open a browser and go to your router's IP address (commonly 192.168.1.1 or 192.168.0.1). Log in using your router credentials. This information may be on a sticker on the router. 4. Locate Port Forwarding Settings The location of this option varies by router: Netgear: Advanced > Port Forwarding TP-Link: NAT Forwarding > Virtual Servers ASUS: WAN > Virtual Server/Port Forwarding Linksys: Apps and Gaming > Port Range Forwarding 5. Add a New Port Forwarding Rule Typical settings for Minecraft: Service Name: Minecraft External Port: 25565 Internal IP Address: Your local IP address Internal Port: 25565 Protocol: TCP or Both (TCP/UDP) Status: Enabled Save and apply the settings. 6. Share Your Public IP You can find your public IP by searching “what is my IP” on Google or visiting a website like whatismyip.com. This is the address others will use to connect. 7. Test the Server Ask someone outside your network to join the server using: :25565 If everything is set up correctly, they should be able to connect. ISP-Specific Notes Some ISPs may make port forwarding difficult or impossible: T-Mobile Home Internet: Uses Carrier-Grade NAT (CGNAT), which blocks port forwarding entirely. Xfinity: Use 10.0.0.1 to access router settings and add port rules under Advanced > Port Forwarding. AT&T and Verizon: May require enabling a DMZ or adjusting firewall rules. Troubleshooting Port Forwarding Issues Server Not Reachable Verify that your server is running and listening on port 25565. Double-check the internal IP and port forwarding rule. Ensure your firewall allows traffic on port 25565. Router Access Problems Make sure you’re using the correct gateway IP. If login credentials don’t work, reset the router or refer to the documentation. UPnP Not Working Universal Plug and Play (UPnP) can automate port forwarding, but it’s often unreliable. Manual configuration is more stable. Alternatives When Port Forwarding Isn't Possible If you’re unable to configure port forwarding due to ISP restrictions like CGNAT, or if you don’t have access to your router, tunneling tools offer a practical workaround. Using Pinggy Pinggy is a lightweight reverse tunneling tool that allows public access to local services. It can tunnel Minecraft traffic securely over TCP, bypassing NAT and firewall restrictions. Example command to expose a Minecraft server: ssh -p 443 -R0:localhost:25565 tcp@a.pinggy.io Once connected, Pinggy will provide a public TCP address (e.g., subdomain.pinggy.io:port). Players can use this to connect to your server. Important: You should still ensure your server is properly secured when exposed to the internet via tunnels. Securing Your Public Minecraft Server Whether you use port forwarding or a tunn
Hosting your own Minecraft server is one of the most rewarding ways to experience the game. Whether you're playing with friends or building a public world, one of the key steps to getting your server online is configuring port forwarding.
This guide walks you through what port forwarding is, why it’s required for Minecraft servers, how to set it up in 2025, and what to do if it’s not an option due to internet service provider (ISP) restrictions. It also covers modern tunneling tools like Pinggy that serve as alternatives when port forwarding is not possible.
What is Port Forwarding?
Port forwarding is a network configuration that allows external devices to access services on a private network. When you set up port forwarding, you tell your router to direct incoming traffic on a specific port (used by Minecraft) to your server’s local IP address inside your network.
Minecraft servers use TCP port 25565 by default. Without port forwarding, only devices connected to your local network can join the server. With it, others on the internet can connect to your server using your public IP address.
Why Minecraft Requires Port Forwarding
If you’re hosting a Minecraft server from your own machine and want others to join from outside your local network, port forwarding is essential. It enables:
- Access to the server from any location
- A direct connection using your public IP and Minecraft's port
- Full control over game settings, mods, and server policies
- Hosting without relying on third-party services
How to Set Up Minecraft Port Forwarding
1. Set Up the Minecraft Server
Download and run the official Minecraft server file (server.jar) from the Minecraft website. Make sure the server is configured and working locally.
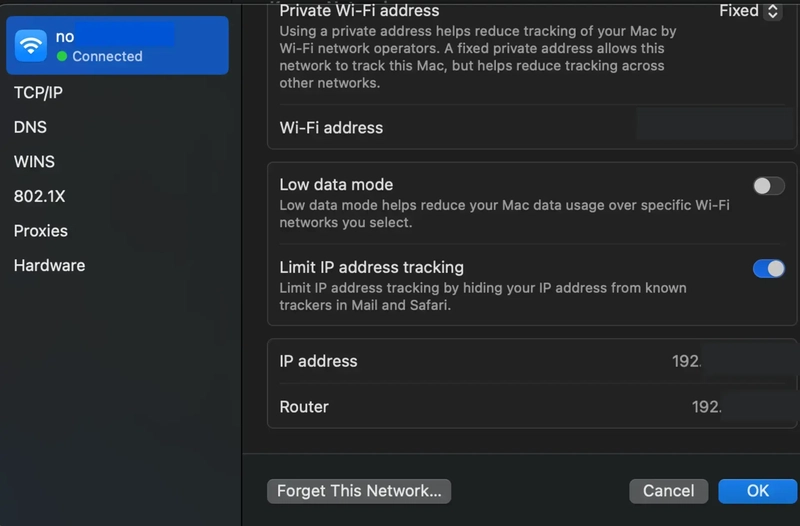
2. Find Your Local IP Address
You’ll need your device’s local IP to forward traffic correctly.
-
Windows: Open Command Prompt and run
ipconfig. Look for the IPv4 address. -
macOS/Linux: Use
ifconfigorip addrin the terminal.
3. Access Your Router's Admin Interface
Open a browser and go to your router's IP address (commonly 192.168.1.1 or 192.168.0.1). Log in using your router credentials. This information may be on a sticker on the router.
4. Locate Port Forwarding Settings
The location of this option varies by router:
- Netgear: Advanced > Port Forwarding
- TP-Link: NAT Forwarding > Virtual Servers
- ASUS: WAN > Virtual Server/Port Forwarding
- Linksys: Apps and Gaming > Port Range Forwarding
5. Add a New Port Forwarding Rule
Typical settings for Minecraft:
- Service Name: Minecraft
-
External Port:
25565 - Internal IP Address: Your local IP address
-
Internal Port:
25565 - Protocol: TCP or Both (TCP/UDP)
- Status: Enabled
Save and apply the settings.
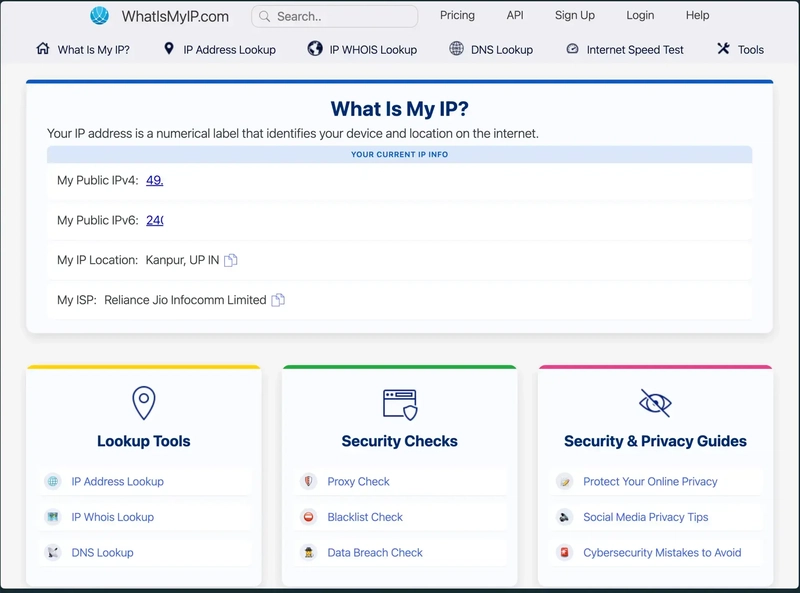
6. Share Your Public IP
You can find your public IP by searching “what is my IP” on Google or visiting a website like whatismyip.com. This is the address others will use to connect.
7. Test the Server
Ask someone outside your network to join the server using:
:25565
If everything is set up correctly, they should be able to connect.
ISP-Specific Notes
Some ISPs may make port forwarding difficult or impossible:
- T-Mobile Home Internet: Uses Carrier-Grade NAT (CGNAT), which blocks port forwarding entirely.
-
Xfinity: Use
10.0.0.1to access router settings and add port rules under Advanced > Port Forwarding. - AT&T and Verizon: May require enabling a DMZ or adjusting firewall rules.
Troubleshooting Port Forwarding Issues
Server Not Reachable
- Verify that your server is running and listening on port 25565.
- Double-check the internal IP and port forwarding rule.
- Ensure your firewall allows traffic on port 25565.
Router Access Problems
- Make sure you’re using the correct gateway IP.
- If login credentials don’t work, reset the router or refer to the documentation.
UPnP Not Working
Universal Plug and Play (UPnP) can automate port forwarding, but it’s often unreliable. Manual configuration is more stable.
Alternatives When Port Forwarding Isn't Possible
If you’re unable to configure port forwarding due to ISP restrictions like CGNAT, or if you don’t have access to your router, tunneling tools offer a practical workaround.
Using Pinggy
Pinggy is a lightweight reverse tunneling tool that allows public access to local services. It can tunnel Minecraft traffic securely over TCP, bypassing NAT and firewall restrictions.
Example command to expose a Minecraft server:
ssh -p 443 -R0:localhost:25565 tcp@a.pinggy.io
Once connected, Pinggy will provide a public TCP address (e.g., subdomain.pinggy.io:port). Players can use this to connect to your server.
Important: You should still ensure your server is properly secured when exposed to the internet via tunnels.
Securing Your Public Minecraft Server
Whether you use port forwarding or a tunnel, always take steps to secure your server:
- Enable user authentication and use strong passwords
- Use a whitelist or allowlist to limit access
- Keep the server software up to date
- Monitor logs and traffic regularly
- Backup your world data often
Conclusion
Port forwarding remains a viable and widely used way to host a Minecraft server in 2025. However, it's not always feasible due to ISP limitations or network configurations. In such cases, tools like Pinggy offer a simple and effective way to expose your local server to the internet.
Choose the method that best suits your setup and technical comfort level. Regardless of how you connect, understanding your network configuration and securing your server are critical for a smooth and safe multiplayer experience.
References