


![How to Build an AI Assistant with Keith Moehring [MAICON 2025 Speaker Series]](https://www.marketingaiinstitute.com/hubfs/MAICON-Speaker_Series%20%281%29.png)
![[The AI Show Episode 156]: AI Answers - Data Privacy, AI Roadmaps, Regulated Industries, Selling AI to the C-Suite & Change Management](https://www.marketingaiinstitute.com/hubfs/ep%20156%20cover.png)
![[The AI Show Episode 155]: The New Jobs AI Will Create, Amazon CEO: AI Will Cut Jobs, Your Brain on ChatGPT, Possible OpenAI-Microsoft Breakup & Veo 3 IP Issues](https://www.marketingaiinstitute.com/hubfs/ep%20155%20cover.png)


.jpg?width=1920&height=1920&fit=bounds&quality=70&format=jpg&auto=webp#)


_Michael_Burrell_Alamy.jpg?width=1280&auto=webp&quality=80&disable=upscale#)


Build Python Docker Development Environment on Win11 from Scratch
Guideline This guide is to help build python docker development environment on brand new Win11. Install WSL on win11, which used to create Linux container on windows. Install Docker Desktop on Windows Install VSCode on Windows Create Dockerfile, build docker image and run docker container Create Docker-compose to automate the process of build and render by code modification # Step 1 Install WSL on win11 WSL, aka Windows Sub-system Linux is a tool to help build virtual environment on windows and share the file system. By WSL, Docker desktop on windows can build Linux core container inside of it, which can help the same behavior as we deploy our container to Linux server. Let's see how to enable WSL on win11 Open Powershell to install wsl wls --install # By default widnows will install Ubuntu as WSL. # You need to configure user / password to complete the installation. After the installation complete, you can test wsl Ubuntu by search in "Ubuntu" in start menu or open in windows terminal Or in terminal with following command wsl -d Ubuntu Step 2 Install Docker Desktop You can download and install Docker Desktop on windows from the following URL https://docs.docker.com/desktop/setup/install/windows-install/ After you complete the installation of Docker Desktop, you need to go to the setting of docker desk to enable WSL integration, which basically will allow you to run docker daemon inside of WSL ![[Pasted image 20250509171217.png]] To check if docker desktop run well, go to WSL Ubuntu environment and run docker --version docker run hello-world # it is the test docker image for testing Step 3 Install VSCode In this guide, we suppose to use VScode as our IDE. Actually I found that you need to pay for Pycharm Professional to have remote Python interpreter configuration. Download VSCode through the following URL https://code.visualstudio.com/ The following extension as well WSL - Microsoft Dev Container - Microsoft Python - Microsoft Docker - Microsoft Now we can develop inside of VSCode and run the code inside of docker container which is running WSL Ubuntu Install python virtual environment on Ubuntu Install python3 and pip3 # check which version of python3 installed on your os python3 --version # Install pip3 sudo apt install python3-pip pip3 --version # check pip3 installed correctly install venv for python virtual-env sudo apt-get update sudo apt-get install libpython3-dev sudo apt-get install python3-venv create python virtual environment python3 -m venv .venv # Activate virtual environment source ./venv/bin/activate # Install python package in virtual environment pip install -r requirements.txt # to exit virtual environment deactivate Configure Python interpreter inside of virtual environment as Python interpreter for the code in the VSCode ctrl + shift + p to select new python interpreter select virtual env you just created Now we have configured our local python development environment well. Then let's create docker container and make the same environment in the container. The objective here is we develop locally but render our server inside of docker. The code is locally saved on your windows, including requirements.txt, Dockerfile, docker-compose, .gitignore, all of them will help use to rebuild the container or environment from scratch in regardless of docker container life cycle. Step 4 Create Dockerfile You need to have some basic knowledge to understand the following tutorial. I personally refer the video of Arjan on youtube https://www.youtube.com/watch?v=zkMRWDQV4Tg&t=405s. Cannot recommend more. The following example and code is just an example from him. you can refer the code here https://github.com/ArjanCodes/2022-docker/blob/main/README.md?plain=1 Create a folder under your home directory on your WSL Ubuntu for your FastApi app - app - requirements.txt - main.py - Dockerfile - channels.json Allow explain what are those files used for one by one requirements.txt fastapi # popular python API framework pydantic # python package of python typing uvicorn # python package used in fastapi for server watchfiles # python package to watch any file change in the main directory,as uvicorn, the server of FastAPI, only detect the change of .py file main.py is a basic FastAPI script to provide basic function for testing import json from dataclasses import dataclass, field from fastapi import FastAPI, HTTPException, Response app = FastAPI() @dataclass class Channel: id: str name: str tags: list[str] = field(default_factory=list) # default value is a list description: str = "" channels: dict[str, Channel] = {} with open("channels.json", encoding="utf8") as file: channels_raw = json.load(file) for channel_raw in channels_raw: channel = Channel(**channel_raw) channels[channel.id] =
Guideline
This guide is to help build python docker development environment on brand new Win11.
- Install WSL on win11, which used to create Linux container on windows.
- Install Docker Desktop on Windows
- Install VSCode on Windows
- Create Dockerfile, build docker image and run docker container
- Create Docker-compose to automate the process of build and render by code modification # Step 1 Install WSL on win11 WSL, aka Windows Sub-system Linux is a tool to help build virtual environment on windows and share the file system. By WSL, Docker desktop on windows can build Linux core container inside of it, which can help the same behavior as we deploy our container to Linux server.
Let's see how to enable WSL on win11
Open Powershell to install wsl
wls --install
# By default widnows will install Ubuntu as WSL.
# You need to configure user / password to complete the installation.
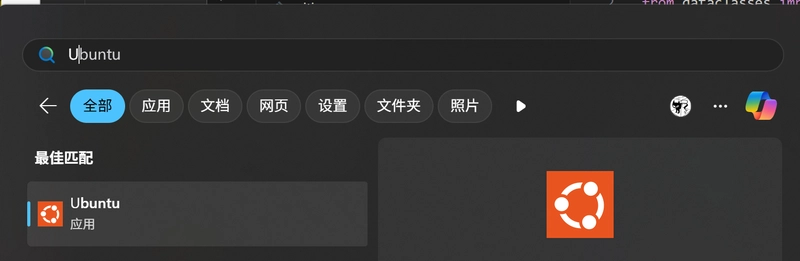
After the installation complete, you can test wsl Ubuntu by search in "Ubuntu" in start menu or open in windows terminal
Or in terminal with following command
wsl -d Ubuntu
Step 2 Install Docker Desktop
You can download and install Docker Desktop on windows from the following URL
https://docs.docker.com/desktop/setup/install/windows-install/
After you complete the installation of Docker Desktop, you need to go to the setting of docker desk to enable WSL integration, which basically will allow you to run docker daemon inside of WSL
![[Pasted image 20250509171217.png]]
To check if docker desktop run well, go to WSL Ubuntu environment and run
docker --version
docker run hello-world # it is the test docker image for testing
Step 3 Install VSCode
In this guide, we suppose to use VScode as our IDE. Actually I found that you need to pay for Pycharm Professional to have remote Python interpreter configuration.
Download VSCode through the following URL
https://code.visualstudio.com/
The following extension as well
- WSL - Microsoft
- Dev Container - Microsoft
- Python - Microsoft
- Docker - Microsoft Now we can develop inside of VSCode and run the code inside of docker container which is running WSL Ubuntu
Install python virtual environment on Ubuntu
Install python3 and pip3
# check which version of python3 installed on your os
python3 --version
# Install pip3
sudo apt install python3-pip
pip3 --version # check pip3 installed correctly
install venv for python virtual-env
sudo apt-get update
sudo apt-get install libpython3-dev
sudo apt-get install python3-venv
create python virtual environment
python3 -m venv .venv
# Activate virtual environment
source ./venv/bin/activate
# Install python package in virtual environment
pip install -r requirements.txt

# to exit virtual environment
deactivate
Configure Python interpreter inside of virtual environment as Python interpreter for the code in the VSCode
ctrl + shift + p to select new python interpreter

select virtual env you just created

Now we have configured our local python development environment well. Then let's create docker container and make the same environment in the container. The objective here is we develop locally but render our server inside of docker. The code is locally saved on your windows, including requirements.txt, Dockerfile, docker-compose, .gitignore, all of them will help use to rebuild the container or environment from scratch in regardless of docker container life cycle.
Step 4 Create Dockerfile
You need to have some basic knowledge to understand the following tutorial. I personally refer the video of Arjan on youtube https://www.youtube.com/watch?v=zkMRWDQV4Tg&t=405s. Cannot recommend more. The following example and code is just an example from him.
you can refer the code here https://github.com/ArjanCodes/2022-docker/blob/main/README.md?plain=1
Create a folder under your home directory on your WSL Ubuntu for your FastApi app
- app
    - requirements.txt
    - main.py
    - Dockerfile
    - channels.json
Allow explain what are those files used for one by one
requirements.txt
fastapi # popular python API framework
pydantic # python package of python typing
uvicorn # python package used in fastapi for server
watchfiles # python package to watch any file change in the main directory,as uvicorn, the server of FastAPI, only detect the change of .py file
main.py is a basic FastAPI script to provide basic function for testing
import json

from dataclasses import dataclass, field
from fastapi import FastAPI, HTTPException, Response

app = FastAPI()

@dataclass
class Channel:
    id: str
    name: str
    tags: list[str] = field(default_factory=list) # default value is a list
    description: str = ""

channels: dict[str, Channel] = {}

with open("channels.json", encoding="utf8") as file:
    channels_raw = json.load(file)
    for channel_raw in channels_raw:
        channel = Channel(**channel_raw)
        channels[channel.id] = channel

@app.get("/")
def read_root() -> Response:
    return Response("The server is running! fan xiao")

@app.get("/channels/{channel_id}", response_model=Channel)
def read_item(channel_id: str) -> Channel:
    if channel_id not in channels:
        raise HTTPException(status_code=404, detail="Channel not found")
    return channels[channel_id]
channels.json is a list of json object
[
    {
        "id": "codestackr",
        "name": "codeSTACKr",
        "tags": ["web development", "typescript"],
        "description": "My tutorials are generally about web development and include coding languages such as HTML, CSS, Sass, JavaScript, and TypeScript."
    },
    {
        "id": "jackherrington",
        "name": "Jack Herrington",
        "tags": ["frontend", "technology"],
        "description": "Frontend videos from basic to very advanced; tutorials, technology deep dives. You'll love it!"
    },
    {
        "id": "arjancodes",
        "name": "ArjanCodes",
        "tags": ["software design", "Python"],
        "description": "ArjanCodes focuses on helping you become a better software developer."
    }
]
Dockerfile
You can think Dockerfile is the handbook Docker Daemon used to build docker image.
When you run docker build command, Docker Daemon will find Dockerfile in current directory to build docker image.
Several points need to be mentioned
# Base image to specify the python version
FROM python:3.14.0b1-slim-bullseye
# Make a working directory in the container
WORKDIR /app
# Copy and install requirements.txt to the container
# The installation will be cached by docker itself. Suppose we don't change the requirement as frequently as code, each time we change the docker file it, this package installation would be re-run
# --no-cache-dir means not save the python package inside of container
COPY ./requirements.txt /app
RUN pip3 install --no-cache-dir -r requirements.txt
# copy the local source code to container
COPY . /app
# run flask server on port 80
CMD ["uvicorn", "main:app", "--host", "0.0.0.0", "--port", "80"]
- Build image from the
Dockerfile
# . means find Dcokerfile in the current directory
# -t means tag. If you didn't assign a tag, docker daemon will randomly assign it, which helps you later on easily find this image
docker build -t xiao/channel_api:0.1 .
- run docker container
# channel-api is image name
# -d means detached
docker run -d -p 8080:80 channel_api

# kill container
docker kill
- Test on local browser
http://localhost:8080/
Step 5 Create Docker-compose
To automate the process of build and render by code modification, we create docker compose
Create a docker-compose.yaml file
services:
  app:
    build: . # Directory of Dockerfile
    container_name: simple-python-server
    # the command will replace the CMD in Dockerfile restart the server
    # uvicorn only detect the change on .py file
    command: uvicorn main:app --host 0.0.0.0 --port 80 --reload
    ports:
      - 8080:80 # Local on windows port 8080 mapping to docker container port 80
    # Any change in volumes will trigger reload uvicorn server, overwrite the copy command in Dockerfile
    volumes:
      - .:/app
run docker container based on docker compose
docker compose up --build # first time you need to use --build