Struggling with UI Bugs After Every Release? Try Visual Regression Testing
A release goes live. Your code passed all tests, automated suites turned green, and everything felt like a win-until screenshots start flooding in. Misaligned buttons, vanishing text, layout chaos across mobile devices. You frantically open the live site. It’s broken. Again. You squint at your Git diff. Nothing suspicious. You ask QA-they missed it too. The worst part? It was perfect when you tested it. If this pattern feels familiar, you’re not alone. UI bugs are notorious for creeping into releases at the worst times. But there's a smarter way to catch them before they go public. Visual regression testing offers a powerful safety net by highlighting layout and design changes before they reach users. Let’s unpack how this method can save your team time, reputation, and stress-release after release. Why UI Breaks Happen Post-Release Even After Code Passes Functional tests are great-they ensure buttons work, forms submit, and pages load. But they don’t care if your logo is off-center or your call-to-action button is pushed below the fold. UI bugs live in the visual layer, which is often the last to be tested and the first to fail. Common reasons UI bugs slip through: Environment Differences: Your local machine might not render fonts, spacing, or media queries the same way production servers do. Last-Minute Code Changes: Even a single CSS tweak in a shared file can affect unrelated components. Content Changes: Live content feeds can introduce longer text strings or images that disrupt layout. Third-Party Scripts: Ads, trackers, or widgets can inject unexpected behavior into your layout. Functional tests won’t catch these. But side-by-side visual comparisons will. What Is Visual Regression Testing and How Does It Work? Visual regression testing compares screenshots of your web pages before and after code changes. If any pixels shift, margins expand, fonts change, or buttons move, the tool flags a visual difference. These discrepancies-called “visual diffs”-are reviewed and either approved or corrected. Think of it as version control for your UI’s appearance. Unlike functional or unit tests, visual testing answers questions like: Did a component move unexpectedly? Is this layout consistent across viewports? Did a fix for one feature break another? It’s especially useful when working in large codebases or distributed teams where small tweaks can ripple through the UI unexpectedly. Major Advantages of Visual Regression Testing in Your Workflow Integrating visual testing isn’t just about bug prevention-it adds reliability to your entire design system. Catches UI Changes You Didn’t Intend Code reviewers and testers focus on logic and functionality. Visual diffs highlight purely aesthetic shifts that might otherwise be missed. Reduces Time Spent on Manual QA Manual visual checks across browsers and devices take hours. Automation reduces this to minutes with consistent, unbiased comparisons. Builds Stakeholder Confidence When product managers, designers, or executives know your UI won’t change unless approved, they’re more confident with every deployment. Scales with Your Team As your front-end grows more complex, or new team members join, visual testing ensures the system’s look remains coherent. Key Features to Look for in Visual Regression Testing Tools Not all visual testing tools are created equal. If you’re looking to adopt one, keep these features in mind: Cross-Browser Support: Ensure consistency across Chrome, Safari, Firefox, and Edge. Viewport Responsiveness Testing: Detect visual issues across mobile, tablet, and desktop screen sizes. Automated Screenshot Comparison: Highlight pixel-level changes between baseline and new versions. Baseline Management: Approve, reject, or update visual changes easily. CI/CD Integration: Automatically trigger tests during deployment pipelines. Test Filtering & Notification Systems: Only review critical changes and get alerted when visual bugs emerge. Popular tools like Percy, Applitools, and BackstopJS check most of these boxes. When Should You Use Visual Regression Testing? Visual testing shouldn’t be reserved for redesigns or big releases. It shines when used proactively and consistently. Ideal use cases include: - Before and after every deployment - When modifying shared UI components - Adding or updating global styles or CSS utility classes - Testing responsive layouts across breakpoints - Integrating third-party tools or analytics scripts - During large-scale migrations (e.g., Bootstrap to Tailwind, React updates) **In all these situations, **the risk of breaking something visually is high—making automated visual checks essential. Pro Tips for Effective Visual Regression Workflows Once visual regression becomes part of your toolkit, there are ways to make the most of it: Mock Dynamic Data: Avoid false positives caused by
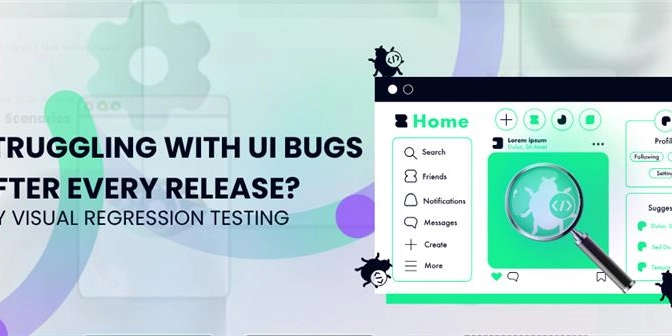
A release goes live. Your code passed all tests, automated suites turned green, and everything felt like a win-until screenshots start flooding in. Misaligned buttons, vanishing text, layout chaos across mobile devices. You frantically open the live site. It’s broken. Again.
You squint at your Git diff. Nothing suspicious. You ask QA-they missed it too. The worst part? It was perfect when you tested it.
If this pattern feels familiar, you’re not alone. UI bugs are notorious for creeping into releases at the worst times. But there's a smarter way to catch them before they go public.
Visual regression testing offers a powerful safety net by highlighting layout and design changes before they reach users.
Let’s unpack how this method can save your team time, reputation, and stress-release after release.
Why UI Breaks Happen Post-Release Even After Code Passes
Functional tests are great-they ensure buttons work, forms submit, and pages load. But they don’t care if your logo is off-center or your call-to-action button is pushed below the fold. UI bugs live in the visual layer, which is often the last to be tested and the first to fail.
Common reasons UI bugs slip through:
Environment Differences: Your local machine might not render fonts, spacing, or media queries the same way production servers do.
Last-Minute Code Changes: Even a single CSS tweak in a shared file can affect unrelated components.
Content Changes: Live content feeds can introduce longer text strings or images that disrupt layout.
Third-Party Scripts: Ads, trackers, or widgets can inject unexpected behavior into your layout.
Functional tests won’t catch these. But side-by-side visual comparisons will.
What Is Visual Regression Testing and How Does It Work?
Visual regression testing compares screenshots of your web pages before and after code changes. If any pixels shift, margins expand, fonts change, or buttons move, the tool flags a visual difference. These discrepancies-called “visual diffs”-are reviewed and either approved or corrected.
Think of it as version control for your UI’s appearance.
Unlike functional or unit tests, visual testing answers questions like:
Did a component move unexpectedly?
Is this layout consistent across viewports?
Did a fix for one feature break another?
It’s especially useful when working in large codebases or distributed teams where small tweaks can ripple through the UI unexpectedly.
Major Advantages of Visual Regression Testing in Your Workflow
Integrating visual testing isn’t just about bug prevention-it adds reliability to your entire design system.
Catches UI Changes You Didn’t Intend
Code reviewers and testers focus on logic and functionality. Visual diffs highlight purely aesthetic shifts that might otherwise be missed.
Reduces Time Spent on Manual QA
Manual visual checks across browsers and devices take hours. Automation reduces this to minutes with consistent, unbiased comparisons.
Builds Stakeholder Confidence
When product managers, designers, or executives know your UI won’t change unless approved, they’re more confident with every deployment.
Scales with Your Team
As your front-end grows more complex, or new team members join, visual testing ensures the system’s look remains coherent.
Key Features to Look for in Visual Regression Testing Tools
Not all visual testing tools are created equal. If you’re looking to adopt one, keep these features in mind:
Cross-Browser Support: Ensure consistency across Chrome, Safari, Firefox, and Edge.
Viewport Responsiveness Testing: Detect visual issues across mobile, tablet, and desktop screen sizes.
Automated Screenshot Comparison: Highlight pixel-level changes between baseline and new versions.
Baseline Management: Approve, reject, or update visual changes easily.
CI/CD Integration: Automatically trigger tests during deployment pipelines.
Test Filtering & Notification Systems: Only review critical changes and get alerted when visual bugs emerge.
Popular tools like Percy, Applitools, and BackstopJS check most of these boxes.
When Should You Use Visual Regression Testing?
Visual testing shouldn’t be reserved for redesigns or big releases. It shines when used proactively and consistently.
Ideal use cases include:
- Before and after every deployment
- When modifying shared UI components
- Adding or updating global styles or CSS utility classes
- Testing responsive layouts across breakpoints
- Integrating third-party tools or analytics scripts
- During large-scale migrations (e.g., Bootstrap to Tailwind, React updates)
**In all these situations, **the risk of breaking something visually is high—making automated visual checks essential.
Pro Tips for Effective Visual Regression Workflows
Once visual regression becomes part of your toolkit, there are ways to make the most of it:
Mock Dynamic Data: Avoid false positives caused by ever-changing content by using static data during testing.
Test Critical Paths First: Start with homepage, login, checkout, and dashboards—pages with the highest traffic or business value.
Update Baselines Intelligently: Visual changes aren’t always bugs. Make sure updates to design or layout are intentional before committing new baselines.
Pair with Functional Testing: Combine visual checks with unit and integration tests to cover all layers of your app.
With smart test coverage, you’ll fix fewer bugs and build with more confidence.
Real-Life Scenarios Where Visual Regression Saved the Day
Visual regression testing has helped countless teams catch bugs early. Here are a few examples:
A global eCommerce platform caught a mobile product grid misalignment caused by a new CSS class.
A SaaS dashboard identified a modal that disappeared on Firefox after a dependency upgrade.
A marketing site caught image carousels overflowing their containers after a content team uploaded larger banners.
In each case, the bug wasn’t a code failure-it was a visual regression, invisible to standard testing but obvious in screenshots.
Tools Worth Exploring to Get Started
You don’t have to reinvent the wheel. These tools offer powerful features out of the box:
Percy: Tight GitHub integration, works well with Storybook and CI/CD pipelines.
Applitools Eyes: Uses AI to reduce false positives and supports dynamic UIs.
BackstopJS: Developer-friendly and highly customizable for custom workflows.
Chromatic: Great for component-driven teams using Storybook.
Most offer free tiers, so you can try them out before committing to a full suite.
In Nutshell: Build Releases You Can Trust
Every UI bug you let slip into production chips away at user trust. But catching them early isn’t about working harder-it’s about testing smarter.
Visual regression testing helps you spot layout shifts, styling issues, and unexpected changes before your users do. When integrated into your pipeline, it becomes a silent guardian that ensures every release looks just as good as the last.
If You’re Struggling with UI Bugs After Every Release & You Need Visual Regression Testing…
You can try visual regression testing tools like Percy, Applitools, or BackstopJS,Testevolve . Explore some visual regression testing service provider companies as well. They provide excellent solutions for these types of UI challenges and ensure your interface stays reliable after every update.






![[The AI Show Episode 150]: AI Answers: AI Roadmaps, Which Tools to Use, Making the Case for AI, Training, and Building GPTs](https://www.marketingaiinstitute.com/hubfs/ep%20150%20cover.png)
![[The AI Show Episode 149]: Google I/O, Claude 4, White Collar Jobs Automated in 5 Years, Jony Ive Joins OpenAI, and AI’s Impact on the Environment](https://www.marketingaiinstitute.com/hubfs/ep%20149%20cover.png)









![[FREE EBOOKS] Solutions Architect’s Handbook, The Embedded Linux Security Handbook & Four More Best Selling Titles](https://www.javacodegeeks.com/wp-content/uploads/2012/12/jcg-logo.jpg)


![How to Survive in Tech When Everything's Changing w/ 21-year Veteran Dev Joe Attardi [Podcast #174]](https://cdn.hashnode.com/res/hashnode/image/upload/v1748483423794/0848ad8d-1381-474f-94ea-a196ad4723a4.png?#)











_ArtemisDiana_Alamy.jpg?width=1280&auto=webp&quality=80&disable=upscale#)










![Sonos Father's Day Sale: Save Up to 26% on Arc Ultra, Ace, Move 2, and More [Deal]](https://www.iclarified.com/images/news/97469/97469/97469-640.jpg)


![Apple 15-inch M4 MacBook Air On Sale for $1023.86 [Lowest Price Ever]](https://www.iclarified.com/images/news/97468/97468/97468-640.jpg)


