


![[The AI Show Episode 146]: Rise of “AI-First” Companies, AI Job Disruption, GPT-4o Update Gets Rolled Back, How Big Consulting Firms Use AI, and Meta AI App](https://www.marketingaiinstitute.com/hubfs/ep%20146%20cover.png)


![Beats Studio Pro Wireless Headphones Now Just $169.95 - Save 51%! [Deal]](https://www.iclarified.com/images/news/97258/97258/97258-640.jpg)


How to Design a Tape Roller Using 3D CAD Software
How to Design a Tape Roller Using 3D CAD Software Designing a tape roller involves understanding both ergonomic principles and functional mechanics, particularly the integration of rotating and stationary parts. SelfCAD, with its robust 3D modeling and sculpting capabilities, provides an ideal platform for creating precise, interlocking components such as rollers, handles, and cutting edges. This article guides the reader through the step-by-step process of modeling a tape roller using SelfCAD. By the end of this guide, readers will have a functional digital model that demonstrates both mechanical logic and design efficiency, suitable for prototyping or manufacturing via 3D printing. To access the interactive tutorial to this article, check out; https://www.selfcad.com/tutorials/582738p5j4xh1v3f4sz5g505x5j5x2k5w4i6 Once you’ve launched the editor; From the 3D Shapes category on the toolbar choose cylinder; Set height to 50, vertical segments to 128 Tick the checkmark to finalize cylinder Click to activate polygon selection; Click on highlighted region to select it Click delete button to delete selected objects From the modify category on the toolbar choose add thickness; Set thickness to 5 Tick the checkmark to finalize add thickness From the 3D Shapes category on the toolbar choose cylinder; Set top radius to 5, bottom radius to 5, height to 50 Tick the checkmark to finalize cylinder Click highlighted part on selection cube to turn off region selection Click on mesh 4 to select it; Click stitch & scoop on the toolbar; From the tool panel choose union. Tick the checkmark to finalize union From the 3D Shapes category on the toolbar choose cylinder; Set top radius to 25, bottom radius to 25, height to 45, vertical segments to 128, position y to 6 Tick the checkmark to finalize cylinder From the 3D Shapes category on the toolbar choose capsule; Set top radius to 3, bottom radius to 3, height to 20, position y to 45, position z to -20. Tick the checkmark to finalize capsule Click color picker button to change color of object; Click black. Click ok Click on mesh 12 to select it. Click on mesh 16 to deselect Click color picker button to change color of object; Click lavender Click ok Click on mesh 16 to select it Click stitch & scoop on the toolbar; From the tool panel choose union. Tick the checkmark to finalize union Click on union 1 to select it Click stitch & scoop on the toolbar; from the tool panel choose difference, Choose union 1 to subtract, and set keep subtracted object to true Tick the checkmark to finalize difference From the 3D Shapes category on the toolbar choose cube; Set width to 1, depth to 25, position y to 5, position z to 14. Tick the checkmark finalize cube Click on difference 1 to select it Click stitch & scoop on the toolbar; from the tool panel choose difference, Choose mesh 20 to subtract, and set keep subtracted object to true Tick the checkmark to finalize difference Click on difference 2 to deselect Click move on the toolbar; Set z to 53 using highlighted gizmo Click scale on the toolbar; Set x to 5 Click rotate on the toolbar; Set y to 320 Click ‘x’ to close transformation panel Click on union 1 to select it Click stitch & scoop on the toolbar; from the tool panel choose difference, Choose mesh 20 to subtract Tick the checkmark to finalize difference As you continue honing your design skills, remember that SelfCAD offers a wealth of resources to support your learning journey. To deepen your understanding and explore more advanced features, consider checking out the interactive tutorials (https://www.selfcad.com/tutorials) available on the SelfCAD website. The tutorials page provides a treasure trove of guides, tips, and tricks that cater to designers of all levels. More structured learning experience can also be accessed at the SelfCAD Academy (https://www.selfcad.com/academy/curriculum/), https://www.youtube.com/@3dmodeling101, and 3D Modeling 101 series (https://www.youtube.com/playlist?list=PL74nFNT8yS9DcE1UlUUdiR1wFGv9DDfTB). This comprehensive resource offers in-depth courses taught by industry experts, allowing you to master the intricacies of SelfCAD at your own pace

How to Design a Tape Roller Using 3D CAD Software
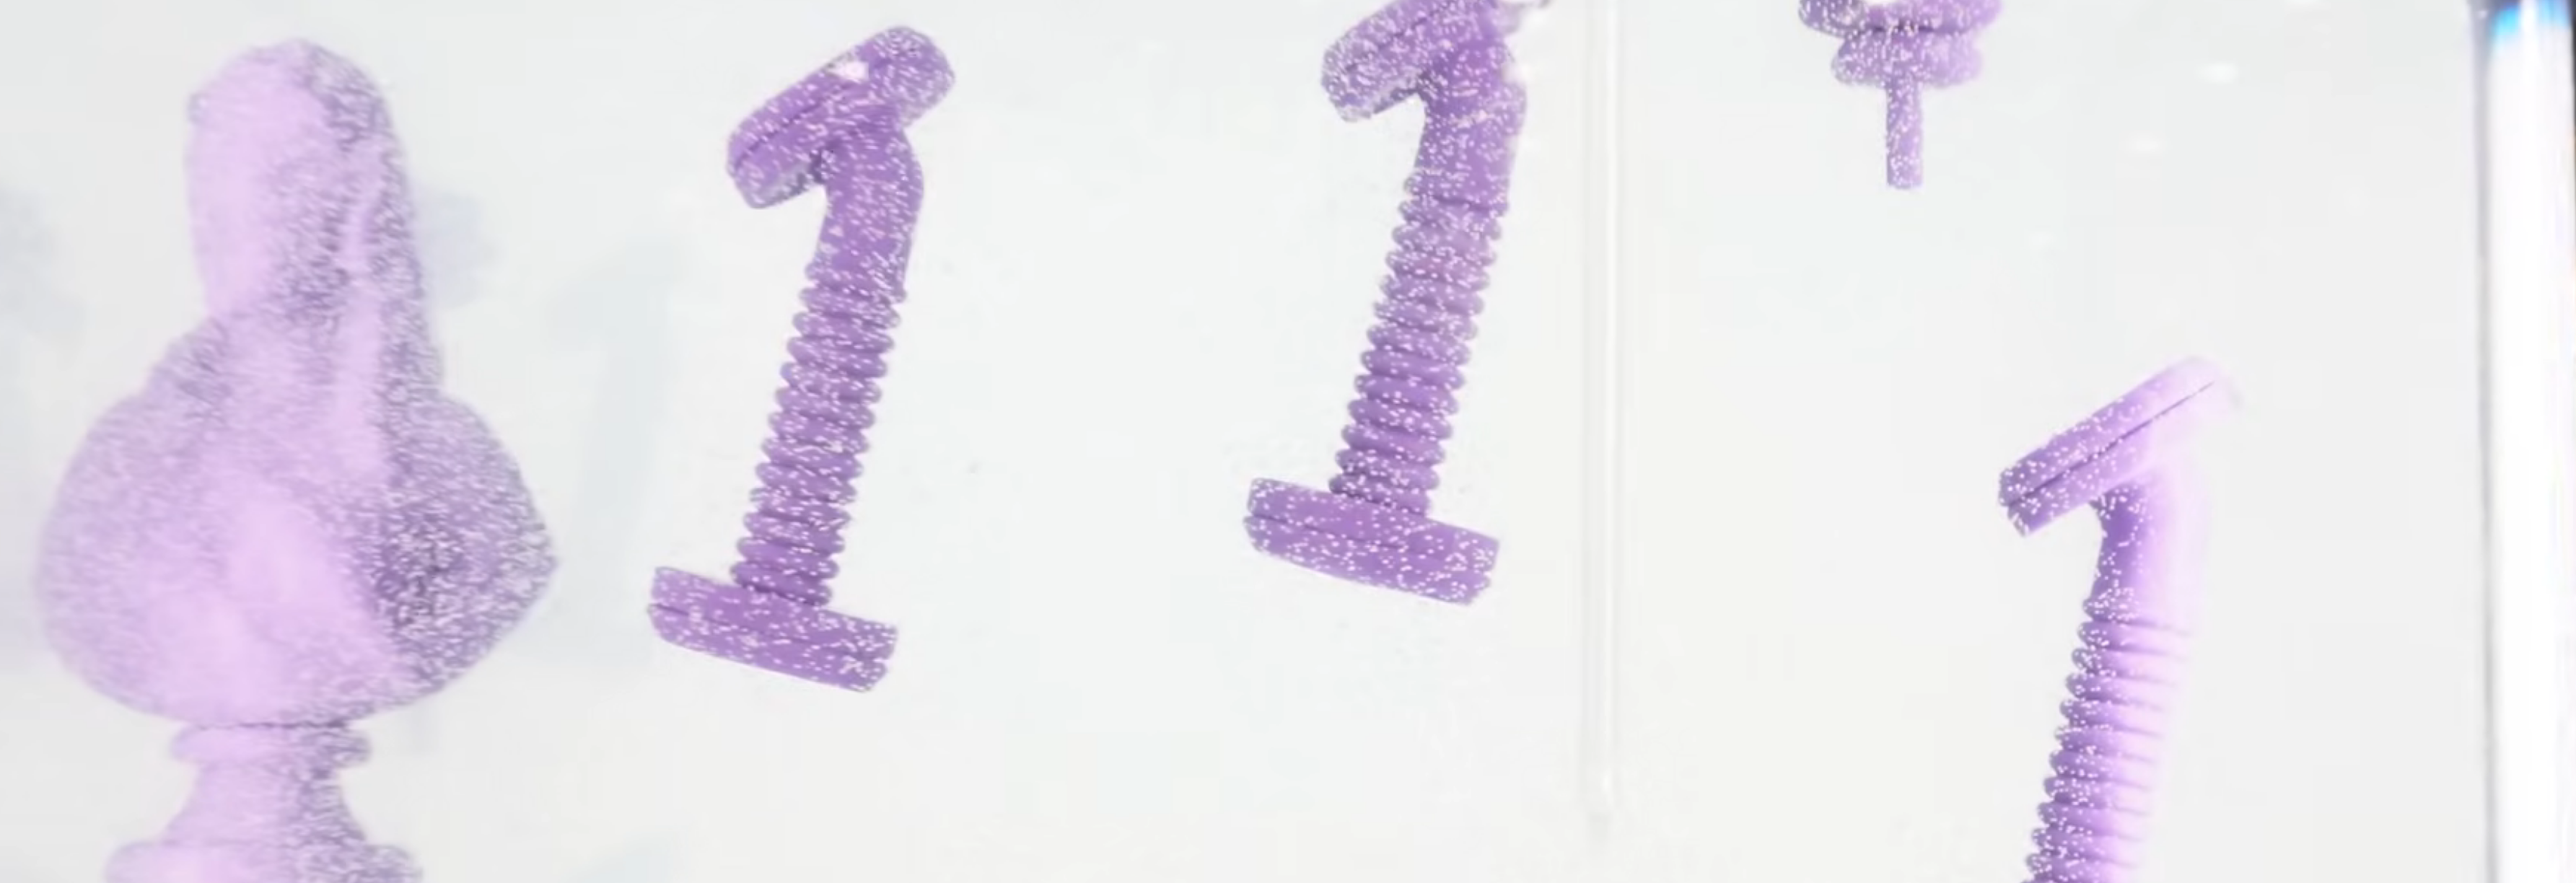
Designing a tape roller involves understanding both ergonomic principles and functional mechanics, particularly the integration of rotating and stationary parts. SelfCAD, with its robust 3D modeling and sculpting capabilities, provides an ideal platform for creating precise, interlocking components such as rollers, handles, and cutting edges. This article guides the reader through the step-by-step process of modeling a tape roller using SelfCAD. By the end of this guide, readers will have a functional digital model that demonstrates both mechanical logic and design efficiency, suitable for prototyping or manufacturing via 3D printing.
To access the interactive tutorial to this article, check out; https://www.selfcad.com/tutorials/582738p5j4xh1v3f4sz5g505x5j5x2k5w4i6
Once you’ve launched the editor;
From the 3D Shapes category on the toolbar choose cylinder; Set height to 50, vertical segments to 128
Tick the checkmark to finalize cylinder
Click to activate polygon selection; Click on highlighted region to select it

Click delete button to delete selected objects
From the modify category on the toolbar choose add thickness; Set thickness to 5
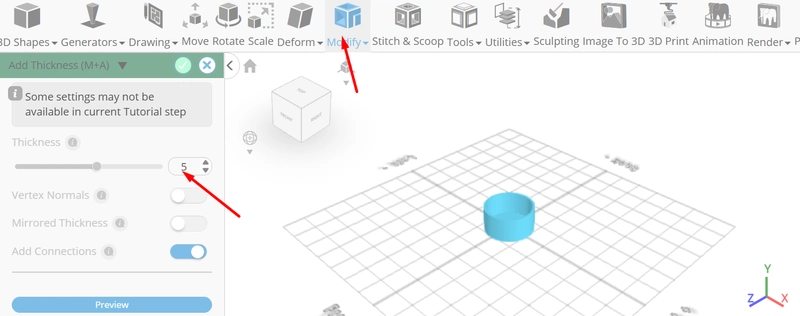
Tick the checkmark to finalize add thickness
From the 3D Shapes category on the toolbar choose cylinder; Set top radius to 5, bottom radius to 5, height to 50

Tick the checkmark to finalize cylinder
Click highlighted part on selection cube to turn off region selection
Click on mesh 4 to select it; Click stitch & scoop on the toolbar; From the tool panel choose union.

Tick the checkmark to finalize union
From the 3D Shapes category on the toolbar choose cylinder; Set top radius to 25, bottom radius to 25, height to 45, vertical segments to 128, position y to 6

Tick the checkmark to finalize cylinder
From the 3D Shapes category on the toolbar choose capsule; Set top radius to 3, bottom radius to 3, height to 20, position y to 45, position z to -20.

Tick the checkmark to finalize capsule
Click color picker button to change color of object; Click black.

Click ok
Click on mesh 12 to select it. Click on mesh 16 to deselect
Click color picker button to change color of object; Click lavender
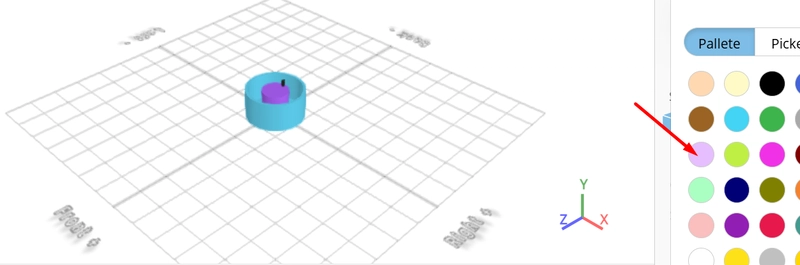
Click ok
Click on mesh 16 to select it
Click stitch & scoop on the toolbar; From the tool panel choose union.

Tick the checkmark to finalize union
Click on union 1 to select it
Click stitch & scoop on the toolbar; from the tool panel choose difference, Choose union 1 to subtract, and set keep subtracted object to true

Tick the checkmark to finalize difference
From the 3D Shapes category on the toolbar choose cube; Set width to 1, depth to 25, position y to 5, position z to 14.
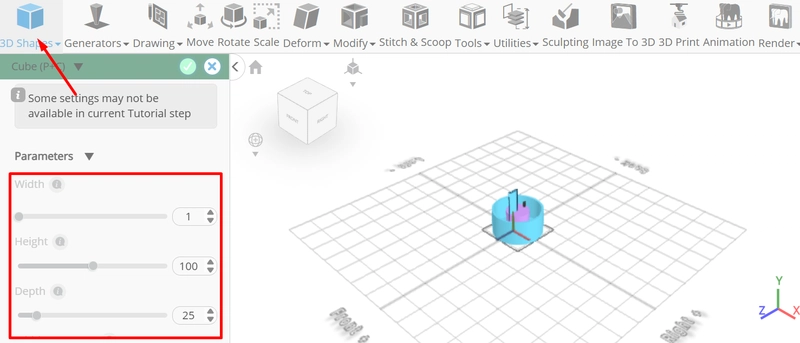
Tick the checkmark finalize cube
Click on difference 1 to select it
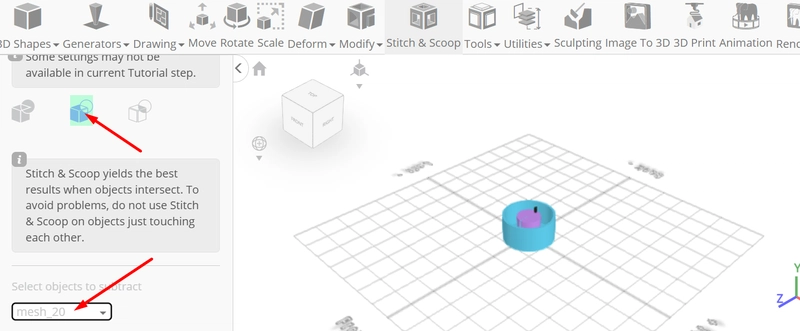
Click stitch & scoop on the toolbar; from the tool panel choose difference, Choose mesh 20 to subtract, and set keep subtracted object to true
Tick the checkmark to finalize difference
Click on difference 2 to deselect
Click move on the toolbar; Set z to 53 using highlighted gizmo

Click scale on the toolbar; Set x to 5

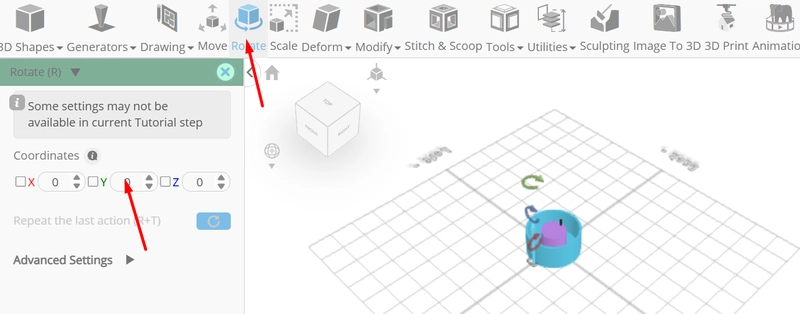
Click rotate on the toolbar; Set y to 320
Click ‘x’ to close transformation panel
Click on union 1 to select it
Click stitch & scoop on the toolbar; from the tool panel choose difference, Choose mesh 20 to subtract

Tick the checkmark to finalize difference
As you continue honing your design skills, remember that SelfCAD offers a wealth of resources to support your learning journey. To deepen your understanding and explore more advanced features, consider checking out the interactive tutorials (https://www.selfcad.com/tutorials) available on the SelfCAD website. The tutorials page provides a treasure trove of guides, tips, and tricks that cater to designers of all levels.
More structured learning experience can also be accessed at the SelfCAD Academy (https://www.selfcad.com/academy/curriculum/), https://www.youtube.com/@3dmodeling101, and 3D Modeling 101 series (https://www.youtube.com/playlist?list=PL74nFNT8yS9DcE1UlUUdiR1wFGv9DDfTB). This comprehensive resource offers in-depth courses taught by industry experts, allowing you to master the intricacies of SelfCAD at your own pace