7 Steps to Build Secure Access Control with AWS IAM
When it comes to building secure systems on AWS, Identity and Access Management (IAM) is your fortress gate. It's the unsung hero of your cloud setup—controlling who can do what, where, and how. But if you've ever opened the IAM dashboard and felt overwhelmed by roles, policies, users, groups, and trust relationships... you're not alone. Many developers approach IAM as an afterthought—something to configure once and forget. That’s a mistake. Misconfigured IAM can lead to overly permissive access, unintended data leaks, or even full-blown breaches. Step 1: Start with Least Privilege, Not Convenience Let’s be honest—when you’re in a rush, it’s tempting to slap an “AdministratorAccess” policy onto your IAM user or role. “It’s just for now,” you tell yourself. That’s the first step toward an insecure system. The Principle of Least Privilege means giving only the permissions that are absolutely necessary—and no more. If a Lambda function just needs to write to one S3 bucket, don't give it s3:* across your account. Limit it to: { "Effect": "Allow", "Action": "s3:PutObject", "Resource": "arn:aws:s3:::your-specific-bucket-name/*" } Real-life tip: Use the IAM Access Analyzer and AWS CloudTrail to observe what permissions your users/services actually use. Then tighten the scope. Why it matters: Least privilege minimizes your blast radius if credentials are compromised. It also enforces good hygiene—developers and services learn to request access intentionally, not blindly. Step 2: Use IAM Roles—Not Users—Wherever Possible IAM Users are like fixed keys. Roles are temporary badges. If your app, Lambda, EC2, ECS, or even a CI/CD pipeline needs access to AWS resources—don’t generate long-lived access keys tied to IAM users. Instead, create IAM Roles and let services assume roles using temporary credentials. Example: Let’s say your EC2 instance needs to read secrets from AWS Secrets Manager. You should: Create an IAM Role with secretsmanager:GetSecretValue permission. Attach the role to your EC2 instance. Done. No access keys, no secrets to rotate. This makes your infrastructure ephemeral, secure, and easier to audit. Pro Tip: You can even set up cross-account roles using trust relationships, allowing a role in Account A to assume a role in Account B. Step 3: Use Policy Conditions to Control the Context IAM policies are not just about “who can access what.” They're also about when, how, and where that access happens. Let’s say you want to allow S3 access only from your VPC or only during office hours. Use policy conditions like this: { "Effect": "Allow", "Action": "s3:GetObject", "Resource": "arn:aws:s3:::your-bucket/*", "Condition": { "IpAddress": { "aws:SourceIp": "203.0.113.0/24" } } } You can condition based on: IP address VPC endpoint MFA authentication Time of day Tags on resources or users This is your secret weapon in environments where roles or policies must remain broad but still need control over context. Step 4: Enable MFA Everywhere—For Humans and Root Let’s talk about Multi-Factor Authentication (MFA)—that extra layer of security most teams forget to enforce. The AWS root account is your ultimate key to the kingdom. If someone gets into it, they can delete everything. So: Enable MFA on the root account. Never use the root account for daily work. Enable MFA on all IAM users (if you still use them). Even better: Require MFA via a policy condition. For example, allow sensitive operations like deleting resources only if MFA is enabled: "Condition": { "Bool": { "aws:MultiFactorAuthPresent": "true" } } Bonus: Use AWS Organizations SCPs (Service Control Policies) to enforce MFA organization-wide. No team member, no exception. Step 5: Organize with Tags, Groups, and Managed Policies In messy environments, IAM becomes a jungle. You’ve got 80 policies, 40 users, 100 roles, and no idea who needs what. Here’s how to organize the chaos: ➤ Use Groups For human users. Assign managed policies (predefined or custom). Example: Developers, Admins, Billing. ➤ Use Tags Tag roles and users with metadata: - Project: BillingService - Environment: Staging - Team: Backend Helps in filtering, policy conditions, billing, and automation. ➤ Use Managed Policies Wisely AWS Managed Policies (e.g., AmazonS3ReadOnlyAccess) are great for starting out. Customer Managed Policies give you control and versioning. Avoid inline policies—they're hard to manage at scale. Tip: Review policies quarterly. Just like you do spring cleaning, clean up unused roles and tighten over-permissive policies. Step 6: Secure Cross-Account and External Access Working with partners? Multi-account setups? It’s common to grant cross-account access—but it’s a dangerous dance if misconfigured. Here’s how to do it right: In Account A (your partner or other
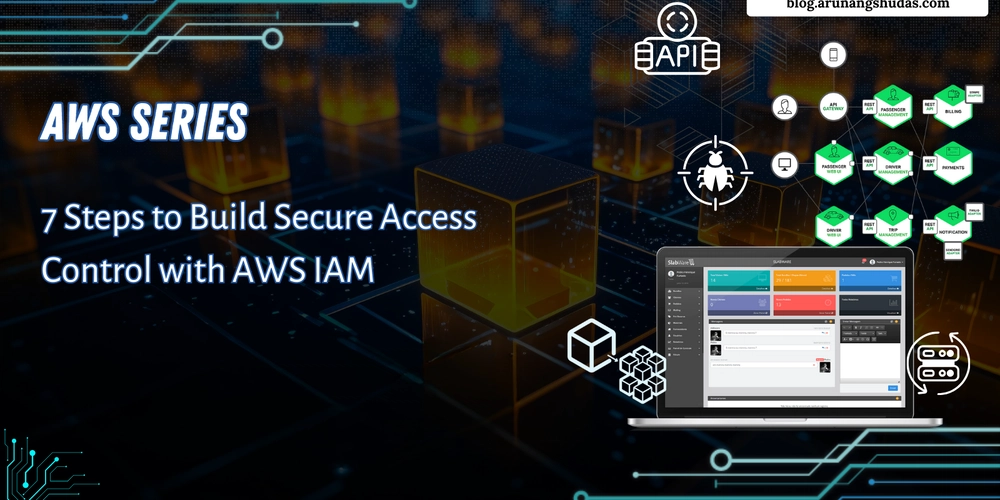
When it comes to building secure systems on AWS, Identity and Access Management (IAM) is your fortress gate. It's the unsung hero of your cloud setup—controlling who can do what, where, and how. But if you've ever opened the IAM dashboard and felt overwhelmed by roles, policies, users, groups, and trust relationships... you're not alone.
Many developers approach IAM as an afterthought—something to configure once and forget. That’s a mistake. Misconfigured IAM can lead to overly permissive access, unintended data leaks, or even full-blown breaches.
Step 1: Start with Least Privilege, Not Convenience
Let’s be honest—when you’re in a rush, it’s tempting to slap an “AdministratorAccess” policy onto your IAM user or role. “It’s just for now,” you tell yourself.
That’s the first step toward an insecure system.
The Principle of Least Privilege means giving only the permissions that are absolutely necessary—and no more. If a Lambda function just needs to write to one S3 bucket, don't give it s3:* across your account. Limit it to:
{
  "Effect": "Allow",
  "Action": "s3:PutObject",
  "Resource": "arn:aws:s3:::your-specific-bucket-name/*"
}
Real-life tip: Use the IAM Access Analyzer and AWS CloudTrail to observe what permissions your users/services actually use. Then tighten the scope.
Why it matters: Least privilege minimizes your blast radius if credentials are compromised. It also enforces good hygiene—developers and services learn to request access intentionally, not blindly.
Step 2: Use IAM Roles—Not Users—Wherever Possible
IAM Users are like fixed keys. Roles are temporary badges.
If your app, Lambda, EC2, ECS, or even a CI/CD pipeline needs access to AWS resources—don’t generate long-lived access keys tied to IAM users. Instead, create IAM Roles and let services assume roles using temporary credentials.
Example: Let’s say your EC2 instance needs to read secrets from AWS Secrets Manager.
You should:
- Create an IAM Role with
secretsmanager:GetSecretValuepermission. - Attach the role to your EC2 instance.
- Done. No access keys, no secrets to rotate.
This makes your infrastructure ephemeral, secure, and easier to audit.
Pro Tip: You can even set up cross-account roles using trust relationships, allowing a role in Account A to assume a role in Account B.
Step 3: Use Policy Conditions to Control the Context
IAM policies are not just about “who can access what.” They're also about when, how, and where that access happens.
Let’s say you want to allow S3 access only from your VPC or only during office hours.
Use policy conditions like this:
{
  "Effect": "Allow",
  "Action": "s3:GetObject",
  "Resource": "arn:aws:s3:::your-bucket/*",
  "Condition": {
    "IpAddress": {
      "aws:SourceIp": "203.0.113.0/24"
    }
  }
}
You can condition based on:
- IP address
- VPC endpoint
- MFA authentication
- Time of day
- Tags on resources or users
This is your secret weapon in environments where roles or policies must remain broad but still need control over context.
Step 4: Enable MFA Everywhere—For Humans and Root
Let’s talk about Multi-Factor Authentication (MFA)—that extra layer of security most teams forget to enforce.
The AWS root account is your ultimate key to the kingdom. If someone gets into it, they can delete everything.
So:
- Enable MFA on the root account.
- Never use the root account for daily work.
- Enable MFA on all IAM users (if you still use them).
Even better: Require MFA via a policy condition. For example, allow sensitive operations like deleting resources only if MFA is enabled:
"Condition": {
  "Bool": {
    "aws:MultiFactorAuthPresent": "true"
  }
}
Bonus: Use AWS Organizations SCPs (Service Control Policies) to enforce MFA organization-wide. No team member, no exception.
Step 5: Organize with Tags, Groups, and Managed Policies
In messy environments, IAM becomes a jungle. You’ve got 80 policies, 40 users, 100 roles, and no idea who needs what.
Here’s how to organize the chaos:
➤ Use Groups
- For human users.
- Assign managed policies (predefined or custom).
- Example:
Developers,Admins,Billing.
➤ Use Tags
- Tag roles and users with metadata:
-
Project: BillingService-Environment: Staging-Team: Backend - Helps in filtering, policy conditions, billing, and automation.
➤ Use Managed Policies Wisely
-
AWS Managed Policies (e.g.,
AmazonS3ReadOnlyAccess) are great for starting out. - Customer Managed Policies give you control and versioning.
- Avoid inline policies—they're hard to manage at scale.
Tip: Review policies quarterly. Just like you do spring cleaning, clean up unused roles and tighten over-permissive policies.
Step 6: Secure Cross-Account and External Access
Working with partners? Multi-account setups? It’s common to grant cross-account access—but it’s a dangerous dance if misconfigured.
Here’s how to do it right:
- In Account A (your partner or other AWS account), create a role with a trust policy like:
{
  "Effect": "Allow",
  "Principal": {
    "AWS": "arn:aws:iam::123456789012:root"
  },
  "Action": "sts:AssumeRole"
}
Assign it the minimum required permissions (least privilege again!).
In Account B (your account), users can now assume the role via the AWS CLI or SDK.
Extra tip: Use External IDs to prevent the "confused deputy" problem when third parties assume roles.
You can also restrict assuming roles only via specific service or region. This reduces abuse vectors.
Step 7: Audit and Monitor—Don’t Just “Set and Forget”
IAM isn’t a “configure once and chill” situation. You need eyes on it constantly.
Here’s how to keep IAM secure over time:
➤ Use AWS CloudTrail
- Tracks every single IAM-related API call (like
AttachUserPolicy,AssumeRole, etc.). - Set up alerts for unusual activity.
➤ Use Access Advisor
- See what permissions aren’t being used by users or roles.
- Clean them up. Less is more.
➤ Enable IAM Access Analyzer
- Continuously analyzes roles, policies, and trust relationships.
- Flags overly permissive configurations, like:
- “This role allows access from any AWS account.”
- “This policy allows
s3:*on all resources.”
➤ Use AWS Config Rules
- Enforce compliance automatically.
- Example: “All IAM users must have MFA” or “No inline policies allowed.”
Real Talk: Security is not a feature; it's a process. You need alerting, dashboards, audits, and reviews.
Bonus: Avoid These 5 Common IAM Mistakes
Let’s close with some honest truths. If you recognize any of these mistakes in your setup, fix them today:
- Using root account for daily tasks.
- Hardcoding access keys in source code (especially public repos).
- Assigning AdministratorAccess to users “just for now.”
- Never deleting unused roles, policies, and users.
- Ignoring IAM warnings in the AWS console.
IAM warnings are not suggestions—they’re red flags.
Final Thoughts: IAM Is an Investment
You don’t build access control in a day. It evolves with your application, team, and architecture.
Quick Recap of the 7 Steps
- Start with Least Privilege, Not Convenience
- Use IAM Roles—Not Users—Wherever Possible
- Use Policy Conditions to Control the Context
- Enable MFA Everywhere—For Humans and Root
- Organize with Tags, Groups, and Managed Policies
- Secure Cross-Account and External Access
- Audit and Monitor—Don’t Just “Set and Forget”
You may also like:
Read more blogs from Here
Share your experiences in the comments, and let’s discuss how to tackle them!
Follow me on Linkedin


![[The AI Show Episode 143]: ChatGPT Revenue Surge, New AGI Timelines, Amazon’s AI Agent, Claude for Education, Model Context Protocol & LLMs Pass the Turing Test](https://www.marketingaiinstitute.com/hubfs/ep%20143%20cover.png)












.png?#)









![[Fixed] Gemini app is failing to generate Audio Overviews](https://i0.wp.com/9to5google.com/wp-content/uploads/sites/4/2025/03/Gemini-Audio-Overview-cover.jpg?resize=1200%2C628&quality=82&strip=all&ssl=1)

![What’s new in Android’s April 2025 Google System Updates [U: 4/14]](https://i0.wp.com/9to5google.com/wp-content/uploads/sites/4/2025/01/google-play-services-3.jpg?resize=1200%2C628&quality=82&strip=all&ssl=1)


![Apple Seeds tvOS 18.5 Beta 2 to Developers [Download]](https://www.iclarified.com/images/news/97011/97011/97011-640.jpg)
![Apple Releases macOS Sequoia 15.5 Beta 2 to Developers [Download]](https://www.iclarified.com/images/news/97014/97014/97014-640.jpg)


