


![[The AI Show Episode 143]: ChatGPT Revenue Surge, New AGI Timelines, Amazon’s AI Agent, Claude for Education, Model Context Protocol & LLMs Pass the Turing Test](https://www.marketingaiinstitute.com/hubfs/ep%20143%20cover.png)


![From drop-out to software architect with Jason Lengstorf [Podcast #167]](https://cdn.hashnode.com/res/hashnode/image/upload/v1743796461357/f3d19cd7-e6f5-4d7c-8bfc-eb974bc8da68.png?#)


![What are the Best Practices for Structuring Modern Website Design and Development Services for Scalable Projects? [closed]](https://cdn.sstatic.net/Sites/softwareengineering/Img/apple-touch-icon@2.png?v=1ef7363febba)


.png?width=1920&height=1920&fit=bounds&quality=70&format=jpg&auto=webp#)


.jpg?#)


.png?width=1920&height=1920&fit=bounds&quality=70&format=jpg&auto=webp#)


_ArtemisDiana_Alamy.jpg?#)


-xl.jpg)


![Yes, the Gemini icon is now bigger and brighter on Android [U]](https://i0.wp.com/9to5google.com/wp-content/uploads/sites/4/2025/02/Gemini-on-Galaxy-S25.jpg?resize=1200%2C628&quality=82&strip=all&ssl=1)


![Apple Rushes Five Planes of iPhones to US Ahead of New Tariffs [Report]](https://www.iclarified.com/images/news/96967/96967/96967-640.jpg)
![Apple Vision Pro 2 Allegedly in Production Ahead of 2025 Launch [Rumor]](https://www.iclarified.com/images/news/96965/96965/96965-640.jpg)


How to Create and Deploy Windows 11 Virtual Machine on Microsoft Azure
Introduction Here’s a step-by-step guide to create and deploy a Windows 11 Virtual Machine on Microsoft Azure using the Azure Portal. Prerequisites: An Azure Subscription (Free or Paid) Resource Group (If not created, I can guide you on that) Azure Account Access Virtual Network (Optional, Azure will create one if not available) Steps to Create & Deploy Windows 11 VM Step 1: Sign in to Azure Portal Go to: https://portal.azure.com Log in with your Azure credentials Step 2: Navigate to Virtual Machines In the Azure Portal, click on Create a resource group Name the resource group and click on review and create Select "Home" search Virtual Machine and then click on Virtual Machine Click + Create > Azure Virtual Machine Step 3: Configure Basics Subscription: Choose your active Azure subscription Resource Group: Select an existing resource group or create a new one Virtual machine name: Enter a unique name for your VM Region: Choose a region that supports Windows 11 VMs Choose Availability Zone Image: Click Browse all images and select Windows 11 Pro Size: Choose an appropriate VM size based on your workload requirements Step 4: Configure Administrator Account Under the Administrator account section, choose Username and Password. Select inbound ports and click on HTTP ✅ Check the box License Type: I confirm I have a Windows 11 license (if applicable) Step 5: Configure Networking Virtual Network: Default or Create New Subnet: Default or Create New Public IP: Enable (For remote access) NIC Network Security Group: Basic Select Allow RDP (3389) under Inbound Ports Enable Auto-shutdown if required to save costs when not in use Configure Backup settings if needed Step 6: Review + Create Review all your configurations. Click Create. The deployment process may take a few minutes. Once complete, navigate to the VM under Virtual Machines Step 7: Connect to Windows 11 VM Go to Virtual Machines Select your VM Click Connect Download the RDP file Open the RDP file and log in using your credentials Enter the Administrator username and password set during the VM creation process. Windows 11 pro created successfully Conclusion Congratulations! You have successfully created a Windows 11 virtual machine in Microsoft Azure. You can now install applications, configure settings, and manage the VM as needed. Be sure to monitor usage to optimize cost and performance.
Introduction
Here’s a step-by-step guide to create and deploy a Windows 11 Virtual Machine on Microsoft Azure using the Azure Portal.
Prerequisites:
- An Azure Subscription (Free or Paid)
- Resource Group (If not created, I can guide you on that)
- Azure Account Access
- Virtual Network (Optional, Azure will create one if not available)
Steps to Create & Deploy Windows 11 VM
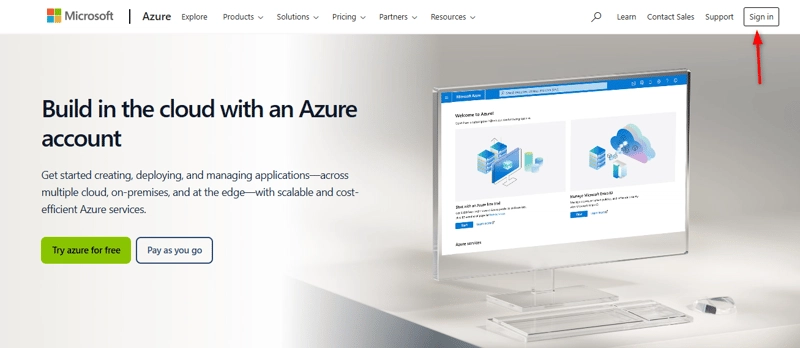
Step 1: Sign in to Azure Portal
- Go to: https://portal.azure.com Log in with your Azure credentials
Step 2: Navigate to Virtual Machines
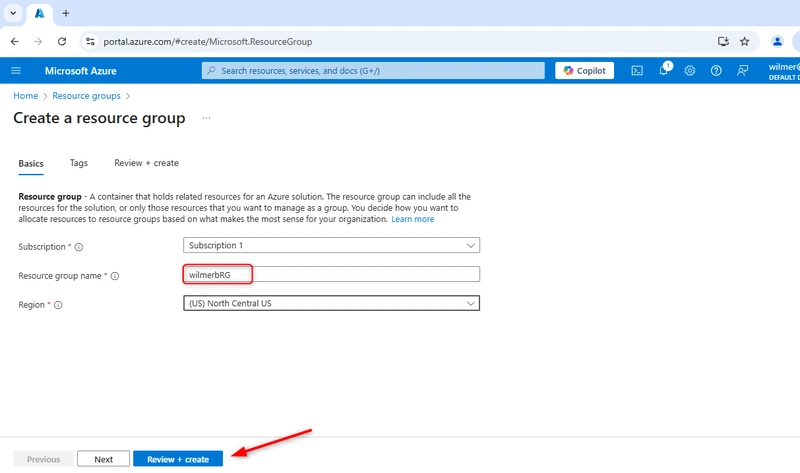
- In the Azure Portal, click on Create a resource group
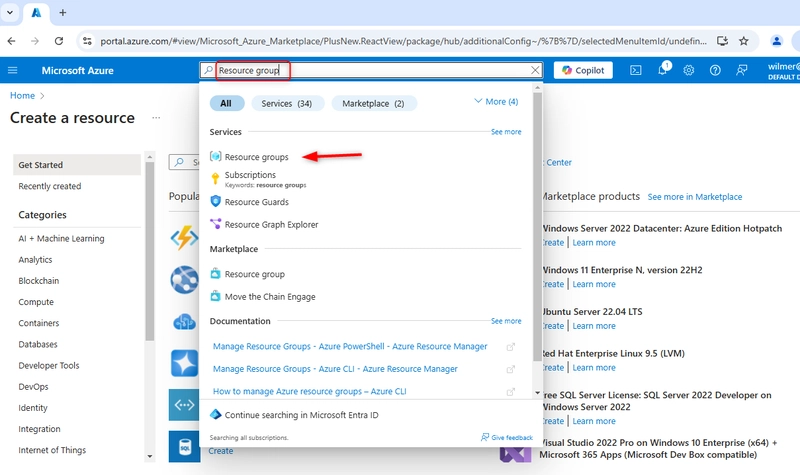
- Name the resource group and click on review and create
- Select "Home" search Virtual Machine and then click on Virtual Machine
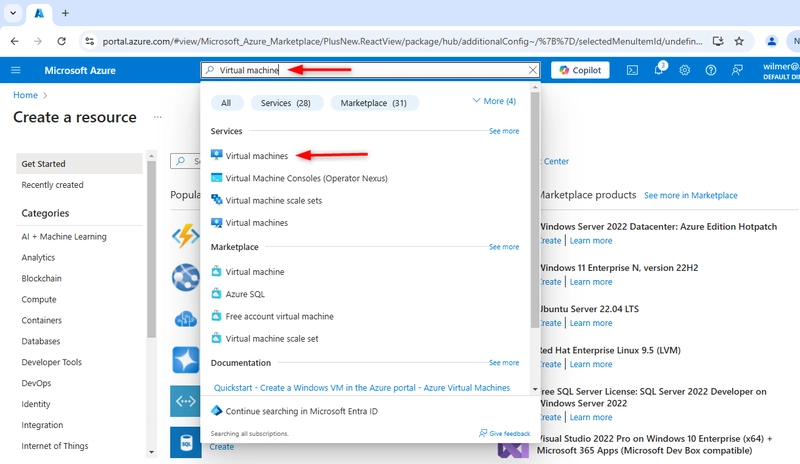
- Click + Create > Azure Virtual Machine

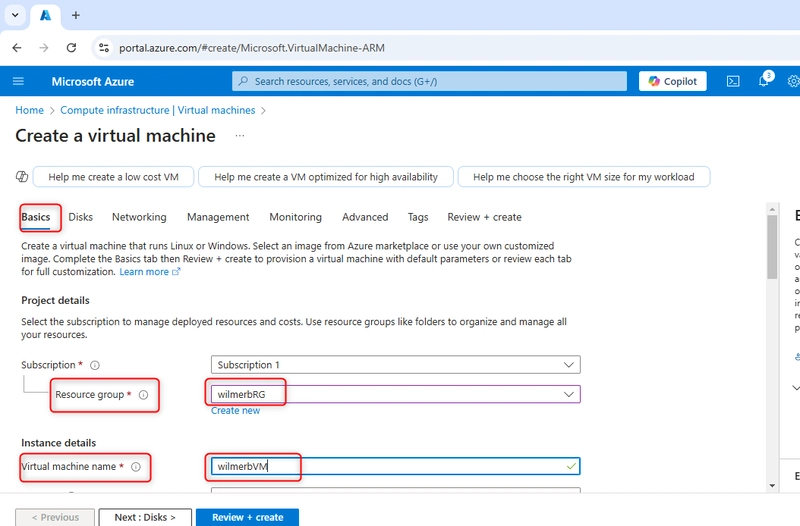
Step 3: Configure Basics
- Subscription: Choose your active Azure subscription
- Resource Group: Select an existing resource group or create a new one
- Virtual machine name: Enter a unique name for your VM
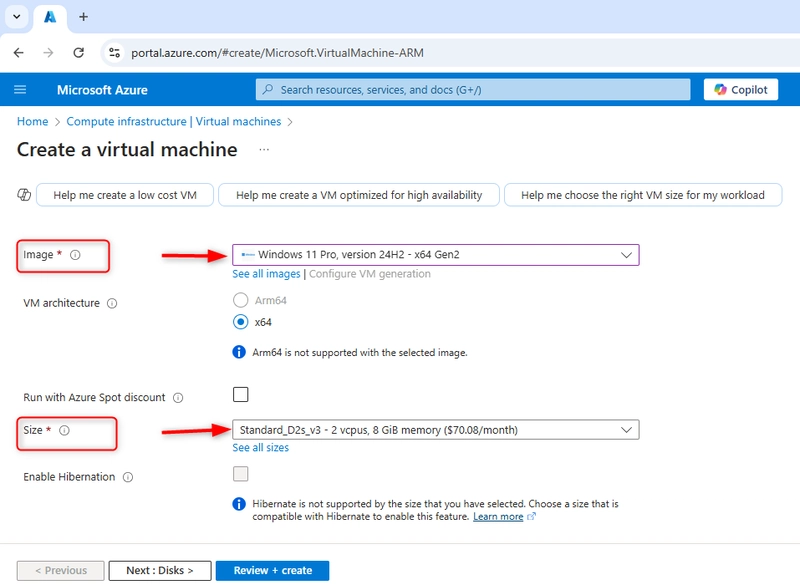
- Region: Choose a region that supports Windows 11 VMs
- Choose Availability Zone

- Image: Click Browse all images and select Windows 11 Pro
- Size: Choose an appropriate VM size based on your workload requirements
Step 4: Configure Administrator Account
- Under the Administrator account section, choose Username and Password.
- Select inbound ports and click on HTTP
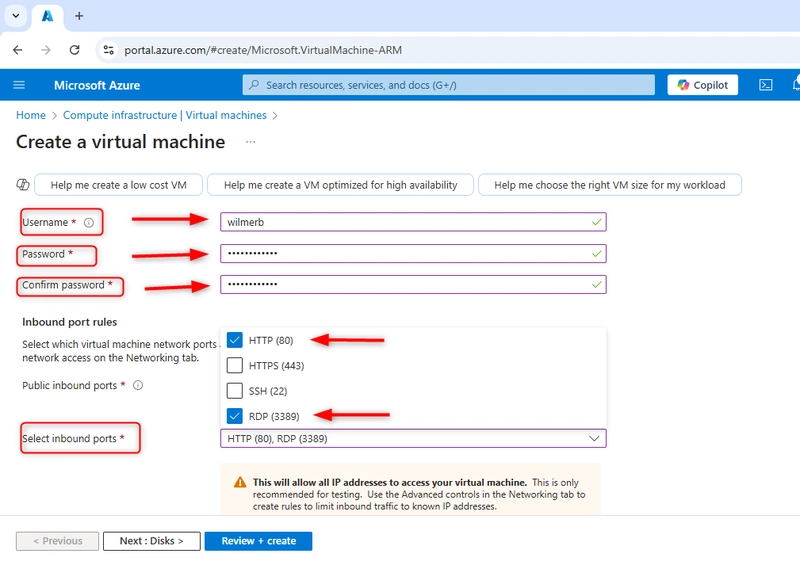
✅ Check the box License Type: I confirm I have a Windows 11 license (if applicable)
Step 5: Configure Networking
- Virtual Network: Default or Create New
- Subnet: Default or Create New
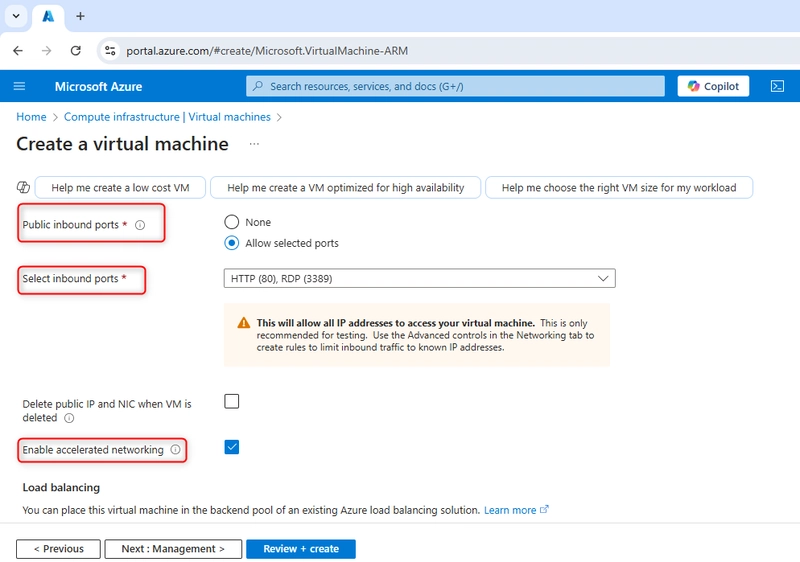
- Public IP: Enable (For remote access)
- NIC Network Security Group: Basic
- Select Allow RDP (3389) under Inbound Ports
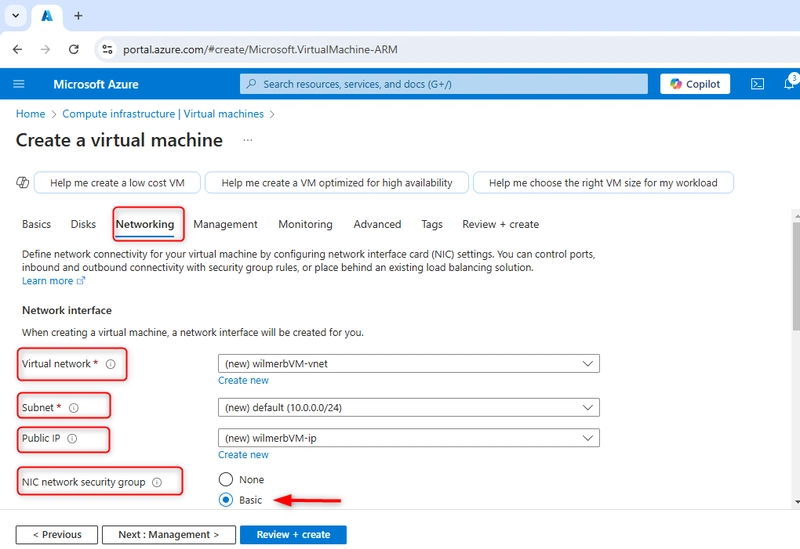
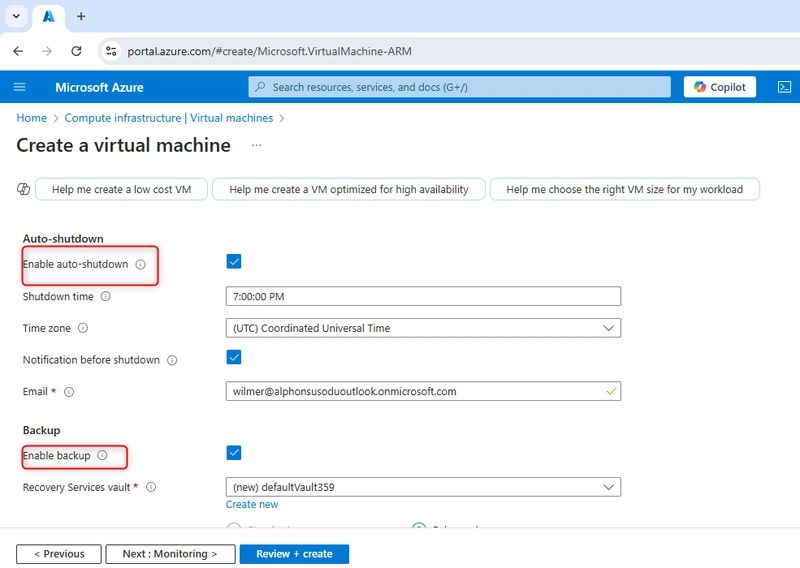
- Enable Auto-shutdown if required to save costs when not in use
- Configure Backup settings if needed
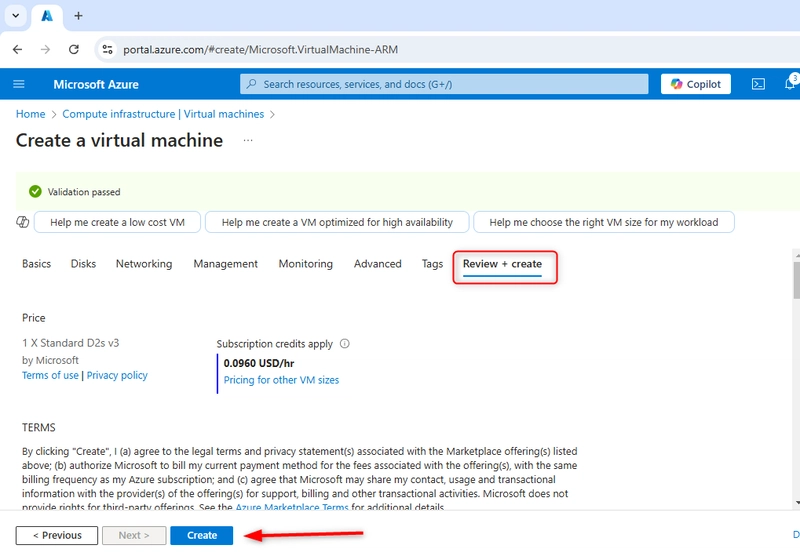
Step 6: Review + Create
- Review all your configurations.
- Click Create.
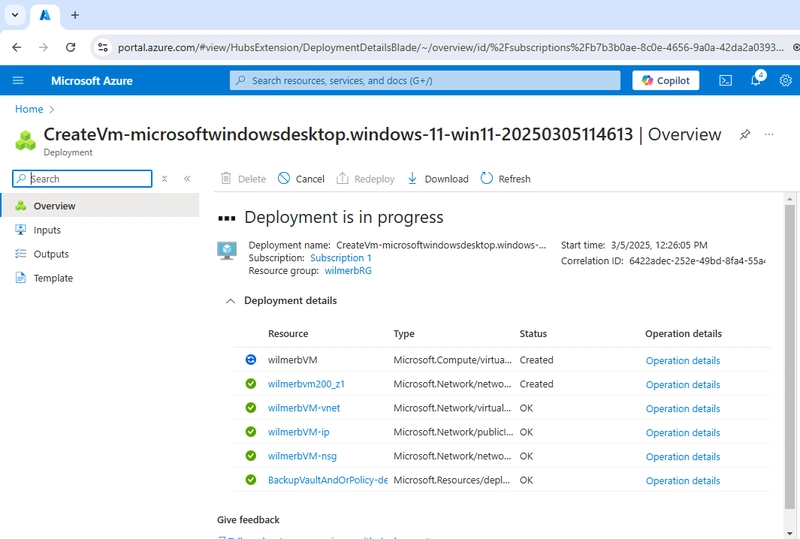
The deployment process may take a few minutes. Once complete, navigate to the VM under Virtual Machines
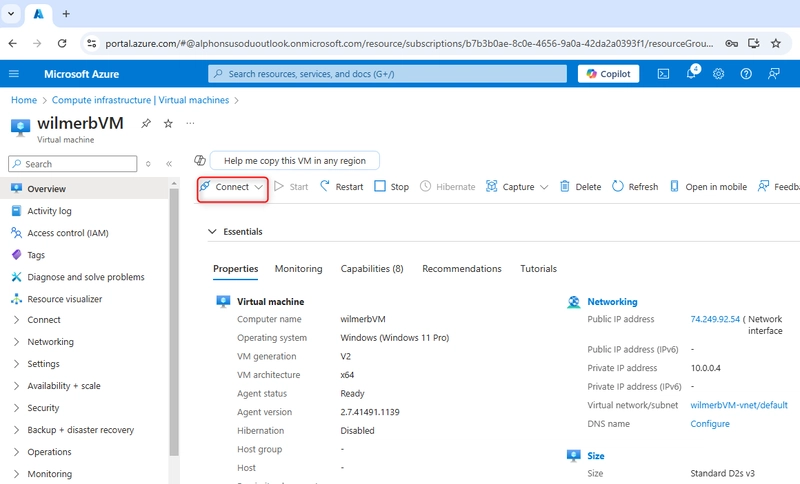
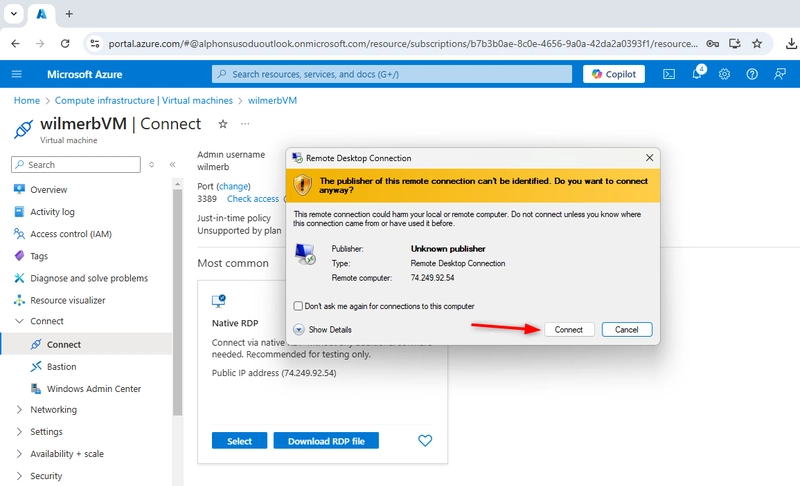
Step 7: Connect to Windows 11 VM
- Go to Virtual Machines
- Select your VM
- Click Connect
- Download the RDP file
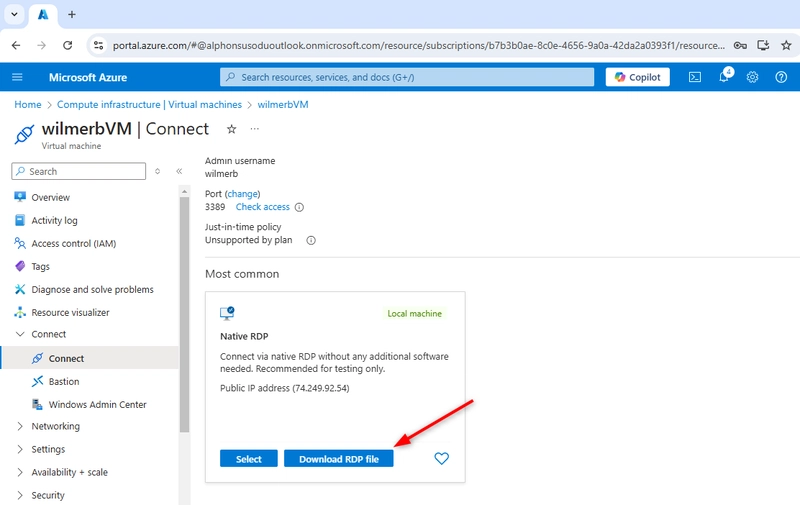
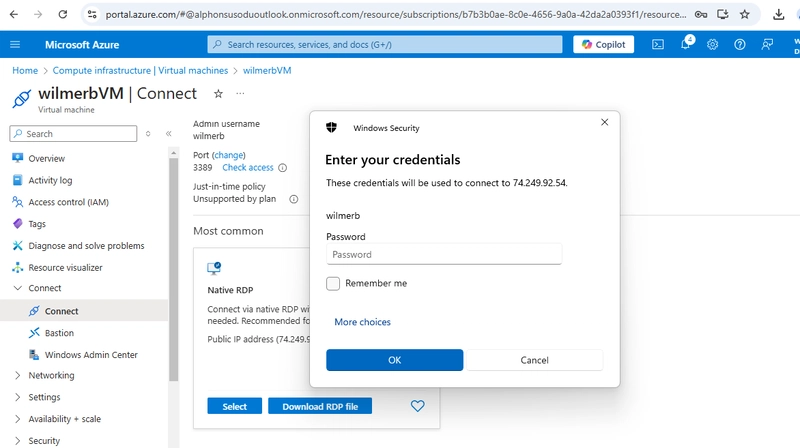
- Open the RDP file and log in using your credentials
- Enter the Administrator username and password set during the VM creation process.
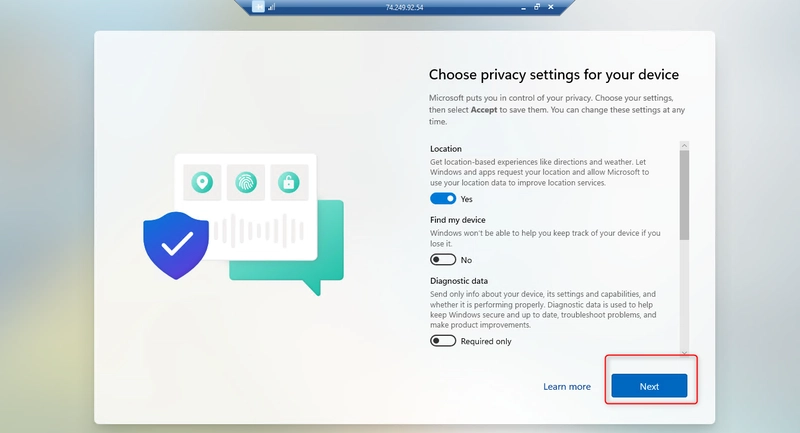
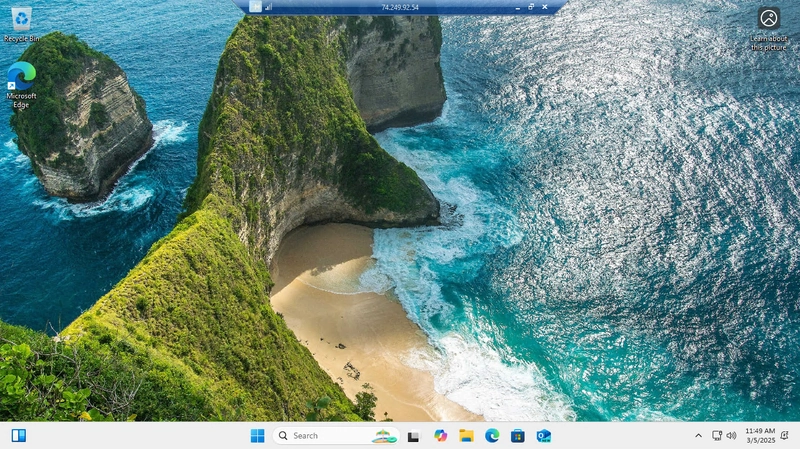
- Windows 11 pro created successfully
Conclusion
Congratulations! You have successfully created a Windows 11 virtual machine in Microsoft Azure. You can now install applications, configure settings, and manage the VM as needed. Be sure to monitor usage to optimize cost and performance.