


![[The AI Show Episode 143]: ChatGPT Revenue Surge, New AGI Timelines, Amazon’s AI Agent, Claude for Education, Model Context Protocol & LLMs Pass the Turing Test](https://www.marketingaiinstitute.com/hubfs/ep%20143%20cover.png)


![From drop-out to software architect with Jason Lengstorf [Podcast #167]](https://cdn.hashnode.com/res/hashnode/image/upload/v1743796461357/f3d19cd7-e6f5-4d7c-8bfc-eb974bc8da68.png?#)


![What are the Best Practices for Structuring Modern Website Design and Development Services for Scalable Projects? [closed]](https://cdn.sstatic.net/Sites/softwareengineering/Img/apple-touch-icon@2.png?v=1ef7363febba)


.png?width=1920&height=1920&fit=bounds&quality=70&format=jpg&auto=webp#)


.jpg?#)


.png?width=1920&height=1920&fit=bounds&quality=70&format=jpg&auto=webp#)


_ArtemisDiana_Alamy.jpg?#)


-xl.jpg)


![Yes, the Gemini icon is now bigger and brighter on Android [U]](https://i0.wp.com/9to5google.com/wp-content/uploads/sites/4/2025/02/Gemini-on-Galaxy-S25.jpg?resize=1200%2C628&quality=82&strip=all&ssl=1)


![Apple Rushes Five Planes of iPhones to US Ahead of New Tariffs [Report]](https://www.iclarified.com/images/news/96967/96967/96967-640.jpg)
![Apple Vision Pro 2 Allegedly in Production Ahead of 2025 Launch [Rumor]](https://www.iclarified.com/images/news/96965/96965/96965-640.jpg)


Blender MCP: Seamless Integration of Blender with Claude AI
Blender MCP (Blender Model Context Protocol) is a nice tool that connects Blender to Claude AI, allowing AI-driven 3D modeling, scene creation, and object manipulation. This integration makes 3D design faster, more intuitive, and highly interactive. Why Use Blender MCP? AI-powered modeling: Direct interaction with Claude AI for instant 3D modifications. Seamless asset management: Access Poly Haven and Hyper3D Rodin for quick model generation. Advanced material control: Modify object textures and materials effortlessly. Script execution: Run Python scripts directly within Blender. Key Features Two-way communication between Blender and Claude AI Object creation, deletion, and transformation Material and texture application Scene inspection and real-time information retrieval AI-generated models via Hyper3D Rodin Installation Guide Prerequisites To install Blender MCP, ensure you have: Blender 3.0+ Python 3.10+ uv package manager (Essential for running MCP) Installing UV For Mac: brew install uv For Windows: powershell -c "irm https://astral.sh/uv/install.ps1 | iex" Then, add to the system path: set Path=C:\Users\nntra\.local\bin;%Path% Full installation guide ⚠️ Do not proceed before installing UV Setting Up MCP in Claude AI Open Claude AI Desktop Navigate to Settings > Developer > Edit Config Add the following to claude_desktop_config.json: { "mcpServers": { "blender": { "command": "uvx", "args": [ "blender-mcp" ] } } } Installing Blender Addon Download the addon.py file Open Blender Navigate to Edit > Preferences > Add-ons Click Install... and select addon.py Enable the addon (Checkbox: "Interface: Blender MCP") How to Use Blender MCP Connecting to Claude AI Open Blender and press N to access the 3D View Sidebar Navigate to the BlenderMCP tab Enable Poly Haven API (Optional) Click "Connect to Claude" Ensure the MCP Server is running Example Commands You can now interact with Blender through Claude AI by using commands like: Create a 3D scene: "Generate a dungeon scene with a dragon guarding gold" Demo video Modify textures: "Make this car red and metallic" Use Poly Haven assets: "Create a beach scene using HDRIs and rock models from Poly Haven" Demo video AI-generated models: "Generate a 3D garden gnome using Hyper3D Rodin" Adjust camera: "Set up isometric camera view" Lighting setup: "Adjust lighting to a studio environment" Using MCP with Cursor Integration Open Cursor Settings > MCP Paste the command: uvx blender-mcp Cursor setup guide video] ⚠️ Run MCP server on either Cursor or Claude, NOT both Troubleshooting & FAQs Common Issues & Fixes Connection Issues: Ensure the Blender Addon Server is running and correctly configured on Claude. Timeout Errors: Break complex requests into smaller commands. Poly Haven API Issues: Refresh API settings if assets fail to load. General Fix: Restart Blender and Claude AI. Security Considerations Python Execution Risks: The execute_blender_code function allows arbitrary code execution. Always save work before using it. Large Asset Downloads: Disable Poly Haven integration if not needed. Complex Commands: Break large operations into smaller steps for efficiency. Contributing & Development Blender MCP is an open-source project. Contributions are welcome! Submit a Pull Request or report issues on the GitHub repository: @blender-mcp Final Thoughts Blender MCP is a game-changer for 3D artists, allowing AI-assisted modeling, asset management, and interactive scene creation. By integrating Claude AI with Blender, this tool accelerates workflows and brings creative visions to life effortlessly.

Blender MCP (Blender Model Context Protocol) is a nice tool that connects Blender to Claude AI, allowing AI-driven 3D modeling, scene creation, and object manipulation. This integration makes 3D design faster, more intuitive, and highly interactive.
Why Use Blender MCP?
- AI-powered modeling: Direct interaction with Claude AI for instant 3D modifications.
- Seamless asset management: Access Poly Haven and Hyper3D Rodin for quick model generation.
- Advanced material control: Modify object textures and materials effortlessly.
- Script execution: Run Python scripts directly within Blender.
Key Features
- Two-way communication between Blender and Claude AI
- Object creation, deletion, and transformation
- Material and texture application
- Scene inspection and real-time information retrieval
- AI-generated models via Hyper3D Rodin
Installation Guide
Prerequisites
To install Blender MCP, ensure you have:
- Blender 3.0+
- Python 3.10+
- uv package manager (Essential for running MCP)
Installing UV
For Mac:
brew install uv
For Windows:
powershell -c "irm https://astral.sh/uv/install.ps1 | iex"
Then, add to the system path:
set Path=C:\Users\nntra\.local\bin;%Path%
⚠️ Do not proceed before installing UV
Setting Up MCP in Claude AI
- Open Claude AI Desktop
- Navigate to Settings > Developer > Edit Config
- Add the following to
claude_desktop_config.json:
{
    "mcpServers": {
        "blender": {
            "command": "uvx",
            "args": [
                "blender-mcp"
            ]
        }
    }
}
Installing Blender Addon
- Download the
addon.pyfile - Open Blender
- Navigate to Edit > Preferences > Add-ons
- Click Install... and select
addon.py - Enable the addon (Checkbox: "Interface: Blender MCP")
How to Use Blender MCP
Connecting to Claude AI
- Open Blender and press N to access the 3D View Sidebar
- Navigate to the BlenderMCP tab
- Enable Poly Haven API (Optional)
- Click "Connect to Claude"
- Ensure the MCP Server is running
Example Commands

You can now interact with Blender through Claude AI by using commands like:
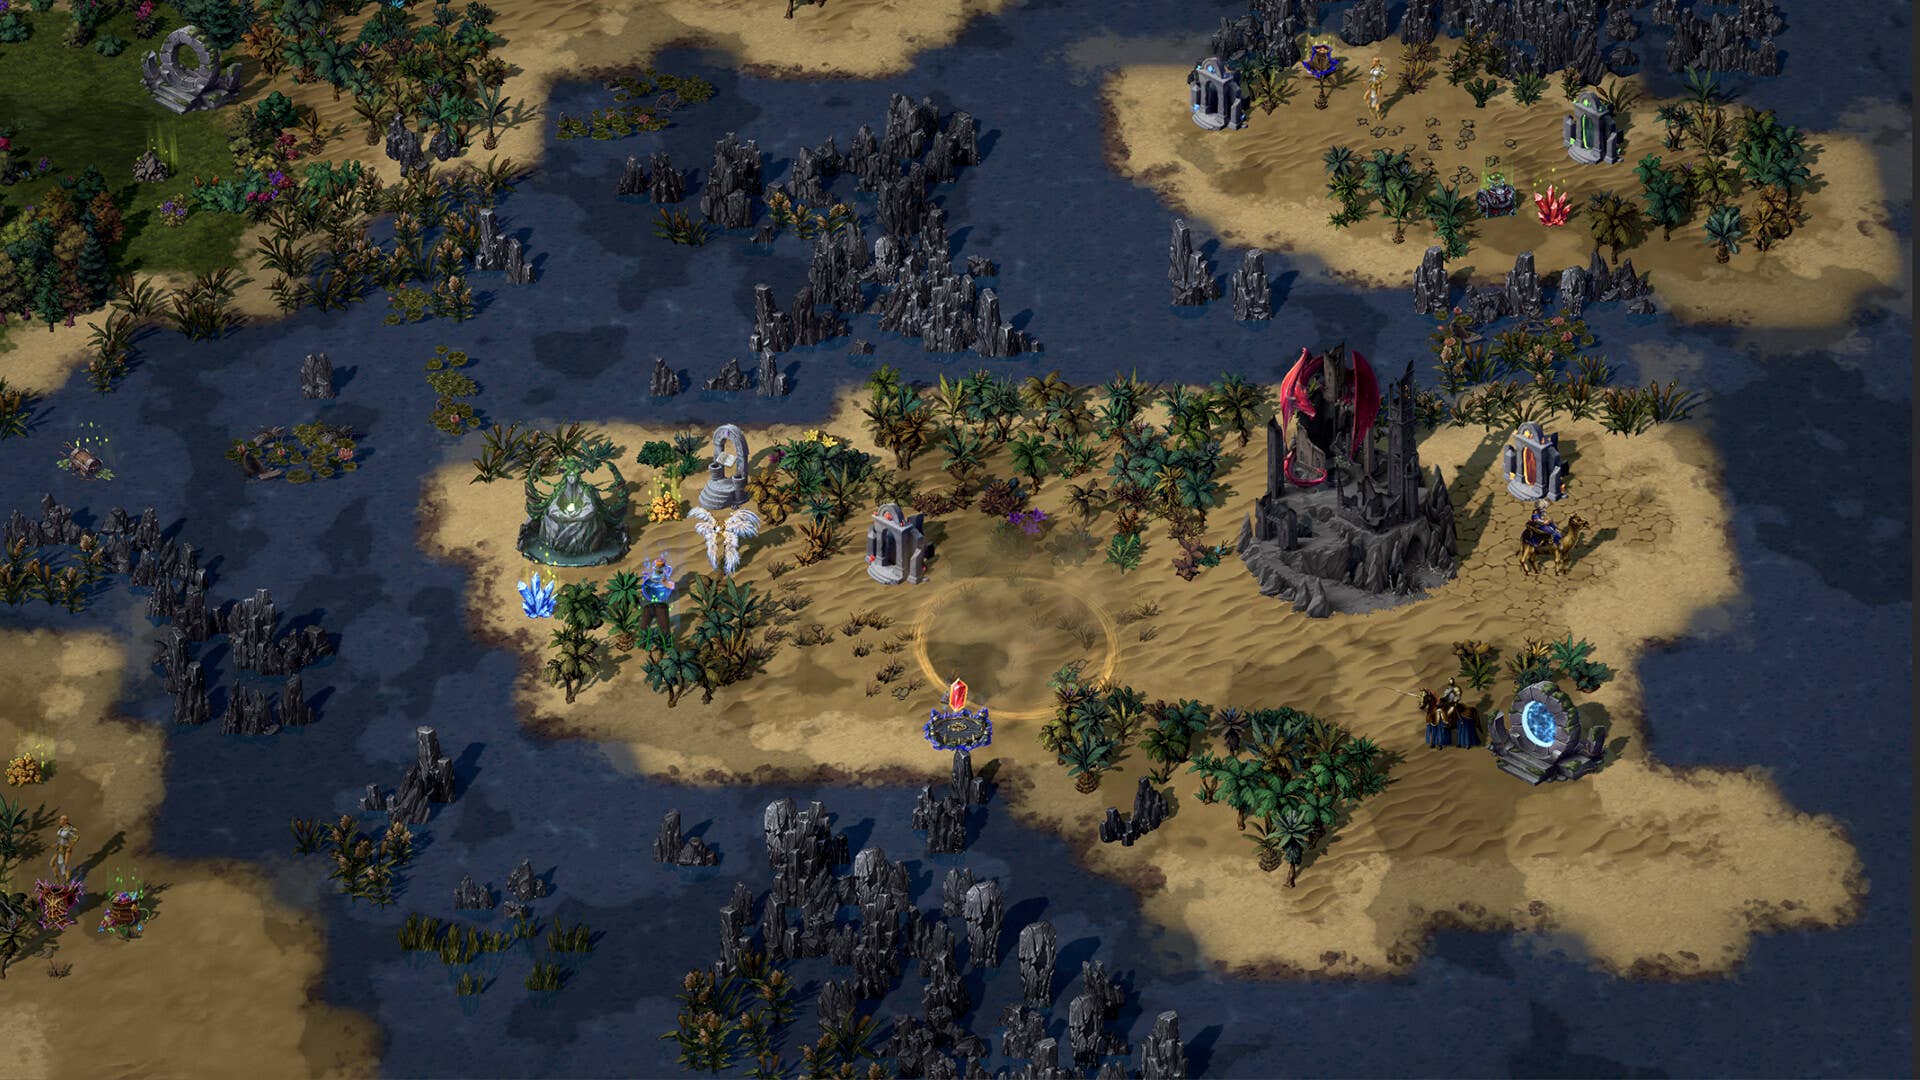
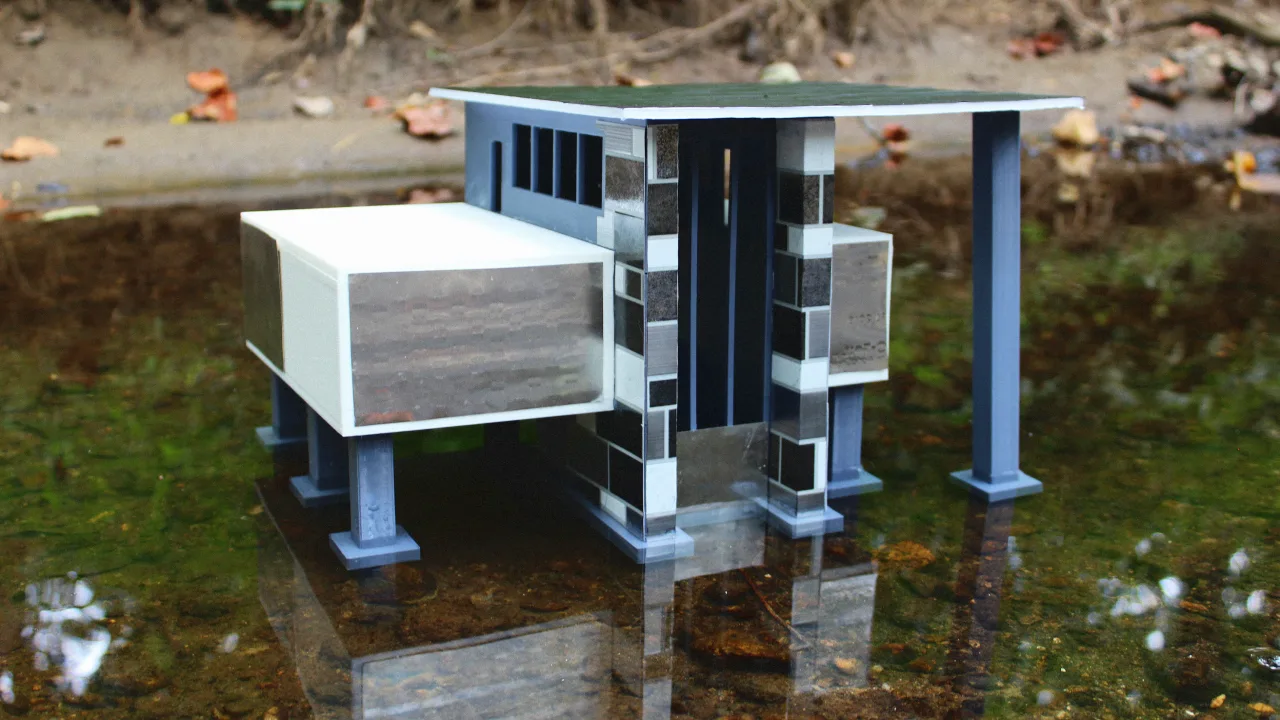
- Create a 3D scene: "Generate a dungeon scene with a dragon guarding gold"
Demo video
- Modify textures: "Make this car red and metallic"
- Use Poly Haven assets: "Create a beach scene using HDRIs and rock models from Poly Haven"
Demo video
- AI-generated models: "Generate a 3D garden gnome using Hyper3D Rodin"
- Adjust camera: "Set up isometric camera view"
- Lighting setup: "Adjust lighting to a studio environment"
Using MCP with Cursor Integration
- Open Cursor Settings > MCP
- Paste the command:
uvx blender-mcp
Cursor setup guide video]
⚠️ Run MCP server on either Cursor or Claude, NOT both
Troubleshooting & FAQs
Common Issues & Fixes
- Connection Issues: Ensure the Blender Addon Server is running and correctly configured on Claude.
- Timeout Errors: Break complex requests into smaller commands.
- Poly Haven API Issues: Refresh API settings if assets fail to load.
- General Fix: Restart Blender and Claude AI.
Security Considerations
-
Python Execution Risks: The
execute_blender_codefunction allows arbitrary code execution. Always save work before using it. - Large Asset Downloads: Disable Poly Haven integration if not needed.
- Complex Commands: Break large operations into smaller steps for efficiency.
Contributing & Development
Blender MCP is an open-source project. Contributions are welcome! Submit a Pull Request or report issues on the GitHub repository: @blender-mcp
Final Thoughts
Blender MCP is a game-changer for 3D artists, allowing AI-assisted modeling, asset management, and interactive scene creation. By integrating Claude AI with Blender, this tool accelerates workflows and brings creative visions to life effortlessly.