


![[The AI Show Episode 143]: ChatGPT Revenue Surge, New AGI Timelines, Amazon’s AI Agent, Claude for Education, Model Context Protocol & LLMs Pass the Turing Test](https://www.marketingaiinstitute.com/hubfs/ep%20143%20cover.png)


![From drop-out to software architect with Jason Lengstorf [Podcast #167]](https://cdn.hashnode.com/res/hashnode/image/upload/v1743796461357/f3d19cd7-e6f5-4d7c-8bfc-eb974bc8da68.png?#)


![QA - Best methods for getting large amount of test data into event consuming applications generated from an API application [closed]](https://cdn.sstatic.net/Sites/softwareengineering/Img/apple-touch-icon@2.png?v=1ef7363febba)


-11.11.2024-4-49-screenshot.png?width=1920&height=1920&fit=bounds&quality=70&format=jpg&auto=webp#)


_jvphoto_Alamy.jpg?#)


![Apple Rushes Five Planes of iPhones to US Ahead of New Tariffs [Report]](https://www.iclarified.com/images/news/96967/96967/96967-640.jpg)
![Apple Vision Pro 2 Allegedly in Production Ahead of 2025 Launch [Rumor]](https://www.iclarified.com/images/news/96965/96965/96965-640.jpg)


Step-by-step guide on providing private storage for internal company documents on Azure Portal.
Table of contents. 1. Introduction. 2. Create a storage account for the company's private documents. 3. Configure redundancy for the storage account. 4. Create a private storage container for the corporate data 5. Configure a shared access signature so partners have restricted access to a file. 6. Configure storage access tiers and content replication. 7. Back up the public website storage. 8. Implement lifecycle management to move content to the cool tier. 9. Conclusion. Introduction. Setting up private storage for internal company documents on the Azure Portal is a vital step to ensure data security, accessibility, and organization. This guide offers a clear, step-by-step approach to creating and configuring storage tailored to your organization's needs. It enables secure document management in a scalable cloud environment, whether you're safeguarding sensitive data or optimizing collaboration. This guide simplifies the process to support your goals efficiently. Before you proceed, search this link (https://learn.microsoft.com/en-us/training/modules/guided-project-azure-files-azure-blobs/) and follow through for Azure cloud projects. 2.0. Create a storage account for the company's private documents 2.1. In the portal, search for and select Storage accounts. Select + Create. 2.2. Select the Resource group created in the previous lab*. If the first storage exercise's resource group was deleted after use, you'll have to recreate it. **2.3. Set the **Storage account* name to private. To ensure its uniqueness, add an identifier to the name. leave other settings as default. 2.4. Select Review, and then Create the storage account. 2.5. Wait for the storage account to deploy, and then select Go to the resource. 3.0. Configure the appropriate level of redundancy. 3.1. In the storage account, in the Data management section, select the Redundancy blade. 3.2. Ensure Geo-redundant storage (GRS) is selected and refresh the page. 3.3. Review the primary and secondary location information and save your changes. 4.0. Create a private storage container for the corporate data. 4.1. In the storage account, in the Data storage section, select the Containers blade. Select + Container and ensure the name of the container is private. Ensure the Public access level is Private (no anonymous access). As you have time, review the Advanced settings, but take the defaults and select Create. 4.2. For testing, upload a file to the private container. The type of file doesn’t matter. A small image or text file is a good choice. Test to ensure the file isn’t publically accessible. Select the container and select Upload. Browse to files and select a file. Upload the file. Select the uploaded file. On the Overview tab, copy the URL Paste the URL into a new browser tab. Verify the file doesn’t display and you receive an error. 5.0. An external partner requires read-and-write access to the file for at least the next 24 hours. Configure and test a shared access signature (SAS). 5.1. Select your uploaded blob file and move to the Generate SAS tab. In the Permissions drop-down, ensure the partner has only Read permissions. Select Generate SAS token and URL. Copy the Blob SAS URL to a new browser tab. Verify you can access the file. If you have uploaded an image file it will display in the browser. Other file types will be downloaded. . 6.0. Configure storage access tiers and content replication 6.1. To save on costs, after 30 days, move blobs from the hot tier to the cool tier. Return to the storage account. In the Overview section, notice the Default access tier is set to Hot. In the Data Management section, select the Lifecycle Management Blade. Select Add rule. Set the Rule name to move to cool. Set the Rule scope to Apply the rule to all blobs in the storage account. Select Next. Ensure the 'Last modified' is selected. Set More than (days ago) to 30. In the Then drop-down select Move to cool storage. As you have time, review other lifecycle options in the drop-down. Add the rule. 7.0 The public website files need to be backed up to another storage account. 7.1. In your storage account, create a new container called backup. Use the default values. 7.2. Navigate to your publicwebsite storage account. This storage account was created in the previous exercise. In the Data management section, select the Object replication blade. Select Create replication rules. Set the Destination storage account to the private storage account. Set the Source container to public and the Destination container to backup. Create the replication rule. Optionally, upload a file to the public container Return to the private storage account and refresh the backup container 8.0. Implement lifecycle management to move content to the cool tier. 8.1. Navigate to your storage account in the Azure portal and enable access time tracking. In the Data Management section of the menu, select Lifecycle Management. Withi

Table of contents.
1. Introduction.
2. Create a storage account for the company's private documents.
3. Configure redundancy for the storage account.
4. Create a private storage container for the corporate data
5. Configure a shared access signature so partners have restricted access to a file.
6. Configure storage access tiers and content replication.
7. Back up the public website storage.
8. Implement lifecycle management to move content to the cool tier.
9. Conclusion.
Introduction.
Setting up private storage for internal company documents on the Azure Portal is a vital step to ensure data security, accessibility, and organization. This guide offers a clear, step-by-step approach to creating and configuring storage tailored to your organization's needs. It enables secure document management in a scalable cloud environment, whether you're safeguarding sensitive data or optimizing collaboration. This guide simplifies the process to support your goals efficiently.
Before you proceed, search this link (https://learn.microsoft.com/en-us/training/modules/guided-project-azure-files-azure-blobs/) and follow through for Azure cloud projects.
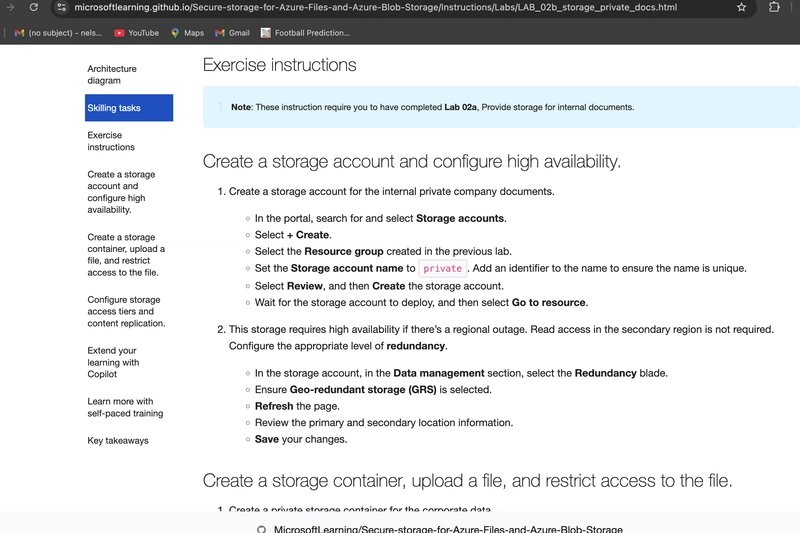
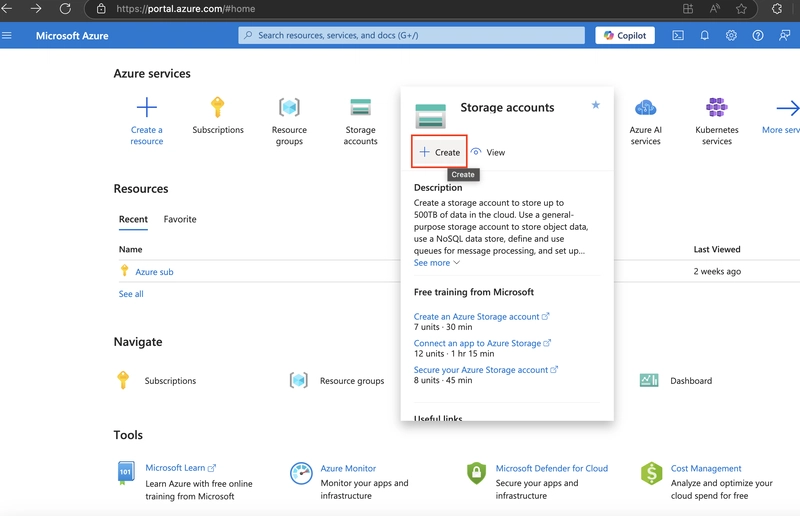
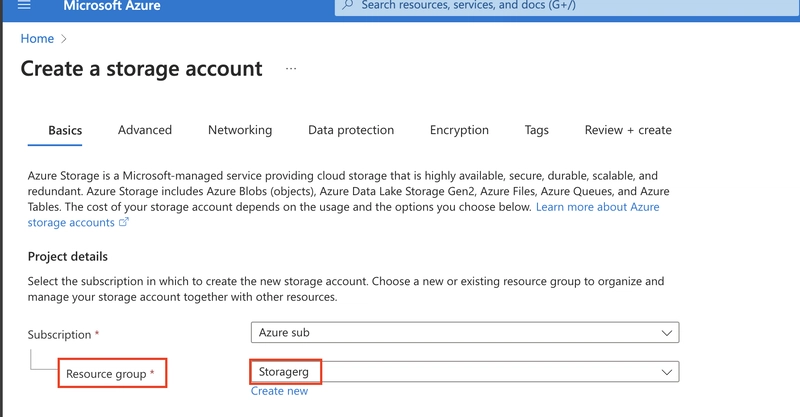
2.0. Create a storage account for the company's private documents
2.1. In the portal, search for and select Storage accounts.
Select + Create.
2.2. Select the Resource group created in the previous lab*.
If the first storage exercise's resource group was deleted after use, you'll have to recreate it.
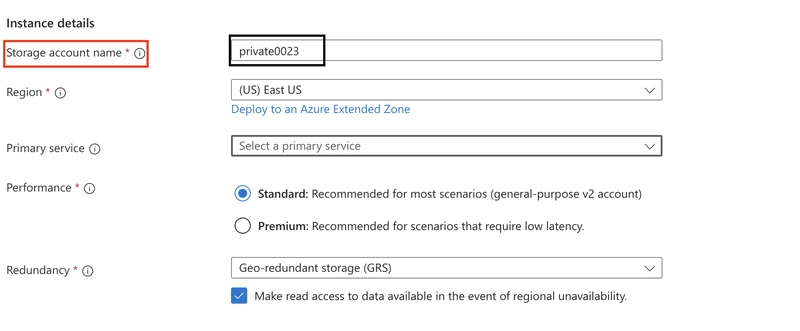
**2.3. Set the **Storage account* name to private. To ensure its uniqueness, add an identifier to the name. leave other settings as default.
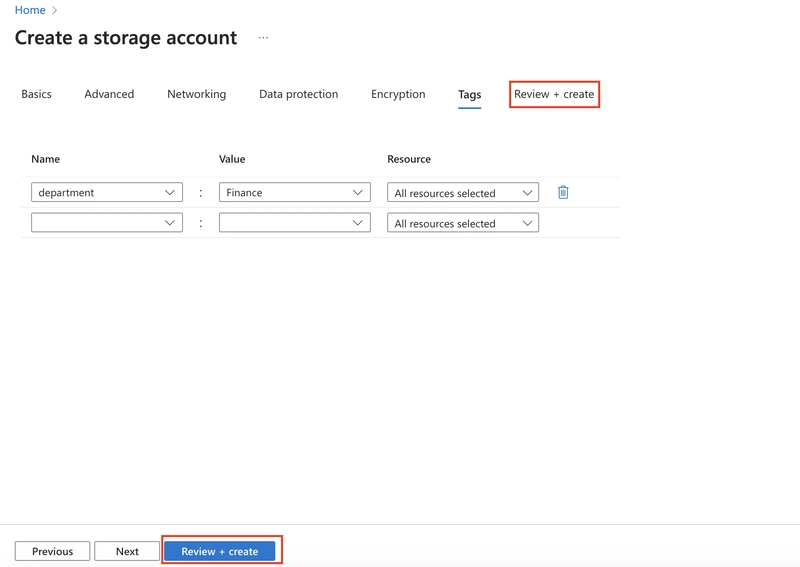
2.4. Select Review, and then Create the storage account.
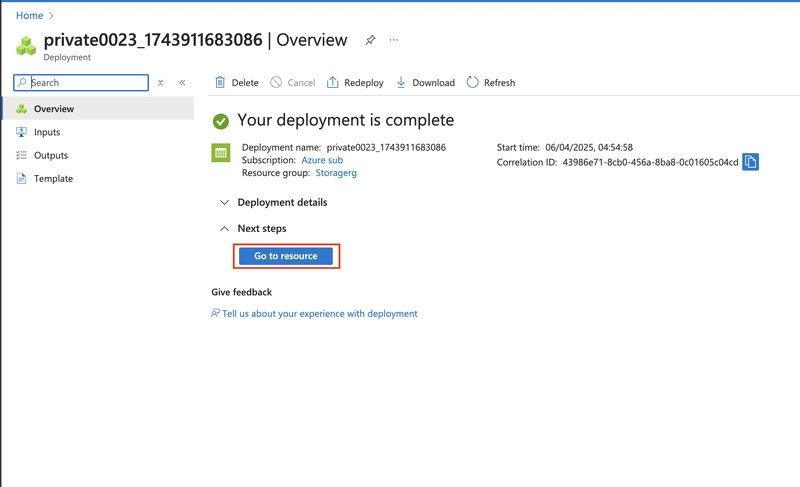
2.5. Wait for the storage account to deploy, and then select Go to the resource.
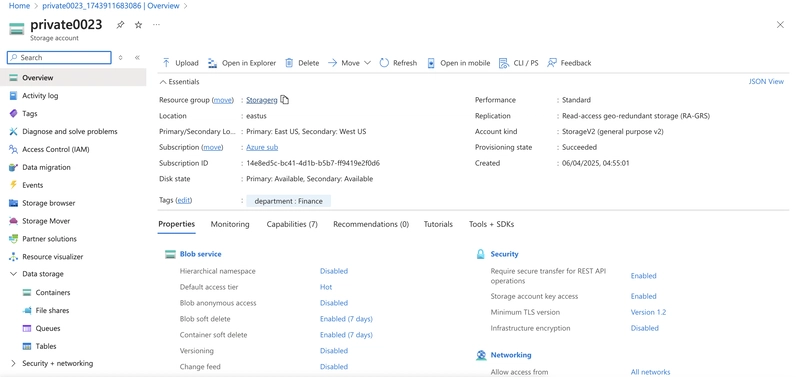
3.0. Configure the appropriate level of redundancy.
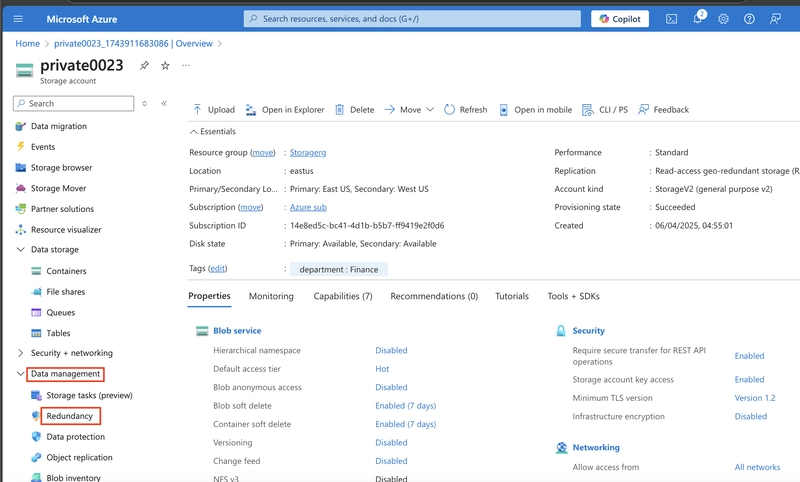
3.1. In the storage account, in the Data management section, select the Redundancy blade.
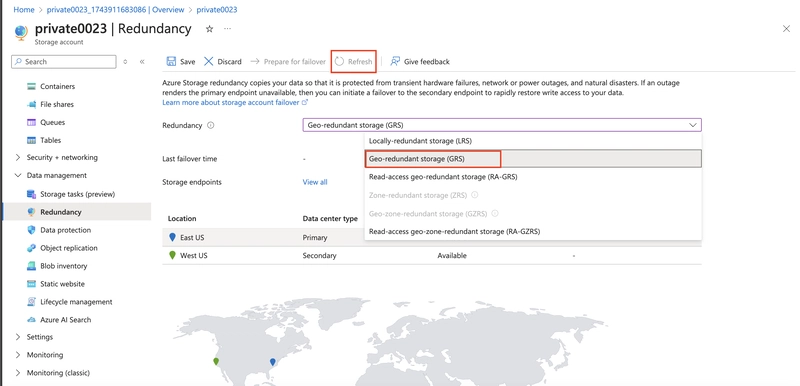
3.2. Ensure Geo-redundant storage (GRS) is selected and refresh the page.
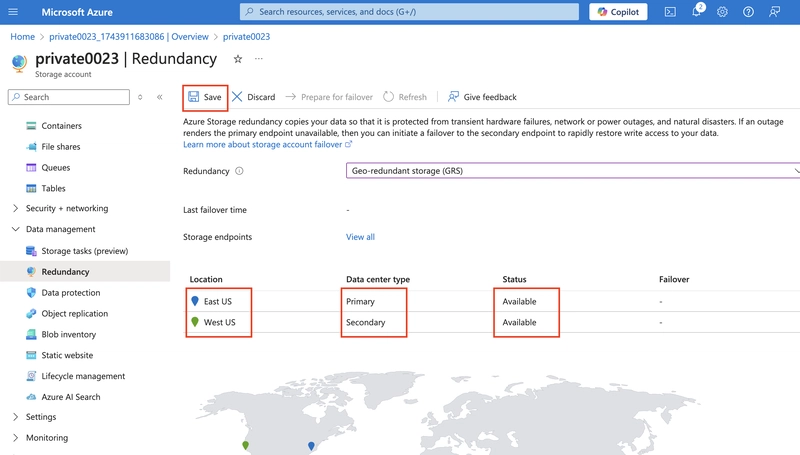
3.3. Review the primary and secondary location information and save your changes.
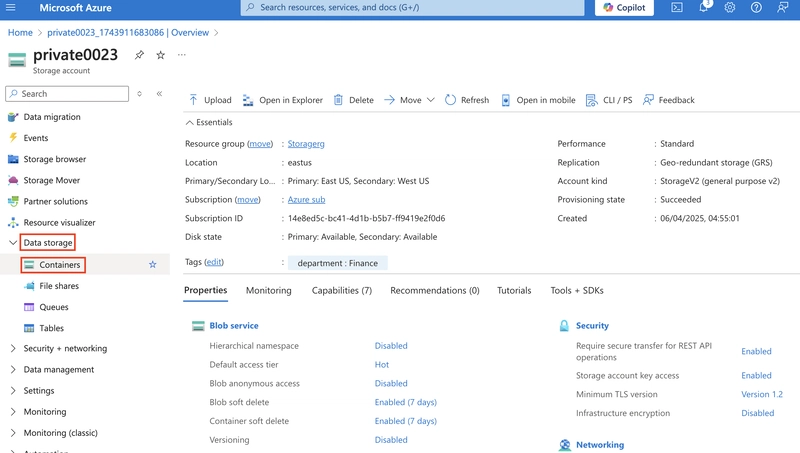
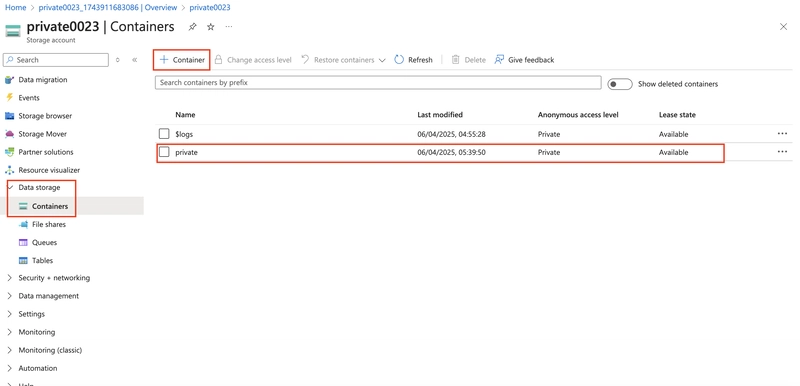
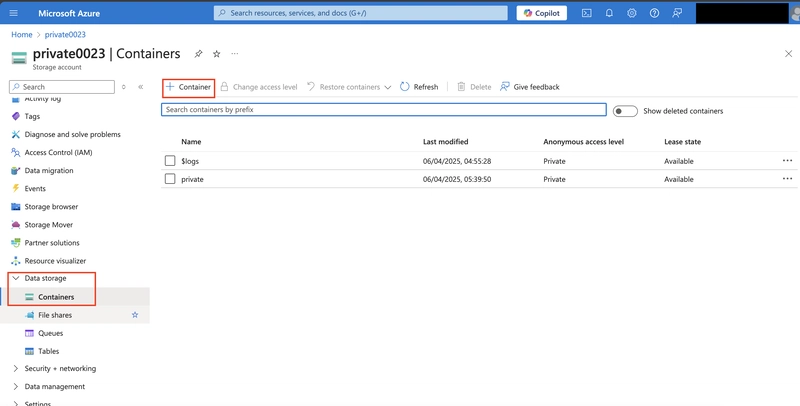
4.0. Create a private storage container for the corporate data.
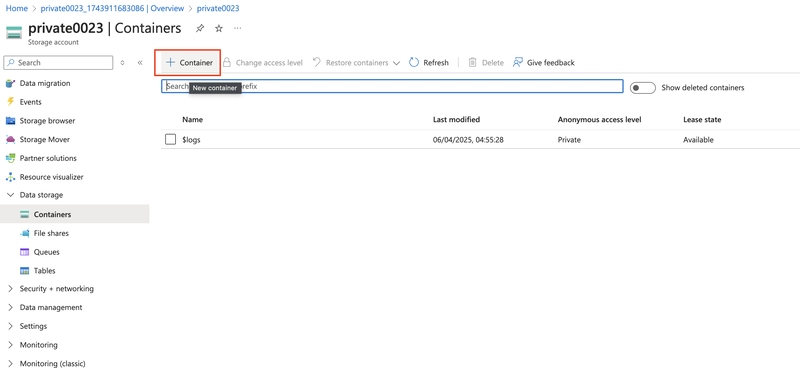
4.1. In the storage account, in the Data storage section, select the Containers blade.
Select + Container and ensure the name of the container is private.
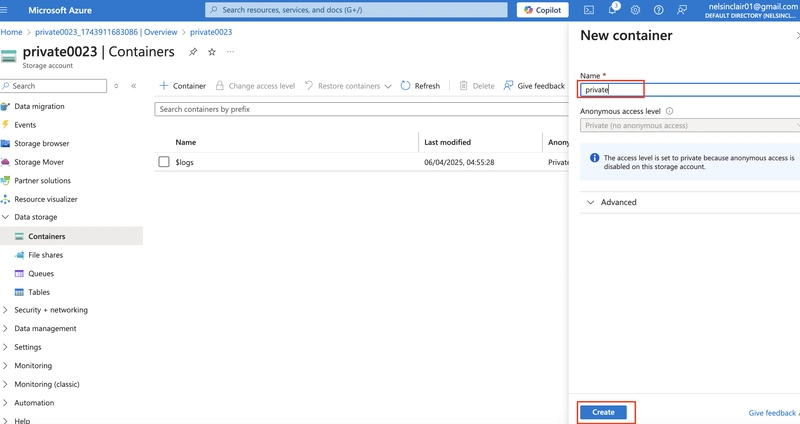
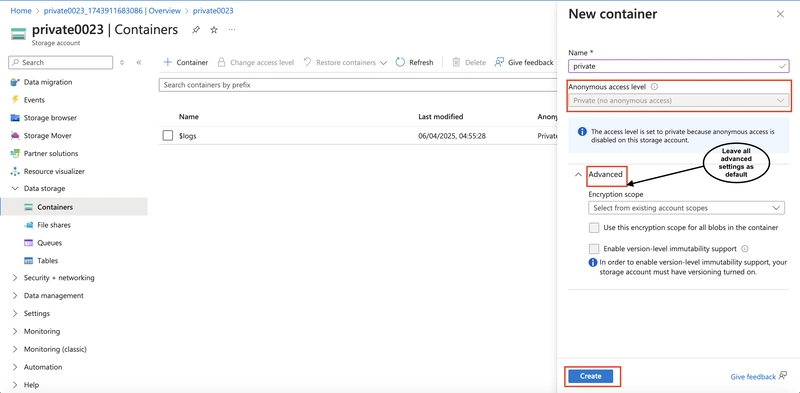
Ensure the Public access level is Private (no anonymous access).
As you have time, review the Advanced settings, but take the defaults and select Create.
4.2. For testing, upload a file to the private container. The type of file doesn’t matter. A small image or text file is a good choice. Test to ensure the file isn’t publically accessible.
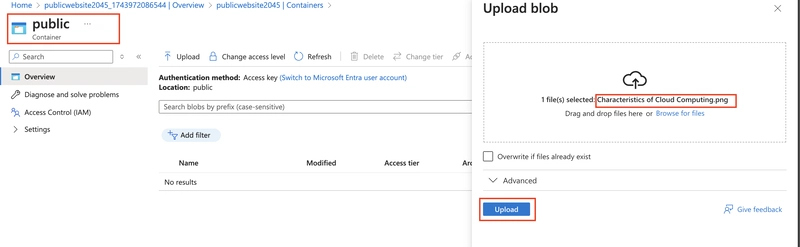
Select the container and select Upload.

Browse to files and select a file.
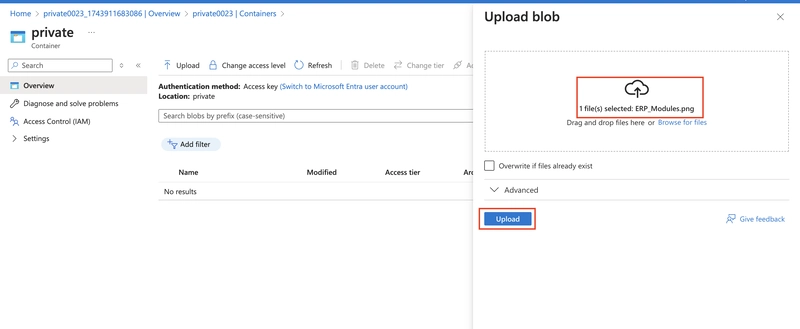
Upload the file.
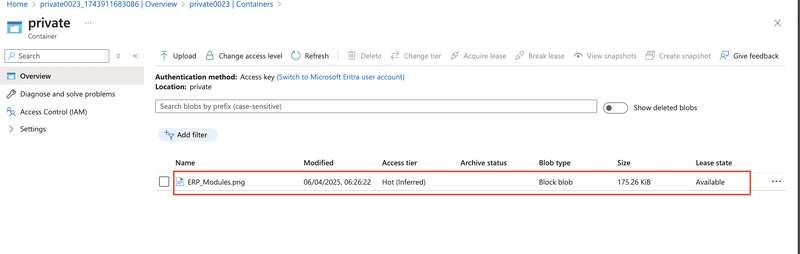
Select the uploaded file.
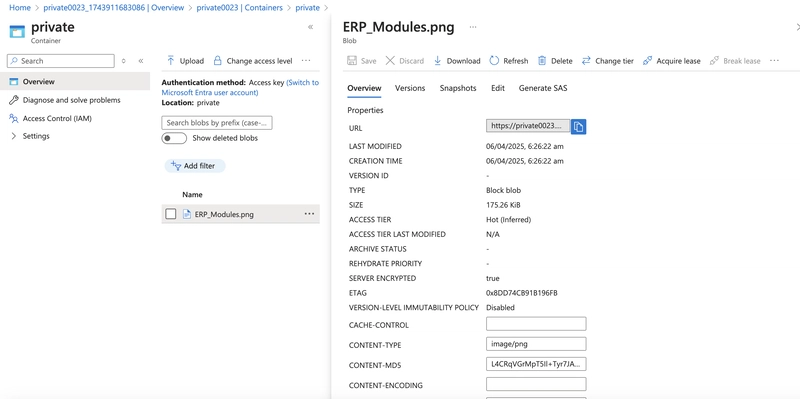
On the Overview tab, copy the URL
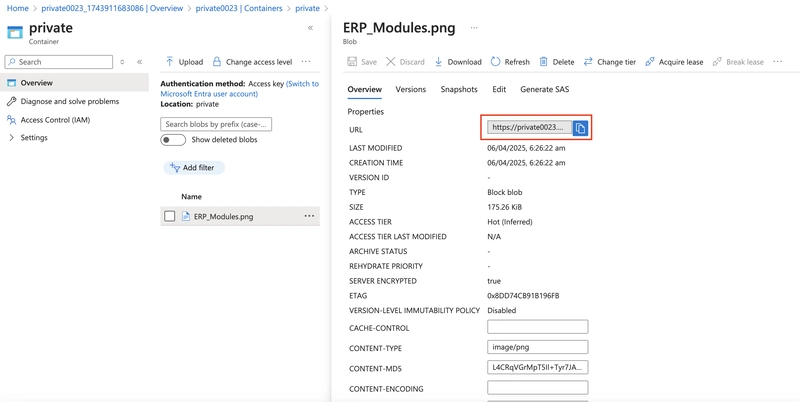
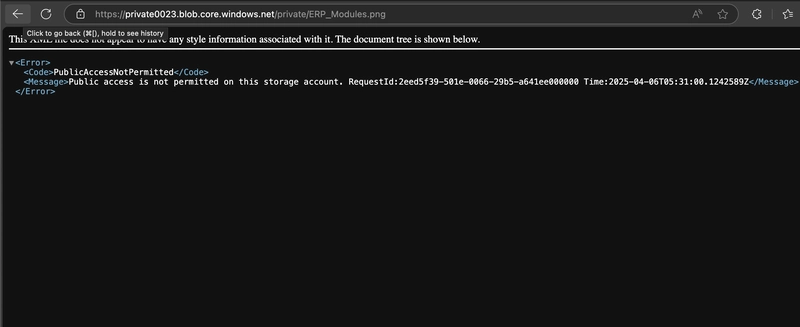
Paste the URL into a new browser tab.
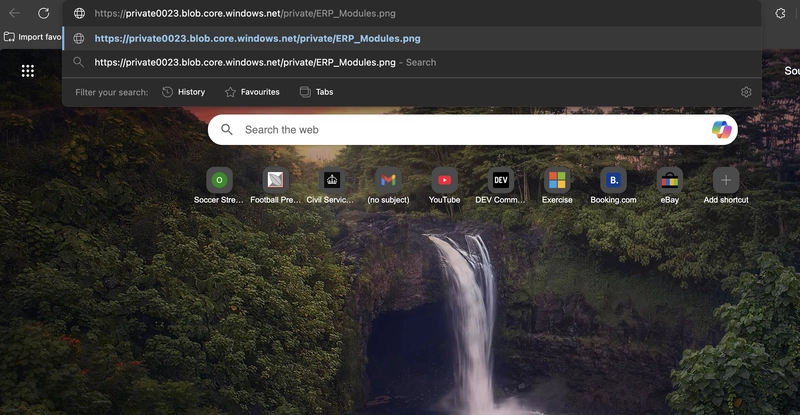
Verify the file doesn’t display and you receive an error.
5.0. An external partner requires read-and-write access to the file for at least the next 24 hours. Configure and test a shared access signature (SAS).
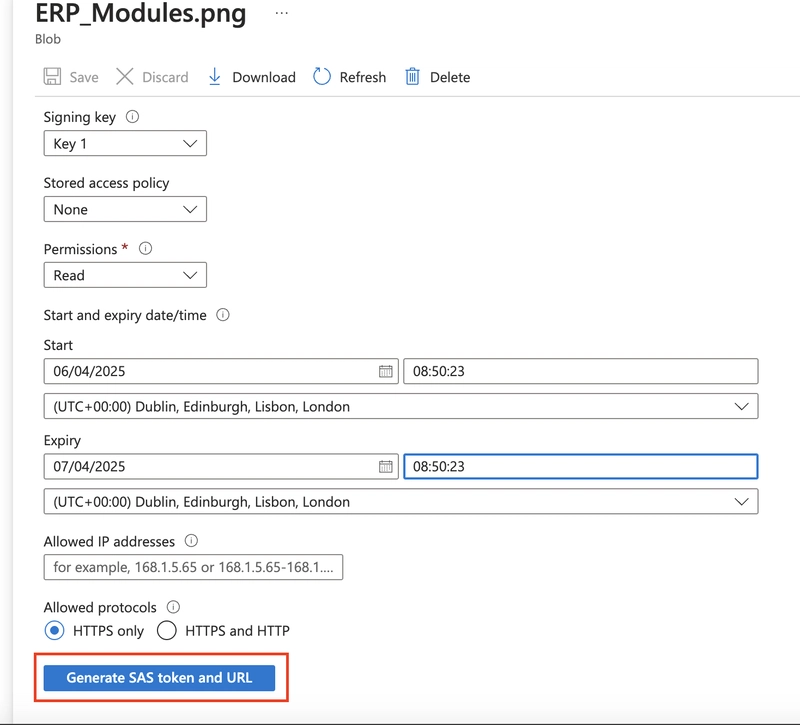
5.1. Select your uploaded blob file and move to the Generate SAS tab.
In the Permissions drop-down, ensure the partner has only Read permissions.
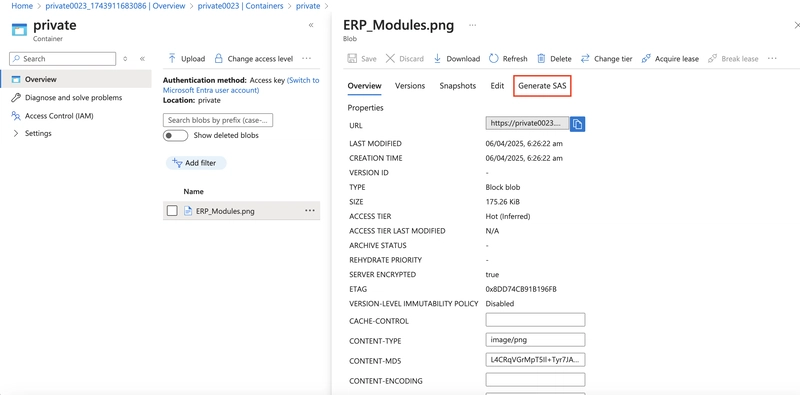
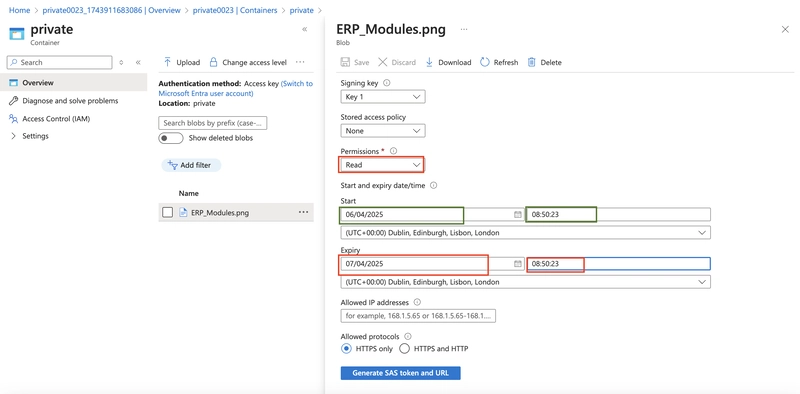
Select Generate SAS token and URL.
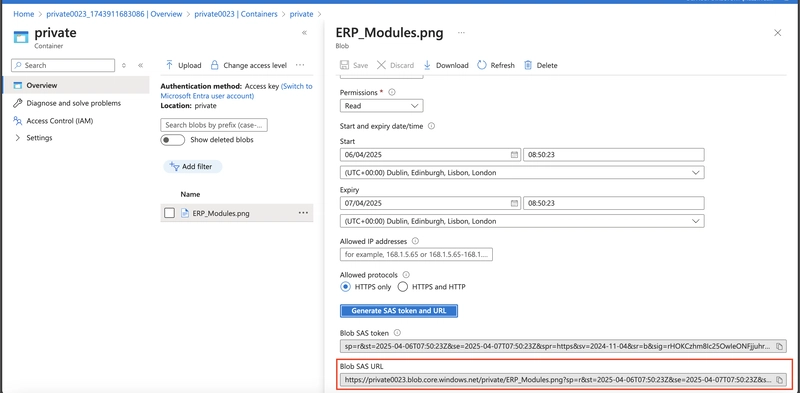
Copy the Blob SAS URL to a new browser tab.
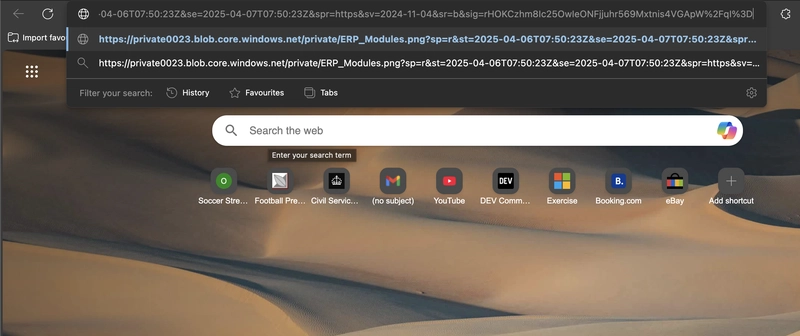
Verify you can access the file. If you have uploaded an image file it will display in the browser. Other file types will be downloaded.
 .
.
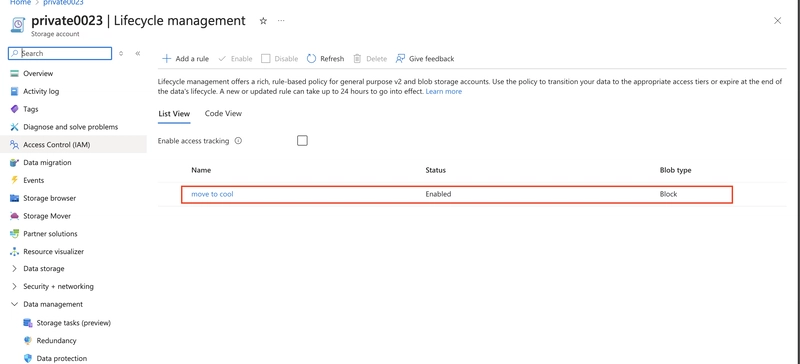
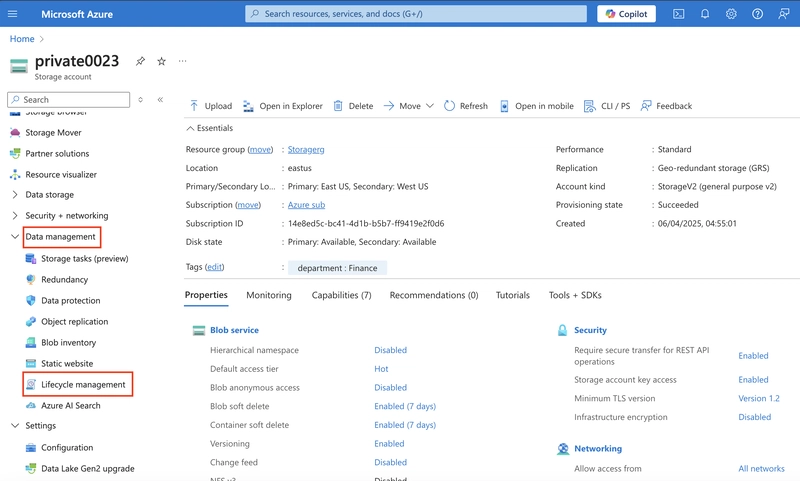
6.0. Configure storage access tiers and content replication
6.1. To save on costs, after 30 days, move blobs from the hot tier to the cool tier.
Return to the storage account.
In the Overview section, notice the Default access tier is set to Hot.
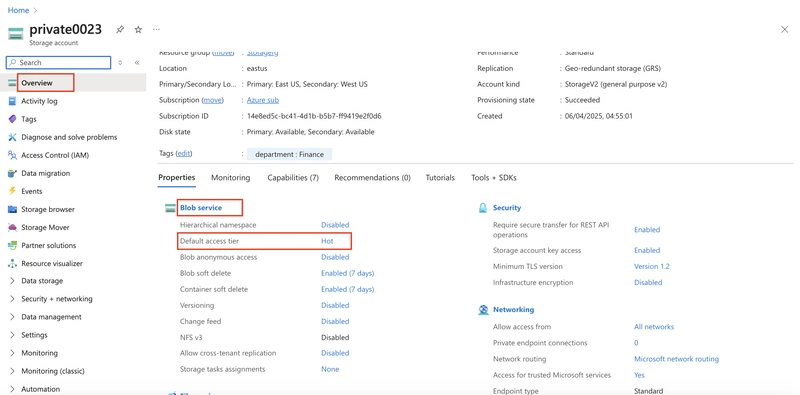
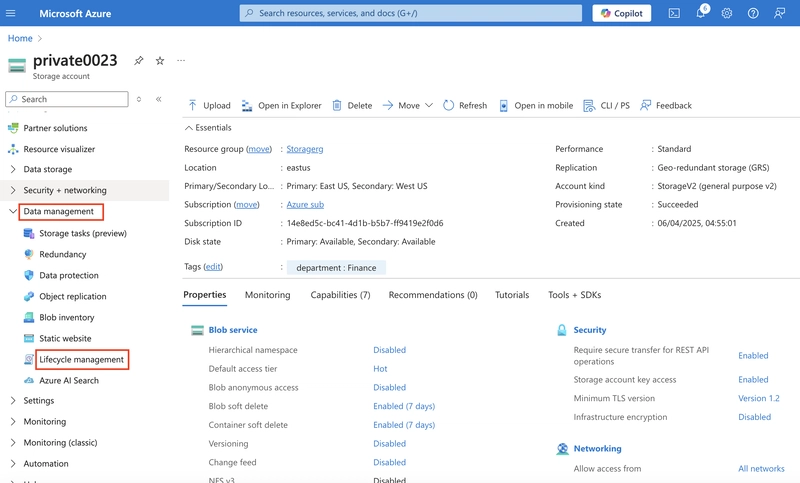
In the Data Management section, select the Lifecycle Management Blade.
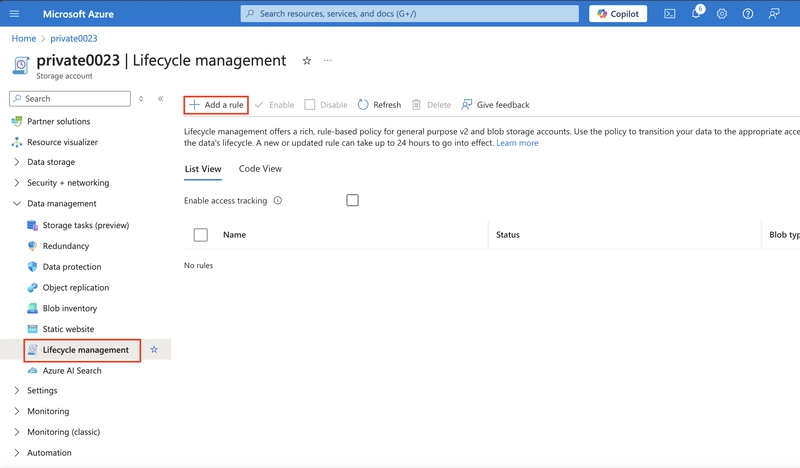
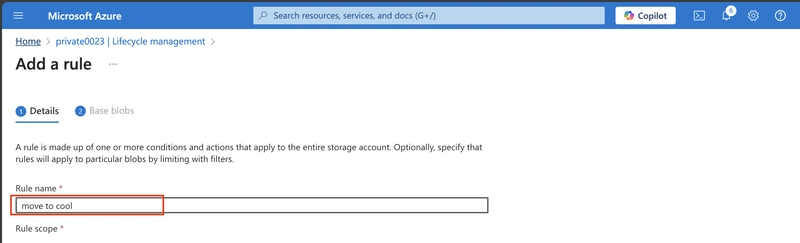
Select Add rule.
Set the Rule name to move to cool.
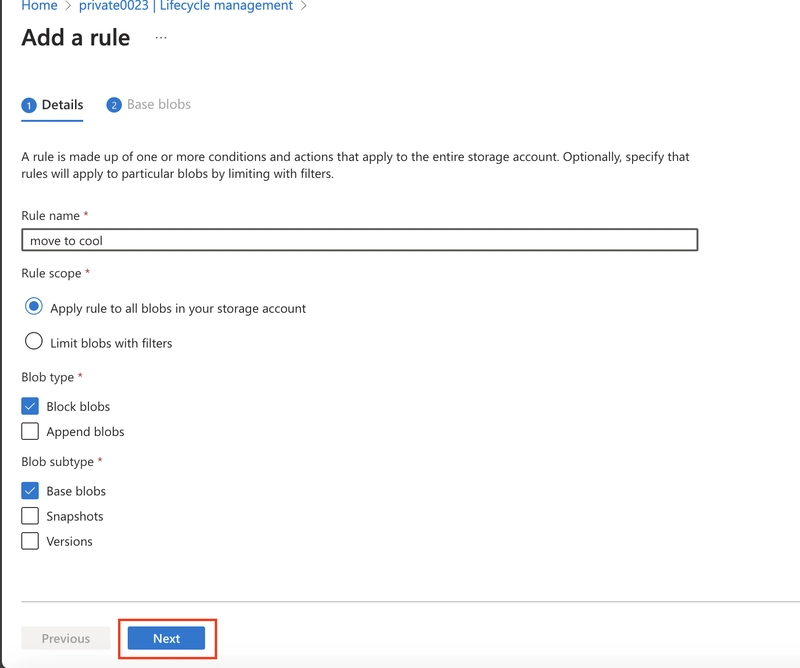
Set the Rule scope to Apply the rule to all blobs in the storage account.

Select Next.
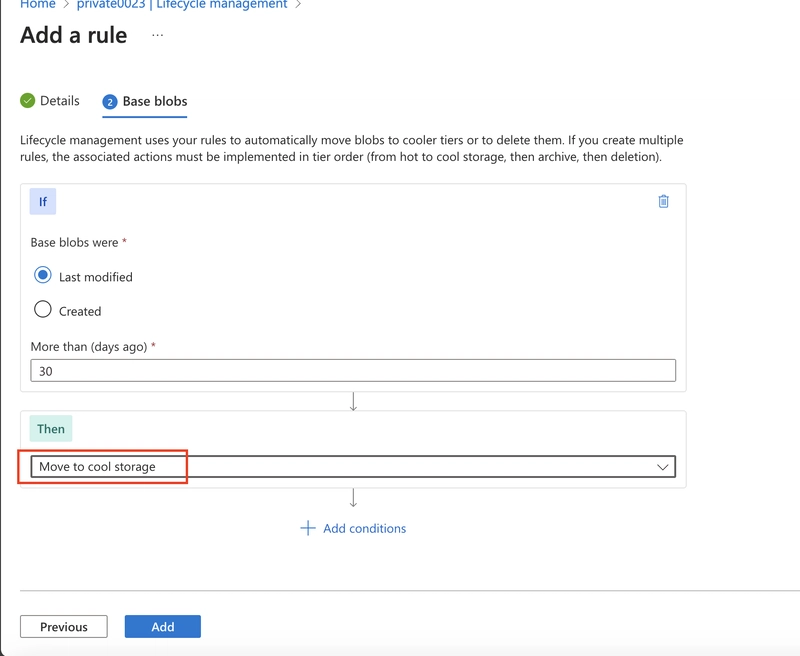
Ensure the 'Last modified' is selected.
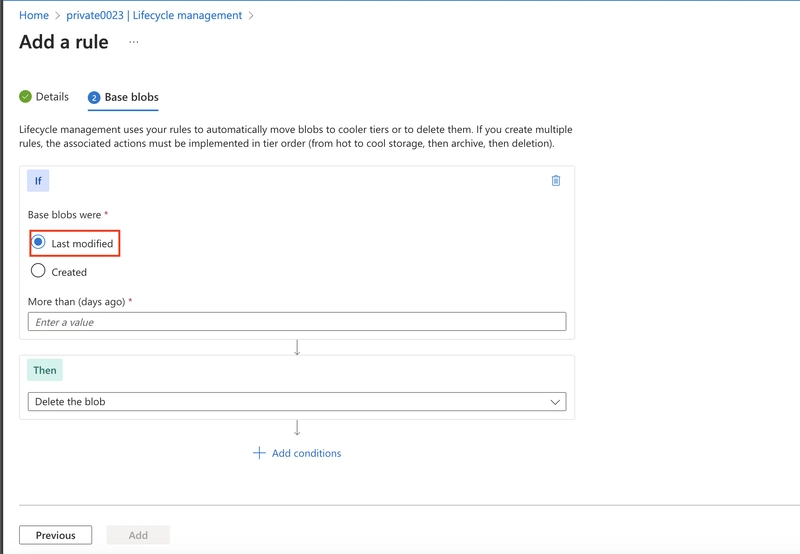
Set More than (days ago) to 30.
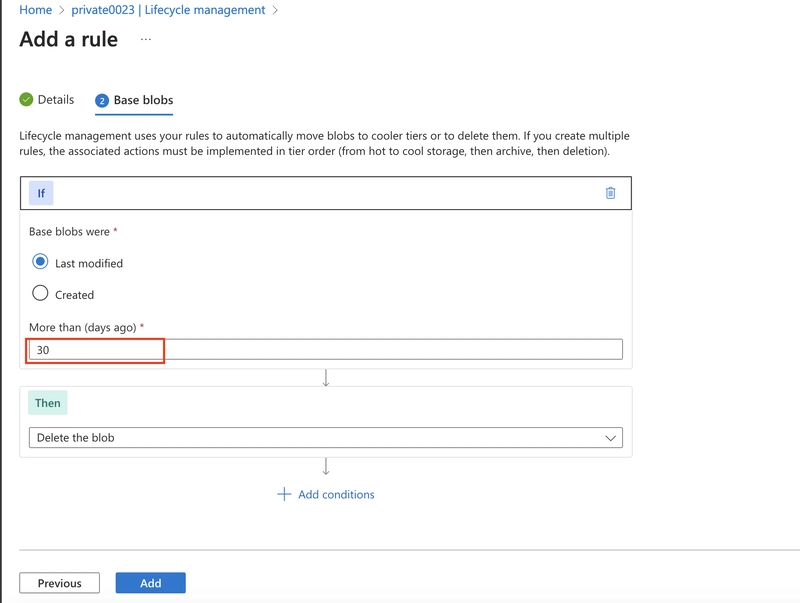
In the Then drop-down select Move to cool storage.
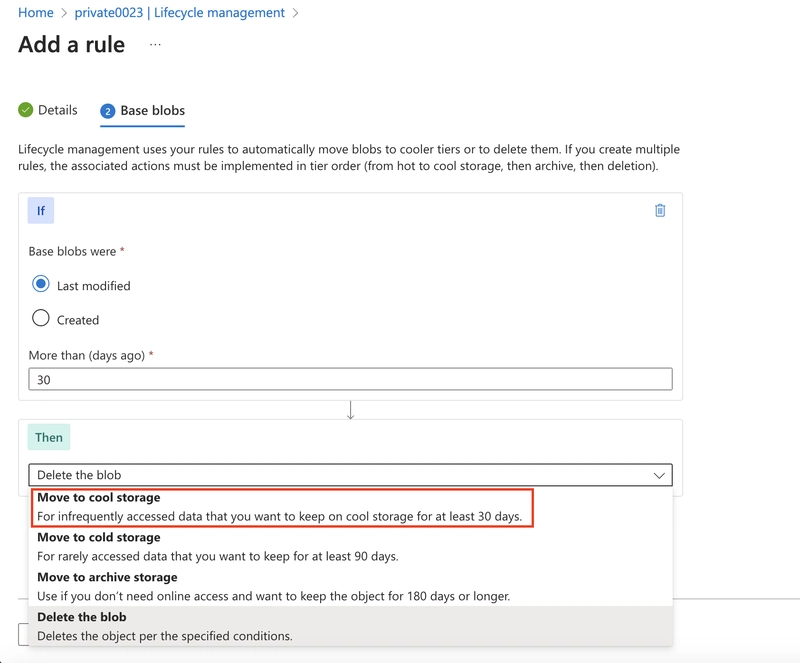
As you have time, review other lifecycle options in the drop-down.
Add the rule.
7.0 The public website files need to be backed up to another storage account.
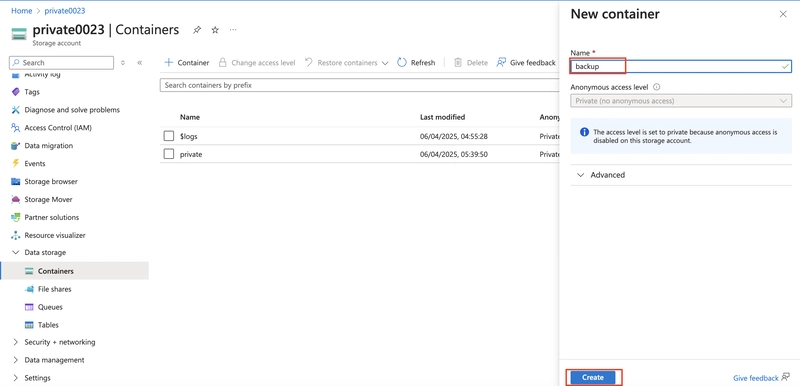
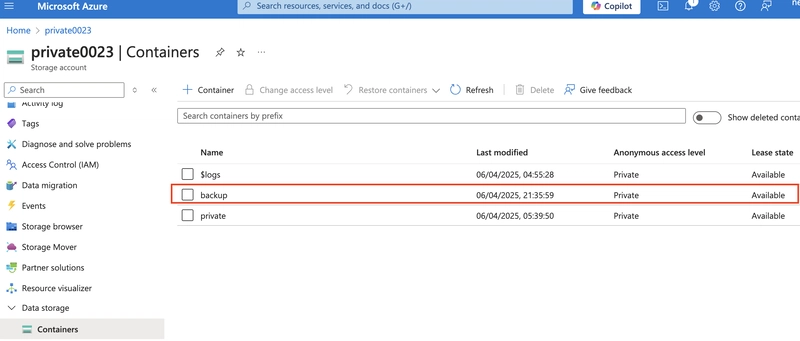
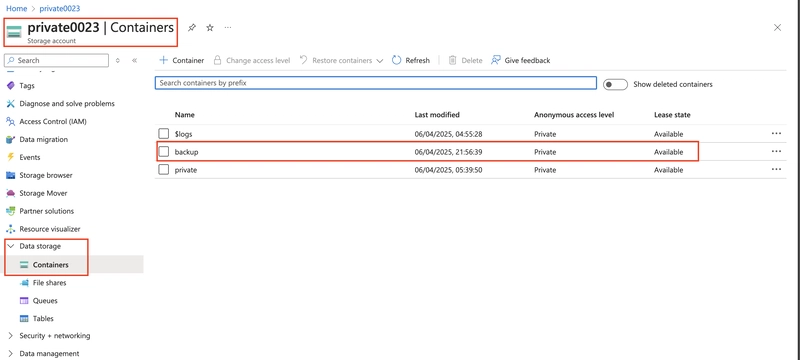
7.1. In your storage account, create a new container called backup. Use the default values.
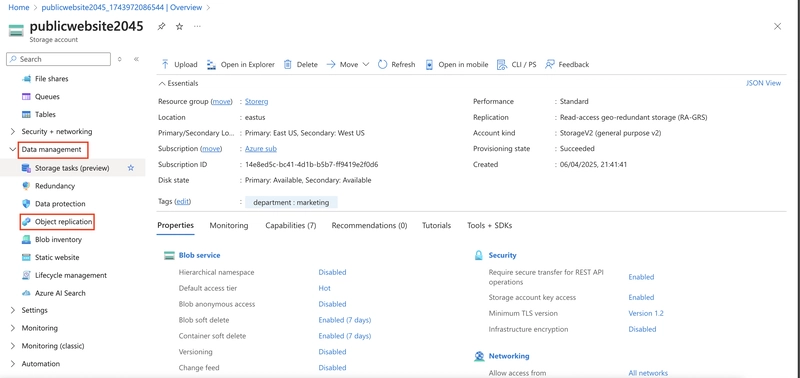
7.2. Navigate to your publicwebsite storage account. This storage account was created in the previous exercise.
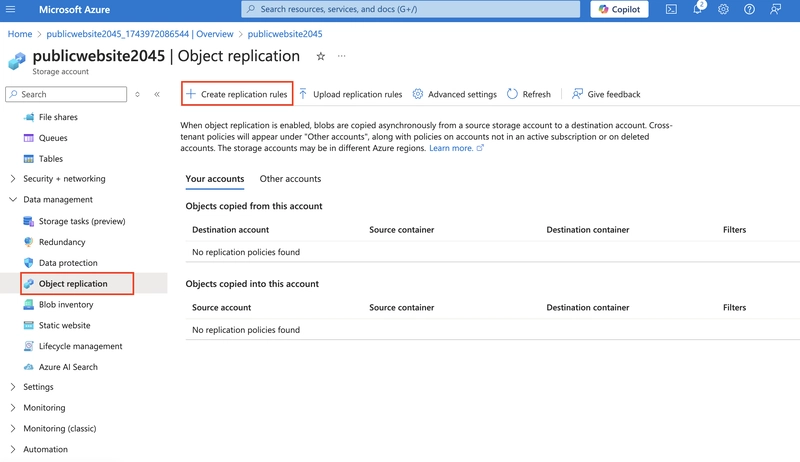
In the Data management section, select the Object replication blade.
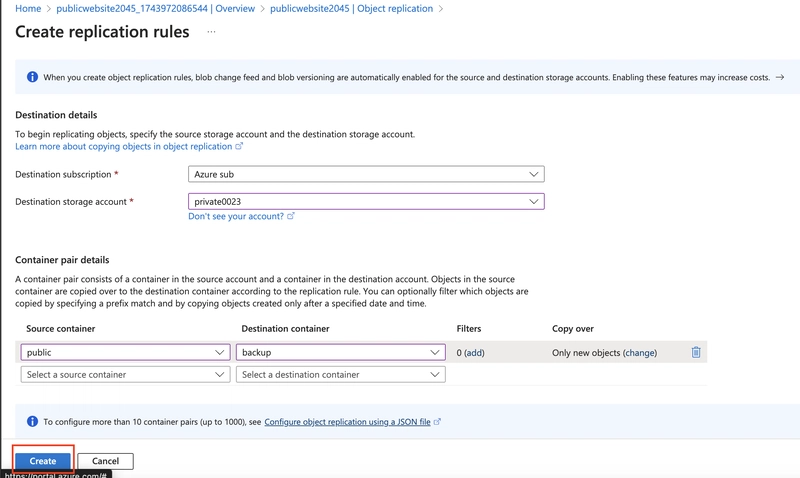
Select Create replication rules.
Set the Destination storage account to the private storage account.
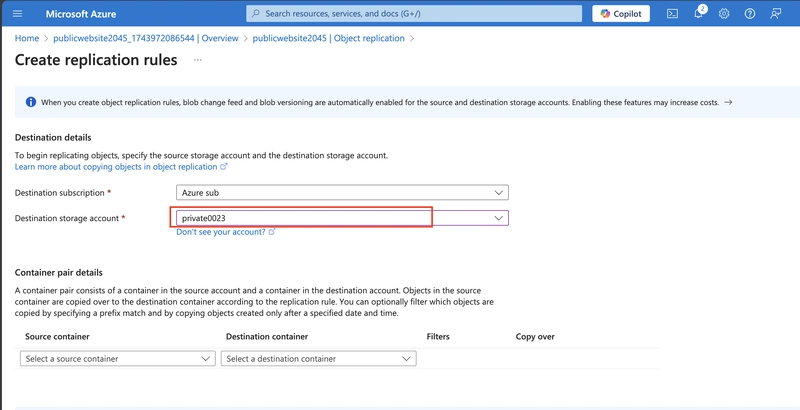
Set the Source container to public and the Destination container to backup.
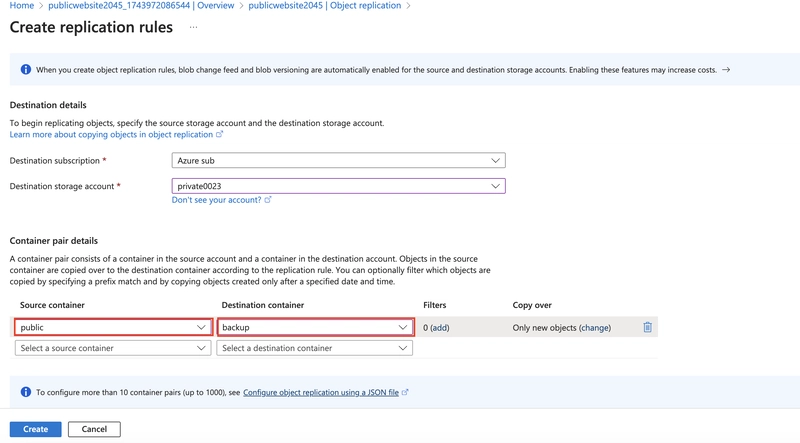
Create the replication rule.
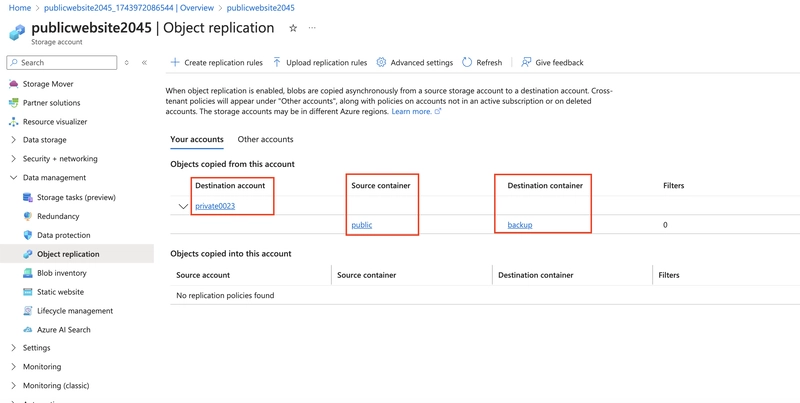
Optionally, upload a file to the public container
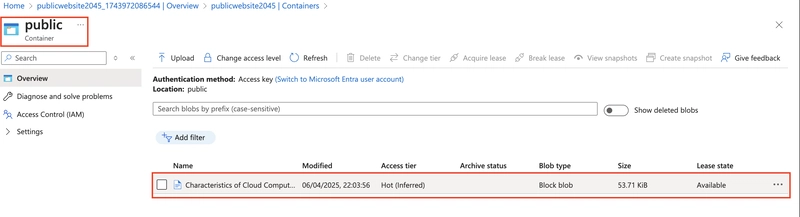
Return to the private storage account and refresh the backup container

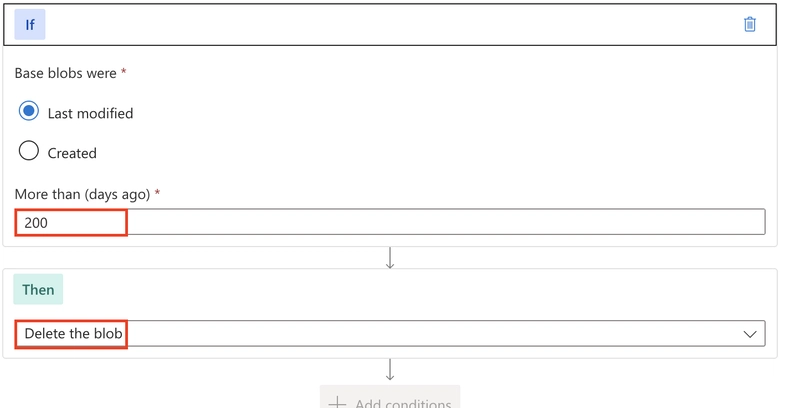
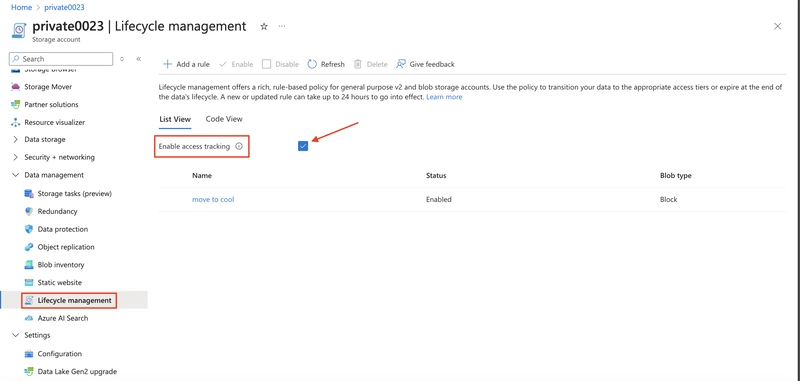
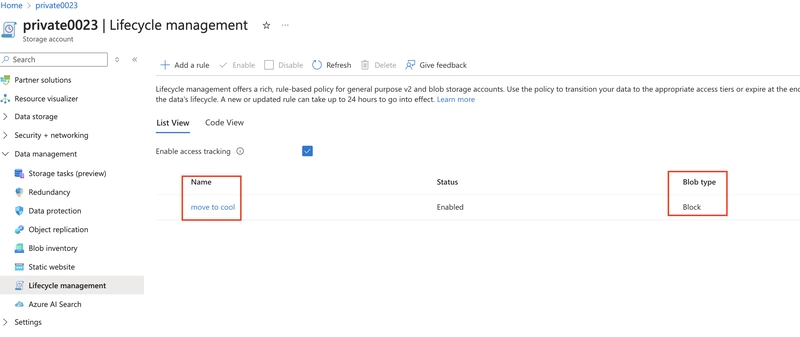
8.0. Implement lifecycle management to move content to the cool tier.
8.1. Navigate to your storage account in the Azure portal and enable access time tracking.
In the Data Management section of the menu, select Lifecycle Management.
Within the Lifecycle Management settings, look for the option to enable 'Access Time Tracking' and check the corresponding box
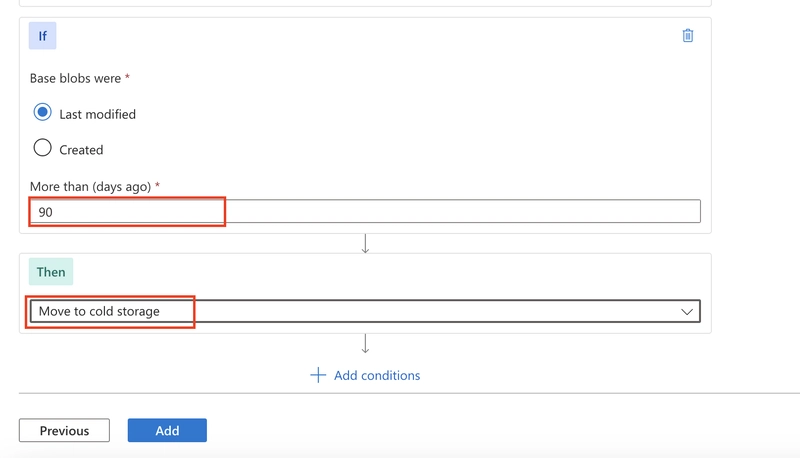
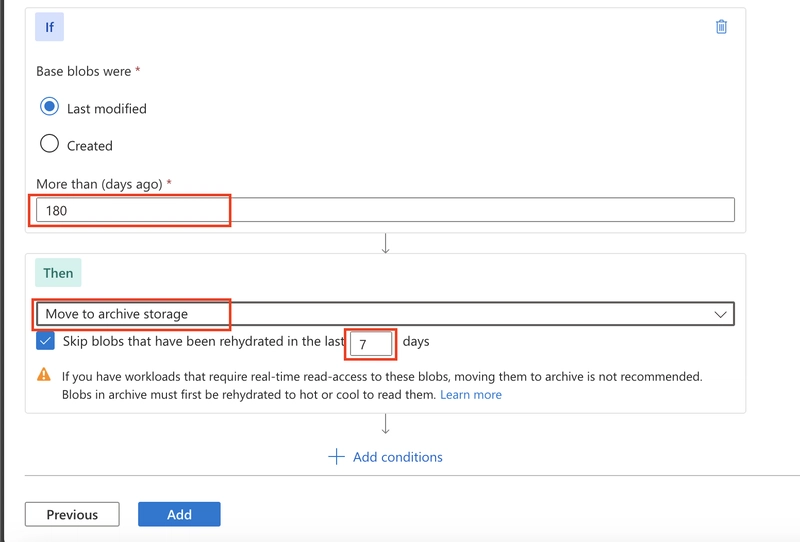
8.2. Create a Lifecycle Management Policy:
Go to the Lifecycle Management section in your storage account, add a new rule specifying conditions, such as the number of days since the blob was created or last modified.
Define the action to move blobs to the cool tier when the conditions are met.(refer to 6.1 of this article)
8.3 Apply Filters: Use blob prefixes or tags to target specific blobs or containers for the policy.
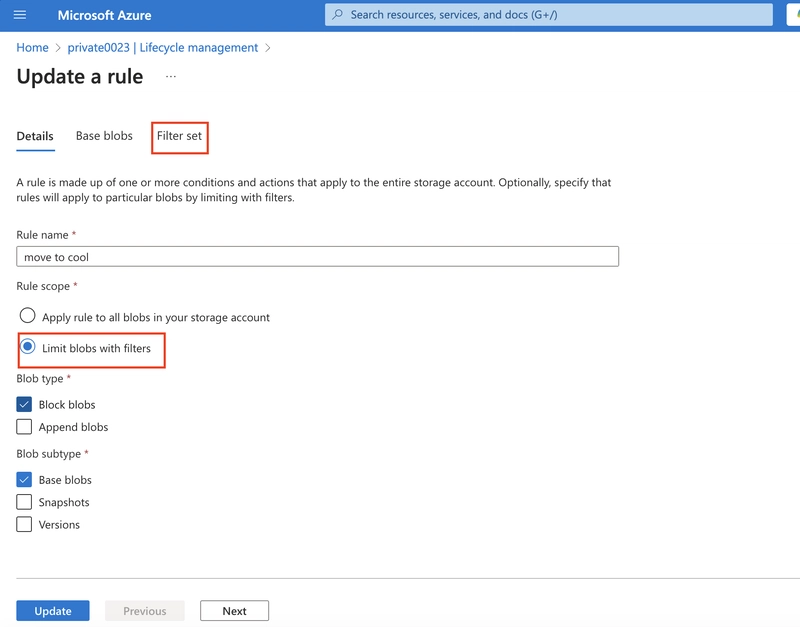
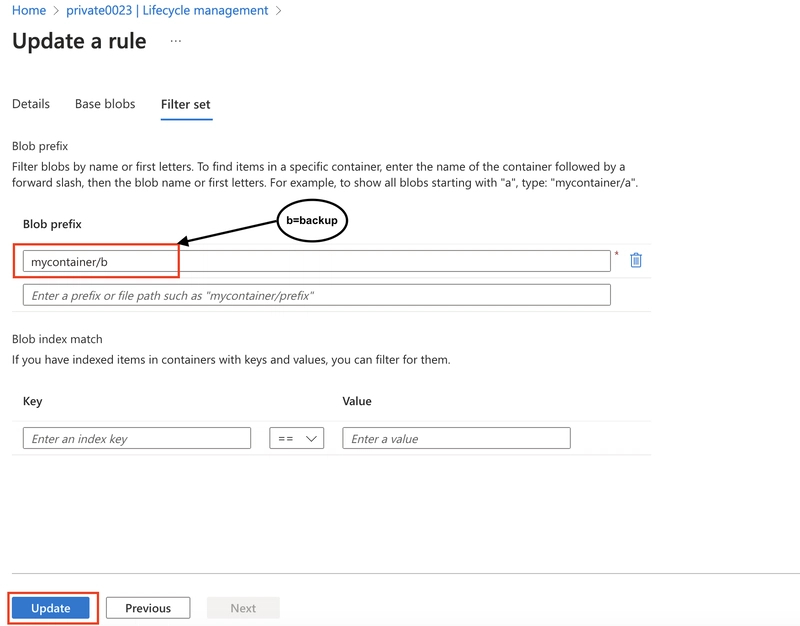
Activate the Policy: Ensure the rule is enabled and wait for it to execute automatically based on the defined conditions.
Conclusion
By following this guide, you’ve successfully set up private storage for internal company documents on the Azure Portal. This ensures your organization’s sensitive data is secure, accessible, and well-organized. With scalable and reliable storage solutions in place, your team can focus on collaboration and innovation while maintaining robust data protection.