


![[The AI Show Episode 148]: Microsoft’s Quiet AI Layoffs, US Copyright Office’s Bombshell AI Guidance, 2025 State of Marketing AI Report, and OpenAI Codex](https://www.marketingaiinstitute.com/hubfs/ep%20148%20cover%20%281%29.png)
![[The AI Show Episode 146]: Rise of “AI-First” Companies, AI Job Disruption, GPT-4o Update Gets Rolled Back, How Big Consulting Firms Use AI, and Meta AI App](https://www.marketingaiinstitute.com/hubfs/ep%20146%20cover.png)


_Prostock-studio_Alamy.jpg?width=1280&auto=webp&quality=80&disable=upscale#)


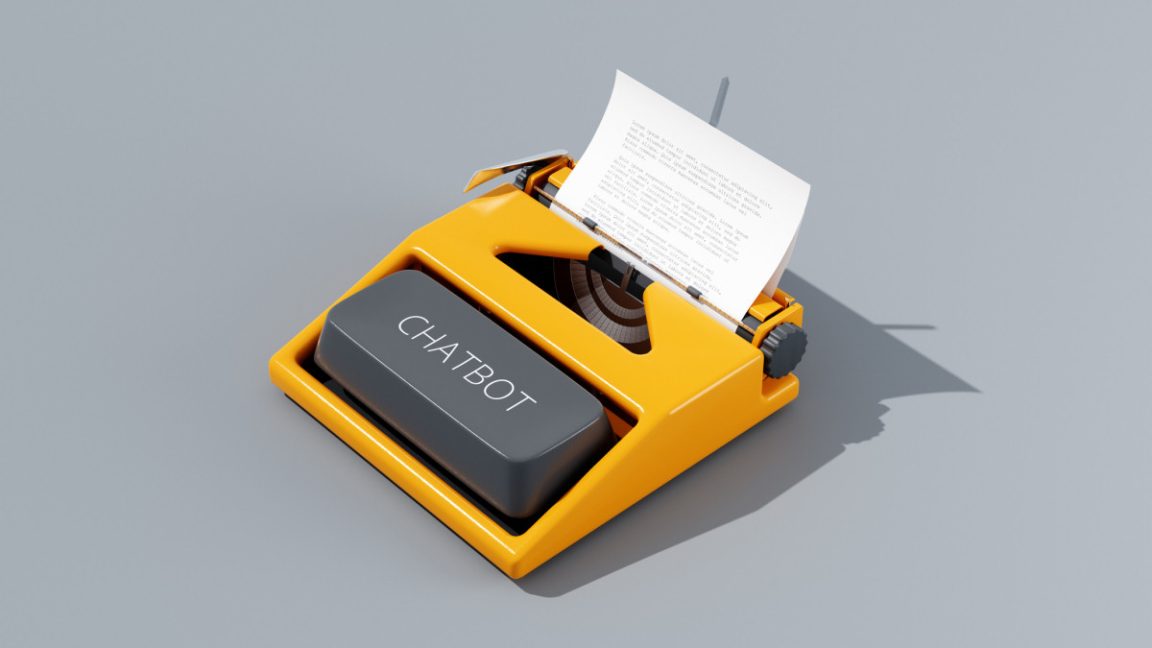
Building a Personal AI Chatbot with React and Flask: A Comprehensive Guide
Have you ever wanted to create your own AI chatbot that you can customize and deploy? In this article, I'll take you through building a personal AI chatbot using React for the frontend and Flask for the backend, powered by Microsoft's DialoGPT-medium model from Hugging Face. This project combines modern web development with AI, resulting in a responsive chat application that can understand and respond to natural language. Let's explore how to build this system from scratch! Table of Contents Project Overview System Architecture Backend Implementation Frontend Implementation Running the Application Future Enhancements Conclusion Project Overview Our personal AI chatbot is a web application that allows users to have conversations with an AI-powered bot. The application consists of: Frontend: A React application built with Vite that provides a clean and responsive chat interface Backend: A Flask API that handles requests and processes them using the DialoGPT-medium model AI Model: Microsoft's DialoGPT-medium, a conversational AI model trained on 147M conversation-like exchanges from Reddit The chatbot processes user inputs, generates human-like responses, and displays them in real-time, creating a seamless conversational experience. System Architecture Let's first understand the overall architecture of our application with this flowchart: The architecture follows a client-server model where: The React frontend captures user input and sends it to the Flask backend The Flask backend processes the input using the DialoGPT model The model generates a response which is sent back to the frontend The frontend displays the response to the user This separation of concerns allows for a clean architecture that's easy to maintain and scale. Backend Implementation Let's start by setting up our Flask backend with the DialoGPT model integration. Setting Up the Environment First, create a virtual environment and install the required dependencies: python -m venv venv source venv/bin/activate # Linux/Mac venv\Scripts\activate # Windows pip install flask flask-cors transformers torch Flask API Implementation Here's the implementation of our Flask API (app.py): from flask import Flask, request, jsonify from flask_cors import CORS from transformers import AutoModelForCausalLM, AutoTokenizer import torch app = Flask(__name__) CORS(app) # Load Hugging Face DialoGPT model and tokenizer MODEL_NAME = "microsoft/DialoGPT-medium" tokenizer = AutoTokenizer.from_pretrained(MODEL_NAME) dialogue_model = AutoModelForCausalLM.from_pretrained(MODEL_NAME) @app.route('/chat', methods=['POST']) def chat(): """ Endpoint to handle chat requests. Expects a JSON payload with a "message" field containing the user's input. Returns a JSON response with the model's generated reply. """ try: # Parse the incoming JSON request data request_data = request.json user_message = request_data.get("message", "") # Validate the user input if not user_message: return jsonify({"error": "No input provided"}), 400 # Generate a response using the model model_response = generate_model_response(user_message) return jsonify({"response": model_response}) except Exception as error: # Handle any exceptions that occur during processing return jsonify({"error": str(error)}), 500 def generate_model_response(user_message): """ Generate a response from the model based on user input. Args: user_message (str): The input message from the user. Returns: str: The generated response from the model. """ # Encode the user message into tokens encoded_input = tokenizer.encode(user_message + tokenizer.eos_token, return_tensors="pt") # Generate a response from the model without computing gradients with torch.no_grad(): response_token_ids = dialogue_model.generate( encoded_input, max_length=100, # Limit the response length pad_token_id=tokenizer.eos_token_id # Use the EOS token for padding ) # Decode the generated token IDs back into a string decoded_response = tokenizer.decode( response_token_ids[:, encoded_input.shape[-1]:][0], skip_special_tokens=True # Remove special tokens from the output ) return decoded_response if __name__ == '__main__': # Run the Flask app in debug mode app.run(debug=True) The code above: Sets up a Flask application with CORS enabled Loads the DialoGPT-medium model and tokenizer from Hugging Face Defines a /chat endpoint that accepts POST requests Processes user messages and generates responses using the DialoGPT model Let's break down the key parts: Model Loading: We load the DialoGPT-medium model and tokenizer at application startup Chat Endpoint: We define a /chat endpoi

Have you ever wanted to create your own AI chatbot that you can customize and deploy? In this article, I'll take you through building a personal AI chatbot using React for the frontend and Flask for the backend, powered by Microsoft's DialoGPT-medium model from Hugging Face.
This project combines modern web development with AI, resulting in a responsive chat application that can understand and respond to natural language. Let's explore how to build this system from scratch!
Table of Contents
- Project Overview
- System Architecture
- Backend Implementation
- Frontend Implementation
- Running the Application
- Future Enhancements
- Conclusion
Project Overview
Our personal AI chatbot is a web application that allows users to have conversations with an AI-powered bot. The application consists of:
- Frontend: A React application built with Vite that provides a clean and responsive chat interface
- Backend: A Flask API that handles requests and processes them using the DialoGPT-medium model
- AI Model: Microsoft's DialoGPT-medium, a conversational AI model trained on 147M conversation-like exchanges from Reddit
The chatbot processes user inputs, generates human-like responses, and displays them in real-time, creating a seamless conversational experience.
System Architecture
Let's first understand the overall architecture of our application with this flowchart:

The architecture follows a client-server model where:
- The React frontend captures user input and sends it to the Flask backend
- The Flask backend processes the input using the DialoGPT model
- The model generates a response which is sent back to the frontend
- The frontend displays the response to the user
This separation of concerns allows for a clean architecture that's easy to maintain and scale.
Backend Implementation
Let's start by setting up our Flask backend with the DialoGPT model integration.
Setting Up the Environment
First, create a virtual environment and install the required dependencies:
python -m venv venv
source venv/bin/activate  # Linux/Mac
venv\Scripts\activate     # Windows
pip install flask flask-cors transformers torch
Flask API Implementation
Here's the implementation of our Flask API (app.py):
from flask import Flask, request, jsonify
from flask_cors import CORS
from transformers import AutoModelForCausalLM, AutoTokenizer
import torch

app = Flask(__name__)
CORS(app)

# Load Hugging Face DialoGPT model and tokenizer
MODEL_NAME = "microsoft/DialoGPT-medium"
tokenizer = AutoTokenizer.from_pretrained(MODEL_NAME)
dialogue_model = AutoModelForCausalLM.from_pretrained(MODEL_NAME)

@app.route('/chat', methods=['POST'])
def chat():
    """
    Endpoint to handle chat requests.

    Expects a JSON payload with a "message" field containing the user's input.
    Returns a JSON response with the model's generated reply.
    """
    try:
        # Parse the incoming JSON request data
        request_data = request.json
        user_message = request_data.get("message", "")

        # Validate the user input
        if not user_message:
            return jsonify({"error": "No input provided"}), 400

        # Generate a response using the model
        model_response = generate_model_response(user_message)
        return jsonify({"response": model_response})

    except Exception as error:
        # Handle any exceptions that occur during processing
        return jsonify({"error": str(error)}), 500

def generate_model_response(user_message):
    """
    Generate a response from the model based on user input.

    Args:
        user_message (str): The input message from the user.

    Returns:
        str: The generated response from the model.
    """
    # Encode the user message into tokens
    encoded_input = tokenizer.encode(user_message + tokenizer.eos_token, return_tensors="pt")

    # Generate a response from the model without computing gradients
    with torch.no_grad():
        response_token_ids = dialogue_model.generate(
            encoded_input,
            max_length=100,  # Limit the response length
            pad_token_id=tokenizer.eos_token_id  # Use the EOS token for padding
        )

    # Decode the generated token IDs back into a string
    decoded_response = tokenizer.decode(
        response_token_ids[:, encoded_input.shape[-1]:][0],
        skip_special_tokens=True  # Remove special tokens from the output
    )
    return decoded_response

if __name__ == '__main__':
    # Run the Flask app in debug mode
    app.run(debug=True)
The code above:
- Sets up a Flask application with CORS enabled
- Loads the DialoGPT-medium model and tokenizer from Hugging Face
- Defines a
/chatendpoint that accepts POST requests - Processes user messages and generates responses using the DialoGPT model
Let's break down the key parts:
- Model Loading: We load the DialoGPT-medium model and tokenizer at application startup
-
Chat Endpoint: We define a
/chatendpoint that accepts POST requests with a JSON payload containing a "message" field -
Response Generation: The
generate_model_responsefunction uses the DialoGPT model to generate a response based on the user input
Understanding DialoGPT
DialoGPT (Dialogue Generative Pre-trained Transformer) is a conversational AI model developed by Microsoft. It's trained on 147 million conversation-like exchanges extracted from Reddit, making it capable of generating contextually relevant and human-like responses.
Key features of DialoGPT-medium include:
- 345 million parameters
- Trained on diverse conversational data
- Ability to maintain context in multi-turn conversations
- Pre-trained on the GPT-2 architecture
The model uses a transformer architecture, which allows it to understand the context of a conversation and generate appropriate responses.
Frontend Implementation
Now, let's implement the React frontend using Vite.
Setting Up the React Project
npm create vite@latest frontend -- --template react
cd frontend
npm install axios
Implementing the Chat Interface
Here's our main component implementation (App.jsx):
import React, { useState, memo } from "react";
import axios from "axios";

// Define styles for the components to improve readability and maintainability
const styles = {
    container: { padding: "20px", maxWidth: "600px", margin: "0 auto" },
    chatBox: { border: "1px solid #ccc", padding: "10px", marginBottom: "20px", height: "400px", overflowY: "scroll" },
    inputContainer: { display: "flex", gap: "10px" },
    inputField: { flex: 1, padding: "10px" },
    sendButton: { padding: "10px" }
};

// MessageList component is memoized to prevent unnecessary re-renders
// It takes chatMessages as a prop and displays each message
const MessageList = memo(({ chatMessages }) => (
    <div style={styles.chatBox}>
        {chatMessages.map((message, index) => (
            <div key={index} style={{ textAlign: message.sender === "user" ? "right" : "left" }}>
                <strong>{message.sender === "user" ? "You" : "Bot"}: strong>
                <span>{message.text}span>
            div>
        ))}
    div>
));

/**
 * App component serves as the main component for the chat application.
 * It manages the state of chat messages and user input, and handles sending messages.
 */
function App() {
    // State to store chat messages
    const [chatMessages, setChatMessages] = useState([]);
    // State to store the current user input
    const [userInput, setUserInput] = useState("");

    /**
     * handleSendMessage is an asynchronous function that sends the user's message to the server
     * and updates the chat messages with the response from the server.
     */
    const handleSendMessage = async () => {
        // Prevent sending empty messages
        if (!userInput.trim()) return;

        // Create a user message object and update the chat messages state
        const userMessage = { sender: "user", text: userInput };
        setChatMessages((previousMessages) => [...previousMessages, userMessage]);
        // Clear the input field
        setUserInput("");

        try {
            // Send the user message to the server and await the response
            const response = await axios.post("http://127.0.0.1:5000/chat", { message: userInput });
            // Create a bot message object from the server response and update the chat messages state
            const botMessage = { sender: "bot", text: response.data.response };
            setChatMessages((previousMessages) => [...previousMessages, botMessage]);
        } catch (error) {
            // Log the error and update the chat messages with an error message
            console.error("Error sending message:", error);
            setChatMessages((previousMessages) => [...previousMessages, { sender: "bot", text: "Error: Unable to connect to the server." }]);
        }
    };

    return (
        <div style={styles.container}>
            <h1>Personal AI Chatboth1>
            {/* Render the MessageList component with the current chat messages */}
            <MessageList chatMessages={chatMessages} />
            <div style={styles.inputContainer}>
                {/* Input field for user to type their message */}
                <input
                    type="text"
                    value={userInput}
                    onChange={(e) => setUserInput(e.target.value)}
                    placeholder="Type a message..."
                    style={styles.inputField}
                />
                {/* Button to send the message */}
                <button onClick={handleSendMessage} style={styles.sendButton}>
                    Send
                button>
            div>
        div>
    );
}

export default App;
The React frontend:
- Provides a clean and intuitive chat interface
- Manages the state of messages using React hooks
- Handles user input and sends messages to the Flask backend
- Displays both user messages and bot responses
Let's break down the key components:
- MessageList: A memoized component that renders the chat messages
- App: The main component that manages the state and handles user interactions
- handleSendMessage: An asynchronous function that sends user messages to the Flask backend and processes the responses
Understanding React Hooks
The frontend uses two important React hooks:
- useState: For managing the state of chat messages and user input
- useEffect: (Not shown in the example but could be used for initialization or side effects)
These hooks enable us to create a functional component-based architecture that's clean and efficient.
Running the Application
To run the complete application, you'll need to start both the frontend and backend servers.
Running the Backend
cd backend
python app.py
This starts the Flask server on http://localhost:5000.
Running the Frontend
cd frontend
npm run dev
This starts the Vite development server, typically on http://localhost:5173.
Once both servers are running, you can open your browser to the frontend URL and start chatting with your personal AI!
Future Enhancements
While our current implementation provides a solid foundation, there are several ways to enhance and extend the chatbot:
- Conversation History: Implement persistent storage to maintain chat history across sessions
- Fine-Tuning the Model: Train the chatbot with custom datasets for specific use cases
- Voice Interaction: Add speech-to-text and text-to-speech functionality for a voice-driven experience
- Advanced UI Styling: Enhance the frontend using CSS frameworks like Tailwind CSS or Material-UI
- Deployment: Host the chatbot on platforms like AWS, Heroku, or Vercel
-
Alternative Models: Experiment with other conversational AI models:
- OpenAI's GPT-3.5 for more advanced responses
- BlenderBot for long-form conversations
- T5 (Text-to-Text Transfer Transformer) for more versatile NLP tasks
Conclusion
In this article, we've built a complete personal AI chatbot application using React and Flask, powered by Microsoft's DialoGPT-medium model. We've explored the architecture, implementation details, and potential future enhancements.
This project demonstrates the power of combining modern web technologies with AI to create interactive and engaging applications. The modular architecture makes it easy to extend and customize the chatbot for different use cases.
Building your own AI chatbot is not only educational but also opens up possibilities for creating personalized digital assistants, customer support solutions, or just fun conversational agents to interact with.
I encourage you to experiment with the code, try different models, and add your own features to make the chatbot truly personal!
References
- Microsoft DialoGPT Model - The official DialoGPT-medium model page on Hugging Face.
- Flask Documentation - Official documentation for the Flask web framework.
- React Documentation - Official documentation for React.
- Hugging Face Transformers - Documentation for the Transformers library.
- DialoGPT: Large-Scale Generative Pre-training for Conversational Response Generation - Original research paper for DialoGPT.
This project is licensed under the MIT License - see the LICENSE file for details.
Open for Projects
I'm currently available to take on new projects in the following areas:
- Artificial Intelligence solutions (both no-code and custom development)
- No-code automation with n8n (and open to other automation platforms)
- React.js frontend development
- Node.js backend/API development
- WooCommerce development and customization
- Stripe payment integration and automation
- PHP applications and frameworks
- Python development
- Supabase, Vercel & GitHub integration
My Expertise
I'm a Senior Web Developer with growing expertise in AI/ML solutions, passionate about creating practical applications that leverage artificial intelligence to solve real-world problems. While relatively new to AI/ML development (less than a year of focused experience), I've quickly built a portfolio of functional projects that demonstrate my ability to integrate AI capabilities into useful applications. My specialized skills include:
- AI Integration: Connecting pre-trained AI models with web applications through APIs and direct implementation
- Computer Vision & NLP: Implementing image captioning, sentiment analysis, text summarization, chatbots, and language translation applications
- Agentic AI Workflows: Creating intelligent autonomous agents that can execute complex tasks through multi-step reasoning
- Full-Stack Development: Crafting seamless experiences with React.js frontends and Python/Flask or Node.js backends
- E-commerce Solutions: Expert in WooCommerce/Stripe integrations with subscription management and payment processing
- Automation Tools: Python scripts and n8n workflows for business-critical processes and data pipelines
- Content Automation: Creating AI-powered systems that generate complete content packages from blog posts to social media updates
Featured Projects
Personal AI Chatbot - A complete conversational AI application built with React and Flask, powered by Microsoft's DialoGPT-medium model from Hugging Face. This project demonstrates how to create an interactive chatbot with a clean, responsive interface that understands and generates human-like text responses.
Image Captioning App - A full-stack application that generates descriptive captions for uploaded images using AI. Built with React for the frontend and Flask for the backend, this app leverages Salesforce's BLIP model via Hugging Face's transformers library to analyze images and create natural language descriptions of their content.
Sentiment Analysis App - A lightweight full-stack application that performs sentiment analysis on user-provided text using React.js for the frontend and Flask with Hugging Face Transformers for the backend. This project demonstrates how easily powerful pre-trained NLP models can be integrated into modern web applications.
Agentic AI Workflow - A Python-based framework for building intelligent AI agents that can break down complex tasks into manageable steps and execute them sequentially. This project demonstrates how to leverage OpenRouter API to access multiple AI models (OpenAI, Anthropic, Google, etc.) through a unified interface, enabling more sophisticated problem-solving capabilities and better reasoning in AI applications.
WiseCashAI - A revolutionary privacy-first financial management platform that operates primarily in your browser, ensuring your sensitive financial data never leaves your control. Unlike cloud-based alternatives that collect and monetize your information, WiseCashAI offers AI-powered features like intelligent transaction categorization, envelope-based budgeting, and goal tracking while keeping your data local. Optional Google Drive integration with end-to-end encryption provides cross-device access without compromising privacy.
Content Automation Workflow Pro - AI-powered content generation system that transforms content creation with a single command. This Python-based workflow leverages OpenRouter and Replicate to generate SEO-optimized blog posts, custom thumbnail images, and platform-specific social media posts across 7+ platforms, reducing content creation time from hours to minutes.
Stripe/WooCommerce Integration Tools:
- Stripe Validator Tool - Cross-references WooCommerce subscription data with the Stripe API to prevent payment failures (78% reduction in failures)
- Invoice Notifier System - Automatically identifies overdue invoices and sends strategic payment reminders (64% reduction in payment delays)
- WooCommerce Bulk Refunder - Python script for efficiently processing bulk refunds with direct payment gateway API integration
Open-Source AI Mini Projects
I'm actively developing open-source AI applications that solve real-world problems:
- Image Captioning App - Generates descriptive captions for images using Hugging Face's BLIP model
- AI Resume Analyzer - Extracts key details from resumes using BERT-based NER models
- Document Summarizer - Creates concise summaries from lengthy documents using BART models
- Multilingual Translator - Real-time translation tool supporting multiple language pairs
- Toxic Comment Detector - Identifies harmful or offensive language in real-time
- Recipe Finder - AI-powered tool that recommends recipes based on available ingredients
- Personal AI Chatbot - Customizable chat application built with DialoGPT
All these projects are available on my GitHub with full source code.
Development Philosophy
I believe in creating technology that empowers users without compromising their privacy or control. My projects focus on:
- Privacy-First Design: Keeping sensitive data under user control by default
- Practical AI Applications: Leveraging AI capabilities to solve real-world problems
- Modular Architecture: Building systems with clear separation of concerns for better maintainability
- Accessibility: Making powerful tools available to everyone regardless of technical expertise
- Open Source: Contributing to the community and ensuring transparency
Technical Articles & Tutorials
I regularly share detailed tutorials on AI development, automation, and integration solutions:
- Building a Personal AI Chatbot with React and Flask - Complete guide to creating a conversational AI application
- Building an Image Captioning App with React, Flask and BLIP - Learn how to create a computer vision application that generates natural language descriptions of images
- Building a Sentiment Analysis App with React and Flask - Step-by-step guide to creating a full-stack NLP application
- Creating an Agentic AI Workflow with OpenRouter - Tutorial on building intelligent AI agents
- Getting Started with Content Automation Workflow Pro - Comprehensive guide to automated content creation
- Building Privacy-First AI Applications - Techniques for implementing AI features while respecting user privacy
I specialize in developing practical solutions that leverage AI and automation to solve real business problems and deliver measurable results. Find my tutorials on DEV.to and premium tools in my Gumroad store.
If you have a project involving e-commerce, content automation, financial tools, or custom AI applications, feel free to reach out directly at landix.ninal@gmail.com.