


![[The AI Show Episode 146]: Rise of “AI-First” Companies, AI Job Disruption, GPT-4o Update Gets Rolled Back, How Big Consulting Firms Use AI, and Meta AI App](https://www.marketingaiinstitute.com/hubfs/ep%20146%20cover.png)


.jpg?width=1920&height=1920&fit=bounds&quality=70&format=jpg&auto=webp#)


_Alexey_Kotelnikov_Alamy.jpg?width=1280&auto=webp&quality=80&disable=upscale#)
_Brian_Jackson_Alamy.jpg?width=1280&auto=webp&quality=80&disable=upscale#)


 Stolen 884,000 Credit Card Details on 13 Million Clicks from Users Worldwide.webp?#)


![Roku clarifies how ‘Pause Ads’ work amid issues with some HDR content [U]](https://i0.wp.com/9to5google.com/wp-content/uploads/sites/4/2025/05/roku-pause-ad-1.jpg?resize=1200%2C628&quality=82&strip=all&ssl=1)
![Look at this Chrome Dino figure and its adorable tiny boombox [Gallery]](https://i0.wp.com/9to5google.com/wp-content/uploads/sites/4/2025/05/chrome-dino-youtube-boombox-1.jpg?resize=1200%2C628&quality=82&strip=all&ssl=1)


![Apple Seeds visionOS 2.5 RC to Developers [Download]](https://www.iclarified.com/images/news/97240/97240/97240-640.jpg)
![Apple Seeds tvOS 18.5 RC to Developers [Download]](https://www.iclarified.com/images/news/97243/97243/97243-640.jpg)


Free custom domain for your projects
The GitHub Student Developer Pack offers students free access to premium developer tools and services, including cloud credits, CI/CD platforms, and more. Follow this step-by-step guide to join the program, unlock these benefits, and claim a free domain from Namecheap. Step 1: Join the GitHub Student Developer Pack Verify Your Student Status To qualify for the GitHub Student Developer Pack, you must be a current student (at least 13 years old) enrolled in a degree or diploma-granting program. Here's how to confirm eligibility: Check Requirements: Ensure you have a verifiable school-issued email address (e.g., ending in .edu) or other documentation like a student ID, transcript, or enrollment letter. Prepare Documentation: If you don’t have a school email, gather a clear image or PDF of your student ID, transcript, or an official letter from your school stating your enrollment status. Create or Log In to Your GitHub Account You’ll need a GitHub account to apply for the pack. Sign Up: If you don’t have an account, go to github.com and click “Sign up.” Follow the prompts to create a free account. Log In: If you already have an account, log in with your credentials. Navigate to the GitHub Education Page Visit the GitHub Education website at education.github.com. Scroll to the “GitHub Student Developer Pack” section and click Get the Pack or Get started. Start the Application Process On the GitHub Student Developer Pack page, click Get your pack. You’ll be redirected to a form to verify your academic status. Complete the Application Form Fill out the application form with the following details: Personal Information: Enter your full name and GitHub username. School Email: Provide your school-issued email address if available. This is the fastest way to get verified. Alternative Verification: If you don’t have a school email, select the option to upload documentation. Upload a clear image or PDF of your student ID, transcript, or enrollment letter. Purpose: Briefly describe how you plan to use the Student Developer Pack (e.g., for coding projects, learning, or open-source contributions). Submit Your Application Review your information and uploaded documents (if applicable). Click Submit to send your application to GitHub for review. Wait for Verification School Email: If you used a school-issued email, verification is often instant or takes a few hours. Manual Review: If you uploaded documents, GitHub’s team will review them, which may take 1–5 business days. You’ll receive an email notification once your application is approved or if additional information is needed. Access Your Benefits Once approved, you’ll gain access to the GitHub Student Developer Pack: Log in to your GitHub account. Visit education.github.com/pack to explore available tools and services. Redeem offers by following the instructions for each partner (e.g., DigitalOcean, Heroku, or Namecheap). Some may require linking your GitHub account or signing up separately. Renew Your Benefits (If Needed) The Student Developer Pack is valid as long as you’re a student. GitHub may periodically ask you to re-verify your student status. Follow the same process to upload updated documentation or confirm your enrollment. Tips for a Smooth Application Use a School Email: If available, this speeds up verification significantly. Clear Documentation: Ensure uploaded documents are legible and include your name, school, and current enrollment date. Check Spam Folder: GitHub’s response email may land in your spam or junk folder. Contact Support: If you face issues or delays, reach out to GitHub Support via support.github.com. Step 2: Avail a Free Domain from Namecheap One of the many benefits of the GitHub Student Developer Pack is access to a free domain from Namecheap. Follow these steps to claim and set up your domain for use with GitHub Pages. Claim the Free Domain: Among the benefits, you can claim a free .me domain from Namecheap. After claiming the domain, a repository named your-username.github.io will be created in your GitHub account. Repository Contents: This repository will contain a CNAME file with your domain name as its content and a README file. Note on SSL: For GitHub Pages, you don’t need to avail a free SSL certificate, as GitHub provides HTTPS automatically. However, if you plan to deploy your project elsewhere, you may need one, which is also freely available validity of domain name: 1 year Set Up the Domain in GitHub Navigate to your GitHub account’s Settings > Pages. Under the “Custom domain” section, click Add a domain. Enter your domain name (e.g., yourname.me). GitHub will prompt you to verify ownership of the domain. Verify Domain Ownership with Namecheap Log in to your Namecheap account. Navigate to the Dashboard. Fin
The GitHub Student Developer Pack offers students free access to premium developer tools and services, including cloud credits, CI/CD platforms, and more. Follow this step-by-step guide to join the program, unlock these benefits, and claim a free domain from Namecheap.
Step 1: Join the GitHub Student Developer Pack
Verify Your Student Status
To qualify for the GitHub Student Developer Pack, you must be a current student (at least 13 years old) enrolled in a degree or diploma-granting program. Here's how to confirm eligibility:
-
Check Requirements: Ensure you have a verifiable school-issued email address (e.g., ending in
.edu) or other documentation like a student ID, transcript, or enrollment letter. - Prepare Documentation: If you don’t have a school email, gather a clear image or PDF of your student ID, transcript, or an official letter from your school stating your enrollment status.
Create or Log In to Your GitHub Account
You’ll need a GitHub account to apply for the pack.
- Sign Up: If you don’t have an account, go to github.com and click “Sign up.” Follow the prompts to create a free account.
- Log In: If you already have an account, log in with your credentials.
Navigate to the GitHub Education Page
- Visit the GitHub Education website at education.github.com.
- Scroll to the “GitHub Student Developer Pack” section and click Get the Pack or Get started.
Start the Application Process
- On the GitHub Student Developer Pack page, click Get your pack.
- You’ll be redirected to a form to verify your academic status.
Complete the Application Form
Fill out the application form with the following details:
- Personal Information: Enter your full name and GitHub username.
- School Email: Provide your school-issued email address if available. This is the fastest way to get verified.
- Alternative Verification: If you don’t have a school email, select the option to upload documentation. Upload a clear image or PDF of your student ID, transcript, or enrollment letter.
- Purpose: Briefly describe how you plan to use the Student Developer Pack (e.g., for coding projects, learning, or open-source contributions).
Submit Your Application
- Review your information and uploaded documents (if applicable).
- Click Submit to send your application to GitHub for review.
Wait for Verification
- School Email: If you used a school-issued email, verification is often instant or takes a few hours.
- Manual Review: If you uploaded documents, GitHub’s team will review them, which may take 1–5 business days.
- You’ll receive an email notification once your application is approved or if additional information is needed.
Access Your Benefits
Once approved, you’ll gain access to the GitHub Student Developer Pack:
- Log in to your GitHub account.
- Visit education.github.com/pack to explore available tools and services.
- Redeem offers by following the instructions for each partner (e.g., DigitalOcean, Heroku, or Namecheap). Some may require linking your GitHub account or signing up separately.
Renew Your Benefits (If Needed)
- The Student Developer Pack is valid as long as you’re a student.
- GitHub may periodically ask you to re-verify your student status. Follow the same process to upload updated documentation or confirm your enrollment.
Tips for a Smooth Application
- Use a School Email: If available, this speeds up verification significantly.
- Clear Documentation: Ensure uploaded documents are legible and include your name, school, and current enrollment date.
- Check Spam Folder: GitHub’s response email may land in your spam or junk folder.
- Contact Support: If you face issues or delays, reach out to GitHub Support via support.github.com.
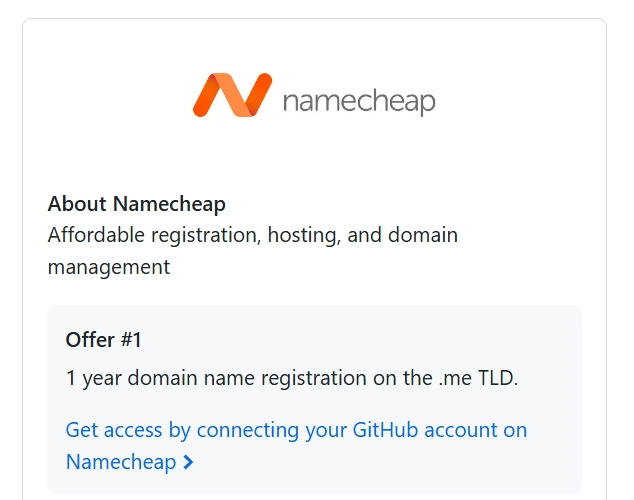
Step 2: Avail a Free Domain from Namecheap
One of the many benefits of the GitHub Student Developer Pack is access to a free domain from Namecheap. Follow these steps to claim and set up your domain for use with GitHub Pages.
-
Claim the Free Domain: Among the benefits, you can claim a free
.medomain from Namecheap. After claiming the domain, a repository namedyour-username.github.iowill be created in your GitHub account. -
Repository Contents: This repository will contain a
CNAMEfile with your domain name as its content and a README file. - Note on SSL: For GitHub Pages, you don’t need to avail a free SSL certificate, as GitHub provides HTTPS automatically. However, if you plan to deploy your project elsewhere, you may need one, which is also freely available
- validity of domain name: 1 year
Set Up the Domain in GitHub
- Navigate to your GitHub account’s Settings > Pages.
- Under the “Custom domain” section, click Add a domain.

- Enter your domain name (e.g.,
yourname.me). - GitHub will prompt you to verify ownership of the domain.

Verify Domain Ownership with Namecheap
- Log in to your Namecheap account.
- Navigate to the Dashboard.
- Find your domain and click Manage.

- Go to the Advanced DNS tab.
- Add a TXT record to verify ownership:
-
Host: Use the value provided by GitHub (e.g.,
_github-pages-challenge-yourusername). -
Value: Enter the verification code provided by GitHub (e.g.,
81e12bbe76d30d12897eea833d7ree). - TTL: Set to 1 minute.
-
Host: Use the value provided by GitHub (e.g.,
- Save the changes.

- Return to the GitHub Pages settings and click Verify. GitHub will check the TXT record to confirm ownership. This process may take up to 12 hours.
Add a CNAME Record (Optional)
- In Namecheap’s Advanced DNS tab, you can also add a CNAME record to point your domain to GitHub Pages:
- Type: CNAME Record
-
Host:
www -
Value:
your-username.github.io - TTL: 1 min
![]()
Enable HTTPS
- After 12 hours, once the domain is verified, it may show a “Connection not secure” warning.
- To enable a secure HTTPS connection, navigate to the
your-username.github.iorepository’s Settings > Pages. - Check the box for Enforce HTTPS.

Conclusion
By joining the GitHub Student Developer Pack and claiming a free domain from Namecheap, you can enhance your development projects with professional tools and a custom domain. Follow these steps to set up your GitHub Pages site with a verified, secure domain. Start your journey today at education.github.com/pack/join!