


![[The AI Show Episode 145]: OpenAI Releases o3 and o4-mini, AI Is Causing “Quiet Layoffs,” Executive Order on Youth AI Education & GPT-4o’s Controversial Update](https://www.marketingaiinstitute.com/hubfs/ep%20145%20cover.png)


_XFkvNLu.png?width=1920&height=1920&fit=bounds&quality=70&format=jpg&auto=webp#)


_Tanapong_Sungkaew_via_Alamy.jpg?width=1280&auto=webp&quality=80&disable=upscale#)


![Apple Restructures Global Affairs and Apple Music Teams [Report]](https://www.iclarified.com/images/news/97162/97162/97162-640.jpg)
![New iPhone Factory Goes Live in India, Another Just Days Away [Report]](https://www.iclarified.com/images/news/97165/97165/97165-640.jpg)


How to use VS Code to develop Arduino
Using VS Code for Arduino Development offers better code management, debugging, and extensions compared to the Arduino IDE. Here's a step-by-step guide: 1. Install Prerequisites Arduino IDE (required for compiler/tools): Download from arduino.cc and install. VS Code: Download from code.visualstudio.com. 2. Install the Arduino Extension Open VS Code. Go to Extensions (Ctrl+Shift+X). Search for "Arduino" and install the official extension by Microsoft. 3. Configure Arduino Path Open VS Code settings (Ctrl+,). Search for Arduino Path and set it to your Arduino IDE installation folder: Windows: C:\Program Files (x86)\Arduino macOS: /Applications/Arduino.app/Contents/Java Linux: /usr/share/arduino 4. Create/Open an Arduino Project New Project: Press F1 > Arduino: Initialize. Select a board (e.g., Arduino Uno). Choose a sketch folder. Existing Project: Open the folder containing your .ino file. 5. Select Board & Port Click the board name in the bottom status bar (e.g., Arduino Uno). Select your target board from the list. Click the port (e.g., COM3 or /dev/ttyACM0). 6. Build & Upload Build (Verify): Ctrl+Alt+R or click the checkmark icon. Upload: Ctrl+Alt+U or click the arrow icon. Serial Monitor: Ctrl+Alt+Shift+M to debug output. 7. Advanced Features IntelliSense & Autocomplete Install C/C++ Extension (by Microsoft). Configure c_cpp_properties.json (auto-generated by Arduino extension). Debugging Install Cortex-Debug extension (for ARM-based boards like Arduino Due). Use an external debugger (e.g., J-Link) with launch.json. Library Management Add libraries via Library Manager (F1 > Arduino: Library Manager). Manually place libraries in ~/Arduino/libraries (or your sketchbook folder). 8. Example platformio.ini (Alternative with PlatformIO) For more control, use PlatformIO in VS Code: ini [env:uno] platform = atmelavr board = uno framework = arduino monitor_speed = 9600 9. Troubleshooting 10. Recommended Extensions PlatformIO IDE: Advanced project management. GitLens: Version control. Code Runner: Quick script testing. Why VS Code Over Arduino IDE? Git Integration: Track code changes. Multi-file Projects: Better than Arduino’s single-tab limitation. Debugging: Breakpoints/watch variables (with hardware debuggers). For beginners, start with the Arduino IDE, but switch to VS Code for larger projects!
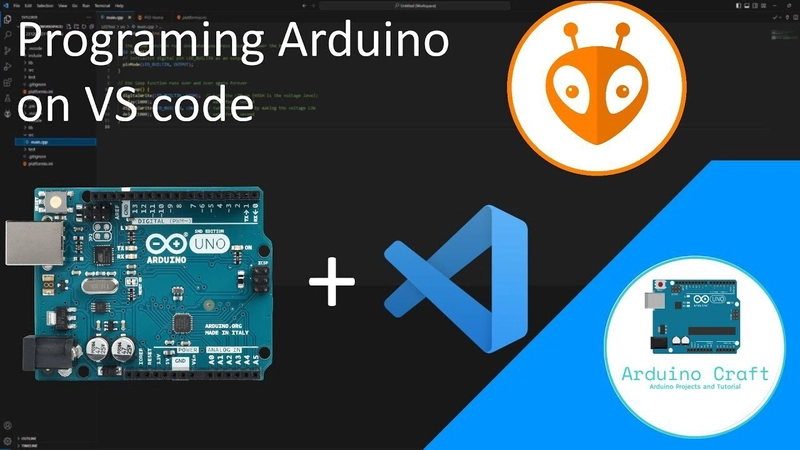
Using VS Code for Arduino Development offers better code management, debugging, and extensions compared to the Arduino IDE. Here's a step-by-step guide:
1. Install Prerequisites
Arduino IDE (required for compiler/tools):
Download from arduino.cc and install.
VS Code:
Download from code.visualstudio.com.
2. Install the Arduino Extension
- Open VS Code.
- Go to Extensions (Ctrl+Shift+X).
- Search for "Arduino" and install the official extension by Microsoft.
3. Configure Arduino Path
Open VS Code settings (Ctrl+,).
Search for Arduino Path and set it to your Arduino IDE installation folder:
- Windows: C:\Program Files (x86)\Arduino
- macOS: /Applications/Arduino.app/Contents/Java
- Linux: /usr/share/arduino
4. Create/Open an Arduino Project
New Project:
- Press F1 > Arduino: Initialize.
- Select a board (e.g., Arduino Uno).
- Choose a sketch folder.
Existing Project:
Open the folder containing your .ino file.
5. Select Board & Port
- Click the board name in the bottom status bar (e.g., Arduino Uno).
- Select your target board from the list.
- Click the port (e.g., COM3 or /dev/ttyACM0).
6. Build & Upload
- Build (Verify): Ctrl+Alt+R or click the checkmark icon.
- Upload: Ctrl+Alt+U or click the arrow icon.
- Serial Monitor: Ctrl+Alt+Shift+M to debug output.
7. Advanced Features
IntelliSense & Autocomplete
- Install C/C++ Extension (by Microsoft).
- Configure c_cpp_properties.json (auto-generated by Arduino extension).
Debugging
- Install Cortex-Debug extension (for ARM-based boards like Arduino Due).
- Use an external debugger (e.g., J-Link) with launch.json.
Library Management
- Add libraries via Library Manager (F1 > Arduino: Library Manager).
- Manually place libraries in ~/Arduino/libraries (or your sketchbook folder).
8. Example platformio.ini (Alternative with PlatformIO)
For more control, use PlatformIO in VS Code:
ini
[env:uno]
platform = atmelavr
board = uno
framework = arduino
monitor_speed = 9600
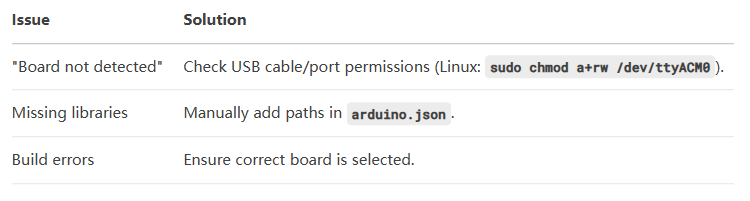
9. Troubleshooting
10. Recommended Extensions
- PlatformIO IDE: Advanced project management.
- GitLens: Version control.
- Code Runner: Quick script testing.
Why VS Code Over Arduino IDE?
- Git Integration: Track code changes.
- Multi-file Projects: Better than Arduino’s single-tab limitation.
- Debugging: Breakpoints/watch variables (with hardware debuggers).
For beginners, start with the Arduino IDE, but switch to VS Code for larger projects!