


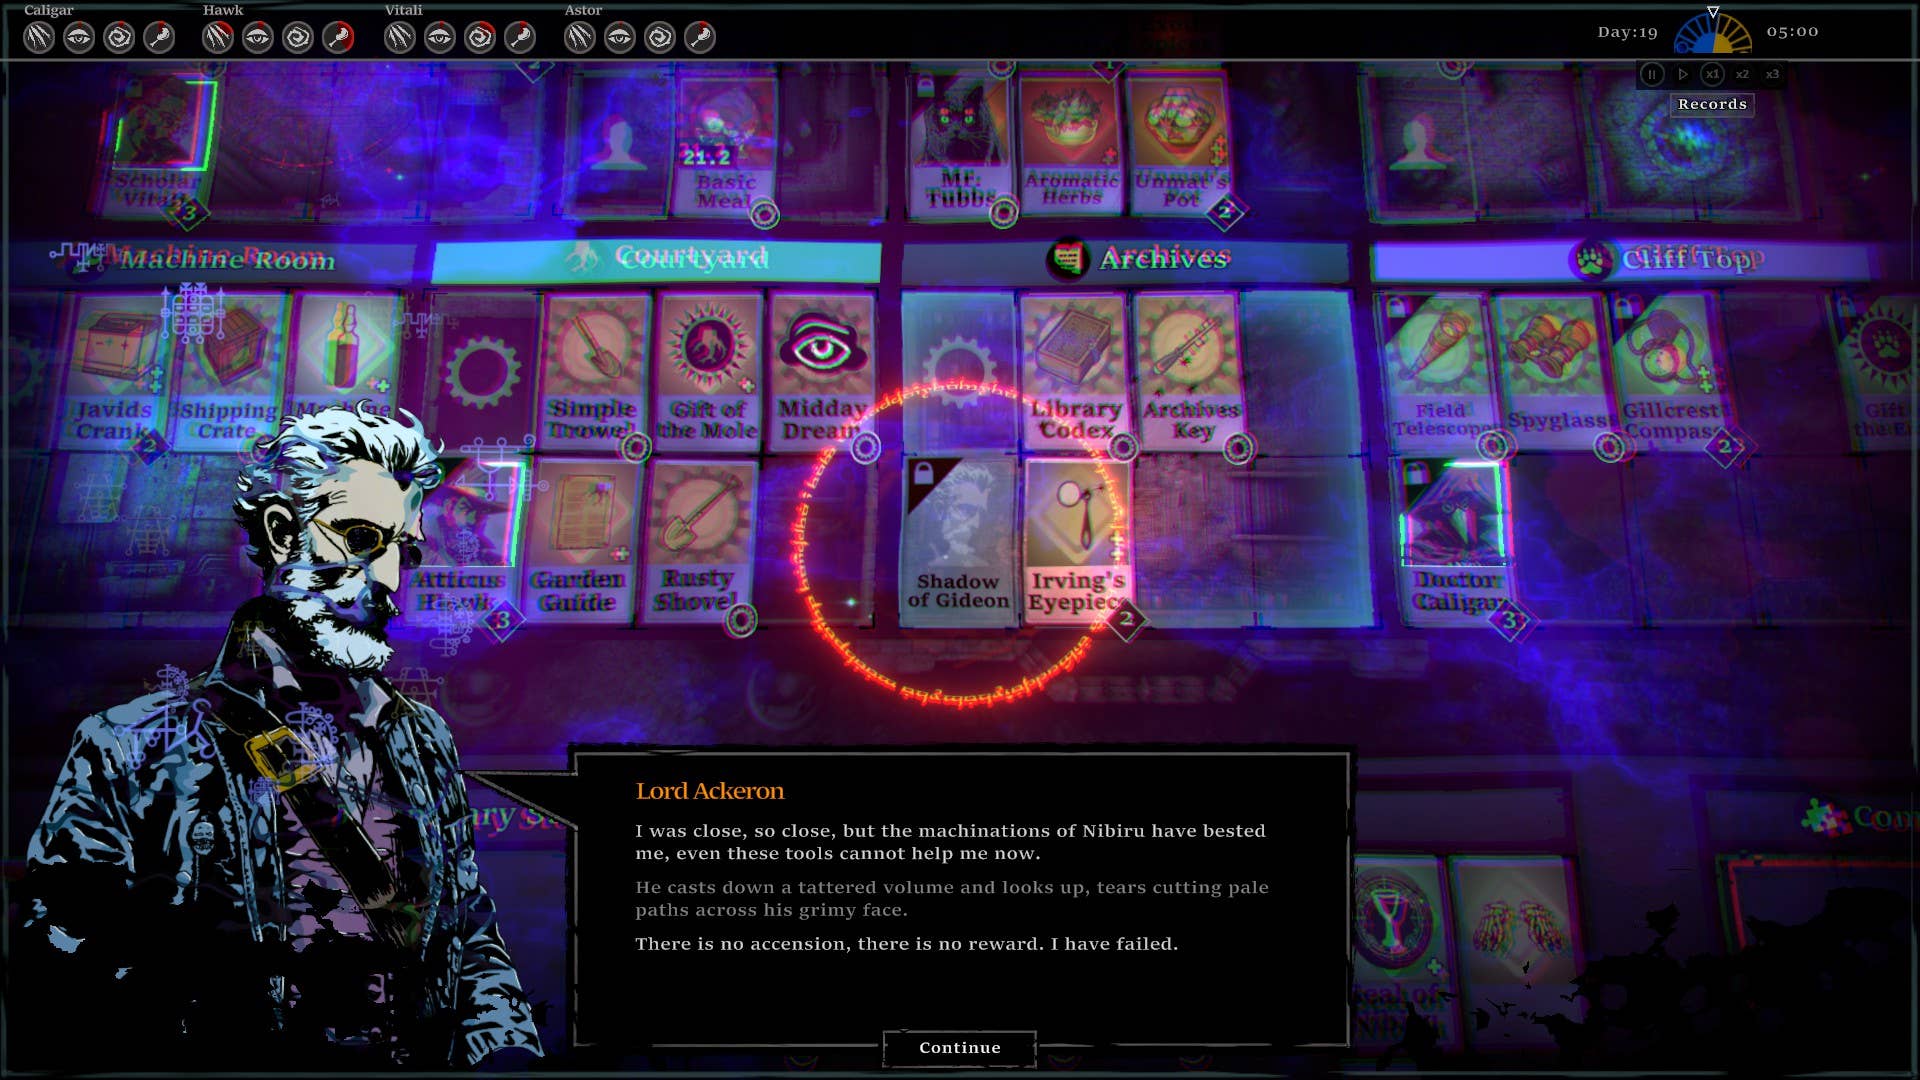
_courtesy_VERTICAL.jpg)


![[The AI Show Episode 145]: OpenAI Releases o3 and o4-mini, AI Is Causing “Quiet Layoffs,” Executive Order on Youth AI Education & GPT-4o’s Controversial Update](https://www.marketingaiinstitute.com/hubfs/ep%20145%20cover.png)


_Andreas_Prott_Alamy.jpg?width=1280&auto=webp&quality=80&disable=upscale#)


![Apple Ships 55 Million iPhones, Claims Second Place in Q1 2025 Smartphone Market [Report]](https://www.iclarified.com/images/news/97185/97185/97185-640.jpg)


How to Set Up Termux Desktop GUI on Android | Linux on Mobile
Hey, Linux fan! Did you know you can use Termux with a graphical interface? If you didn’t know, yes, it's possible! With the right setup, you can turn your Termux terminal into a desktop-like environment. If you want to learn how to do this, you’re in the right place. This guide will help you with everything—from installation to customization—so keep reading! What is Termux GUI? Termux is mainly made for using commands, but you can add some packages to make it work like a graphical interface. There isn't an official graphical version of Termux, but by using packages like a VNC server and the XFCE4 desktop, you can get a complete Linux desktop on your Android device. Requirements for Termux Desktop GUI Before you proceed, ensure your device meets the following requirements: Termux application (Download from F-Droid or GitHub) VNC Viewer application (for accessing the desktop environment) At least 500MB of mobile data At least 3GB of free storage Steps to Install Termux Desktop GUI Follow these simple steps to install and set up the GUI version of Termux: Step 1: Install Termux Download and install the latest version of Termux from F-Droid or GitHub. Step 2: Install Necessary Packages Open Termux and enter the following commands one by one: pkg update && pkg upgrade -y pkg install git -y git clone https://github.com/adi1090x/termux-desktop cd termux-desktop chmod +x setup.sh ./setup.sh --install Step 3: Set Up a VNC Password At the end of the installation process, you’ll be prompted to create a VNC password. This password should be at least six characters long. It won’t be visible while typing, so make sure to remember it. Step 4: Start the VNC Server Restart Termux and start the VNC server using this command: startdesktop Copy the address localhost:1, as you’ll need it in the next step. Step 5: Connect to VNC Viewer Open the VNC Viewer app. Tap the + (plus) button to add a new connection. Enter localhost:1 as the address and assign a name. Tap Create , then Connect. Then you will see This Alert: This connection is unencrypted. Would you like to continue? Type OK on the top corner Enter the VNC password you set earlier and tap Continue. Congratulations!

Hey, Linux fan! Did you know you can use Termux with a graphical interface? If you didn’t know, yes, it's possible! With the right setup, you can turn your Termux terminal into a desktop-like environment. If you want to learn how to do this, you’re in the right place. This guide will help you with everything—from installation to customization—so keep reading!

What is Termux GUI?
Termux is mainly made for using commands, but you can add some packages to make it work like a graphical interface. There isn't an official graphical version of Termux, but by using packages like a VNC server and the XFCE4 desktop, you can get a complete Linux desktop on your Android device.
Requirements for Termux Desktop GUI
Before you proceed, ensure your device meets the following requirements:
- Termux application (Download from F-Droid or GitHub)
- VNC Viewer application (for accessing the desktop environment)
- At least 500MB of mobile data
- At least 3GB of free storage
Steps to Install Termux Desktop GUI
Follow these simple steps to install and set up the GUI version of Termux:
Step 1: Install Termux
Download and install the latest version of Termux from F-Droid or GitHub.
Step 2: Install Necessary Packages
Open Termux and enter the following commands one by one:
pkg update && pkg upgrade -y
pkg install git -y
git clone https://github.com/adi1090x/termux-desktop
cd termux-desktop
chmod +x setup.sh
./setup.sh --install
Step 3: Set Up a VNC Password
At the end of the installation process, you’ll be prompted to create a VNC password. This password should be at least six characters long. It won’t be visible while typing, so make sure to remember it.

Step 4: Start the VNC Server
Restart Termux and start the VNC server using this command:
startdesktop
Copy the address localhost:1, as you’ll need it in the next step.

Step 5: Connect to VNC Viewer
- Open the VNC Viewer app.
- Tap the + (plus) button to add a new connection.

- Enter localhost:1 as the address and assign a name.

- Tap Create , then Connect.

- Then you will see This Alert: This connection is unencrypted. Would you like to continue? Type OK on the top corner

- Enter the VNC password you set earlier and tap Continue.

Congratulations!


