Getting started with Raycast for Teams
Raycast is an app that provides quick access to your tools. It reduces context switching with a command line inspired interface and connects with GitHub, Linear, and G Suite among others, to "take your daily workflow to the next level." In July 2022, Raycast released Raycast for Teams. It's Raycast with a collaborative layer, including: Shared Snippets Shared Quicklinks Shared Extensions At Bucket, we use it to experiment with in-house extensions. We also use templates built by the Raycast team, like the Brand Guidelines extension, to quickly grab colors, logos, and brand assets, without bothering designers, or the Team Time extension, for a quick overview of your team's timezones. This post is step-by-step guide to get started. Here we go. Prerequisites First off, make sure you have the following prerequisites. You have Raycast 1.26.0 or higher installed You have Node.js 20.15 or higher installed — Raycast recommends nvm to install Node You have npm 7 or higher installed Getting started with Raycast for Teams Raycast for Teams allows you to build, share and discover extensions in a private store. The store is only accessible to members of your Raycast organization. Create your Raycast organization To get started, create your Raycast organization. Let's use the Create Organization command. In the root search, start typing organization — or use this Deeplink. Specify the name of your org, a handle (used in links, e.g. https://raycast.com/{teamHandle}/{extension}) and optionally upload an avatar. Create your private Raycast Store After you've created your organization, it's time to set up a private store for your extensions. Open the Raycast Store and select your Organization — pro tip: use Cmd + Shift + P Press Cmd Enter to start onboarding. Init a local repository First, select a folder to create a local repository for your private extension store. Raycast creates a folder that contains a Getting Started extension — a simple extension with a command that shows a list with useful links. Build the Getting Started extension After you have created the local repository, open your terminal and navigate into the raycast-extensions/getting-started folder: cd ~/path/raycast-extensions/getting-started From there, copy/paste this command in your terminal to start development mode: npm install && npx ray dev Raycast opens and you can see a new Development section in the root search. The section shows all commands that are under active development. You can open the command and open a few links. Publish the Getting Started extension Now, let's share the extension with your team. Copy/paste this command in your terminal: npx ray publish The command verifies, builds and publishes the extension to your private extension store. The extension is only accessible to members of your Raycast organization. Bravo! You just built and published your first private extension. Now, let's go one step forward with Templates. Advanced: Raycast for Teams Templates To fully embrace the value of Raycast for Teams, Raycast built some high-quality, ready-to-use templates. Existing templates: Brand Guidelines: Quickly grab colors, logos, and brand assets from Raycast, without bothering designers Bug Tracker: Keep a record of bugs across your platform, and log new issues CRUD Admin Panel: An admin panel to create, read, update, and delete user data Daily Active Users Dashboard: Keep an eye on your startup's growth People Directory: An easy way to explore your company employees Standups: Keep your team in the loop by sending regular updates to Slack Team Time: Quick overview of your team's timezones As a remote-first company, the Team Time template is super useful. Let's start with it. Create a new extension let's go back to the raycast-extensions folder with the following command: cd ~/path/raycast-extensions Copy/paste the following command: npx create-raycast-extension -t team-time Build the extension From your terminal, run this: cd ~/path/raycast-extensions/team-time && npx ray dev Open Raycast, and you'll notice your Team Time extension at the top of the root search. Develop the extension To make changes to your extension, open the ./src/index.tsx file in your extension directory, change the variables and save it. Then, open your command in Raycast again and see your changes. Before publishing, update the package.json file with your handles: { ... "author": "{yourHandle}", "owner": "{teamHandle}", ... } Publish the extension Now, you can press ⌃ C in your terminal to stop npx ray dev. Copy/paste this command in your terminal: npx ray publish Amazing! You just built and published your second private extension. Off to many! Wrapping up That's a wrap! To recap, we've ju
Raycast is an app that provides quick access to your tools.
It reduces context switching with a command line inspired interface and connects with GitHub, Linear, and G Suite among others, to "take your daily workflow to the next level."
In July 2022, Raycast released Raycast for Teams. It's Raycast with a collaborative layer, including:
- Shared Snippets
- Shared Quicklinks
- Shared Extensions
At Bucket, we use it to experiment with in-house extensions. We also use templates built by the Raycast team, like the Brand Guidelines extension, to quickly grab colors, logos, and brand assets, without bothering designers, or the Team Time extension, for a quick overview of your team's timezones.
This post is step-by-step guide to get started.
Here we go.
Prerequisites
First off, make sure you have the following prerequisites.
- You have Raycast 1.26.0 or higher installed
- You have Node.js 20.15 or higher installed — Raycast recommends
nvmto install Node - You have
npm7 or higher installed
Getting started with Raycast for Teams
Raycast for Teams allows you to build, share and discover extensions in a private store. The store is only accessible to members of your Raycast organization.
Create your Raycast organization
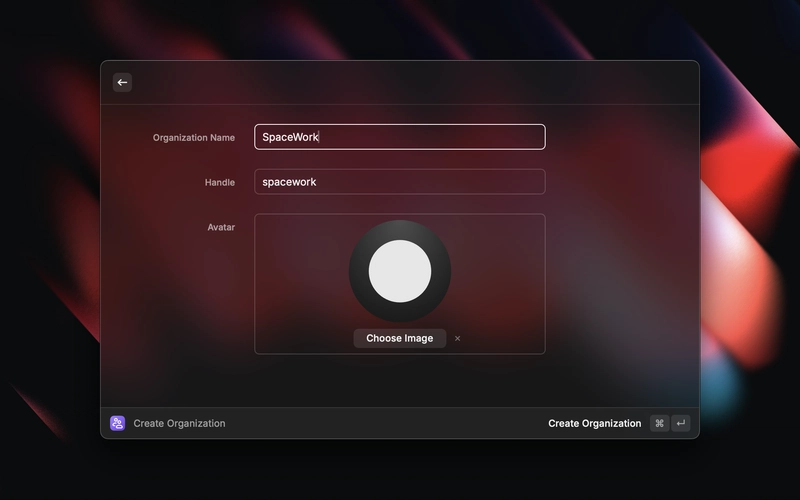
To get started, create your Raycast organization. Let's use the Create Organization command. In the root search, start typing organization — or use this Deeplink. Specify the name of your org, a handle (used in links, e.g. https://raycast.com/{teamHandle}/{extension}) and optionally upload an avatar.
Create your private Raycast Store
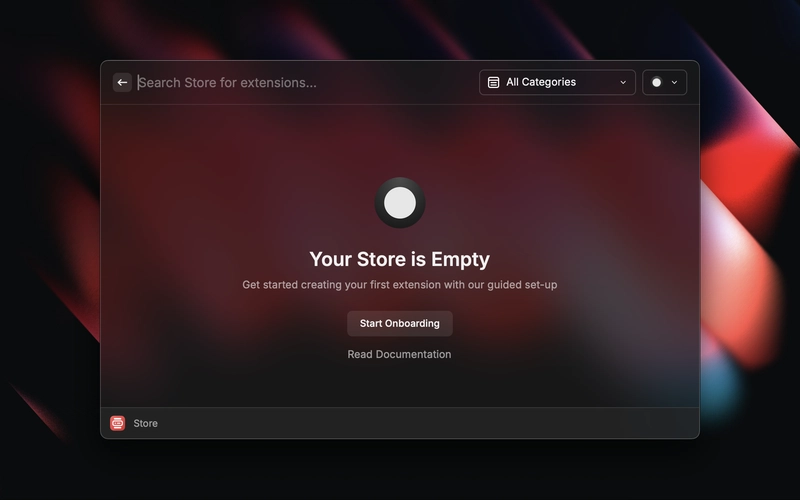
After you've created your organization, it's time to set up a private store for your extensions.
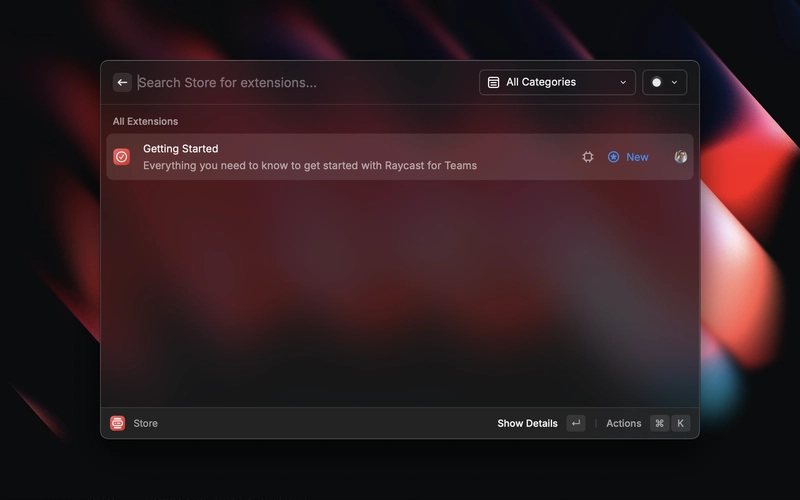
Open the Raycast Store and select your Organization — pro tip: use Cmd + Shift + P
Press Cmd Enter to start onboarding.
Init a local repository
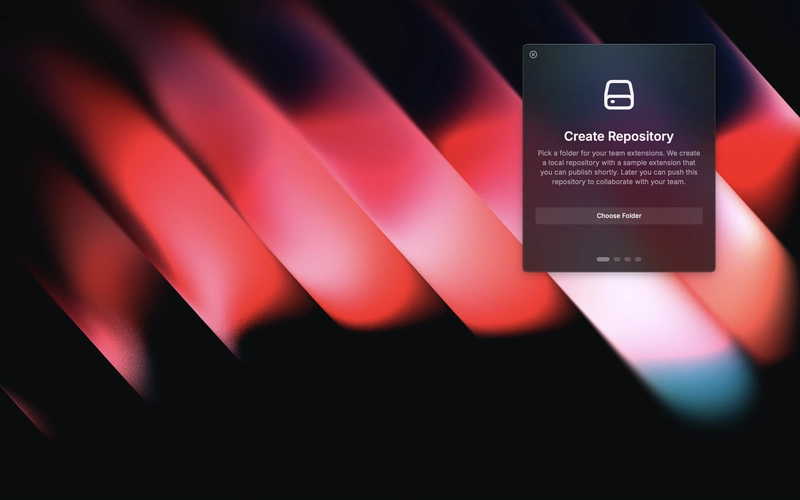
First, select a folder to create a local repository for your private extension store.
Raycast creates a folder that contains a Getting Started extension — a simple extension with a command that shows a list with useful links.
Build the Getting Started extension
After you have created the local repository, open your terminal and navigate into the raycast-extensions/getting-started folder:
cd ~/path/raycast-extensions/getting-started
From there, copy/paste this command in your terminal to start development mode:
npm install && npx ray dev
Raycast opens and you can see a new Development section in the root search. The section shows all commands that are under active development. You can open the command and open a few links.
Publish the Getting Started extension
Now, let's share the extension with your team.
Copy/paste this command in your terminal:
npx ray publish
The command verifies, builds and publishes the extension to your private extension store. The extension is only accessible to members of your Raycast organization.
Bravo! You just built and published your first private extension. Now, let's go one step forward with Templates.
Advanced: Raycast for Teams Templates
To fully embrace the value of Raycast for Teams, Raycast built some high-quality, ready-to-use templates.
Existing templates:
- Brand Guidelines: Quickly grab colors, logos, and brand assets from Raycast, without bothering designers
- Bug Tracker: Keep a record of bugs across your platform, and log new issues
- CRUD Admin Panel: An admin panel to create, read, update, and delete user data
- Daily Active Users Dashboard: Keep an eye on your startup's growth
- People Directory: An easy way to explore your company employees
- Standups: Keep your team in the loop by sending regular updates to Slack
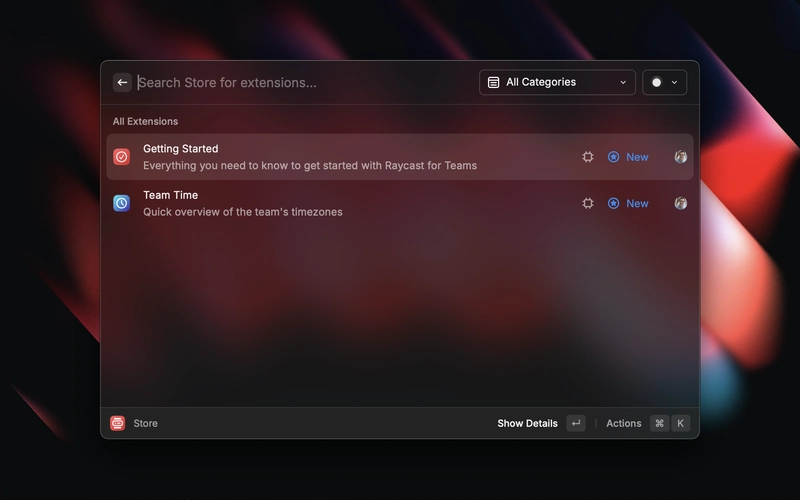
- Team Time: Quick overview of your team's timezones
As a remote-first company, the Team Time template is super useful. Let's start with it.
Create a new extension
let's go back to the raycast-extensions folder with the following command:
cd ~/path/raycast-extensions
Copy/paste the following command:
npx create-raycast-extension -t team-time
Build the extension
From your terminal, run this:
cd ~/path/raycast-extensions/team-time && npx ray dev
Open Raycast, and you'll notice your Team Time extension at the top of the root search.
Develop the extension
To make changes to your extension, open the ./src/index.tsx file in your extension directory, change the variables and save it. Then, open your command in Raycast again and see your changes.
Before publishing, update the package.json file with your handles:
{
  ...
  "author": "{yourHandle}",
  "owner": "{teamHandle}",
  ...
}
Publish the extension
Now, you can press ⌃ C in your terminal to stop npx ray dev.
Copy/paste this command in your terminal:
npx ray publish
Amazing! You just built and published your second private extension. Off to many!
Wrapping up
That's a wrap!
To recap, we've just:
- Created a Raycast organization
- Created your private Raycast Store
- Built and published a Getting Started extension
- Built and published an advanced extension from the Template Gallery
Bravo! It's time to spread the word in your team.
Go to your Raycast organization and copy/paste the invite link from there:
raycast://organizations/{org}/manage
Enjoy!
Helpful links
- Learn more about Raycast for Teams
- Explore the Templates Gallery — built by the Raycast team
- Read the Raycast documentation







![[The AI Show Episode 142]: ChatGPT’s New Image Generator, Studio Ghibli Craze and Backlash, Gemini 2.5, OpenAI Academy, 4o Updates, Vibe Marketing & xAI Acquires X](https://www.marketingaiinstitute.com/hubfs/ep%20142%20cover.png)









![[DEALS] Microsoft Office Professional 2021 for Windows: Lifetime License (75% off) & Other Deals Up To 98% Off – Offers End Soon!](https://www.javacodegeeks.com/wp-content/uploads/2012/12/jcg-logo.jpg)



















_Anthony_Brown_Alamy.jpg?#)
_Hanna_Kuprevich_Alamy.jpg?#)


.png?#)







![Hands-on: We got to play Nintendo Switch 2 for nearly six hours yesterday [Video]](https://i0.wp.com/9to5toys.com/wp-content/uploads/sites/5/2025/04/Switch-FI-.jpg.jpg?resize=1200%2C628&ssl=1)
![Fitbit redesigns Water stats and logging on Android, iOS [U]](https://i0.wp.com/9to5google.com/wp-content/uploads/sites/4/2023/03/fitbit-logo-2.jpg?resize=1200%2C628&quality=82&strip=all&ssl=1)


![YouTube Announces New Creation Tools for Shorts [Video]](https://www.iclarified.com/images/news/96923/96923/96923-640.jpg)

![Apple Faces New Tariffs but Has Options to Soften the Blow [Kuo]](https://www.iclarified.com/images/news/96921/96921/96921-640.jpg)


