![[The AI Show Episode 143]: ChatGPT Revenue Surge, New AGI Timelines, Amazon’s AI Agent, Claude for Education, Model Context Protocol & LLMs Pass the Turing Test](https://www.marketingaiinstitute.com/hubfs/ep%20143%20cover.png)


![From drop-out to software architect with Jason Lengstorf [Podcast #167]](https://cdn.hashnode.com/res/hashnode/image/upload/v1743796461357/f3d19cd7-e6f5-4d7c-8bfc-eb974bc8da68.png?#)


.jpg?#)


_ArtemisDiana_Alamy.jpg?#)


 (1).webp?#)


-xl.jpg)


![Yes, the Gemini icon is now bigger and brighter on Android [U]](https://i0.wp.com/9to5google.com/wp-content/uploads/sites/4/2025/02/Gemini-on-Galaxy-S25.jpg?resize=1200%2C628&quality=82&strip=all&ssl=1)


![Apple Rushes Five Planes of iPhones to US Ahead of New Tariffs [Report]](https://www.iclarified.com/images/news/96967/96967/96967-640.jpg)
![Apple Vision Pro 2 Allegedly in Production Ahead of 2025 Launch [Rumor]](https://www.iclarified.com/images/news/96965/96965/96965-640.jpg)


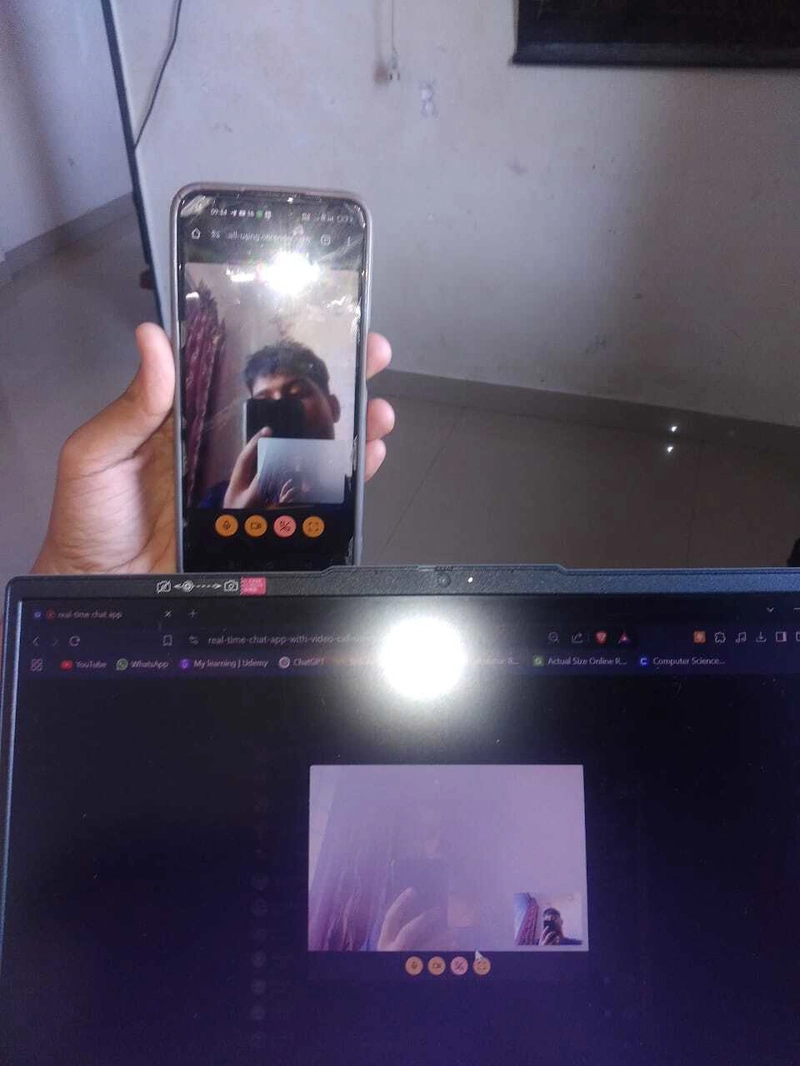
Chat-app with video-call tutorial [MERN]
Live project link: Chat-app Building a Real-Time Chat App with the MERN Stack Creating a real-time chat application is a great way to enhance your full-stack development skills. This guide provides a quick overview of setting up a MERN-based chat app with Socket.IO for real-time messaging, Cloudinary for profile images, and JWT authentication for user security. This is not a full tutorial—instead, it summarizes key steps. For detailed implementation, refer to the linked YouTube tutorial below. Features User Authentication – Secure login and registration with JWT. Real-Time Messaging – Instant chat functionality with Socket.IO. Responsive UI – Mobile-friendly design with Tailwind CSS. Image Uploads – Profile images stored using Cloudinary. Video Calling – WebRTC integration for one-on-one calls. Tech Stack Frontend: React.js, Tailwind CSS Backend: Node.js, Express.js, MongoDB Database: MongoDB with Mongoose Real-Time Communication: Socket.IO, WebRTC (for calls) Authentication: JSON Web Tokens (JWT) with bcrypt Image Storage: Cloudinary 1. Setting Up the Backend Install Dependencies Create a new project and install required packages: mkdir mern-chat-app && cd mern-chat-app npm init -y npm install express mongoose cors bcryptjs jsonwebtoken socket.io dotenv cloudinary multer Configure Environment Variables Create a .env file to store sensitive data: PORT=5000 MONGO_URI=your_mongodb_connection_string JWT_SECRET=your_jwt_secret CLOUDINARY_CLOUD_NAME=your_cloud_name CLOUDINARY_API_KEY=your_api_key CLOUDINARY_API_SECRET=your_api_secret Express Server Setup const express = require('express'); const mongoose = require('mongoose'); const cors = require('cors'); const dotenv = require('dotenv'); const authRoutes = require('./routes/authRoutes'); // Example route file const chatRoutes = require('./routes/chatRoutes'); const socketIo = require('socket.io'); const http = require('http'); dotenv.config(); const app = express(); const server = http.createServer(app); const io = socketIo(server, { cors: { origin: '*' } }); app.use(cors()); app.use(express.json()); app.use('/api/auth', authRoutes); app.use('/api/chat', chatRoutes); mongoose.connect(process.env.MONGO_URI, { useNewUrlParser: true, useUnifiedTopology: true, }).then(() => console.log('MongoDB connected')); const PORT = process.env.PORT || 5000; server.listen(PORT, () => console.log(`Server running on port ${PORT}`)); 2. Authentication (JWT & Mongoose Setup) User Model (Mongoose Schema) const mongoose = require('mongoose'); const bcrypt = require('bcryptjs'); const UserSchema = new mongoose.Schema({ username: { type: String, required: true, unique: true }, email: { type: String, required: true, unique: true }, password: { type: String, required: true }, }); UserSchema.pre('save', async function (next) { if (!this.isModified('password')) return next(); this.password = await bcrypt.hash(this.password, 10); next(); }); module.exports = mongoose.model('User', UserSchema); Auth Routes const express = require('express'); const User = require('../models/User'); const jwt = require('jsonwebtoken'); const bcrypt = require('bcryptjs'); const router = express.Router(); router.post('/register', async (req, res) => { const { username, email, password } = req.body; try { const user = new User({ username, email, password }); await user.save(); res.status(201).json({ message: 'User created successfully' }); } catch (err) { res.status(400).json({ error: err.message }); } }); router.post('/login', async (req, res) => { const { email, password } = req.body; const user = await User.findOne({ email }); if (!user || !(await bcrypt.compare(password, user.password))) { return res.status(401).json({ error: 'Invalid credentials' }); } const token = jwt.sign({ userId: user._id }, process.env.JWT_SECRET, { expiresIn: '1h' }); res.json({ token }); }); module.exports = router; 3. Setting Up the Frontend Install React & Dependencies npx create-react-app client cd client npm install axios socket.io-client react-router-dom tailwindcss Configure Tailwind CSS npx tailwindcss init Edit tailwind.config.js: module.exports = { content: ['./src/**/*.{js,jsx,ts,tsx}'], theme: { extend: {} }, plugins: [], }; Import Tailwind into index.css: @tailwind base; @tailwind components; @tailwind utilities; 4. Real-Time Chat with Socket.IO Backend Socket.IO Setup io.on('connection', (socket) => { console.log('New client connected'); socket.on('sendMessage', (message) => { io.emit('message', message); }); socket.on('disconnect', () => { console.log('Client disconnected'); }); }); Frontend Socket.IO Integration i
![Chat-app with video-call tutorial [MERN]](https://media2.dev.to/dynamic/image/width=800%2Cheight=%2Cfit=scale-down%2Cgravity=auto%2Cformat=auto/https%3A%2F%2Fdev-to-uploads.s3.amazonaws.com%2Fuploads%2Farticles%2Fpfblidqd1r11sewa8zhk.png)
Live project link: Chat-app
Building a Real-Time Chat App with the MERN Stack
Creating a real-time chat application is a great way to enhance your full-stack development skills. This guide provides a quick overview of setting up a MERN-based chat app with Socket.IO for real-time messaging, Cloudinary for profile images, and JWT authentication for user security.
This is not a full tutorial—instead, it summarizes key steps. For detailed implementation, refer to the linked YouTube tutorial below.
Features
- User Authentication – Secure login and registration with JWT.
Real-Time Messaging – Instant chat functionality with Socket.IO.
Responsive UI – Mobile-friendly design with Tailwind CSS.

- Image Uploads – Profile images stored using Cloudinary.
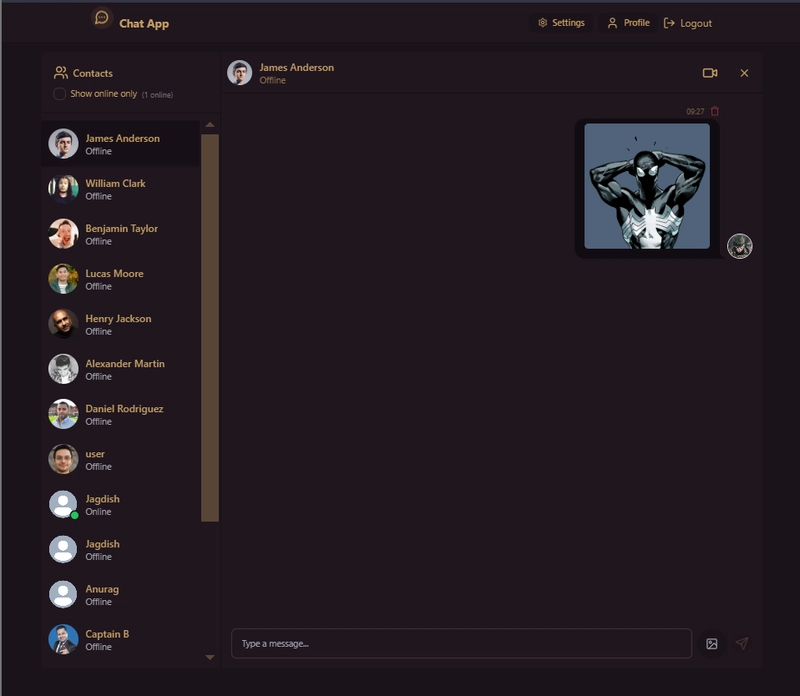
- Video Calling – WebRTC integration for one-on-one calls.
Tech Stack
- Frontend: React.js, Tailwind CSS
- Backend: Node.js, Express.js, MongoDB
- Database: MongoDB with Mongoose
- Real-Time Communication: Socket.IO, WebRTC (for calls)
- Authentication: JSON Web Tokens (JWT) with bcrypt
- Image Storage: Cloudinary
1. Setting Up the Backend
Install Dependencies
Create a new project and install required packages:
mkdir mern-chat-app && cd mern-chat-app
npm init -y
npm install express mongoose cors bcryptjs jsonwebtoken socket.io dotenv cloudinary multer
Configure Environment Variables
Create a .env file to store sensitive data:
PORT=5000
MONGO_URI=your_mongodb_connection_string
JWT_SECRET=your_jwt_secret
CLOUDINARY_CLOUD_NAME=your_cloud_name
CLOUDINARY_API_KEY=your_api_key
CLOUDINARY_API_SECRET=your_api_secret
Express Server Setup
const express = require('express');
const mongoose = require('mongoose');
const cors = require('cors');
const dotenv = require('dotenv');
const authRoutes = require('./routes/authRoutes'); // Example route file
const chatRoutes = require('./routes/chatRoutes');
const socketIo = require('socket.io');
const http = require('http');

dotenv.config();
const app = express();
const server = http.createServer(app);
const io = socketIo(server, { cors: { origin: '*' } });

app.use(cors());
app.use(express.json());
app.use('/api/auth', authRoutes);
app.use('/api/chat', chatRoutes);

mongoose.connect(process.env.MONGO_URI, {
  useNewUrlParser: true,
  useUnifiedTopology: true,
}).then(() => console.log('MongoDB connected'));

const PORT = process.env.PORT || 5000;
server.listen(PORT, () => console.log(`Server running on port ${PORT}`));
2. Authentication (JWT & Mongoose Setup)
User Model (Mongoose Schema)
const mongoose = require('mongoose');
const bcrypt = require('bcryptjs');

const UserSchema = new mongoose.Schema({
  username: { type: String, required: true, unique: true },
  email: { type: String, required: true, unique: true },
  password: { type: String, required: true },
});

UserSchema.pre('save', async function (next) {
  if (!this.isModified('password')) return next();
  this.password = await bcrypt.hash(this.password, 10);
  next();
});

module.exports = mongoose.model('User', UserSchema);
Auth Routes
const express = require('express');
const User = require('../models/User');
const jwt = require('jsonwebtoken');
const bcrypt = require('bcryptjs');
const router = express.Router();

router.post('/register', async (req, res) => {
  const { username, email, password } = req.body;
  try {
    const user = new User({ username, email, password });
    await user.save();
    res.status(201).json({ message: 'User created successfully' });
  } catch (err) {
    res.status(400).json({ error: err.message });
  }
});

router.post('/login', async (req, res) => {
  const { email, password } = req.body;
  const user = await User.findOne({ email });
  if (!user || !(await bcrypt.compare(password, user.password))) {
    return res.status(401).json({ error: 'Invalid credentials' });
  }
  const token = jwt.sign({ userId: user._id }, process.env.JWT_SECRET, { expiresIn: '1h' });
  res.json({ token });
});

module.exports = router;
3. Setting Up the Frontend
Install React & Dependencies
npx create-react-app client
cd client
npm install axios socket.io-client react-router-dom tailwindcss
Configure Tailwind CSS
npx tailwindcss init
Edit tailwind.config.js:
module.exports = {
  content: ['./src/**/*.{js,jsx,ts,tsx}'],
  theme: { extend: {} },
  plugins: [],
};
Import Tailwind into index.css:
@tailwind base;
@tailwind components;
@tailwind utilities;
4. Real-Time Chat with Socket.IO
Backend Socket.IO Setup
io.on('connection', (socket) => {
  console.log('New client connected');

  socket.on('sendMessage', (message) => {
    io.emit('message', message);
  });

  socket.on('disconnect', () => {
    console.log('Client disconnected');
  });
});
Frontend Socket.IO Integration
import io from 'socket.io-client';
const socket = io('http://localhost:5000');

socket.on('message', (message) => {
  console.log(message);
});

const sendMessage = (message) => {
  socket.emit('sendMessage', message);
};
5. Deployment
Once the app is ready, deploy it using:
Example Heroku Deployment:
git init
git add .
git commit -m "Deploy"
heroku create your-app-name
git push heroku main
Conclusion
Building a chat app with MERN & Socket.IO is a great way to practice real-time web development. This guide summarizes the key steps, but for a detailed implementation, check out the YouTube tutorial below:

For Video calling implementation