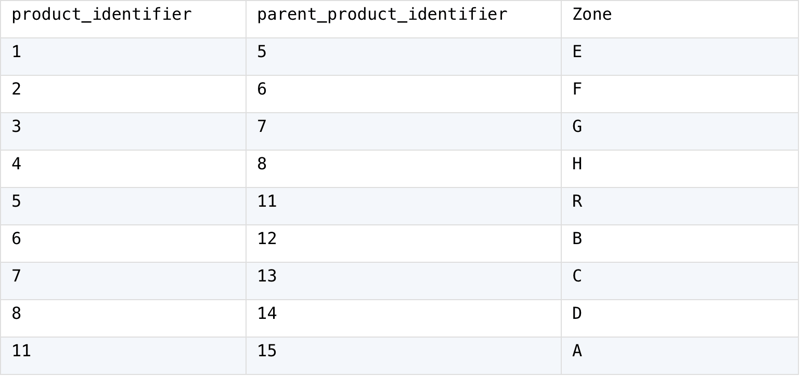


![[The AI Show Episode 144]: ChatGPT’s New Memory, Shopify CEO’s Leaked “AI First” Memo, Google Cloud Next Releases, o3 and o4-mini Coming Soon & Llama 4’s Rocky Launch](https://www.marketingaiinstitute.com/hubfs/ep%20144%20cover.png)


![From fast food worker to cybersecurity engineer with Tae'lur Alexis [Podcast #169]](https://cdn.hashnode.com/res/hashnode/image/upload/v1745242807605/8a6cf71c-144f-4c91-9532-62d7c92c0f65.png?#)


![BPMN-procesmodellering [closed]](https://i.sstatic.net/l7l8q49F.png)


-Jack-Black---Steve's-Lava-Chicken-(Official-Music-Video)-A-Minecraft-Movie-Soundtrack-WaterTower-00-00-32_lMoQ1fI.png?width=1920&height=1920&fit=bounds&quality=70&format=jpg&auto=webp#)


_Brain_light_Alamy.jpg?width=1280&auto=webp&quality=80&disable=upscale#)


![Mac Shipments Up 17% in Q1 2025 Fueled by New M4 MacBook Air [Chart]](https://www.iclarified.com/images/news/97086/97086/97086-640.jpg)
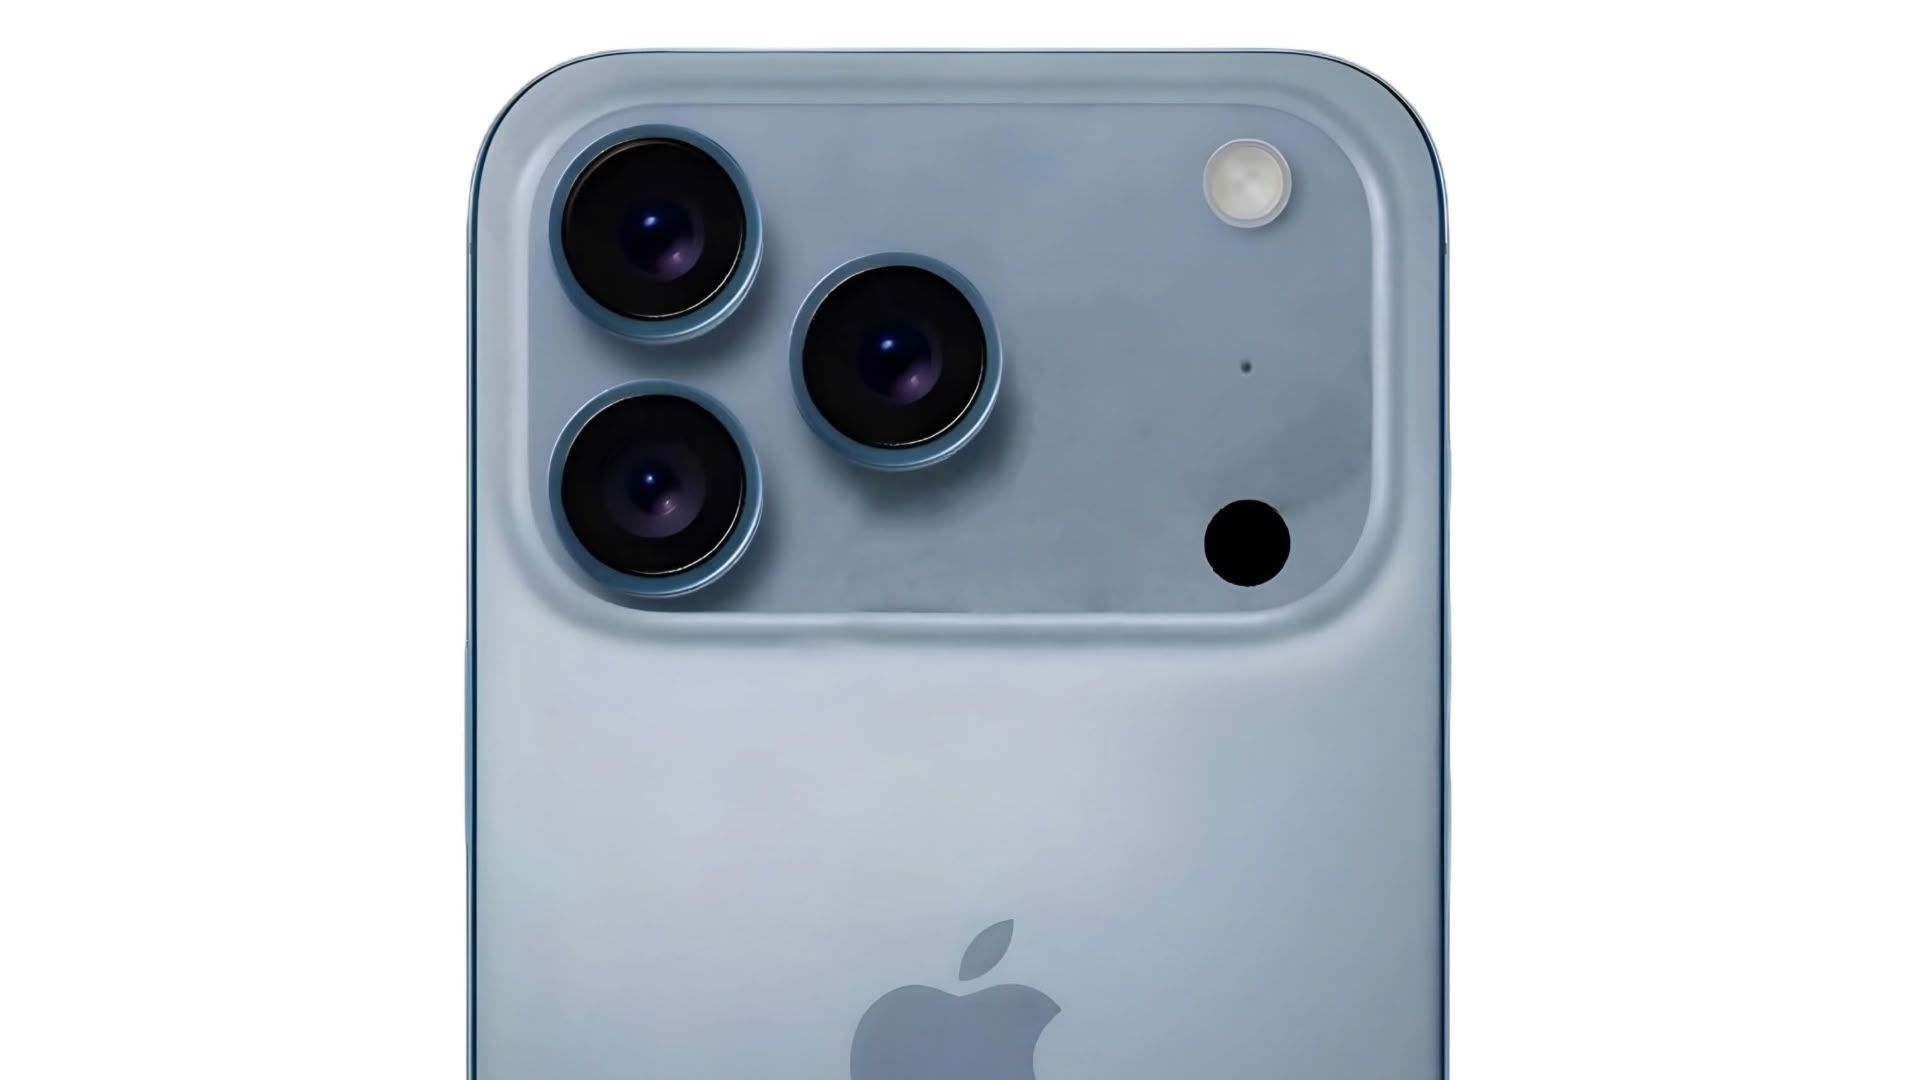
![Next Generation iPhone 17e Nears Trial Production [Rumor]](https://www.iclarified.com/images/news/97083/97083/97083-640.jpg)
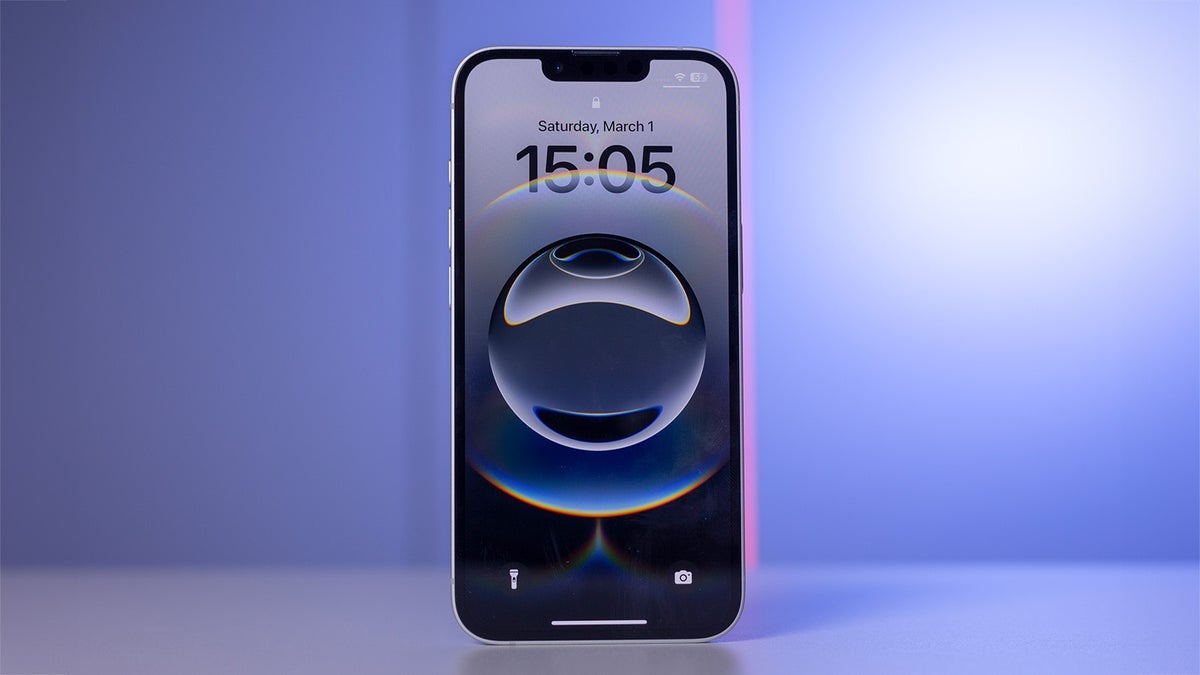
![Apple Releases iOS 18.5 Beta 3 and iPadOS 18.5 Beta 3 [Download]](https://www.iclarified.com/images/news/97076/97076/97076-640.jpg)
![Apple Seeds visionOS 2.5 Beta 3 to Developers [Download]](https://www.iclarified.com/images/news/97077/97077/97077-640.jpg)


Supercharge VSCode GitHub Copilot using Model Context Protocol (MCP) - Easy Setup Guide
Introduction GitHub Copilot has revolutionised the way developers write code, providing intelligent suggestions and automating repetitive tasks. With the introduction of Copilot Chat, users can now interact with Copilot in a conversational manner, asking questions and getting contextual help. But what if you could take this a step further? What if you could enable Copilot to perform actions directly on your GitHub repositories, like creating issues or searching for code snippets? Enter the Model Context Protocol (MCP). MCP is an open standard that allows AI applications like Copilot Agent Mode to securely connect with external tools and data sources, enabling a more integrated experience. There are many MCP servers available, each designed to work with different platforms and services. In this guide, we will focus on the GitHub MCP server, and walk you through the process of getting up and running in VSCode quickly, allowing you to supercharge your Copilot experience in Agent Mode by leveraging its capabilities. This setup will enable Copilot to interact directly with the GitHub API, allowing you to perform various actions like summarising or even creating issues, reading files, and searching code repositories directly from the chat interface. We will also cover the prerequisites, configuration steps, tips to ensure a smooth setup, and troubleshooting advice. Prerequisites Before we start, make sure you have the following installed and set up: Visual Studio Code: The latest stable or insiders release. GitHub Copilot & Copilot Chat Extensions: Installed and enabled in VS Code. GitHub Account: You'll need a GitHub account. MCP servers supports many different packages and languages, so running them in VSCode you would need to have either one of the following installed on your machine: Python for PIP packages. Node.js for NPM packages. TypeScript for TS packages. Docker for Docker images. There are many more supported frameworks and Microsoft even released support for C# recently. You can find the full list of supported languages and packages in the MCP documentation In this post I will be using 'Node.js' so make sure you have the latest version installed on your machine. You can check if it's installed by running node -v in your terminal. If you don't have it, download and install the latest version from the official website. Configuration Steps Open GitHub Copilot Chat in VSCode and select Agent Mode. You can do this by clicking on the Copilot icon in the sidebar and selecting Agent Mode from the dropdown menu. Next, click on the tools
Introduction
GitHub Copilot has revolutionised the way developers write code, providing intelligent suggestions and automating repetitive tasks. With the introduction of Copilot Chat, users can now interact with Copilot in a conversational manner, asking questions and getting contextual help. But what if you could take this a step further? What if you could enable Copilot to perform actions directly on your GitHub repositories, like creating issues or searching for code snippets?
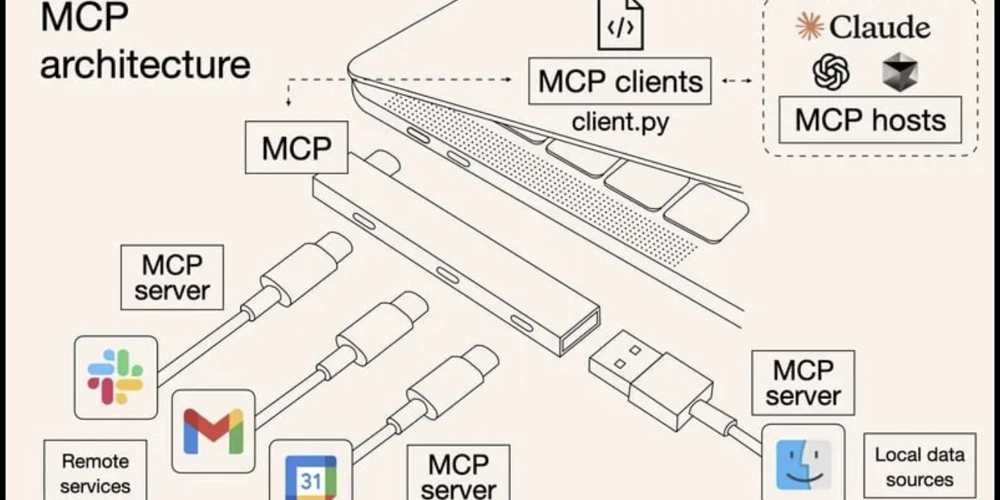
Enter the Model Context Protocol (MCP). MCP is an open standard that allows AI applications like Copilot Agent Mode to securely connect with external tools and data sources, enabling a more integrated experience.
There are many MCP servers available, each designed to work with different platforms and services. In this guide, we will focus on the GitHub MCP server, and walk you through the process of getting up and running in VSCode quickly, allowing you to supercharge your Copilot experience in Agent Mode by leveraging its capabilities.
This setup will enable Copilot to interact directly with the GitHub API, allowing you to perform various actions like summarising or even creating issues, reading files, and searching code repositories directly from the chat interface.
We will also cover the prerequisites, configuration steps, tips to ensure a smooth setup, and troubleshooting advice.
Prerequisites
Before we start, make sure you have the following installed and set up:
- Visual Studio Code: The latest stable or insiders release.
- GitHub Copilot & Copilot Chat Extensions: Installed and enabled in VS Code.
- GitHub Account: You'll need a GitHub account.
MCP servers supports many different packages and languages, so running them in VSCode you would need to have either one of the following installed on your machine:
- Python for PIP packages.
- Node.js for NPM packages.
- TypeScript for TS packages.
- Docker for Docker images.
There are many more supported frameworks and Microsoft even released support for C# recently. You can find the full list of supported languages and packages in the MCP documentation
In this post I will be using 'Node.js' so make sure you have the latest version installed on your machine. You can check if it's installed by running node -v in your terminal. If you don't have it, download and install the latest version from the official website.
Configuration Steps
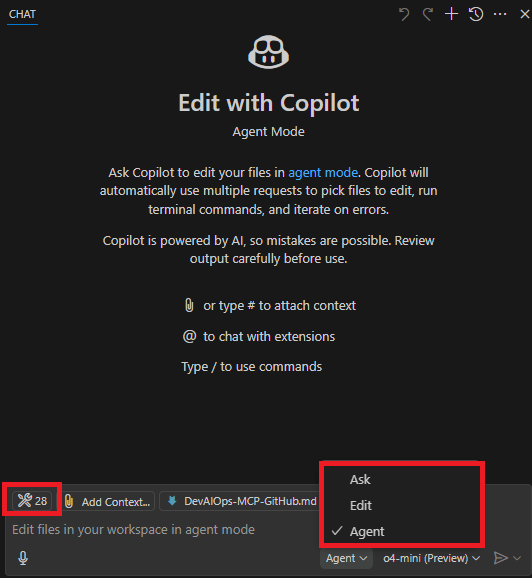
Open GitHub Copilot Chat in VSCode and select Agent Mode. You can do this by clicking on the Copilot icon in the sidebar and selecting Agent Mode from the dropdown menu.
Next, click on the tools