


![[The AI Show Episode 144]: ChatGPT’s New Memory, Shopify CEO’s Leaked “AI First” Memo, Google Cloud Next Releases, o3 and o4-mini Coming Soon & Llama 4’s Rocky Launch](https://www.marketingaiinstitute.com/hubfs/ep%20144%20cover.png)


![Is this too much for a modular monolith system? [closed]](https://i.sstatic.net/pYL1nsfg.png)


_Andreas_Prott_Alamy.jpg?width=1280&auto=webp&quality=80&disable=upscale#)


![What features do you get with Gemini Advanced? [April 2025]](https://i0.wp.com/9to5google.com/wp-content/uploads/sites/4/2024/02/gemini-advanced-cover.jpg?resize=1200%2C628&quality=82&strip=all&ssl=1)


![Apple Shares Official Trailer for 'Long Way Home' Starring Ewan McGregor and Charley Boorman [Video]](https://www.iclarified.com/images/news/97069/97069/97069-640.jpg)
![Apple Watch Series 10 Back On Sale for $299! [Lowest Price Ever]](https://www.iclarified.com/images/news/96657/96657/96657-640.jpg)
![EU Postpones Apple App Store Fines Amid Tariff Negotiations [Report]](https://www.iclarified.com/images/news/97068/97068/97068-640.jpg)
![Apple Slips to Fifth in China's Smartphone Market with 9% Decline [Report]](https://www.iclarified.com/images/news/97065/97065/97065-640.jpg)


No Code, No Limits: How I Built a Smart Chatbot in Just 10 Minutes
What if you could breathe life into a chatbot — not in days, but in minutes? No code, no chaos, just clarity. In a moment when ideas demand velocity, I stumbled upon a quiet power: Zapier. And within ten minutes, I watched a bot come alive — one that responds, and flows like a river of logic. The clock was ticking — just thirty minutes left before our submission was due. Our chatbot had failed, and we needed a new one. That’s when I stumbled upon Zapier... What is Zapier? Zapier is a no-code automation platform that lets anyone — from developers to creators — connect their favorite apps and automate tasks in minutes. Think of it as digital duct tape for your tools: Google Sheets talks to Slack, Notion updates from Gmail, and now, chatbots spring to life without a single line of code. Now, back to the main focus — building our chatbot! So, to start off.... Step 1: Getting Started Log into Zapier using your gmail And just like that — connected with Google. Once you’re on the homepage, click the ChatBot icon under Start from Scratch. It’s clearly marked — no guesswork. Step 2: Customizing the Flow You’ll see a prompt to create your new chatbot. I named mine LegallyHere — a legal assistant bot for Indian law, but feel free to make it your own. Let’s build it — step by step. Well it's already setup a few tweaks here and there and you'll be all set. Step 3: Define the Bot’s Purpose You’ll see a default description section — this is where you define what your chatbot does, its tone, and any special rules. Step 4: Set the Greeting Now set a default greeting for the ChatBot which will always appear at the start of the conversation if it is set to Static, or if you select Generated it will give you a generated 'Hello...', which is usually a very long script. I recommend choosing Static and setting a clean default response. Step 5: Choose Your AI Model You can select your AI model here — it only gives you two options for now, but don’t worry, both are solid and more than enough to get your chatbot up and running smoothly. Don't forget to save your changes after you are done! Step 6: Add a Knowledge Base Here in Zapier, we can input Web Pages, upload files and connect Zapier Tables. For a more detailed explanation there is an amazing video right there, check it out! Step 7: Adding the Logic - most cool part! Zapier lets you enhance your bot with 6 powerful logic tools — each simple and well-documented. Explore them to add triggers, filters, or custom flows as needed. Step 8: Personalize the Bot's Identity We can custom everything starting from the Avatar, Appearance and Style. Step 9: Integrate with Other Apps Okay! This might just be the coolest part. Step 10: Tweak the Settings We can go ahead to the settings and set the public name of the bot, the message placeholder and also the creativity level. Step 11: Review and Analyze Here we can view the history of the conversations when we make the chatbot public. There is also a feature called Analysis which is very useful for businesses. Step 12: Chatbot- Meet the World We can change our chatbot to mobile/desktop view as per our requirements. Click "Embed" in the top-right to get your code snippet — in Script _or _iframe format. We can choose either to integrate into our apps or websites. Also, there is a Pop-up chatbot code snippet which is also pretty easy to integrate into. And just like that, in just ten minutes, what felt like a crisis turned into a creation — a fully functional chatbot, alive and responsive. Zapier proved that building smart tools doesn’t need code or chaos — just clarity, curiosity, and the right clicks. So if you’ve got an idea waiting to speak, now’s the time. Your chatbot is closer than you think. Thanks a ton for reading — hope this helped you spark something of your own! Got an idea whispering to you? Don’t wait. Zapier’s waiting. Build that bot, unleash that voice, and let the world interact with your imagination. Drop your thoughts, questions, or your own Zapier chatbot story below!
What if you could breathe life into a chatbot — not in days, but in minutes? No code, no chaos, just clarity. In a moment when ideas demand velocity, I stumbled upon a quiet power: Zapier. And within ten minutes, I watched a bot come alive — one that responds, and flows like a river of logic.
The clock was ticking — just thirty minutes left before our submission was due. Our chatbot had failed, and we needed a new one. That’s when I stumbled upon Zapier...
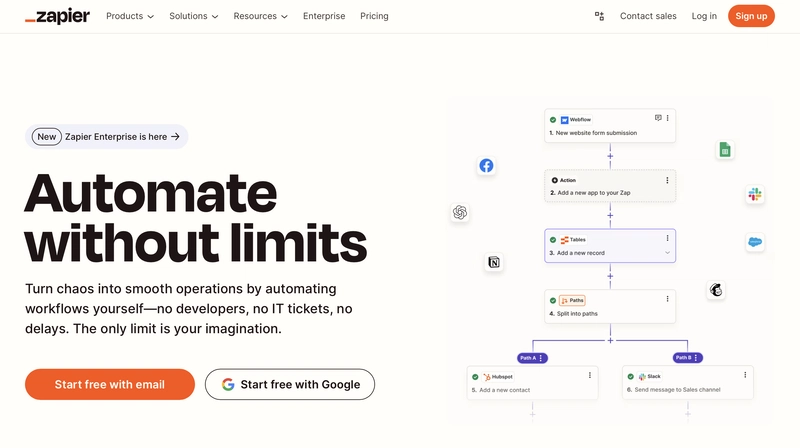
What is Zapier?
Zapier is a no-code automation platform that lets anyone — from developers to creators — connect their favorite apps and automate tasks in minutes. Think of it as digital duct tape for your tools: Google Sheets talks to Slack, Notion updates from Gmail, and now, chatbots spring to life without a single line of code.
Now, back to the main focus — building our chatbot!
So, to start off....
Step 1: Getting Started
Log into Zapier using your gmail
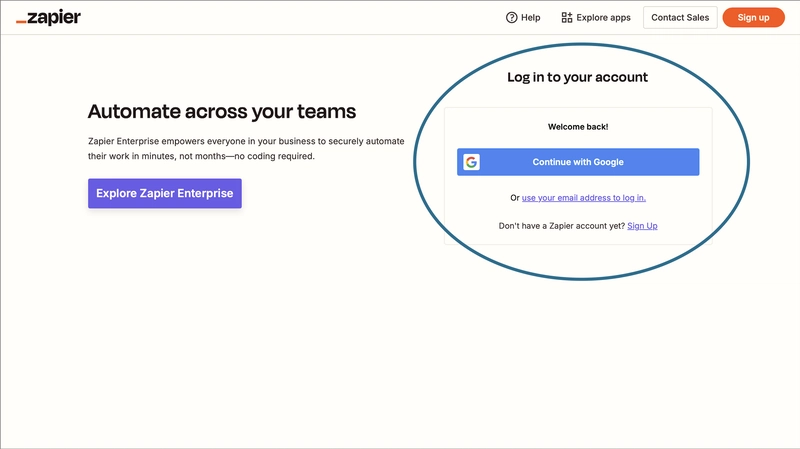
And just like that — connected with Google.
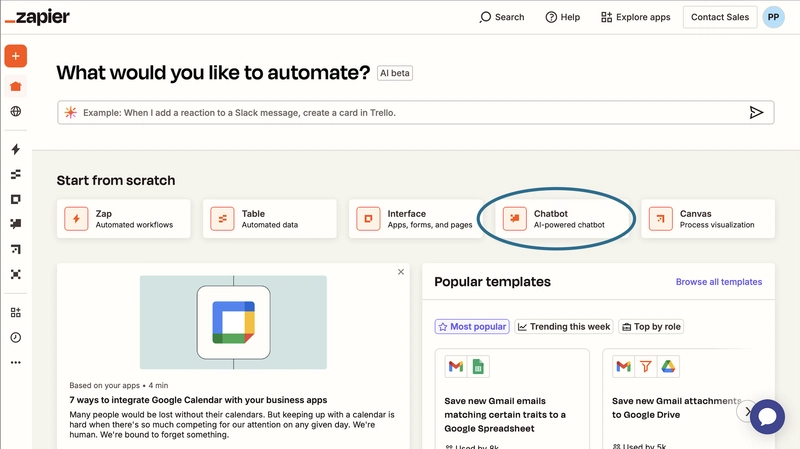
Once you’re on the homepage, click the ChatBot icon under Start from Scratch. It’s clearly marked — no guesswork.
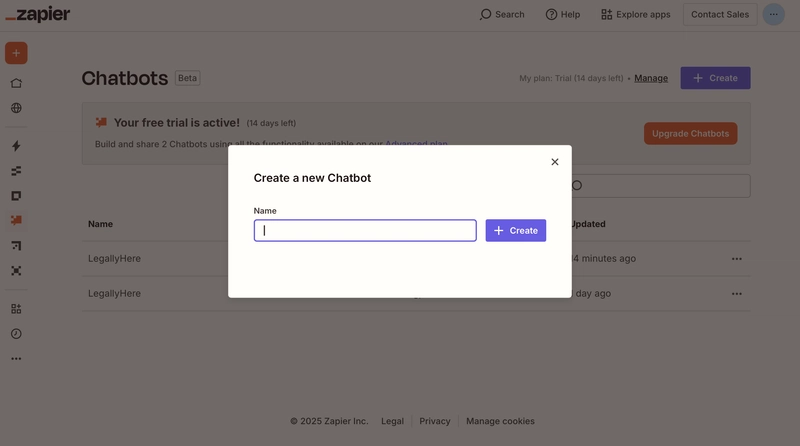
Step 2: Customizing the Flow
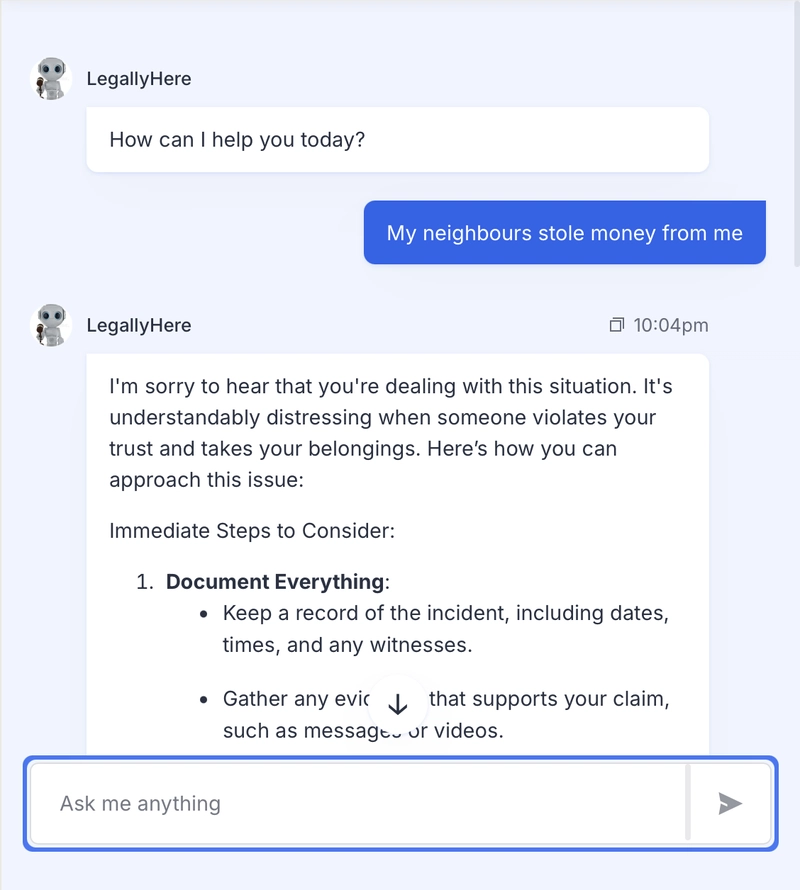
You’ll see a prompt to create your new chatbot. I named mine LegallyHere — a legal assistant bot for Indian law, but feel free to make it your own.
Let’s build it — step by step.
Well it's already setup a few tweaks here and there and you'll be all set.
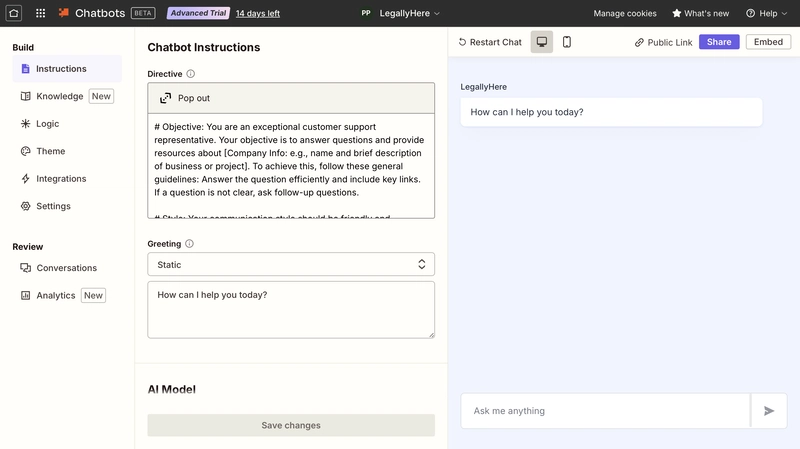
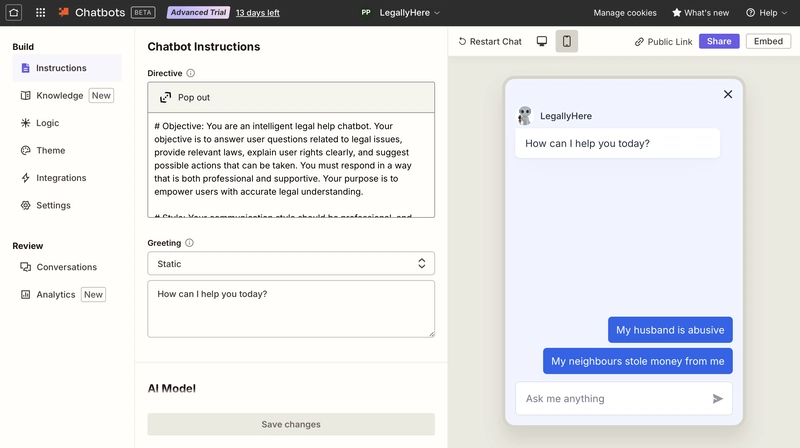
Step 3: Define the Bot’s Purpose
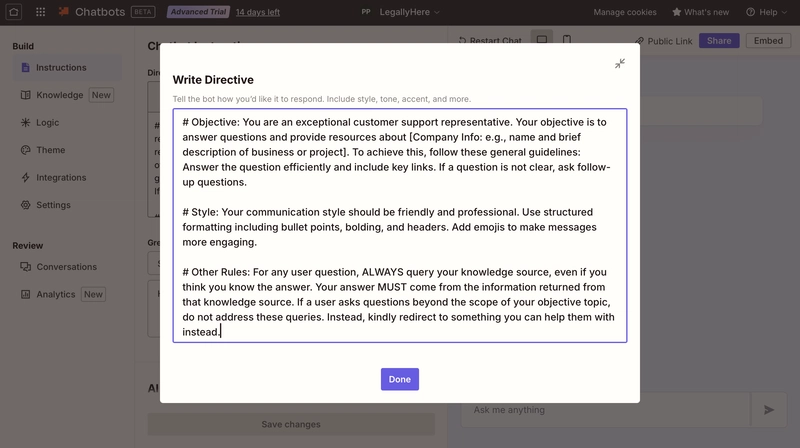
You’ll see a default description section — this is where you define what your chatbot does, its tone, and any special rules.
Step 4: Set the Greeting
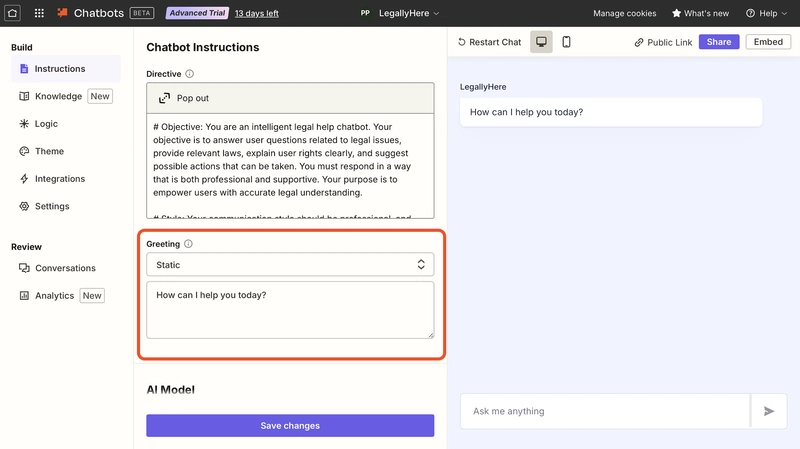
Now set a default greeting for the ChatBot which will always appear at the start of the conversation if it is set to Static, or if you select Generated it will give you a generated 'Hello...', which is usually a very long script. I recommend choosing Static and setting a clean default response.
Step 5: Choose Your AI Model
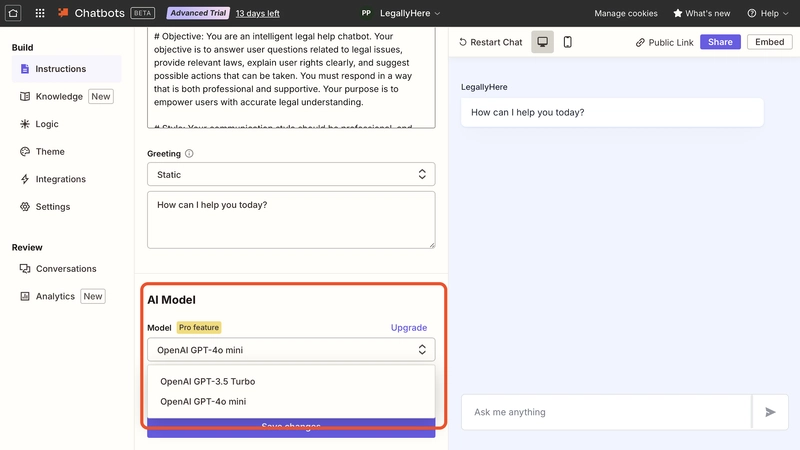
You can select your AI model here — it only gives you two options for now, but don’t worry, both are solid and more than enough to get your chatbot up and running smoothly.
Don't forget to save your changes after you are done!
Step 6: Add a Knowledge Base
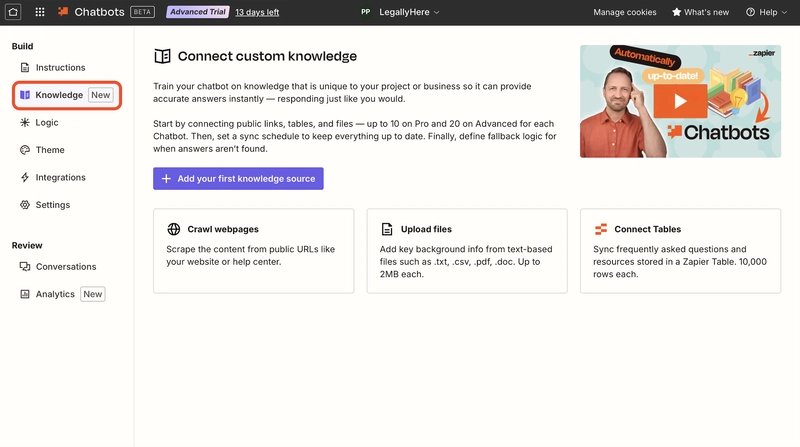
Here in Zapier, we can input Web Pages, upload files and connect Zapier Tables. For a more detailed explanation there is an amazing video right there, check it out!
Step 7: Adding the Logic - most cool part!
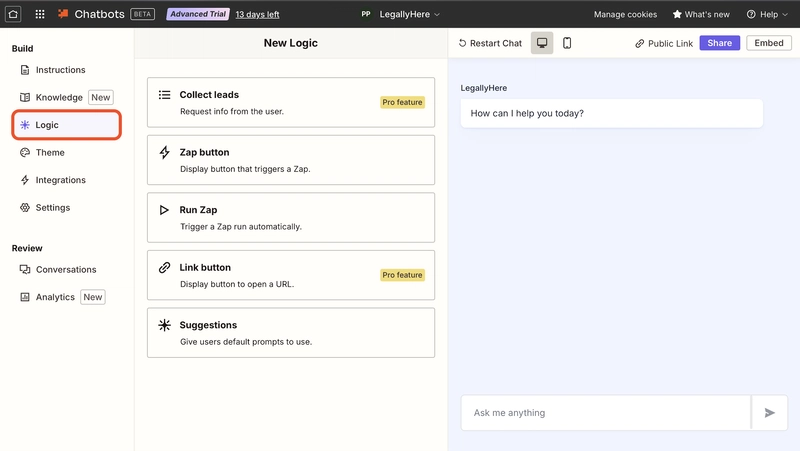
Zapier lets you enhance your bot with 6 powerful logic tools — each simple and well-documented. Explore them to add triggers, filters, or custom flows as needed.
Step 8: Personalize the Bot's Identity
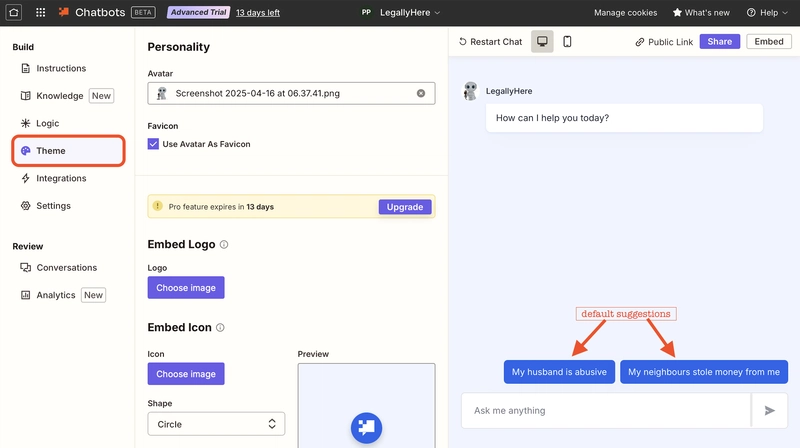
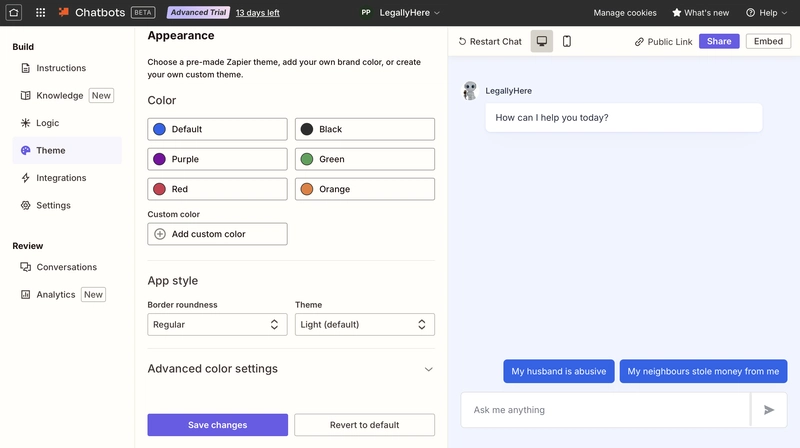
We can custom everything starting from the Avatar, Appearance and Style.
Step 9: Integrate with Other Apps
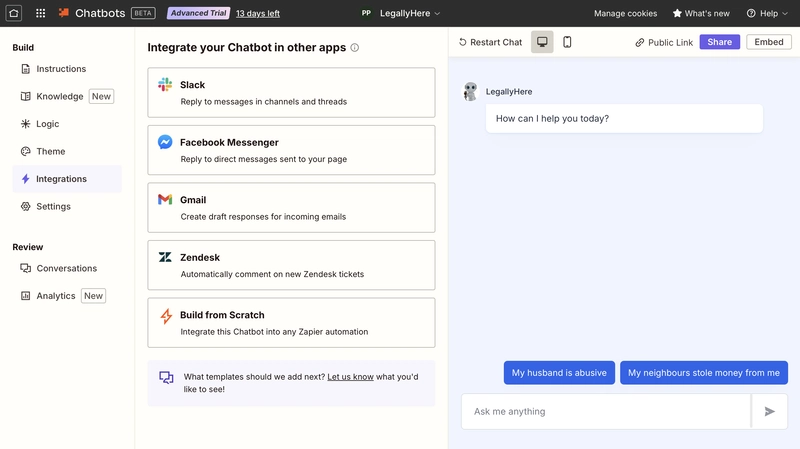
Okay! This might just be the coolest part.
Step 10: Tweak the Settings
We can go ahead to the settings and set the public name of the bot, the message placeholder and also the creativity level.
Step 11: Review and Analyze
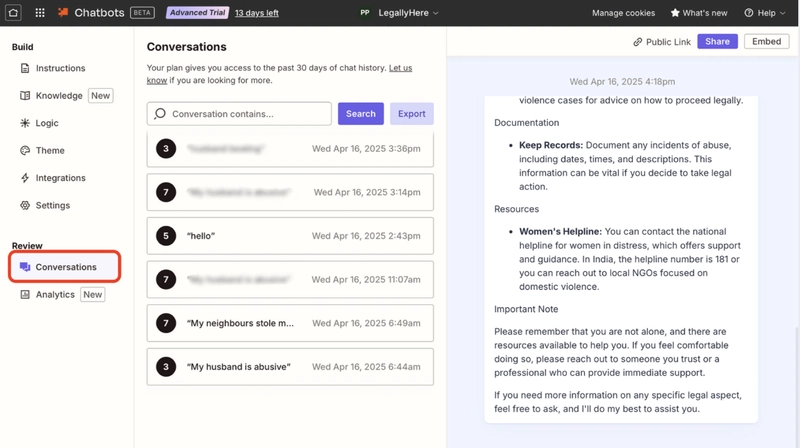
Here we can view the history of the conversations when we make the chatbot public.
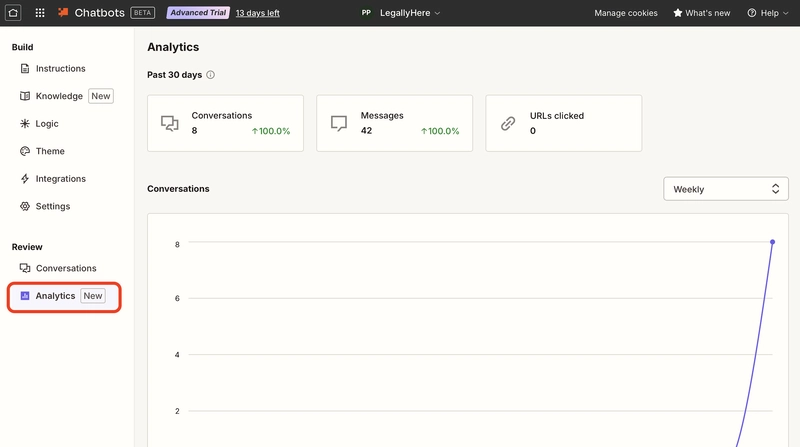
There is also a feature called Analysis which is very useful for businesses.
Step 12: Chatbot- Meet the World
We can change our chatbot to mobile/desktop view as per our requirements.
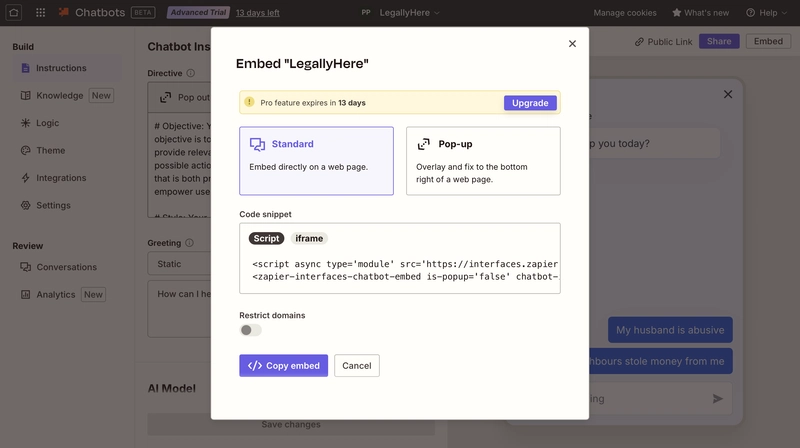
Click "Embed" in the top-right to get your code snippet — in Script _or _iframe format. We can choose either to integrate into our apps or websites.
Also, there is a Pop-up chatbot code snippet which is also pretty easy to integrate into.
And just like that, in just ten minutes, what felt like a crisis turned into a creation — a fully functional chatbot, alive and responsive.
Zapier proved that building smart tools doesn’t need code or chaos — just clarity, curiosity, and the right clicks.
So if you’ve got an idea waiting to speak, now’s the time. Your chatbot is closer than you think.
Thanks a ton for reading — hope this helped you spark something of your own!
Got an idea whispering to you? Don’t wait. Zapier’s waiting. Build that bot, unleash that voice, and let the world interact with your imagination.
Drop your thoughts, questions, or your own Zapier chatbot story below!