


![[The AI Show Episode 142]: ChatGPT’s New Image Generator, Studio Ghibli Craze and Backlash, Gemini 2.5, OpenAI Academy, 4o Updates, Vibe Marketing & xAI Acquires X](https://www.marketingaiinstitute.com/hubfs/ep%20142%20cover.png)


![From drop-out to software architect with Jason Lengstorf [Podcast #167]](https://cdn.hashnode.com/res/hashnode/image/upload/v1743796461357/f3d19cd7-e6f5-4d7c-8bfc-eb974bc8da68.png?#)


.png?#)


(1).jpg?width=1920&height=1920&fit=bounds&quality=80&format=jpg&auto=webp#)


_NicoElNino_Alamy.png?#)
.webp?#)
.webp?#)


![Apple to Source More iPhones From India to Offset China Tariff Costs [Report]](https://www.iclarified.com/images/news/96954/96954/96954-640.jpg)
![Blackmagic Design Unveils DaVinci Resolve 20 With Over 100 New Features and AI Tools [Video]](https://www.iclarified.com/images/news/96951/96951/96951-640.jpg)


How to Build an AI-Powered UI Component in Vue 3
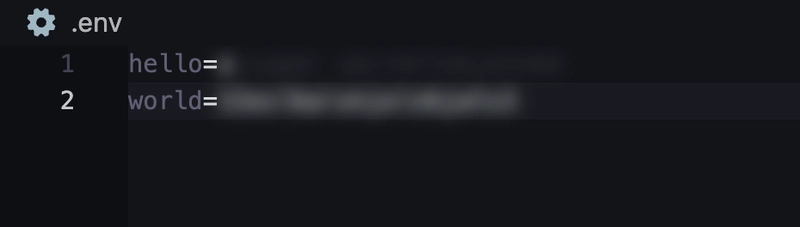
Introduction & Context The rise of AI APIs like OpenAI's GPT and Hugging Face Transformers has opened a new frontier for frontend developers. Today, you can enrich your Vue apps with AI-driven features—without being a machine learning expert. This tutorial walks you through building an AI-powered UI component in Vue 3. You'll learn how to connect to an AI API, handle user input, display responses, and create a polished, interactive user experience. Whether you're working on chatbots, intelligent writing assistants, or form enhancers, this post is for you. Goals and What You’ll Learn By the end of this article, you’ll learn how to: Integrate OpenAI’s API into a Vue 3 project Build a smart text component that suggests improved phrasing Handle async requests and loading states with good UX Apply responsive, accessible design to AI interfaces The Project: AI Writing Assistant We’ll build a smart textarea component. Users write a sentence, and the AI suggests a more professional or grammatically improved version. Stack Vue 3 with and Composition API Axios for API requests OpenAI API (you’ll need an API key) Tailwind CSS (optional for styling) Setup the Project Install Vue 3 via Vite: npm create vite@latest ai-text-suggester -- --template vue cd ai-text-suggester npm install npm install axios Add your OpenAI key to an .env file: VITE_OPENAI_KEY=your_api_key_here Build the AITextSuggester.vue Component {{ loading ? 'Generating...' : 'Improve Writing' }} Suggested: {{ suggestion }} import { ref } from 'vue' import axios from 'axios' const inputText = ref('') const suggestion = ref('') const loading = ref(false) const generateSuggestion = async () => { if (!inputText.value.trim()) return loading.value = true suggestion.value = '' try { const response = await axios.post( 'https://api.openai.com/v1/chat/completions', { model: 'gpt-3.5-turbo', messages: [ { role: 'system', content: 'You are a helpful writing assistant that improves clarity and grammar.' }, { role: 'user', content: `Improve this sentence: ${inputText.value}` } ] }, { headers: { Authorization: `Bearer ${import.meta.env.VITE_OPENAI_KEY}` } } ) suggestion.value = response.data.choices[0].message.content.trim() } catch (error) { console.error('Error generating suggestion:', error) suggestion.value = 'Something went wrong. Please try again.' } finally { loading.value = false } } Accessibility and UX Considerations Disabled button state ensures user can’t spam the API. Loading text gives feedback on current action. Clear separation of input and response aids comprehension.

Introduction & Context
The rise of AI APIs like OpenAI's GPT and Hugging Face Transformers has opened a new frontier for frontend developers. Today, you can enrich your Vue apps with AI-driven features—without being a machine learning expert.
This tutorial walks you through building an AI-powered UI component in Vue 3. You'll learn how to connect to an AI API, handle user input, display responses, and create a polished, interactive user experience.
Whether you're working on chatbots, intelligent writing assistants, or form enhancers, this post is for you.
Goals and What You’ll Learn
By the end of this article, you’ll learn how to:
- Integrate OpenAI’s API into a Vue 3 project
- Build a smart text component that suggests improved phrasing
- Handle async requests and loading states with good UX
- Apply responsive, accessible design to AI interfaces
The Project: AI Writing Assistant
We’ll build a smart textarea component. Users write a sentence, and the AI suggests a more professional or grammatically improved version.
Stack
- Vue 3 with
Accessibility and UX Considerations
- Disabled button state ensures user can’t spam the API.
- Loading text gives feedback on current action.
- Clear separation of input and response aids comprehension.