


![[The AI Show Episode 144]: ChatGPT’s New Memory, Shopify CEO’s Leaked “AI First” Memo, Google Cloud Next Releases, o3 and o4-mini Coming Soon & Llama 4’s Rocky Launch](https://www.marketingaiinstitute.com/hubfs/ep%20144%20cover.png)


.jpg?width=1920&height=1920&fit=bounds&quality=70&format=jpg&auto=webp#)


_Olekcii_Mach_Alamy.jpg?width=1280&auto=webp&quality=80&disable=upscale#)


![Apple Drops New Immersive Adventure Episode for Vision Pro: 'Hill Climb' [Video]](https://www.iclarified.com/images/news/97133/97133/97133-640.jpg)

![Most iPhones Sold in the U.S. Will Be Made in India by 2026 [Report]](https://www.iclarified.com/images/news/97130/97130/97130-640.jpg)
![Apple to Shift Robotics Unit From AI Division to Hardware Engineering [Report]](https://www.iclarified.com/images/news/97128/97128/97128-640.jpg)


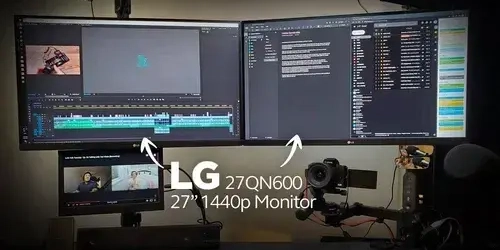
Fedora 39 Multi-Monitor set-up guide : Split, Stack, or Go HDMI-Only ft. QHD 27QN600
Setting up a seamless multi-monitor experience on Fedora 39 can be tricky — especially when you want the login screen (GDM) and user session to behave consistently with your display setup. I'm going to share 3 basic layouts that will help you get started if you're new to either Fedora or just got a new monitor & want to setup with Fedora 39. Once logged-in and having your laptop/system connected to let's say HDMI1 port of the monitor, you can run any of the below scripts to adjust the 1. HDMI-Only : Monitor will be entirely used and laptop screen will be non-functional. xrandr --output eDP-1 --off --output HDMI-1 --mode 2560x1440 --primary 2. Extended Display : Using a laptop screen and an external monitor side-by-side with the cursor able to move freely between them xrandr --output eDP-1 --auto --output HDMI-1 --mode 2560x1440 --right-of eDP-1 --primary 3. Laptop Top-Left, External Monitor Below xrandr --output eDP-1 --auto --pos 0x0 --output HDMI-1 --mode 2560x1440 --pos 0x900 --primary But here's the catch. We're only making the changes. We're neither saving them as scripts nor we've scheduled a thread to execute them. This means each time we login, we will be required to run these commands. We'll perform the setup in 2 parts. One for pre-login screen and another for post-login display. The reason for it is GDM (login screen) and your session run separate X servers with different permissions and display names. xrandr doesn't work on the GDM session from your user session, and vice versa. The GDM layout must be set via static XML (monitors.xml), while your session can use scripts or GUI tools. Even if you match both perfectly, the transition between X servers still causes a delay, hence we'll handle it with a brief sleep period. Let's jump into the steps right away now. STEP1: Create a new script nano ~/.config/fix-resolution.sh Paste this in the file #!/bin/bash # Wait a bit to make sure X session is fully loaded sleep 2 # Set up your preferred layout xrandr --output eDP-1 --off --output HDMI-1 --mode 2560x1440 --primary STEP 2: Make the script executable chmod +x ~/.config/fix-resolution.sh STEP 3: Create autostart .desktop file mkdir -p ~/.config/autostart nano ~/.config/autostart/fix-resolution.desktop Paste this in the file [Desktop Entry] Type=Application Exec=/home/shrey/.config/fix-resolution.sh Hidden=false NoDisplay=false X-GNOME-Autostart-enabled=true Name=Fix Display Resolution Comment=Applies correct xrandr layout STEP 4: Reboot Either use the CLI and paste below command, or reboot from the GUI. reboot Now you'll be able to see that our resolution changes are visible after logging-in, but still the login display has remained unchanged. Moving ahead with our second part (Pre-login display) we'll be making and saving the changes to the GDM. STEP 1: Copy saved Layout to GDM sudo mkdir -p /var/lib/gdm/.config sudo cp ~/.config/monitors.xml /var/lib/gdm/.config/ sudo chown gdm:gdm /var/lib/gdm/.config/monitors.xml STEP 2: Disable Wayland (MUST) , in-case it's enabled sudo nano /etc/gdm/custom.conf #Make sure this is uncommented WaylandEnable=false STEP 3: (Optional) Disable Extra scripts sudo nano /etc/gdm/Init/Default STEP 4: Reboot to test NOTE: Make sure you're using resolution values according to yor monitor specs. Here I've used 2560x1440 since it's the max resolution for my QHD monitor. Hope this helps & Happy Learning !!!
Setting up a seamless multi-monitor experience on Fedora 39 can be tricky — especially when you want the login screen (GDM) and user session to behave consistently with your display setup.
I'm going to share 3 basic layouts that will help you get started if you're new to either Fedora or just got a new monitor & want to setup with Fedora 39.
Once logged-in and having your laptop/system connected to let's say HDMI1 port of the monitor, you can run any of the below scripts to adjust the
1. HDMI-Only : Monitor will be entirely used and laptop screen will be non-functional.
xrandr --output eDP-1 --off --output HDMI-1 --mode 2560x1440 --primary
2. Extended Display : Using a laptop screen and an external monitor side-by-side with the cursor able to move freely between them
xrandr --output eDP-1 --auto --output HDMI-1 --mode 2560x1440 --right-of eDP-1 --primary
3. Laptop Top-Left, External Monitor Below
xrandr --output eDP-1 --auto --pos 0x0 --output HDMI-1 --mode 2560x1440 --pos 0x900 --primary
But here's the catch. We're only making the changes. We're neither saving them as scripts nor we've scheduled a thread to execute them. This means each time we login, we will be required to run these commands.
We'll perform the setup in 2 parts. One for pre-login screen and another for post-login display.
The reason for it is GDM (login screen) and your session run separate X servers with different permissions and display names.
xrandr doesn't work on the GDM session from your user session, and vice versa.
The GDM layout must be set via static XML (monitors.xml), while your session can use scripts or GUI tools.
Even if you match both perfectly, the transition between X servers still causes a delay, hence we'll handle it with a brief sleep period.
Let's jump into the steps right away now.
STEP1: Create a new script
nano ~/.config/fix-resolution.sh
Paste this in the file
#!/bin/bash

# Wait a bit to make sure X session is fully loaded
sleep 2

# Set up your preferred layout
xrandr --output eDP-1 --off --output HDMI-1 --mode 2560x1440 --primary
STEP 2: Make the script executable
chmod +x ~/.config/fix-resolution.sh
STEP 3: Create autostart .desktop file
mkdir -p ~/.config/autostart
nano ~/.config/autostart/fix-resolution.desktop
Paste this in the file
[Desktop Entry]
Type=Application
Exec=/home/shrey/.config/fix-resolution.sh
Hidden=false
NoDisplay=false
X-GNOME-Autostart-enabled=true
Name=Fix Display Resolution
Comment=Applies correct xrandr layout
STEP 4: Reboot
Either use the CLI and paste below command, or reboot from the GUI.
reboot
Now you'll be able to see that our resolution changes are visible after logging-in, but still the login display has remained unchanged.
Moving ahead with our second part (Pre-login display) we'll be making and saving the changes to the GDM.
STEP 1: Copy saved Layout to GDM
sudo mkdir -p /var/lib/gdm/.config
sudo cp ~/.config/monitors.xml /var/lib/gdm/.config/
sudo chown gdm:gdm /var/lib/gdm/.config/monitors.xml
STEP 2: Disable Wayland (MUST) , in-case it's enabled
sudo nano /etc/gdm/custom.conf

#Make sure this is uncommented
WaylandEnable=false
STEP 3: (Optional) Disable Extra scripts
sudo nano /etc/gdm/Init/Default
STEP 4: Reboot to test
NOTE: Make sure you're using resolution values according to yor monitor specs. Here I've used 2560x1440 since it's the max resolution for my QHD monitor.
Hope this helps & Happy Learning !!!