Building a Windows VM on Azure and installing Windows Server (IIS) on it.
Step-by-Step Guide for Creating a Windows VM on Azure and Installing Windows Server on it Step 1: Create a new virtual machine (VM). Go to the search bar and type Virtual Machine. Click the Create button to start the virtual machine creation process. Choose Create a virtual machine hosted by Azure. Select the appropriate subscription and create a resource group by clicking the Create resource group button. Give both the resource group and the VM a name. Step 2: Configure the Virtual machine (VM) Provide other information about your virtual machine, such as the operating system (Windows Server Datacenter-x64 G2), size, and other configuration settings. Leave other options as default. Create an Administrator Account. Use Azureuser for the username and password123 for the password. Select Inbound Port Rules. Select RDP for a Windows VM. This allows IP addresses to connect to the VM. Also select HTTP, which would help connect your virtual machine to the web. Click Next until you reach the Boot Diagnostics in the Monitoring tab, then click on Disable. Click Next to the tags tab and then give the VM a tag name, then click Review + Create. Click on the Create button. If the validation passes, the deployment will proceed. If not, note any recommendations, fix them, and try again. Deployment might take 3-5 minutes. Step 3: Access the Windows Virtual machine Once the virtual machine is deployed, click on the Connect button in the Overview of the virtual machine blade in the Azure portal. Click Native RDP, select, and wait for the configured sign to be displayed on the right-hand side. Download the RDP file. Open the RDP file from your local computer and click on Connect. Enter the Admin Details created during the VM setup. Follow the prompt and click Continue. Use the username and password created for the admin section. Once the connection is successful, start using your virtual machine! Step 4: Install Additional Windows Server Roles (IIS) Click on the Start menu. Type PowerShell and open Windows PowerShell as an administrator (right-click and select Run as administrator). Run the following command to install the IIS role and management tools: Install-WindowsFeature -name Web-Server -IncludeManagementTools If you need specific role services, you can specify them using their feature names. You can verify that IIS has been installed by opening a web browser and navigating to http://localhost. You should see the default IIS welcome page. Or just paste the IP address of the VM in a browser and verify that you installed the webserver. Following these guidelines will have you installed Windows Server and effectively built a Windows Virtual Machine on Azure. Back to top
Step-by-Step Guide for Creating a Windows VM on Azure and Installing Windows Server on it
Step 1: Create a new virtual machine (VM).
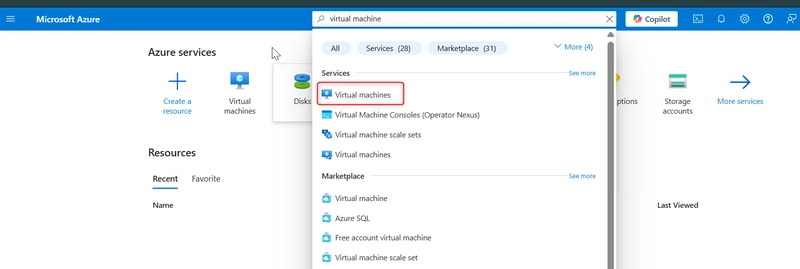
- Go to the search bar and type Virtual Machine.
- Click the Create button to start the virtual machine creation process. Choose Create a virtual machine hosted by Azure.
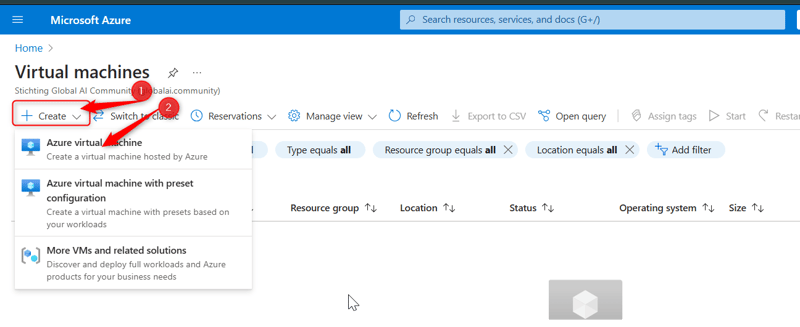
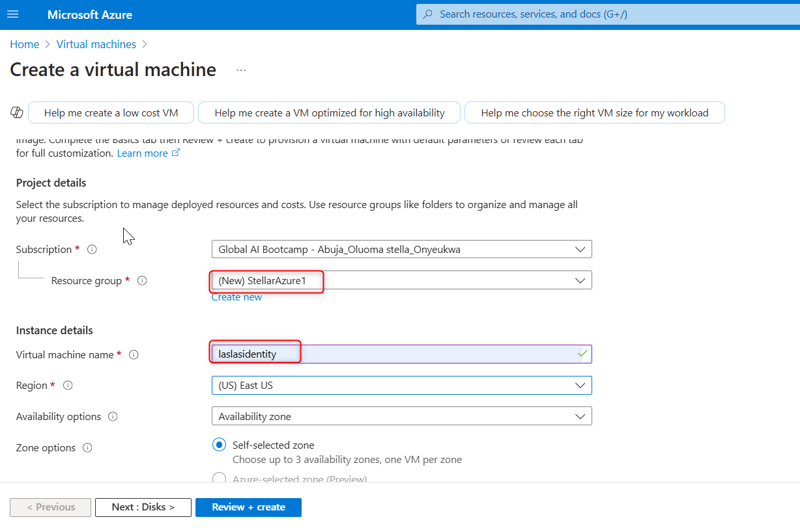
Select the appropriate subscription and create a resource group by clicking the Create resource group button. Give both the resource group and the VM a name.
Step 2: Configure the Virtual machine (VM)
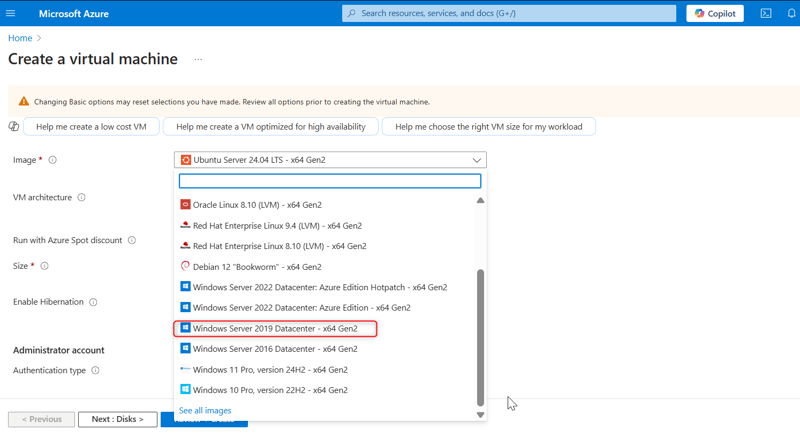
- Provide other information about your virtual machine, such as the operating system (Windows Server Datacenter-x64 G2), size, and other configuration settings. Leave other options as default.
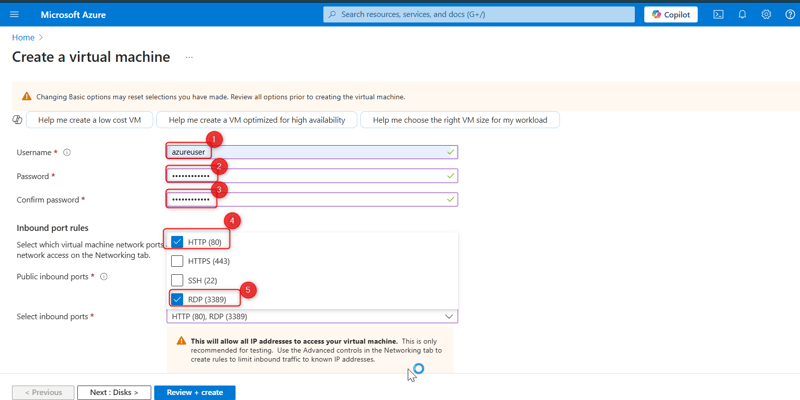
Create an Administrator Account. Use
Azureuserfor the username andpassword123for the password.Select Inbound Port Rules. Select RDP for a Windows VM. This allows IP addresses to connect to the VM. Also select HTTP, which would help connect your virtual machine to the web.
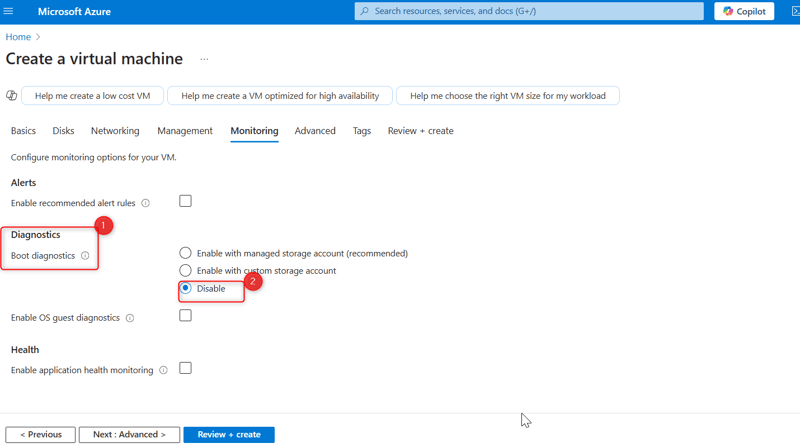
- Click Next until you reach the Boot Diagnostics in the Monitoring tab, then click on Disable.
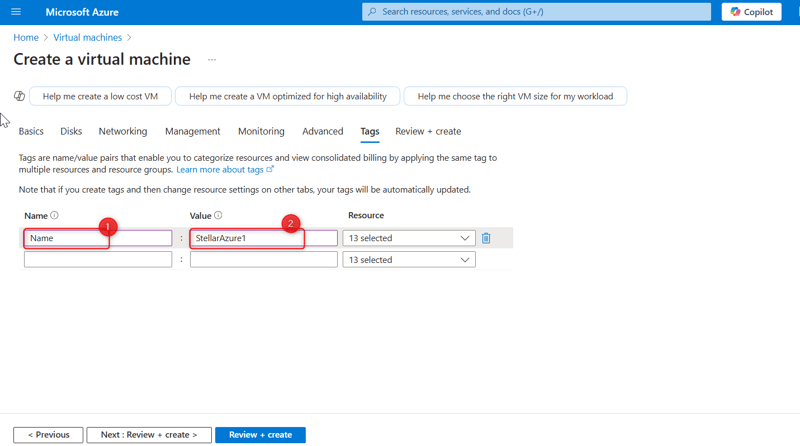
- Click Next to the tags tab and then give the VM a tag name, then click Review + Create.
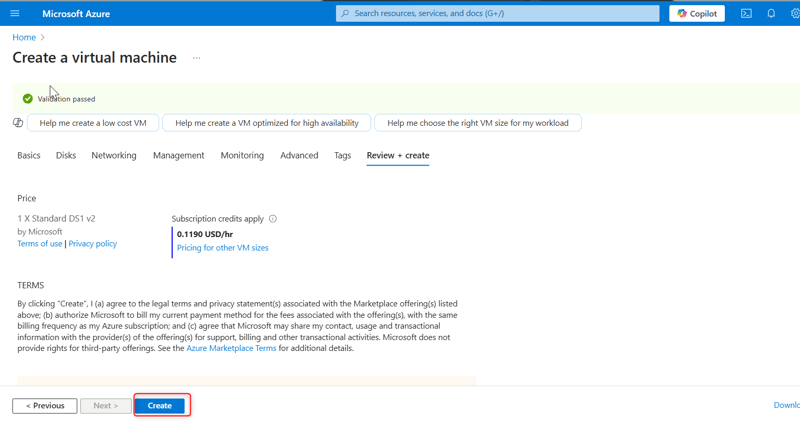
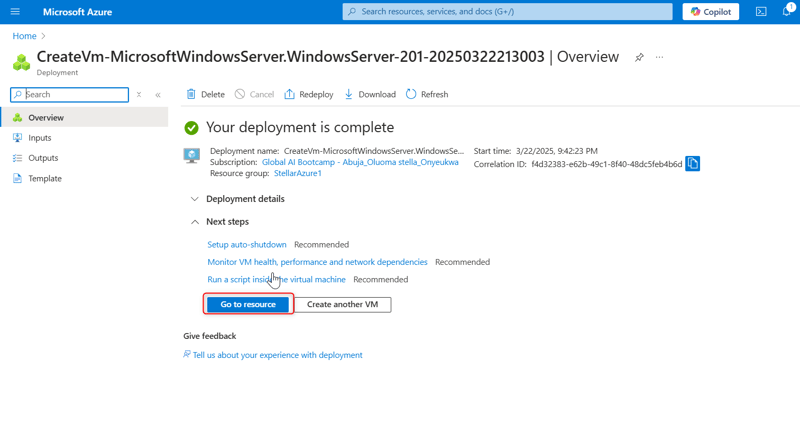
- Click on the Create button. If the validation passes, the deployment will proceed. If not, note any recommendations, fix them, and try again. Deployment might take 3-5 minutes.
Step 3: Access the Windows Virtual machine
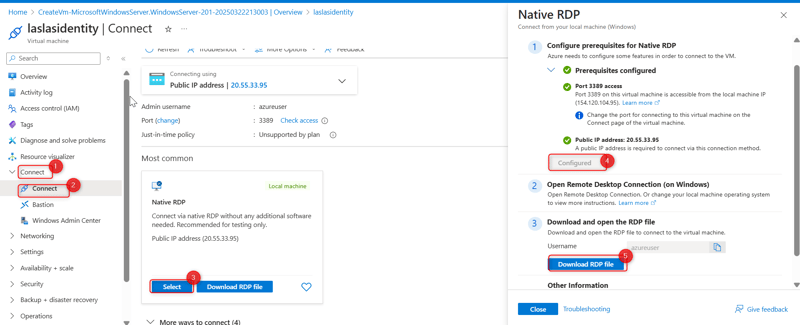
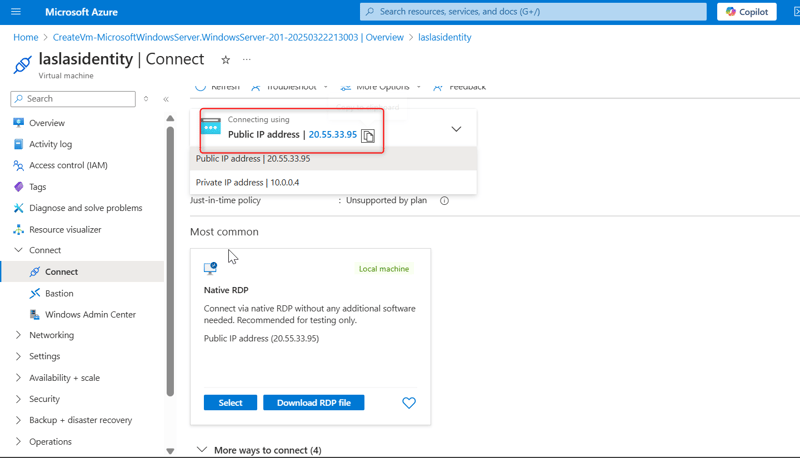
Once the virtual machine is deployed, click on the Connect button in the Overview of the virtual machine blade in the Azure portal.
Click Native RDP, select, and wait for the configured sign to be displayed on the right-hand side. Download the RDP file.
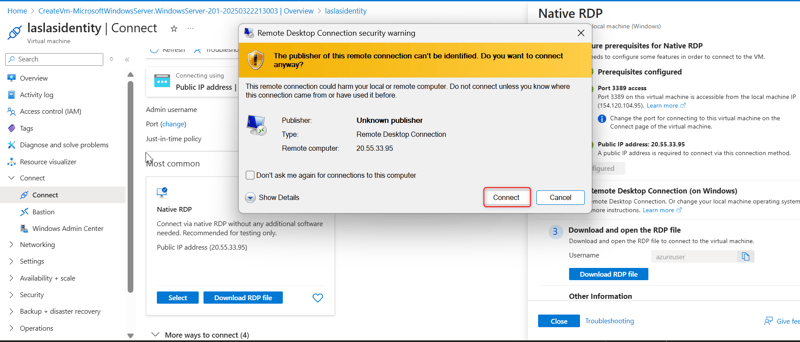
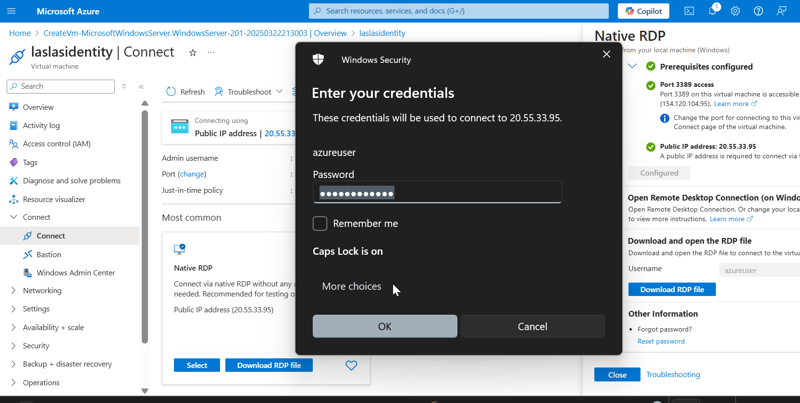
- Open the RDP file from your local computer and click on Connect. Enter the Admin Details created during the VM setup.
- Follow the prompt and click Continue. Use the username and password created for the admin section.
Once the connection is successful, start using your virtual machine!
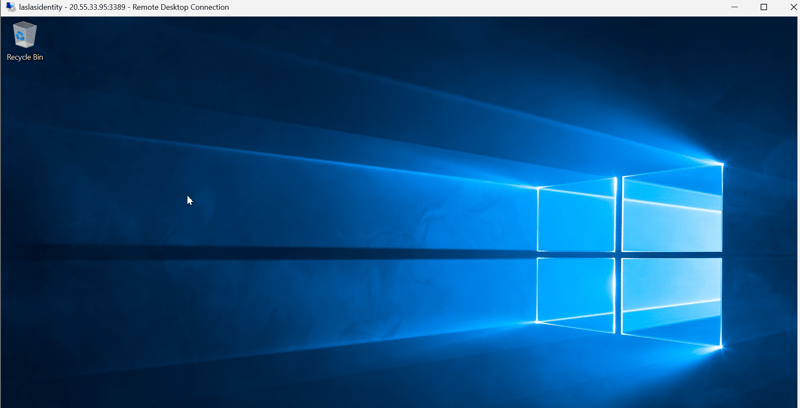
Step 4: Install Additional Windows Server Roles (IIS)Click on the Start menu.
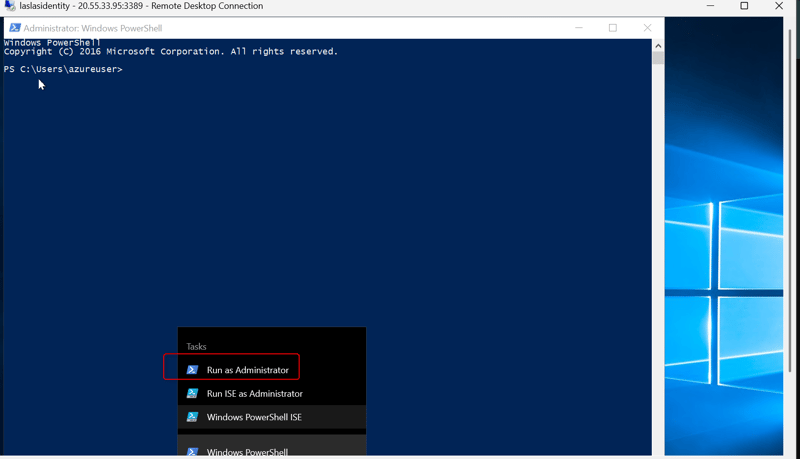
Type PowerShell and open Windows PowerShell as an administrator (right-click and select Run as administrator).
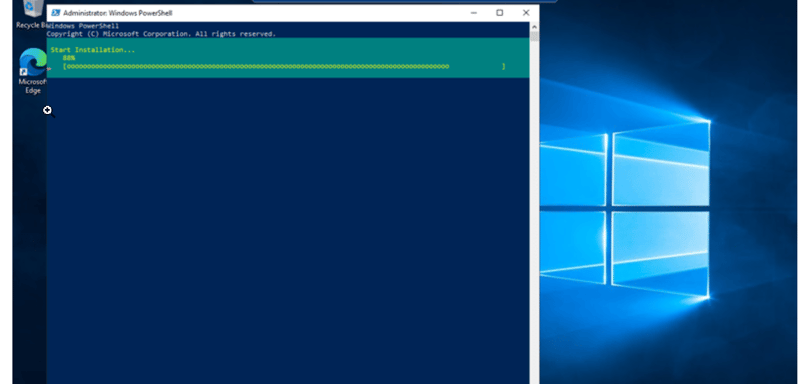
- Run the following command to install the IIS role and management tools:
Install-WindowsFeature -name Web-Server -IncludeManagementTools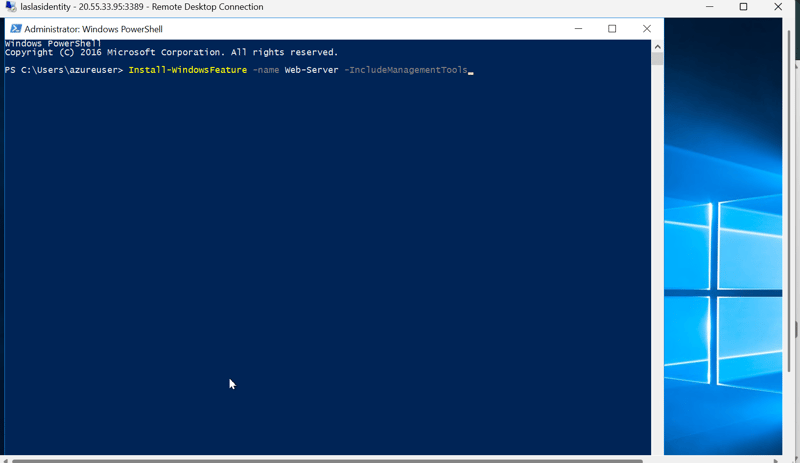
If you need specific role services, you can specify them using their feature names.
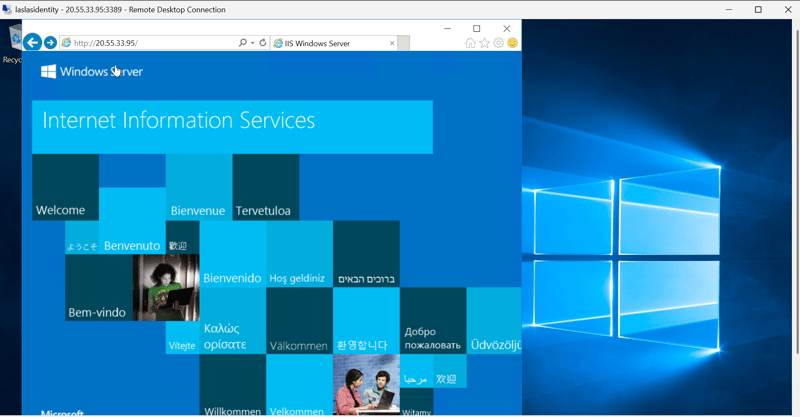
You can verify that IIS has been installed by opening a web browser and navigating to http://localhost. You should see the default IIS welcome page.
Or just paste the IP address of the VM in a browser and verify that you installed the webserver.
- Following these guidelines will have you installed Windows Server and effectively built a Windows Virtual Machine on Azure.


![[The AI Show Episode 142]: ChatGPT’s New Image Generator, Studio Ghibli Craze and Backlash, Gemini 2.5, OpenAI Academy, 4o Updates, Vibe Marketing & xAI Acquires X](https://www.marketingaiinstitute.com/hubfs/ep%20142%20cover.png)


![[FREE EBOOKS] The Kubernetes Bible, The Ultimate Linux Shell Scripting Guide & Four More Best Selling Titles](https://www.javacodegeeks.com/wp-content/uploads/2012/12/jcg-logo.jpg)


![From drop-out to software architect with Jason Lengstorf [Podcast #167]](https://cdn.hashnode.com/res/hashnode/image/upload/v1743796461357/f3d19cd7-e6f5-4d7c-8bfc-eb974bc8da68.png?#)


.png?#)


.jpg?#)


_Christophe_Coat_Alamy.jpg?#)




![Rapidus in Talks With Apple as It Accelerates Toward 2nm Chip Production [Report]](https://www.iclarified.com/images/news/96937/96937/96937-640.jpg)


