


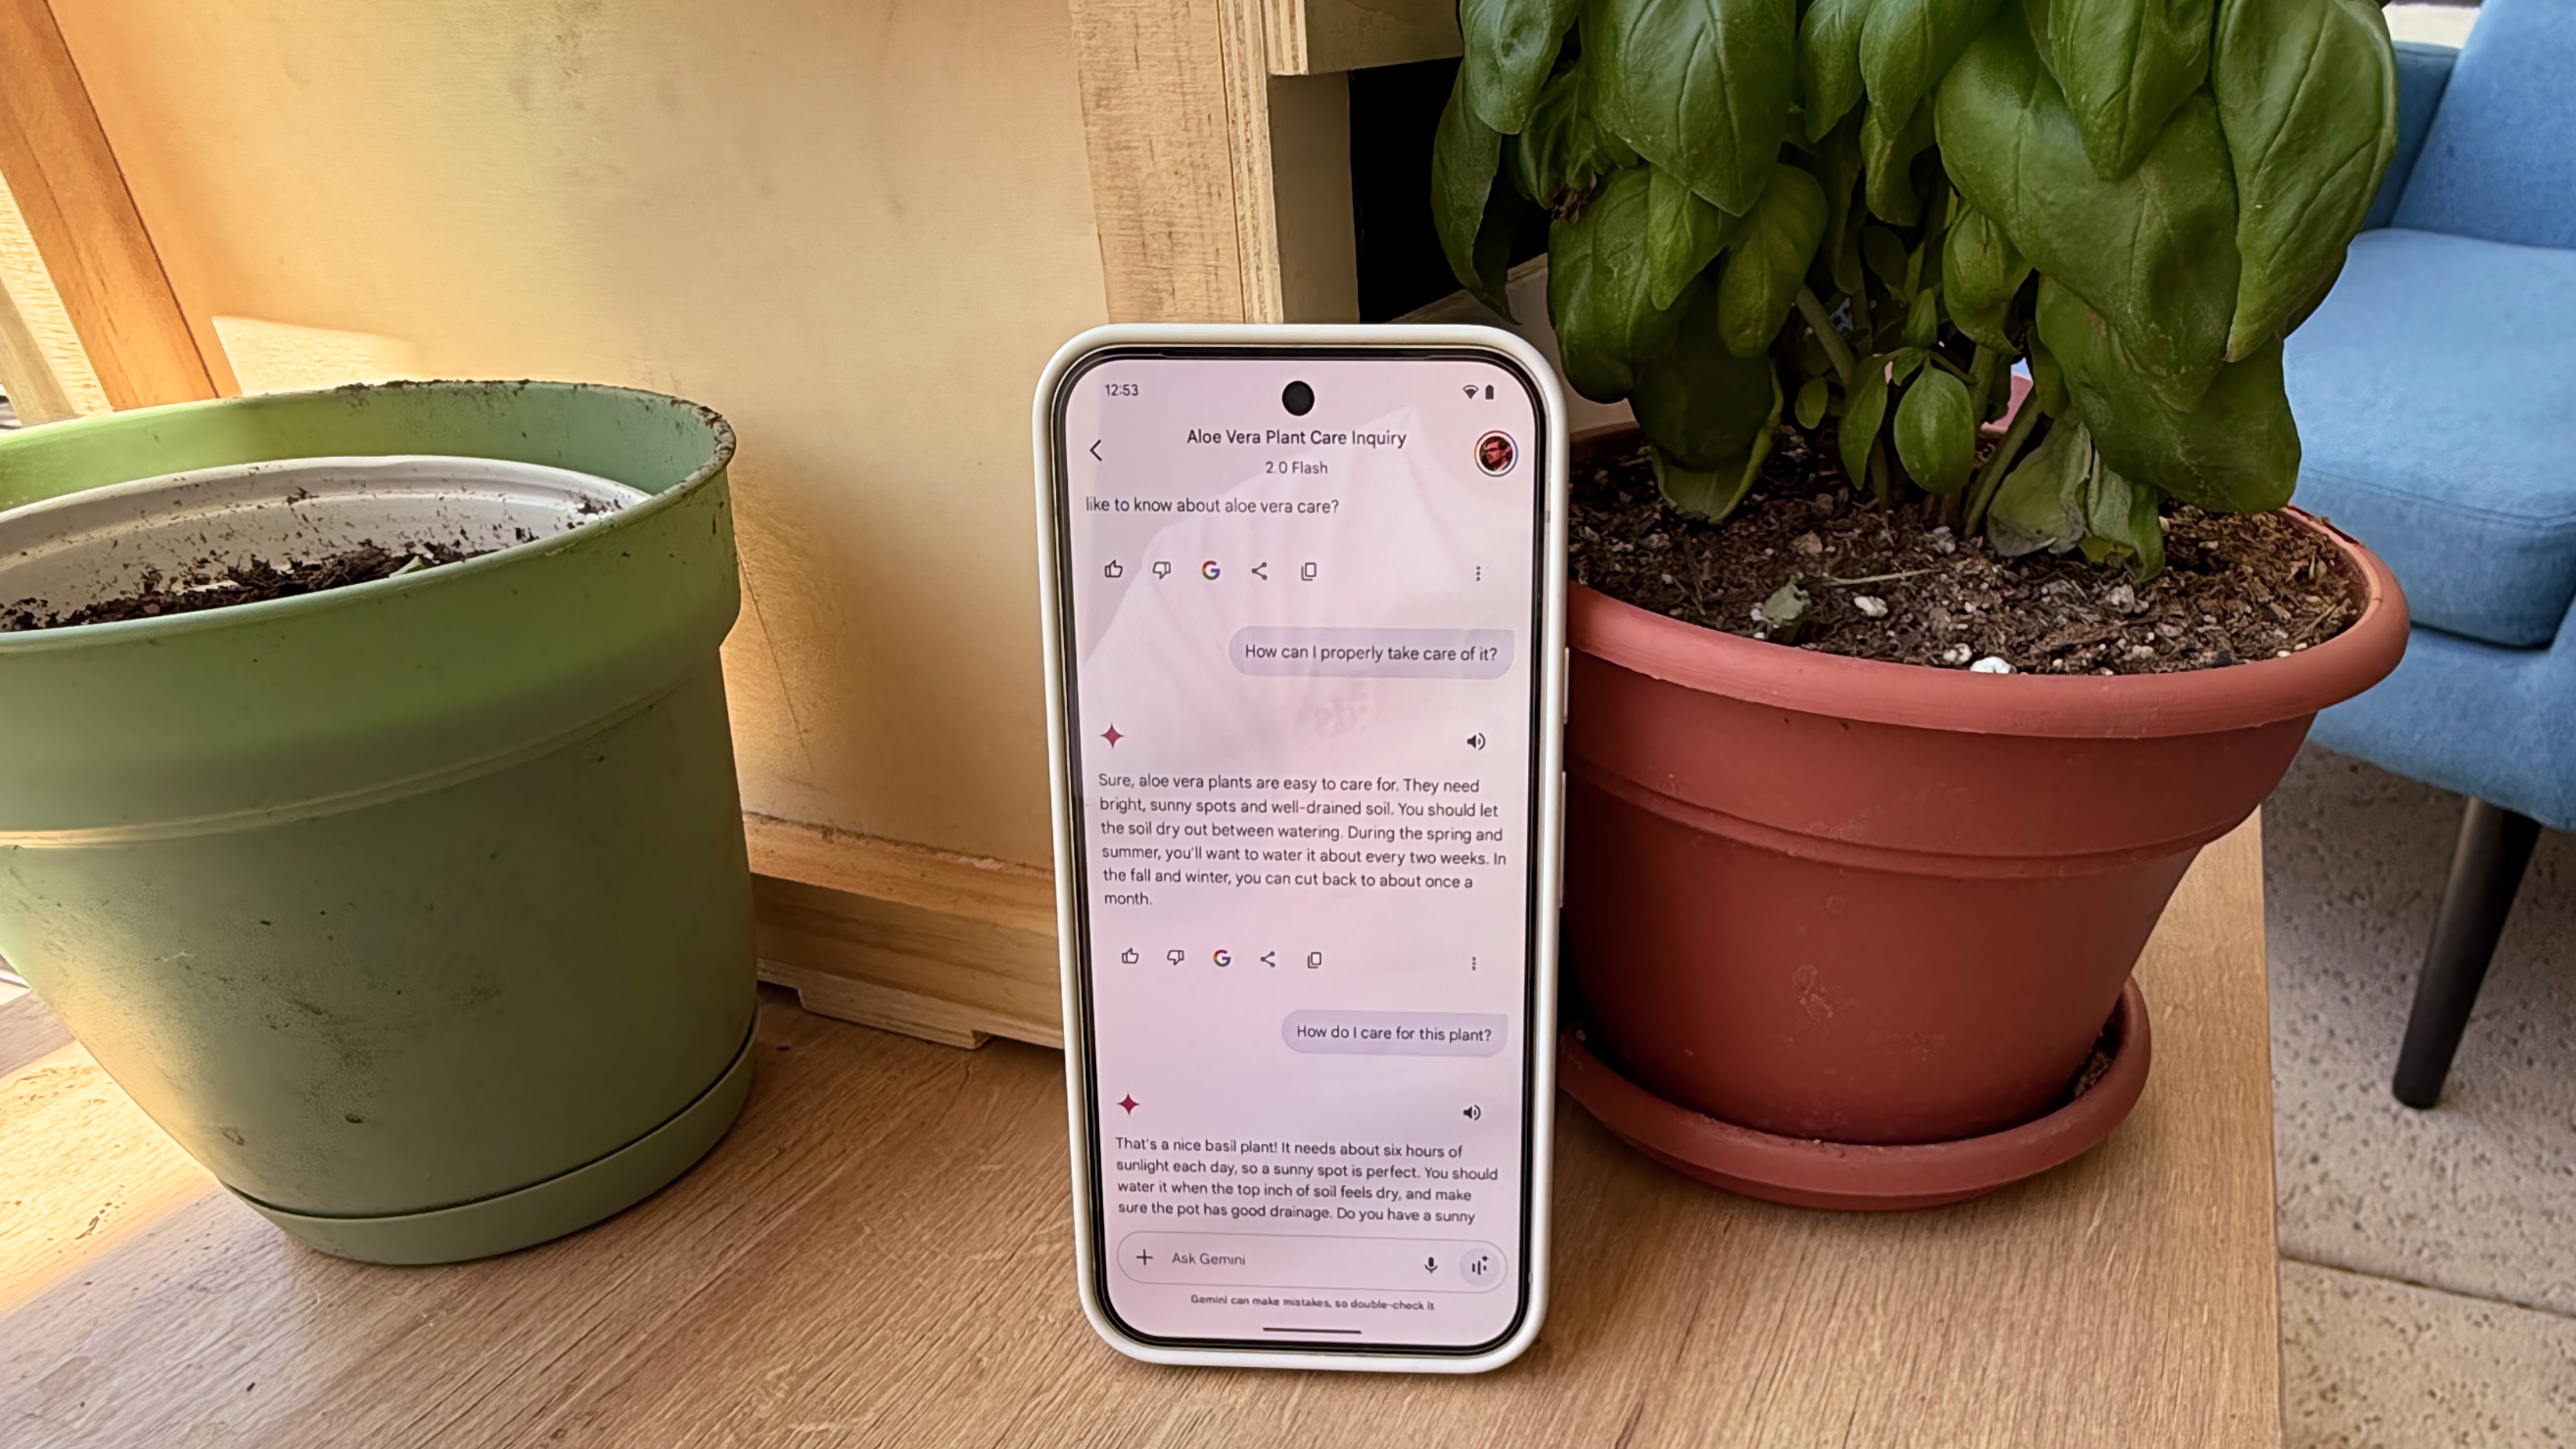
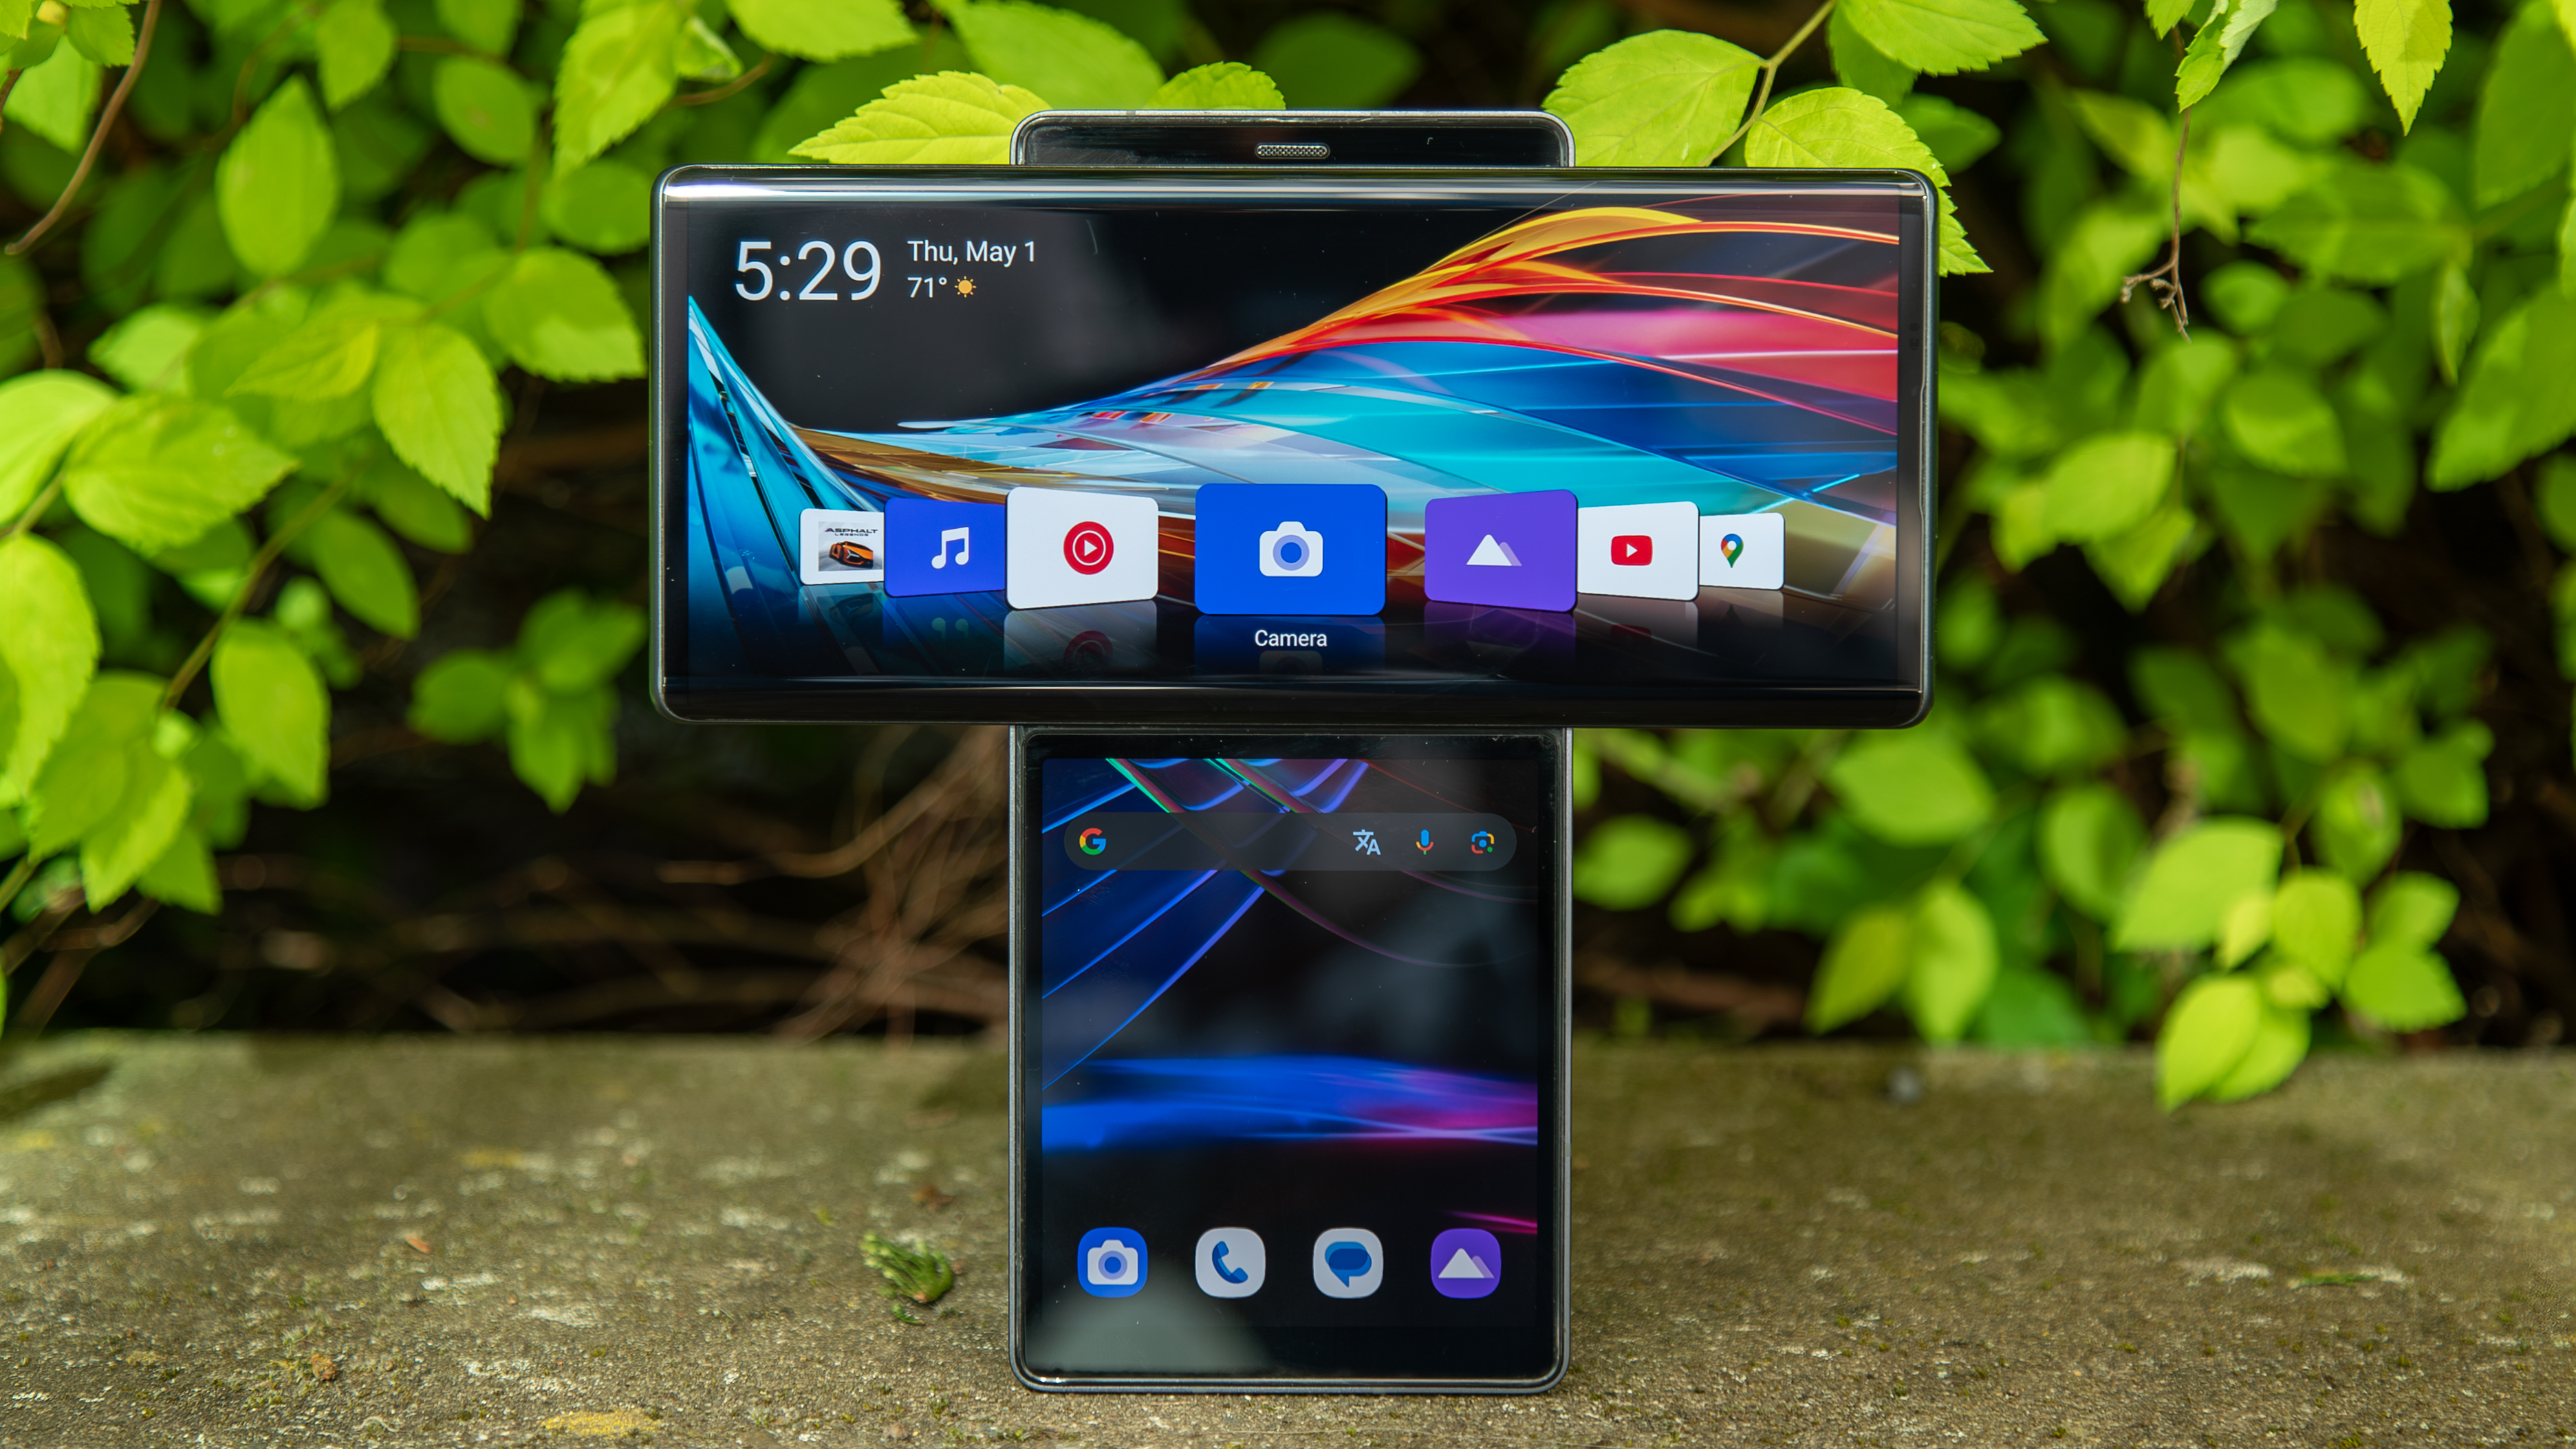
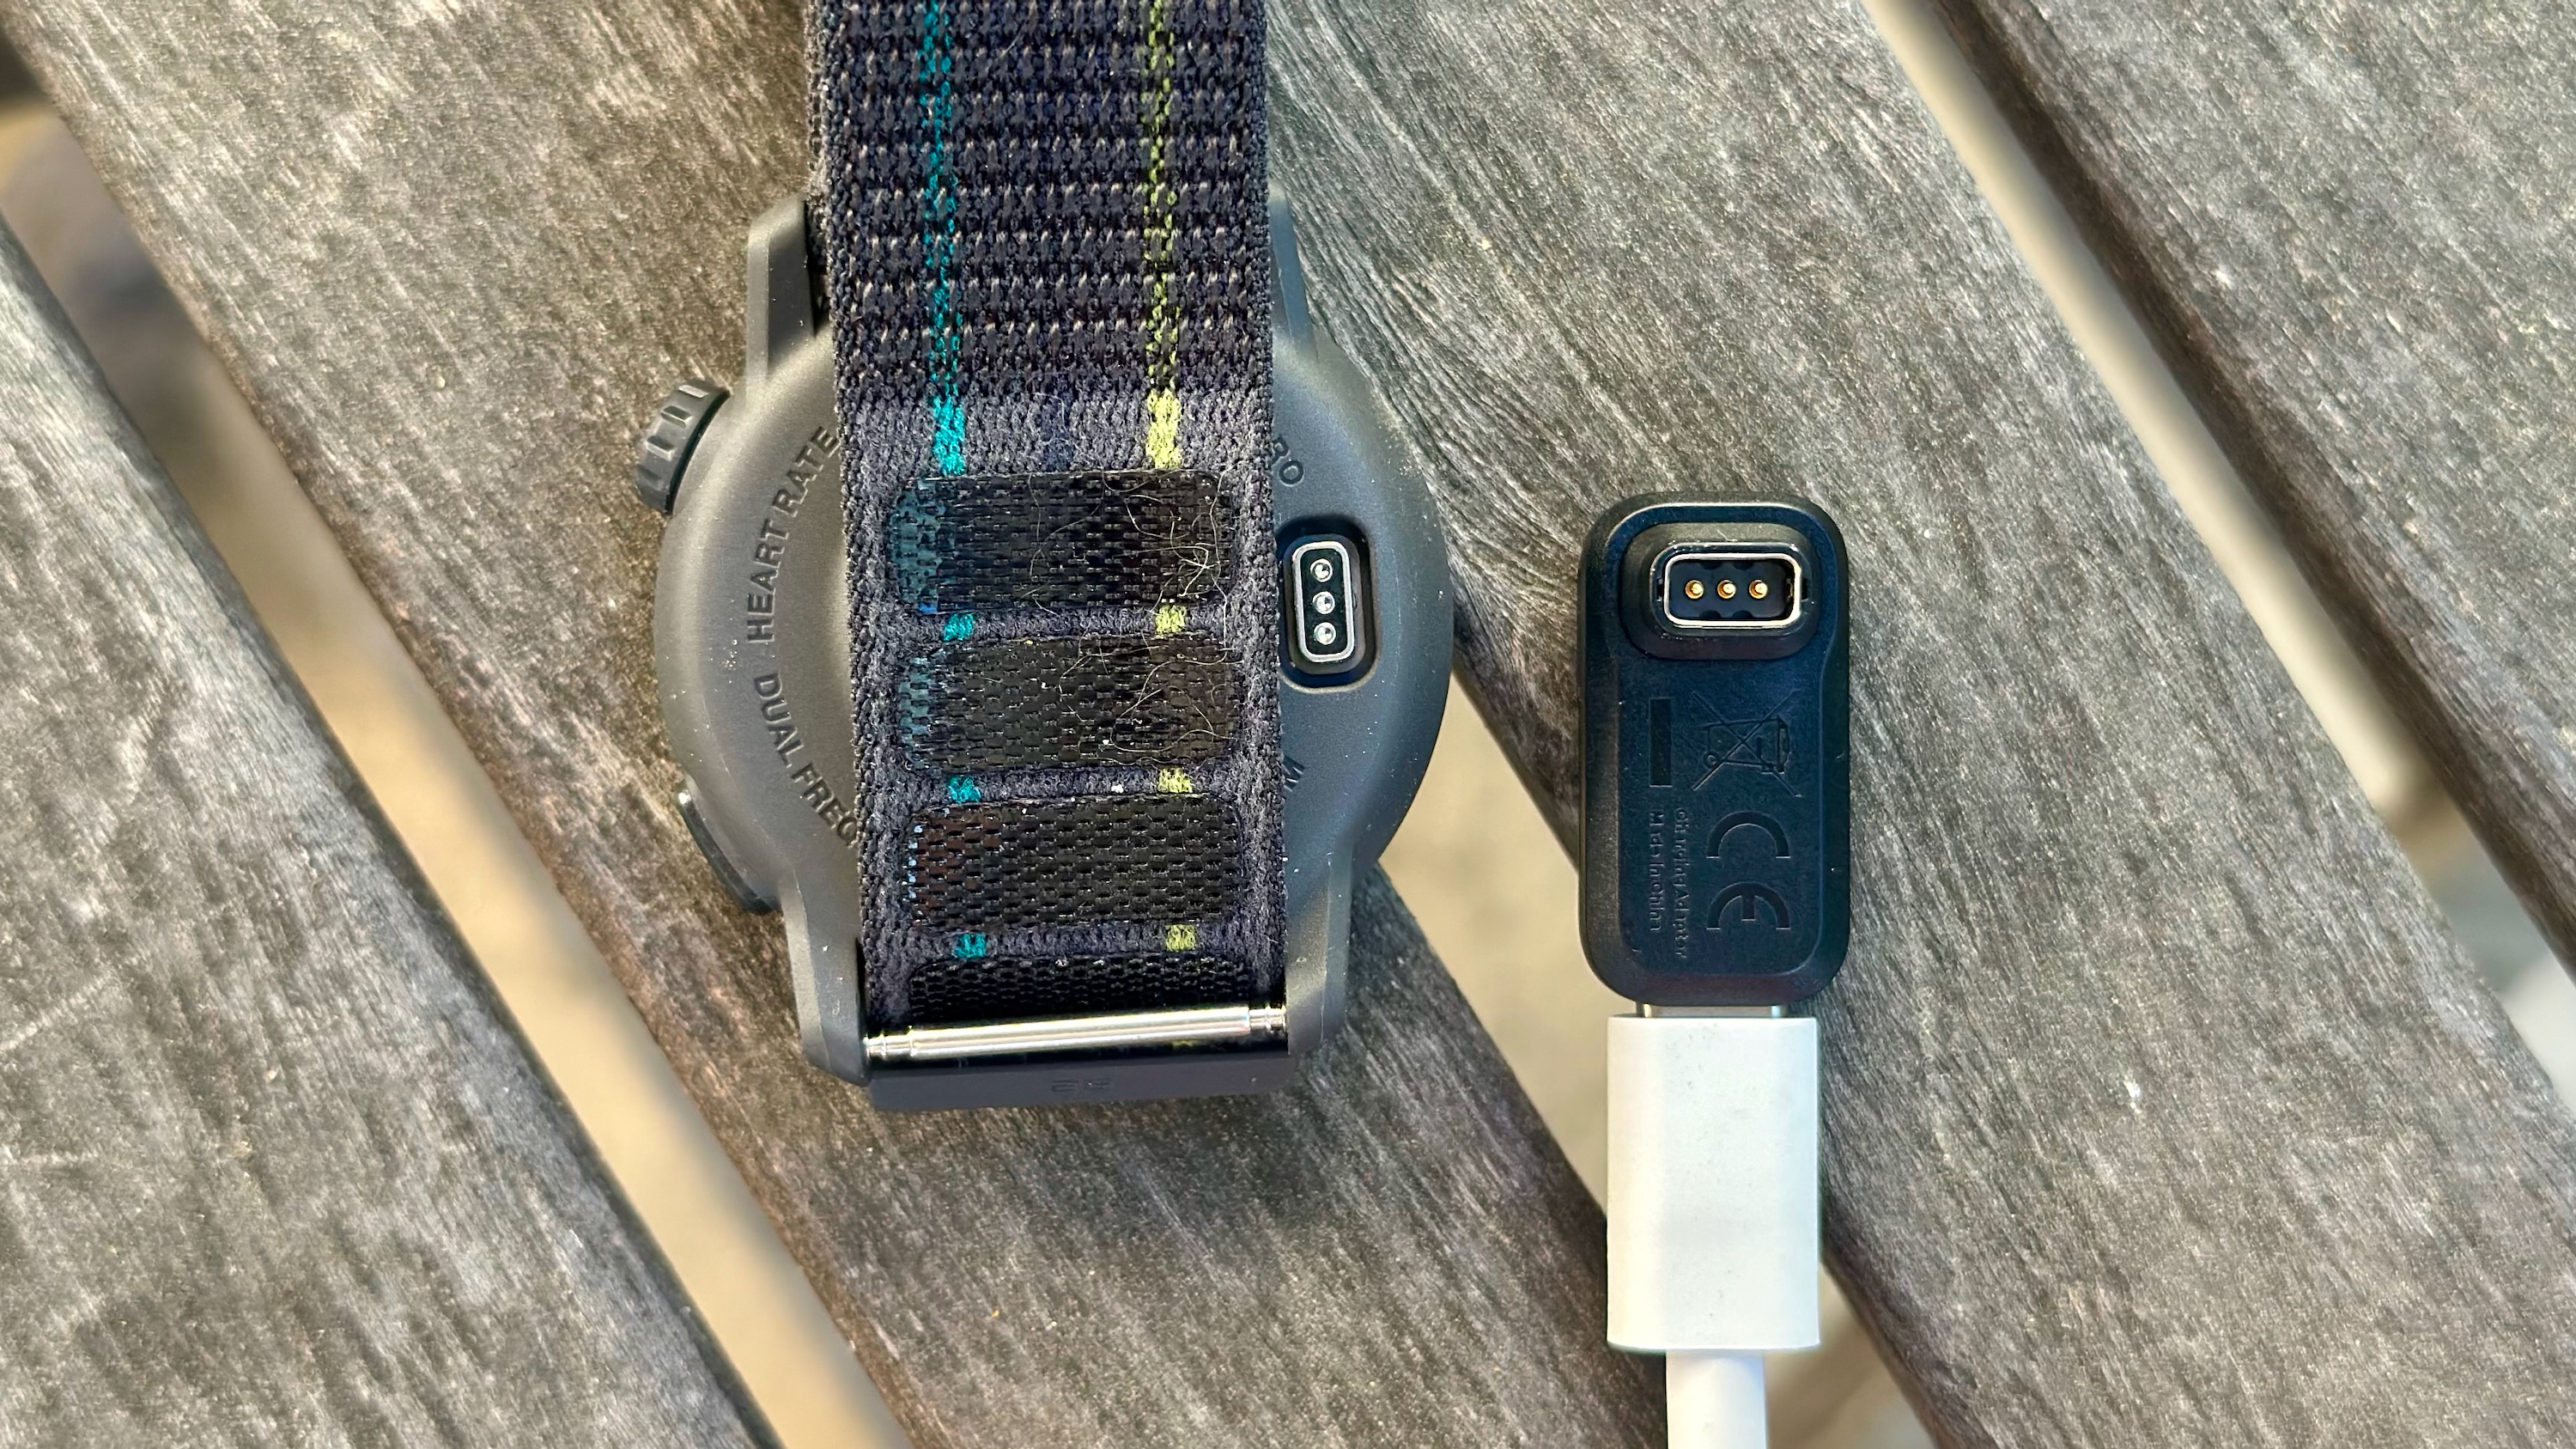
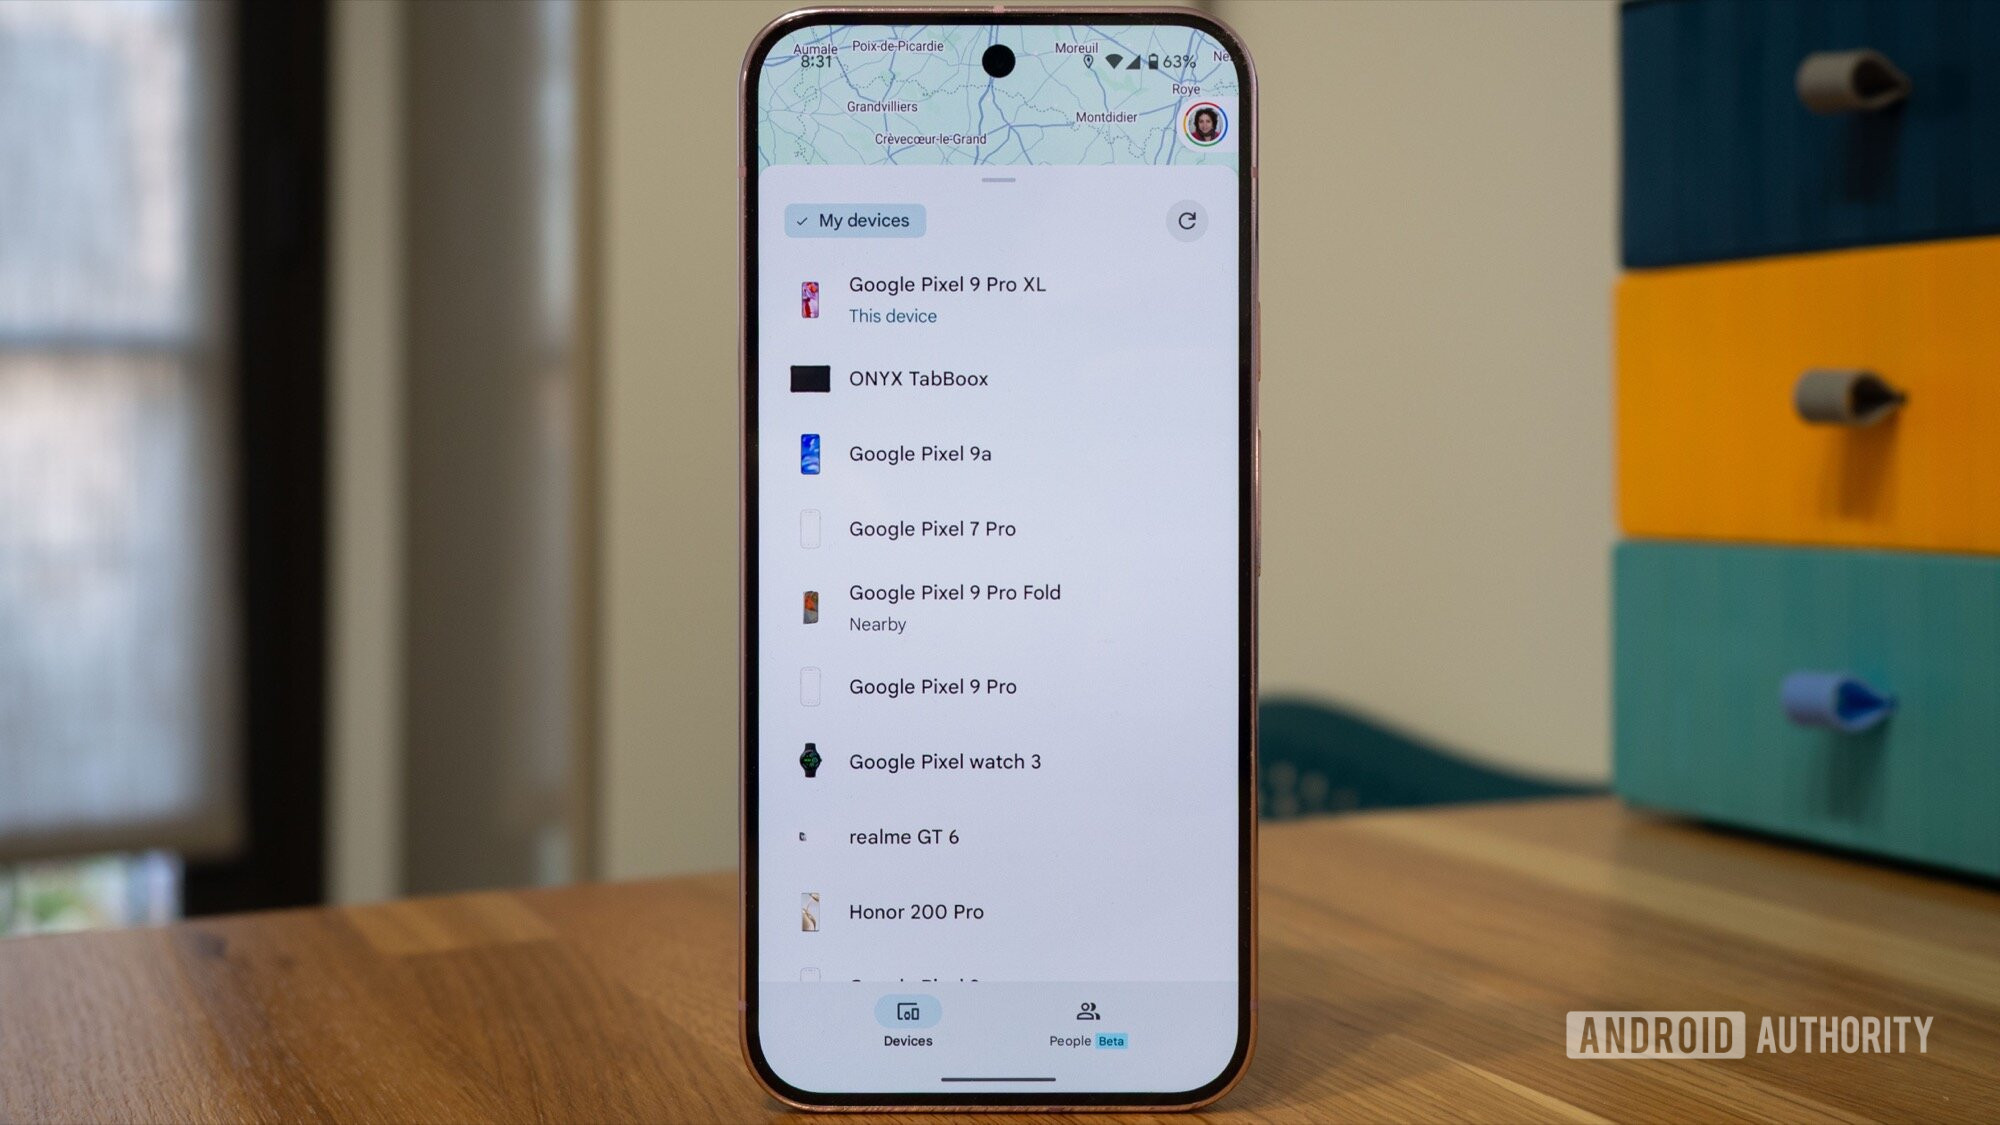
![[The AI Show Episode 145]: OpenAI Releases o3 and o4-mini, AI Is Causing “Quiet Layoffs,” Executive Order on Youth AI Education & GPT-4o’s Controversial Update](https://www.marketingaiinstitute.com/hubfs/ep%20145%20cover.png)


![From Art School Drop-out to Microsoft Engineer with Shashi Lo [Podcast #170]](https://cdn.hashnode.com/res/hashnode/image/upload/v1746203291209/439bf16b-c820-4fe8-b69e-94d80533b2df.png?#)


(1).jpg?#)


![[Updated] Samsung’s 65-inch 4K Smart TV Just Crashed to $299 — That’s Cheaper Than an iPad](https://www.androidheadlines.com/wp-content/uploads/2025/05/samsung-du7200.jpg)


_Inge_Johnsson-Alamy.jpg?width=1280&auto=webp&quality=80&disable=upscale#)


![Apple to Split iPhone Launches Across Fall and Spring in Major Shakeup [Report]](https://www.iclarified.com/images/news/97211/97211/97211-640.jpg)
![Apple to Move Camera to Top Left, Hide Face ID Under Display in iPhone 18 Pro Redesign [Report]](https://www.iclarified.com/images/news/97212/97212/97212-640.jpg)
![Apple Developing Battery Case for iPhone 17 Air Amid Battery Life Concerns [Report]](https://www.iclarified.com/images/news/97208/97208/97208-640.jpg)
![AirPods 4 On Sale for $99 [Lowest Price Ever]](https://www.iclarified.com/images/news/97206/97206/97206-640.jpg)


Build Real-Time Notifications in Laravel + Inertia.js + React with Reverb
Overview In this post, we'll walk through a production-grade setup that enables public, app-wide real-time notifications using: Laravel 12 (backend) Inertia.js + React (frontend) Laravel Reverb for broadcasting Laravel Echo for listening Vite + React for asset compilation No separate API or frontend deployment is needed everything is part of the same app. This setup enables you to: Send real-time messages to all visitors (even unauthenticated) Use public/Private channels via Reverb Once you install a Laravel + Inertia.js application on a Windows machine, you’ll need to set up a Redis server to enable real-time broadcasting and queue support. Since Redis does not officially support Windows, the installation can be a bit tricky. Follow the steps below to set it up properly: Here’s how to get it: *Download the MSI file: * https://github.com/MicrosoftArchive/redis/releases/download/win-3.0.504/Redis-x64-3.0.504.msi Install Redis: Once downloaded, open the .msi installer and follow the on-screen instructions. The installer will add Redis to your Windows machine, and it should be available for use. Alternatively, if you need a more up-to-date version or a better-supported method for running Redis on Windows, consider using Docker or running Redis within a Linux VM using tools like WSL (Windows Subsystem for Linux), which provides a more stable environment for running Redis. XAMPP Setup for Redis As xampp does not have the Redis defualt so we need to setup it first download the zip file and copy the php_redis.dll file inside C:/xampp/php/ext and restart the xampp. Now open the console and type command. php -m | findstr redis Now install predis via command : composer install predis/predis Lets configure Reverb Server Side By default, broadcasting is not enabled in new Laravel applications. To enable broadcasting, you can use the install:broadcasting php artisan install:broadcasting This command will create the config/broadcasting.php configuration file. It will also generate the routes/channels.php file, where you can register your application's broadcast authorization routes and callbacks. When you run the above command, Laravel will prompt you to install Laravel Reverb, the official WebSocket server. Use these values when prompted: • Run in development mode: Yes • Port to serve from: 6001 • Database for presence channels: redis • Laravel authentication server: http://localhost • Serve on HTTP or HTTPS: http • Generate client ID/Key for API: No • Setup cross-domain access to the API: No • Configuration file name: laravel-echo-server.json Client-Side Installation for Reverb To enable real-time event listening in your application, Laravel Echo provides a clean and elegant JavaScript library that simplifies subscribing to channels and handling events broadcast by your backend. Since Reverb uses the Pusher protocol for WebSocket communication, you'll also need the pusher-js library. You can install both dependencies using the following command: Once Laravel Echo is installed, the next step is to initialize a new Echo instance in your application's JavaScript. Inside resources/js/bootstrap.js file, which comes pre-configured with every Laravel project. This ensures Echo is loaded and ready to handle real-time events across your application.Or you can make echo.js if its not present and call it inside bootstrap.js Lets Make a fronted React Component to listen the events In React Component I'm listing for .AppNotice event.Now We need to call this component in Root. Create First Event php artisan make:event AppNoticeBroadcasted via this command you can make an Event. Inside the channel.php we can define the Broadcast channel public.app. Now Setup the Route under web.php file. Event Class Finally we broadcast out first Message :) Hit this in browser and and run app in another browser instance to see the result. http://127.0.0.1:8000/send-message Setting up real-time functionality in a Laravel project using Echo and Reverb can significantly enhance the user experience by enabling instant updates, such as in-app notifications, chat systems, or live data feeds. By integrating tools like laravel-echo, pusher-js, and concurrently, you can streamline both development and performance, keeping your workflow smooth and your codebase organized. This setup is ideal for in-app, real-time interactions. However, for push notifications outside the app such as mobile or browser alerts—services like Firebase Cloud Messaging or OneSignal are more appropriate and can complement your real-time infrastructure. This command does the following: npm run dev – Compiles and watches your frontend assets. php artisan serve – Starts the local development server. php artisan inertia:start-ssr – Boots the Inertia.js server-side rendering service. php artisan queue:work – Begins processing queued jobs. _php artisan reverb:start _– Launches the

Overview
In this post, we'll walk through a production-grade setup that enables public, app-wide real-time notifications using:
- Laravel 12 (backend)
- Inertia.js + React (frontend)
- Laravel Reverb for broadcasting
- Laravel Echo for listening
- Vite + React for asset compilation
No separate API or frontend deployment is needed everything is part of the same app.
This setup enables you to:
- Send real-time messages to all visitors (even unauthenticated)
- Use public/Private channels via Reverb
Once you install a Laravel + Inertia.js application on a Windows machine, you’ll need to set up a Redis server to enable real-time broadcasting and queue support. Since Redis does not officially support Windows, the installation can be a bit tricky. Follow the steps below to set it up properly:
Here’s how to get it:
*Download the MSI file: *
https://github.com/MicrosoftArchive/redis/releases/download/win-3.0.504/Redis-x64-3.0.504.msi
Install Redis:
Once downloaded, open the .msi installer and follow the on-screen instructions.
The installer will add Redis to your Windows machine, and it should be available for use.
Alternatively, if you need a more up-to-date version or a better-supported method for running Redis on Windows, consider using Docker or running Redis within a Linux VM using tools like WSL (Windows Subsystem for Linux), which provides a more stable environment for running Redis.
XAMPP Setup for Redis
As xampp does not have the Redis defualt so we need to setup it first download the zip file and copy the php_redis.dll file inside C:/xampp/php/ext and restart the xampp. Now open the console and type command.
php -m | findstr redis


Now install predis via command : composer install predis/predis
![]()
Lets configure Reverb Server Side
By default, broadcasting is not enabled in new Laravel applications. To enable broadcasting, you can use the install:broadcasting
php artisan install:broadcasting
This command will create the config/broadcasting.php configuration file. It will also generate the routes/channels.php file, where you can register your application's broadcast authorization routes and callbacks.
When you run the above command, Laravel will prompt you to install Laravel Reverb, the official WebSocket server.
Use these values when prompted:
• Run in development mode: Yes
• Port to serve from: 6001
• Database for presence channels: redis
• Laravel authentication server: http://localhost
• Serve on HTTP or HTTPS: http
• Generate client ID/Key for API: No
• Setup cross-domain access to the API: No
• Configuration file name: laravel-echo-server.json
Client-Side Installation for Reverb
To enable real-time event listening in your application, Laravel Echo provides a clean and elegant JavaScript library that simplifies subscribing to channels and handling events broadcast by your backend. Since Reverb uses the Pusher protocol for WebSocket communication, you'll also need the pusher-js library.
You can install both dependencies using the following command:

Once Laravel Echo is installed, the next step is to initialize a new Echo instance in your application's JavaScript. Inside resources/js/bootstrap.js file, which comes pre-configured with every Laravel project. This ensures Echo is loaded and ready to handle real-time events across your application.Or you can make echo.js if its not present and call it inside bootstrap.js


Lets Make a fronted React Component to listen the events

In React Component I'm listing for .AppNotice event.Now We need to call this component in Root.

Create First Event
php artisan make:event AppNoticeBroadcasted via this command you can make an Event.

Inside the channel.php we can define the Broadcast channel public.app.

Now Setup the Route under web.php file.

Event Class

Finally we broadcast out first Message :)
Hit this in browser and and run app in another browser instance to see the result.
http://127.0.0.1:8000/send-message
Setting up real-time functionality in a Laravel project using Echo and Reverb can significantly enhance the user experience by enabling instant updates, such as in-app notifications, chat systems, or live data feeds. By integrating tools like laravel-echo, pusher-js, and concurrently, you can streamline both development and performance, keeping your workflow smooth and your codebase organized.
This setup is ideal for in-app, real-time interactions. However, for push notifications outside the app such as mobile or browser alerts—services like Firebase Cloud Messaging or OneSignal are more appropriate and can complement your real-time infrastructure.
This command does the following:
- npm run dev – Compiles and watches your frontend assets.
- php artisan serve – Starts the local development server.
- php artisan inertia:start-ssr – Boots the Inertia.js server-side rendering service.
- php artisan queue:work – Begins processing queued jobs.
- _php artisan reverb:start _– Launches the Reverb WebSocket server for real-time features.
![]()