


![[The AI Show Episode 142]: ChatGPT’s New Image Generator, Studio Ghibli Craze and Backlash, Gemini 2.5, OpenAI Academy, 4o Updates, Vibe Marketing & xAI Acquires X](https://www.marketingaiinstitute.com/hubfs/ep%20142%20cover.png)


![From drop-out to software architect with Jason Lengstorf [Podcast #167]](https://cdn.hashnode.com/res/hashnode/image/upload/v1743796461357/f3d19cd7-e6f5-4d7c-8bfc-eb974bc8da68.png?#)


(1).jpg?width=1920&height=1920&fit=bounds&quality=80&format=jpg&auto=webp#)


_NicoElNino_Alamy.png?#)
.webp?#)
.webp?#)


![New iOS 19 Leak Allegedly Reveals Updated Icons, Floating Tab Bar, More [Video]](https://www.iclarified.com/images/news/96958/96958/96958-640.jpg)

![Apple to Source More iPhones From India to Offset China Tariff Costs [Report]](https://www.iclarified.com/images/news/96954/96954/96954-640.jpg)
![Blackmagic Design Unveils DaVinci Resolve 20 With Over 100 New Features and AI Tools [Video]](https://www.iclarified.com/images/news/96951/96951/96951-640.jpg)


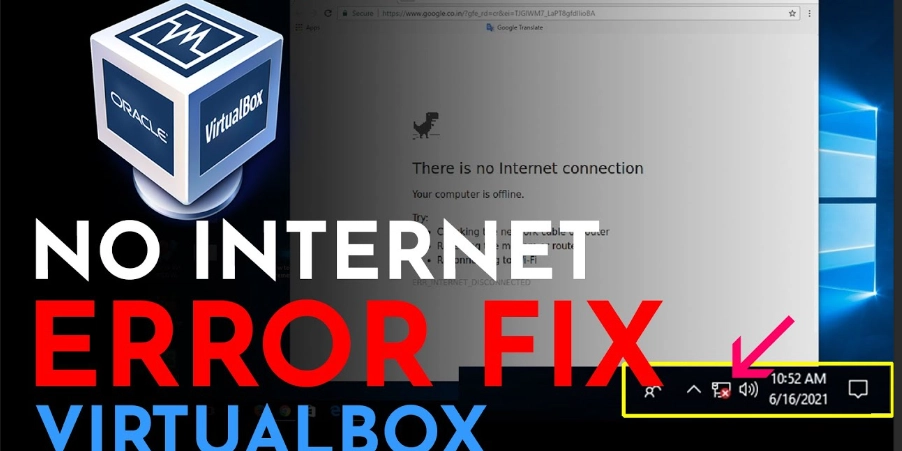
Struggling to Get Internet Access in VirtualBox? Here's How I Solved It
Introduction VirtualBox is an amazing tool that lets us run virtual machines for testing software, trying new operating systems, or simulating networks. However, one problem I faced personally; and that many others encounter; is when the virtual machine just won’t connect to the Internet. It’s frustrating, right? After all, most of what we do these days depends on being online! Let me walk you through what I learned and how I solved this issue step-by-step, so you don’t have to go through the same hassle. Why Internet Connectivity Fails in VirtualBox Before diving into fixes, it helps to know what might be going wrong. Here are the most common culprits: Network Adapter Misconfiguration: If the virtual machine’s network adapter isn’t set up properly, it won’t connect. Firewalls or Antivirus: Security software on your host machine could block the connection. Driver Issues: Outdated or misconfigured network adapter drivers on your host might be the root cause. IP Address Conflicts: Two devices fighting over the same IP address can cause connectivity issues. Missing Guest Additions: Not installing VirtualBox Guest Additions may limit advanced networking features. Simple Solutions to Get Your VM Back Online Here’s exactly what worked for me, broken down into manageable steps: 1. Check and Configure Your Network Adapter Open VirtualBox, select your VM, and go to Settings > Network. Ensure Enable Network Adapter is checked. Select NAT for basic internet access, or choose Bridged Adapter if you want the VM on your local network. If things still don’t work, try changing the Adapter Type under “Advanced” (e.g., Intel PRO/1000 MT Desktop). 2. Restart the Network Adapter Disable the adapter by unchecking Enable Network Adapter in the settings. Save changes, re-enable the adapter, and reboot the VM. Sometimes, a simple refresh is all it takes. 3. Adjust Firewall or Antivirus Settings Check your host machine’s firewall settings to ensure VirtualBox isn’t being blocked. In Windows, go to Windows Defender Firewall > Allow an app or feature and add VirtualBox. For macOS or Linux, grant necessary permissions in their respective security settings. 4. Update Your Host’s Network Adapter Drivers On Windows, access Device Manager, find your network adapter under “Network Adapters,” and update its driver. Restart after the update. 5. Resolve IP Conflicts Check the VM’s IP address using ipconfig (Windows) or ifconfig (Linux). Ensure it doesn’t clash with other devices on your network. To refresh the IP, use commands like ipconfig /release and ipconfig /renew (Windows) or dhclient (Linux). 6. Install VirtualBox Guest Additions While the VM is running, go to Devices > Insert Guest Additions CD Image. Follow the installation steps (it’s straightforward on both Windows and Linux). Restart the VM after installation. 7. Disable VPN or Fix Proxy Settings If you use a VPN, disable it temporarily to test connectivity. Check your proxy settings under Network & Internet (Windows) or equivalent options on other systems. 8. Reinstall VirtualBox as a Last Resort If all else fails, back up your VMs and reinstall VirtualBox. This fixed lingering issues in my case! Summary Internet connectivity in VirtualBox can feel like a roadblock, but with these solutions, you’ll be up and running in no time. Personally, I learned so much while troubleshooting this issue, and I hope this guide saves you both time and headaches. If you’re still stuck after trying everything, it might be worth diving into more advanced network settings or seeking help for your specific environment. If you find the article helpful, please drop a comment below!
Introduction
VirtualBox is an amazing tool that lets us run virtual machines for testing software, trying new operating systems, or simulating networks. However, one problem I faced personally; and that many others encounter; is when the virtual machine just won’t connect to the Internet. It’s frustrating, right? After all, most of what we do these days depends on being online!
Let me walk you through what I learned and how I solved this issue step-by-step, so you don’t have to go through the same hassle.
Why Internet Connectivity Fails in VirtualBox
Before diving into fixes, it helps to know what might be going wrong. Here are the most common culprits:
- Network Adapter Misconfiguration: If the virtual machine’s network adapter isn’t set up properly, it won’t connect.
- Firewalls or Antivirus: Security software on your host machine could block the connection.
- Driver Issues: Outdated or misconfigured network adapter drivers on your host might be the root cause.
- IP Address Conflicts: Two devices fighting over the same IP address can cause connectivity issues.
- Missing Guest Additions: Not installing VirtualBox Guest Additions may limit advanced networking features.
Simple Solutions to Get Your VM Back Online
Here’s exactly what worked for me, broken down into manageable steps:
1. Check and Configure Your Network Adapter
- Open VirtualBox, select your VM, and go to Settings > Network.
- Ensure Enable Network Adapter is checked.
- Select NAT for basic internet access, or choose Bridged Adapter if you want the VM on your local network.
- If things still don’t work, try changing the Adapter Type under “Advanced” (e.g., Intel PRO/1000 MT Desktop).
2. Restart the Network Adapter
- Disable the adapter by unchecking Enable Network Adapter in the settings.
- Save changes, re-enable the adapter, and reboot the VM. Sometimes, a simple refresh is all it takes.
3. Adjust Firewall or Antivirus Settings
- Check your host machine’s firewall settings to ensure VirtualBox isn’t being blocked.
- In Windows, go to Windows Defender Firewall > Allow an app or feature and add VirtualBox.
- For macOS or Linux, grant necessary permissions in their respective security settings.
4. Update Your Host’s Network Adapter Drivers
- On Windows, access Device Manager, find your network adapter under “Network Adapters,” and update its driver. Restart after the update.
5. Resolve IP Conflicts
- Check the VM’s IP address using
ipconfig(Windows) orifconfig(Linux). Ensure it doesn’t clash with other devices on your network. - To refresh the IP, use commands like
ipconfig /releaseandipconfig /renew(Windows) ordhclient(Linux).
6. Install VirtualBox Guest Additions
- While the VM is running, go to Devices > Insert Guest Additions CD Image.
- Follow the installation steps (it’s straightforward on both Windows and Linux).
- Restart the VM after installation.
7. Disable VPN or Fix Proxy Settings
- If you use a VPN, disable it temporarily to test connectivity.
- Check your proxy settings under Network & Internet (Windows) or equivalent options on other systems.
8. Reinstall VirtualBox as a Last Resort
- If all else fails, back up your VMs and reinstall VirtualBox. This fixed lingering issues in my case!
Summary
Internet connectivity in VirtualBox can feel like a roadblock, but with these solutions, you’ll be up and running in no time. Personally, I learned so much while troubleshooting this issue, and I hope this guide saves you both time and headaches.
If you’re still stuck after trying everything, it might be worth diving into more advanced network settings or seeking help for your specific environment.
If you find the article helpful, please drop a comment below!