


![[The AI Show Episode 144]: ChatGPT’s New Memory, Shopify CEO’s Leaked “AI First” Memo, Google Cloud Next Releases, o3 and o4-mini Coming Soon & Llama 4’s Rocky Launch](https://www.marketingaiinstitute.com/hubfs/ep%20144%20cover.png)


![API design for precomputation cache [closed]](https://cdn.sstatic.net/Sites/softwareengineering/Img/apple-touch-icon@2.png?v=1ef7363febba)


_NicoElNino_Alamy.png?width=1280&auto=webp&quality=80&disable=upscale#)
_Olekcii_Mach_Alamy.jpg?width=1280&auto=webp&quality=80&disable=upscale#)


![Apple appealing $570M EU fine, White House says it won’t be tolerated [U]](https://i0.wp.com/9to5mac.com/wp-content/uploads/sites/6/2025/04/Apple-says-570M-EU-fine-is-unfair-White-House-says-it-wont-be-tolerated.jpg?resize=1200%2C628&quality=82&strip=all&ssl=1)


![At Least Three iPhone 17 Models to Feature 12GB RAM [Kuo]](https://www.iclarified.com/images/news/97122/97122/97122-640.jpg)

![Dummy Models Showcase 'Unbelievably' Thin iPhone 17 Air Design [Images]](https://www.iclarified.com/images/news/97114/97114/97114-640.jpg)


Run Your Own AI: Python Chatbots with Ollama and Langchain
Co-authored with @nazakun021 Are you tired of not being able to use ChatGPT because of internet issues, API limits, or concerns about your privacy? Are you looking for a way to run a smart assistant without relying on the cloud and for free? If so, then you’re on the right track by clicking on this article! In this guide, we’ll show you how to build a chatbot from scratch using Python and a locally running LLM — no cloud dependencies, and you wouldn’t even need the internet to run this chatbot! Why Use A Local LLM? Local LLMs (Large Language Models) offer an alternative to cloud-based AI services. With a local LLM, all data stays on your machine — nothing is sent to external servers. This is crucial if you want to work with sensitive data such as healthcare, finance, etc. Local models also give you complete control. You can tweak your prompts and the system’s behavior. You can even regulate the model itself on domain-specific data to improve performance! Why Use Python? Python is the ideal choice for building a chatbot with a local LLM because it's easy to learn, has a clean and readable syntax, and boasts a massive ecosystem of AI and machine learning libraries. Tools like llama-cpp-python, and langchain are all Python-friendly, making integration with LLMs seamless. Why use Langchain? Langchain is used because it simplifies building powerful applications with large language models by providing a framework that supports chaining together multiple steps, integrating with external data sources (like files, APIs, or databases), managing memory for conversations, and creating tool-using agents—all while keeping the code modular and scalable. Prerequisites Before we get started, make sure you have: Python 3.12 A system with at least 8GB RAM (the more RAM the better) Basic familiarity with Python [Optional] A GPU if you want faster speed. Setting up A Local LLM 1. Downloading Ollama First of all, install Ollama from https://ollama.com/ Then select download. Choose depending on your operating system. We’ll select Windows for this installation. After downloading, open the .exe file. After setting up everything, go to your Command Prompt and type "alloma". We still haven’t downloaded any local LLMs. To browse one, go to https://ollama.com/search You can find almost all models here. Select a model depending on your system's RAM and CPU. For uniformity’s sake, we’ll use the “Llama 3.2 3B” version in this tutorial. Select it, then copy the command prompt line to download it to your device. ollama run llama3.2 Then paste it into your command prompt. After downloading, try to do a sample test on your model to see if everything works as expected (Optional, exit your Command Prompt, then reenter) . >Ollama // Opening Ollama >Ollama list // Listing all local LLMs in your device >Ollama run // Running your model, in this case “Llama3.2” Let’s try prompting it, “Introduce yourself.” The ollama installation worked well! Now, let’s work on our simple Chatbot. 2. Coding The Chatbot Let’s open our Code Editor. In this tutorial, we’ll be using VS Code. The next step will be creating a virtual environment that will install the dependencies that we need for this project. Firstly, let’s make a folder that will contain our new chatbot. Let’s name the folder “local-llm-chatbot”. Now we are inside the folder. Let’s start preparing our environment. Select “Ctrl + Backtick” to open the terminal window. Then type in “python3 -m venv chatbot” for Windows. Now, type in: .\chatbot\Scripts\activate.bat // if you're running on the command prompt. .\chatbot\Scripts\Activate.ps1 // if you're on PowerShell. Reminder: Take note of the spelling and the capitalization. If we see that prefix, we’re good to go! Now, let’s download all the packages we need. Type in: pip install langchain langchain-ollama ollama Now it should start downloading… After downloading. We’ll create a Python file. Let’s call it “main.py” right now. In your main.py, type in: from langchain_ollama import OllamaLLM model = OllamaLLM(model=”llama3.2”) After all that set-up, now let’s try generating a sample response from the LLM. To do that, type in: result = model.invoke(input=’Enter Question Here’) print (result) Then run. Now, the setup works, but it’s not user-friendly, and there's still some room for improvement. To do that, let’s import a prompt template. Type in: from langchain_core.prompts import ChatPromptTemplate Then we want to make the actual chat template to instruct the model on how to respond. To do that, make a multiline string, then pass the conversation {context} and the {question}. And how it should answer. This is how it look likes after giving the model a template! But now we want to continue talking to the cha
Co-authored with @nazakun021
Are you tired of not being able to use ChatGPT because of internet issues, API limits, or concerns about your privacy? Are you looking for a way to run a smart assistant without relying on the cloud and for free? If so, then you’re on the right track by clicking on this article!
In this guide, we’ll show you how to build a chatbot from scratch using Python and a locally running LLM — no cloud dependencies, and you wouldn’t even need the internet to run this chatbot!
Why Use A Local LLM?
Local LLMs (Large Language Models) offer an alternative to cloud-based AI services. With a local LLM, all data stays on your machine — nothing is sent to external servers. This is crucial if you want to work with sensitive data such as healthcare, finance, etc. Local models also give you complete control. You can tweak your prompts and the system’s behavior. You can even regulate the model itself on domain-specific data to improve performance!
Why Use Python?
Python is the ideal choice for building a chatbot with a local LLM because it's easy to learn, has a clean and readable syntax, and boasts a massive ecosystem of AI and machine learning libraries. Tools like llama-cpp-python, and langchain are all Python-friendly, making integration with LLMs seamless.
Why use Langchain?
Langchain is used because it simplifies building powerful applications with large language models by providing a framework that supports chaining together multiple steps, integrating with external data sources (like files, APIs, or databases), managing memory for conversations, and creating tool-using agents—all while keeping the code modular and scalable.
Prerequisites
Before we get started, make sure you have:
- Python 3.12
- A system with at least 8GB RAM (the more RAM the better)
- Basic familiarity with Python
- [Optional] A GPU if you want faster speed.
Setting up A Local LLM
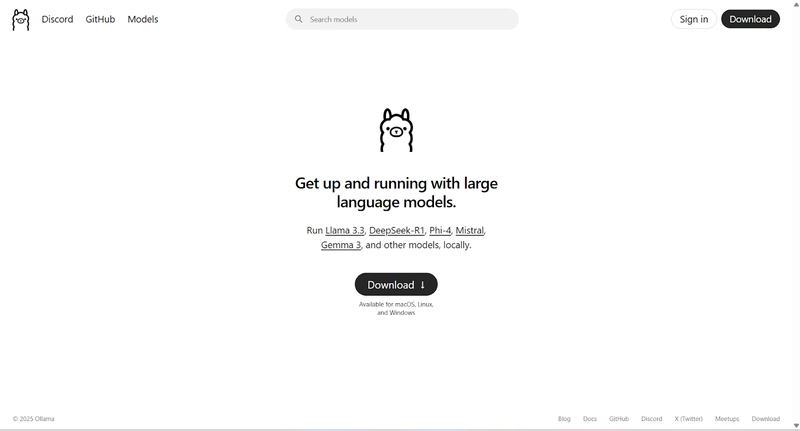
1. Downloading Ollama
- First of all, install Ollama from https://ollama.com/
Then select download. Choose depending on your operating system. We’ll select Windows for this installation.
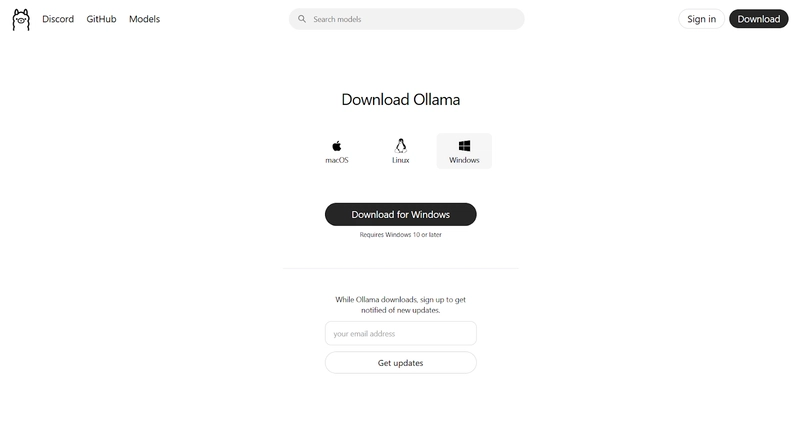
After downloading, open the .exe file.

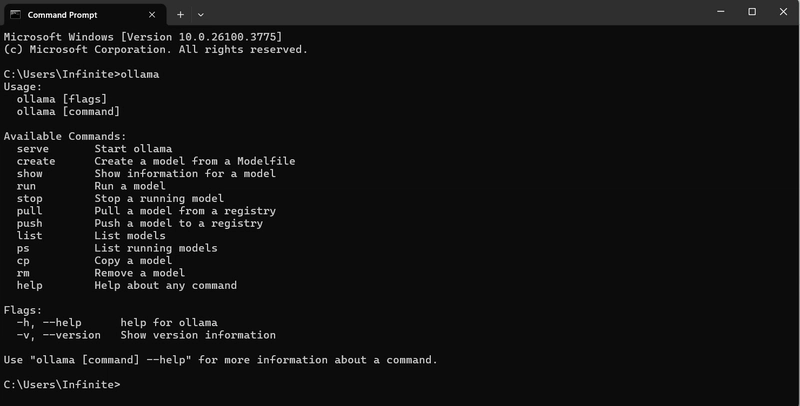
After setting up everything, go to your Command Prompt and type "alloma".
We still haven’t downloaded any local LLMs. To browse one, go to https://ollama.com/search
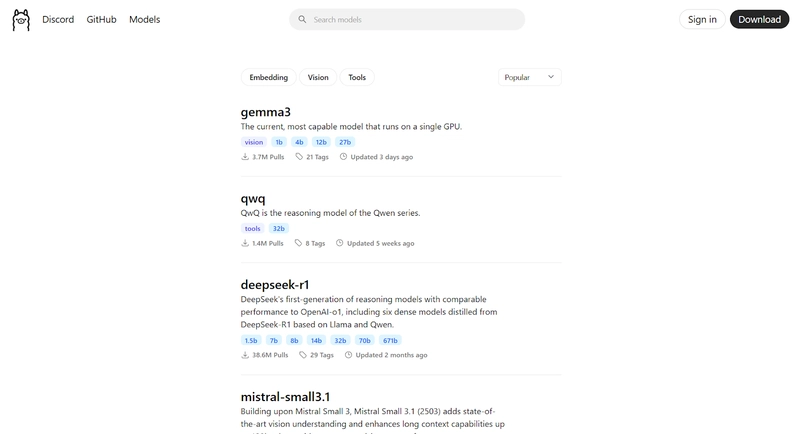
You can find almost all models here. Select a model depending on your system's RAM and CPU. For uniformity’s sake, we’ll use the “Llama 3.2 3B” version in this tutorial.
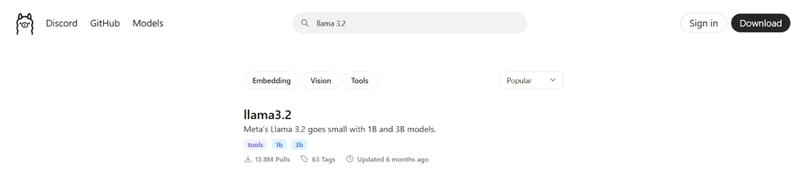
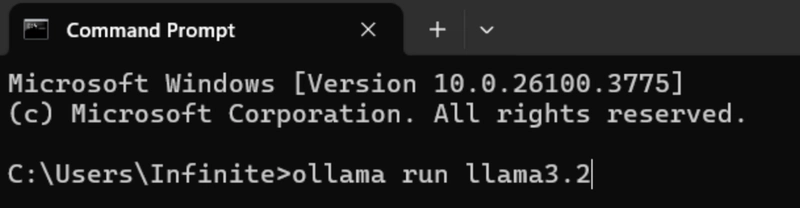
- Select it, then copy the command prompt line to download it to your device.
ollama run llama3.2

- Then paste it into your command prompt.
- After downloading, try to do a sample test on your model to see if everything works as expected (Optional, exit your Command Prompt, then reenter) .
>Ollama                     // Opening Ollama
>Ollama list                    // Listing all local LLMs in your device
>Ollama run   // Running your model, in this case “Llama3.2”
- Let’s try prompting it, “Introduce yourself.”
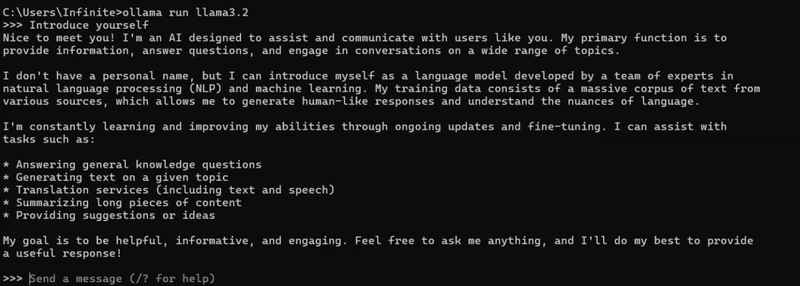
- The ollama installation worked well! Now, let’s work on our simple Chatbot.
2. Coding The Chatbot
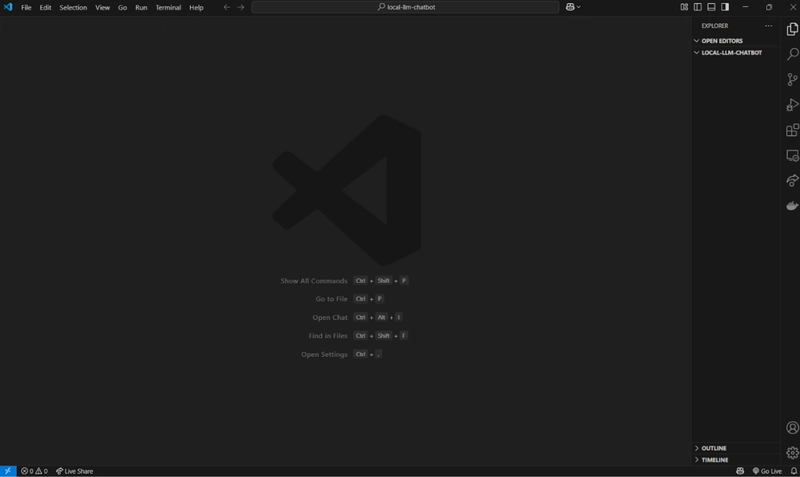
Let’s open our Code Editor. In this tutorial, we’ll be using VS Code.
The next step will be creating a virtual environment that will install the dependencies that we need for this project. Firstly, let’s make a folder that will contain our new chatbot. Let’s name the folder “local-llm-chatbot”.
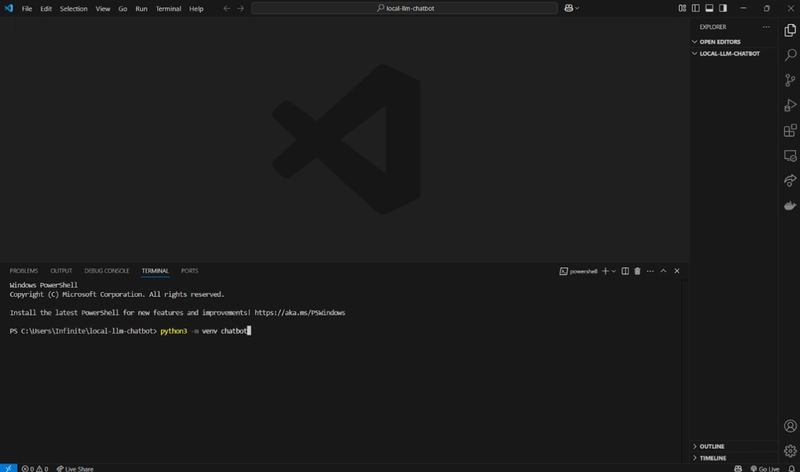
- Now we are inside the folder. Let’s start preparing our environment.
- Select “Ctrl + Backtick” to open the terminal window. Then type in “python3 -m venv chatbot” for Windows.
Now, type in:
.\chatbot\Scripts\activate.bat // if you're running on the command prompt.
.\chatbot\Scripts\Activate.ps1 // if you're on PowerShell.
Reminder: Take note of the spelling and the capitalization.
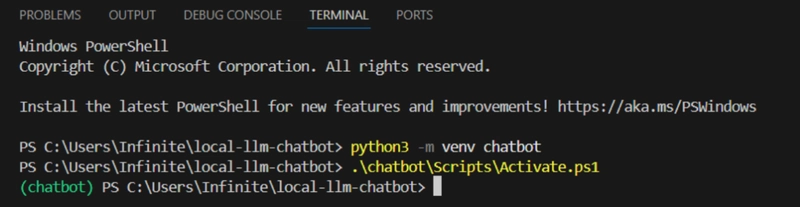
- If we see that prefix, we’re good to go! Now, let’s download all the packages we need.
Type in:
pip install langchain langchain-ollama ollama
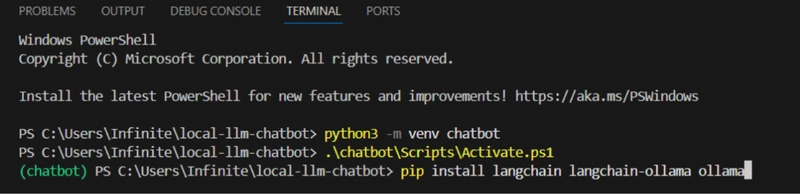
Now it should start downloading…

After downloading. We’ll create a Python file. Let’s call it “main.py” right now.
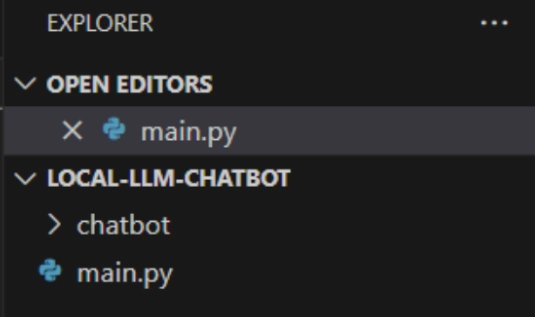
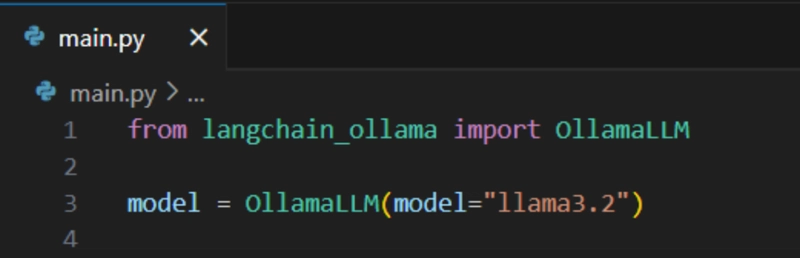
In your main.py, type in:
from langchain_ollama import OllamaLLM
model = OllamaLLM(model=”llama3.2”)
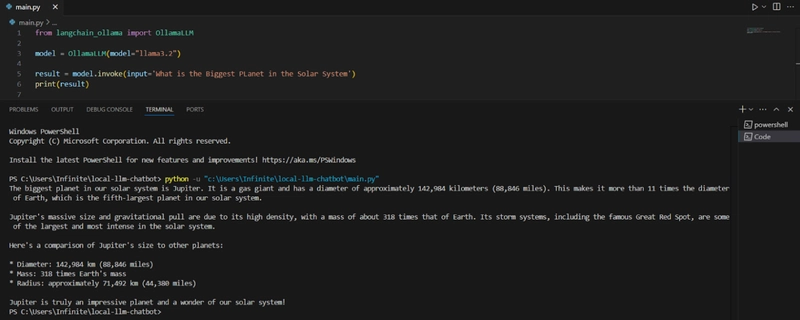
After all that set-up, now let’s try generating a sample response from the LLM.
To do that, type in:
result = model.invoke(input=’Enter Question Here’)
print (result)
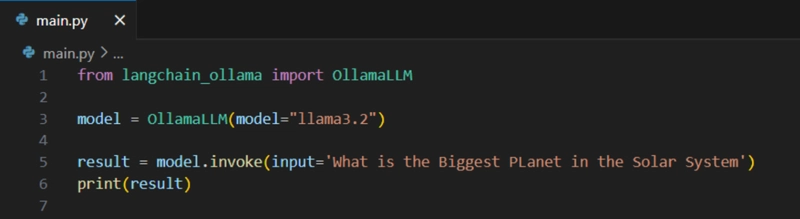
Then run.
Now, the setup works, but it’s not user-friendly, and there's still some room for improvement.
To do that, let’s import a prompt template.
Type in:
from langchain_core.prompts import ChatPromptTemplate

Then we want to make the actual chat template to instruct the model on how to respond. To do that, make a multiline string, then pass the conversation {context} and the {question}. And how it should answer.
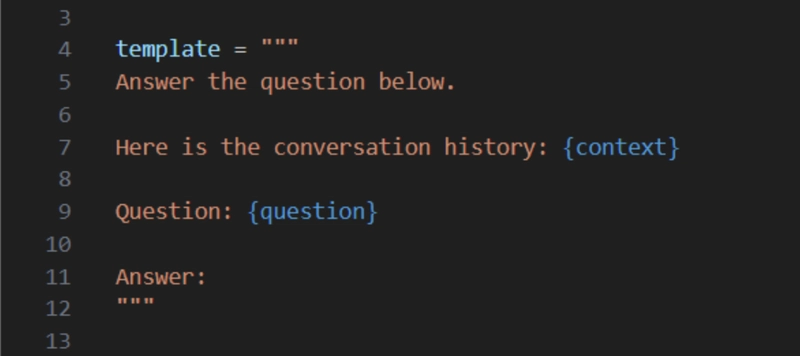
This is how it look likes after giving the model a template!

But now we want to continue talking to the chatbot. Here is a function to handle conversation!
def handle_conversation():
    context = ""
    print("Welcome to the AI Chatbot Powered by Llama3.2, Type 'exit' to quit.")
    while True:
        user_input = input("You: ")
        if user_input.lower() == "exit":
            break
        result = chain.invoke({"context": context, "question": user_input})
        print("Bot: ", result)
        context += f"\nUser: {user_input}\nAI: {result}"


if __name__ == "__main__":
    handle_conversation()
And with that, you've successfully created a fully functional chatbot! If you want the interface to look nicer, you can copy-paste this block of code!
from langchain_ollama import OllamaLLM
from langchain_core.prompts import ChatPromptTemplate


template = """
Answer the question below based on our conversation history


Conversation History:
{context}


Question:
{question}


Answer:
"""


# Initialize the model (ensure model is running)
try:
    model = OllamaLLM(model="llama3.2")
except Exception as e:
    print(f"Error Initializing the LLM.")
    print(f"Details: {e}")
    exit() # Exit if model can't be loaded


prompt = ChatPromptTemplate.from_template(template)
chain = prompt | model


def handle_conversation():
    context = "The conversation has just begun." # Start with a neutral context
    print("\n--- AI Chatbot (Powered by Llama3.2) ---")
    print("Ask me anything! Type 'exit' when you're done.")
    print("----------------------------------------")


    while True:
        user_input = input("You: ")
        if user_input.lower() == "exit":
            print("\n----------------------------------------")
            print("Llama3.2: Goodbye! Thanks for chatting.")
            print("----------------------------------------")
 break


        print("Llama3.2: Thinking...")


        try:
            result = chain.invoke({"context": context, "question": user_input})
            print(f"Llama3.2: {result.strip()}")


            context += f"\nUser: {user_input}\nAI: {result.strip()}"

        except Exception as e:
            print(f"Llama3.2: Sorry, I encountered an error trying to respond. ({e})")

        print("----------------------------------------")


if __name__ == "__main__":
    handle_conversation()
What can you do next?
After building a local chatbot with Python and LLaMA 3, the next step is to create agentic workflows—which let your chatbot do more than just respond. With tools like LangChain, you can build** AI agents** that make decisions, use functions, access files or APIs, and remember past interactions. This turns your chatbot into a smart assistant that can handle multi-step tasks like searching documents, doing calculations, or summarizing info—all powered locally without needing the internet.
Conclusion
Congratulations! You’ve successfully created your very own Python chatbot powered entirely by a large language model running locally with Ollama and LLaMA 3. The process we followed—setting up Ollama, pulling the LLaMA 3 model, and coding the Python interaction—serves as a practical and empowering starting point.
By building this chatbot, you’ve gained hands-on experience in integrating cutting-edge AI models into real-world software. If you want, you can enhance your chatbot by adding features like memory, voice recognition, a graphical user interface, or even connecting it to APIs and databases. The skills and tools you’ve learned here are transferable to a wide range of AI and machine learning projects.
“The best way to predict the future is to invent it.” — Alan Kay
With this mindset, your chatbot isn’t just a project—it’s your chicken jockey into the future of AI innovation.
If you want to see the actual code, feel free to check out our GitHub Repository.
References:
Youtube Video
Ollama LLM's
Langchain