


![[The AI Show Episode 144]: ChatGPT’s New Memory, Shopify CEO’s Leaked “AI First” Memo, Google Cloud Next Releases, o3 and o4-mini Coming Soon & Llama 4’s Rocky Launch](https://www.marketingaiinstitute.com/hubfs/ep%20144%20cover.png)


.jpg?width=1920&height=1920&fit=bounds&quality=70&format=jpg&auto=webp#)


-Resident-Evil-4-Remake-Review---SPOILER-FREE-RESIDENT-EVIL-4-REVIEW-00-04-20.png?width=1920&height=1920&fit=bounds&quality=70&format=jpg&auto=webp#)


![Apple to Shift Robotics Unit From AI Division to Hardware Engineering [Report]](https://www.iclarified.com/images/news/97128/97128/97128-640.jpg)

![Apple Shares New Ad for iPhone 16: 'Trust Issues' [Video]](https://www.iclarified.com/images/news/97125/97125/97125-640.jpg)


MEAN Stack (WEB STACK) Implementation in AWS
MEAN WEB STACK IMPLEMENTATION IN AWS Introduction The MEAN stack is a popular JavaScript stack used for building web applications. It stands for MongoDB, Express.js, AngularJS (or Angular), and Node.js. Here's a brief overview of each component: MongoDB: MongoDB is a NoSQL database that stores data in a flexible, JSON-like format. It is a popular choice for web applications because of its scalability, flexibility, and performance. Express.js: Express.js is a web application framework for Node.js. It provides a set of features for building web applications and APIs, including routing, middleware support, and templating engines. Express.js simplifies the process of building web applications with Node.js by providing a high-level abstraction over the HTTP protocol. AngularJS (or Angular): AngularJS is a JavaScript framework maintained by Google for building dynamic web applications. It extends HTML with additional attributes and provides a set of built-in directives for creating interactive user interfaces. AngularJS follows the Model-View-Controller (MVC) architecture, making it easy to organize code and build complex web applications. Node.js: Node.js is a JavaScript runtime built on Chrome's V8 JavaScript engine. It allows developers to run JavaScript code outside of a web browser, making it possible to build server-side applications with JavaScript. Node.js is known for its event-driven, non-blocking I/O model, which makes it well-suited for building scalable and high-performance web applications. Step 0: Prerequisites 1. Launched an Ubuntu EC2 Instance named “Mean_Stack_Server” with AMI of 22.04 LTS (HVM) in the us-west-2 region using the AWS console. 2. Gave it the instance type of t3.small. The choice of the instance type was based on the following: Memory: The t3.small instance offers more memory than the t2.micro, which is advantageous for applications that require more memory to operate efficiently. Burst Capability: While both instances offer burstable CPU performance, the t3 instances have a more flexible burst model, allowing for more sustained performance during burst periods. This is important for workloads that require consistent performance over longer periods. Performance: While both instances offer burstable performance, the t3.small typically provides better baseline performance compared to the t2.micro. This might be necessary for applications that require a bit more processing power. Created SSH key pair named mean_stack to access the instance on port 22. The default VPC and Subnet were used for the networking configuration. 3. The security group was configured with the following inbound rules: Allow traffic on port 22 (SSH) with source from any IP address. Allow traffic on port 443 (HTTPS) with source from anywhere on the internet. Allow traffic on port 80 (HTTP) with source from anywhere on the internet. (All these would be set by default, later we would go into the security group to set the remaining 2 inbound rules manually.) *- Allow traffic on port 3300 (Custom TCP) with source from anywhere. *- Allow traffic on port 27017 (Custom TCP) with source from anywhere. We will leave the storage at default; 8gb gp3 volume storage. Then we hit the launch instance button. 4. First, we need to move the keypairs file from the download folder into the .ssh folder; cp ~/Downloads/mean_stack.pem ~/.ssh/ The private SSH key that got downloaded has now been moved, permission was changed for the private key file and then used to connect to the instance by running the following commands; chmod 400 ~/.ssh/mean_stack.pem ssh -i ~/.ssh/mean_stack.pem ubuntu@52.32.32.193 Where username=ubuntu and public ip address=52.32.32.193 Step 1 - Install Nodejs Node.js is a JavaScript runtime built on Chrome’s V8 JavaScript engine. Node.js is used in this tutorial to set up the Express routes and AngularJS controllers. 1. Update and Upgrade ubuntu sudo apt update && sudo apt upgrade -y 2. Add certificates sudo apt -y install curl dirmngr apt-transport-https lsb-release ca-certificates curl -sL https://deb.nodesource.com/setup_18.x | sudo -E bash - .3 Install NodeJS sudo apt-get install -y nodejs Step 2 - Install MongoDB For this application, Book records were added to MongoDB that contain books name, ISBN number, author, and number of pages. 1. Download the MongoDB public GPG key curl -fsSL https://pgp.mongodb.com/server-7.0.asc | sudo gpg --dearmor -o /usr/share/keyrings/mongodb-archive-keyring.gpg 2. Add the MongoDB repository echo "deb [ signed-by=/usr/share/keyrings/mongodb-archive-keyring.gpg ] https://repo.mongodb.org/apt/ubuntu jammy/mongodb-org/7.0 multiverse" | sudo tee /etc/apt/sources.list.d/mongodb-org-7.0.list 3. Update the package database and install MongoDB sudo apt-get update sudo apt-get install -y mongodb-org 4. Start and enable MongoDB sudo systemctl sta
MEAN WEB STACK IMPLEMENTATION IN AWS
Introduction
The MEAN stack is a popular JavaScript stack used for building web applications. It stands for MongoDB, Express.js, AngularJS (or Angular), and Node.js. Here's a brief overview of each component:
MongoDB: MongoDB is a NoSQL database that stores data in a flexible, JSON-like format. It is a popular choice for web applications because of its scalability, flexibility, and performance.
Express.js: Express.js is a web application framework for Node.js. It provides a set of features for building web applications and APIs, including routing, middleware support, and templating engines. Express.js simplifies the process of building web applications with Node.js by providing a high-level abstraction over the HTTP protocol.
AngularJS (or Angular): AngularJS is a JavaScript framework maintained by Google for building dynamic web applications. It extends HTML with additional attributes and provides a set of built-in directives for creating interactive user interfaces. AngularJS follows the Model-View-Controller (MVC) architecture, making it easy to organize code and build complex web applications.
Node.js: Node.js is a JavaScript runtime built on Chrome's V8 JavaScript engine. It allows developers to run JavaScript code outside of a web browser, making it possible to build server-side applications with JavaScript. Node.js is known for its event-driven, non-blocking I/O model, which makes it well-suited for building scalable and high-performance web applications.
Step 0: Prerequisites
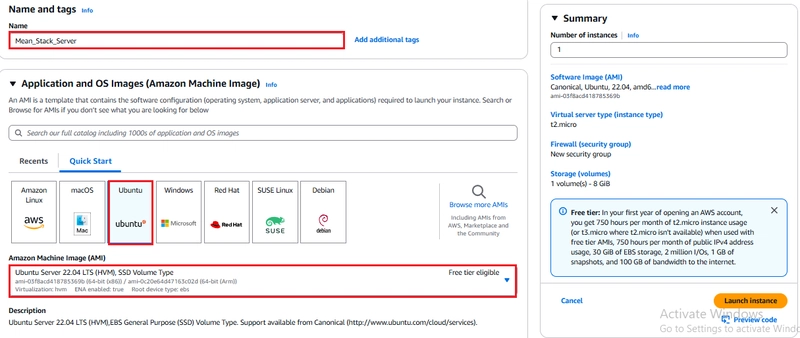
1. Launched an Ubuntu EC2 Instance named “Mean_Stack_Server” with AMI of 22.04 LTS (HVM) in the us-west-2 region using the AWS console.
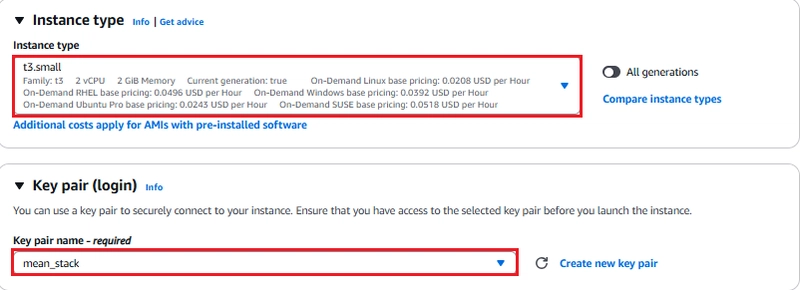
2. Gave it the instance type of t3.small.
The choice of the instance type was based on the following:
Memory: The t3.small instance offers more memory than the t2.micro, which is advantageous for applications that require more memory to operate efficiently.
Burst Capability: While both instances offer burstable CPU performance, the t3 instances have a more flexible burst model, allowing for more sustained performance during burst periods. This is important for workloads that require consistent performance over longer periods.
Performance: While both instances offer burstable performance, the t3.small typically provides better baseline performance compared to the t2.micro. This might be necessary for applications that require a bit more processing power.
Created SSH key pair named mean_stack to access the instance on port 22. The default VPC and Subnet were used for the networking configuration.
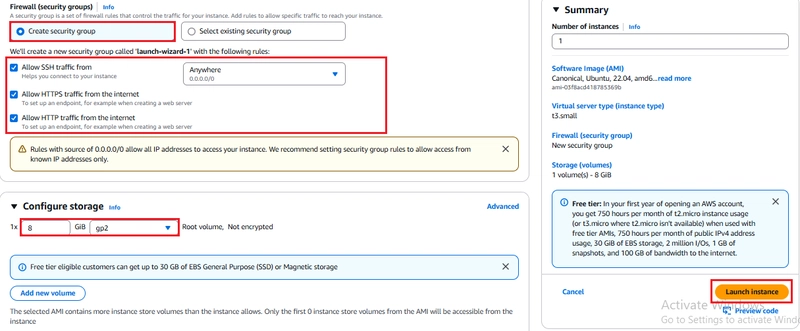
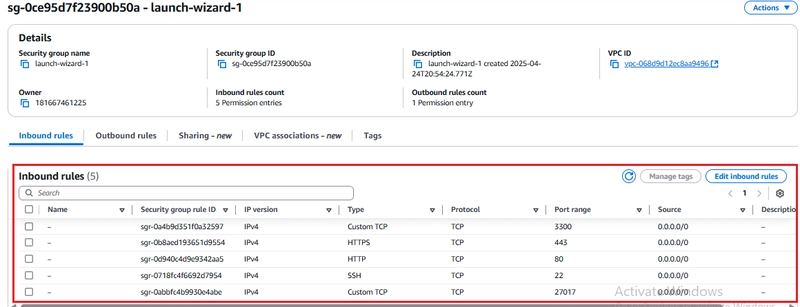
3. The security group was configured with the following inbound rules:
- Allow traffic on port 22 (SSH) with source from any IP address.
- Allow traffic on port 443 (HTTPS) with source from anywhere on the internet.
- Allow traffic on port 80 (HTTP) with source from anywhere on the internet. (All these would be set by default, later we would go into the security group to set the remaining 2 inbound rules manually.) *- Allow traffic on port 3300 (Custom TCP) with source from anywhere. *- Allow traffic on port 27017 (Custom TCP) with source from anywhere.
We will leave the storage at default; 8gb gp3 volume storage. Then we hit the launch instance button.
4. First, we need to move the keypairs file from the download folder into the .ssh folder;
cp ~/Downloads/mean_stack.pem ~/.ssh/
The private SSH key that got downloaded has now been moved, permission was changed for the private key file and then used to connect to the instance by running the following commands;
chmod 400 ~/.ssh/mean_stack.pem
ssh -i ~/.ssh/mean_stack.pem ubuntu@52.32.32.193
Where username=ubuntu and public ip address=52.32.32.193
Step 1 - Install Nodejs

Node.js is a JavaScript runtime built on Chrome’s V8 JavaScript engine. Node.js is used in this tutorial to set up the Express routes and AngularJS controllers.
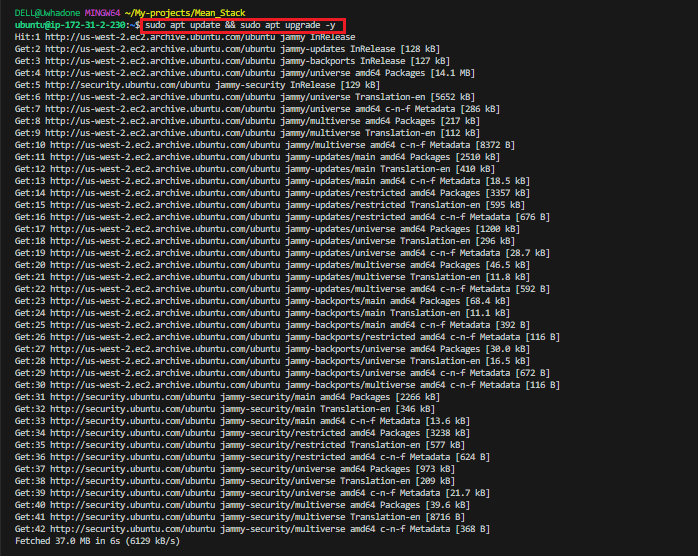
1. Update and Upgrade ubuntu
sudo apt update && sudo apt upgrade -y
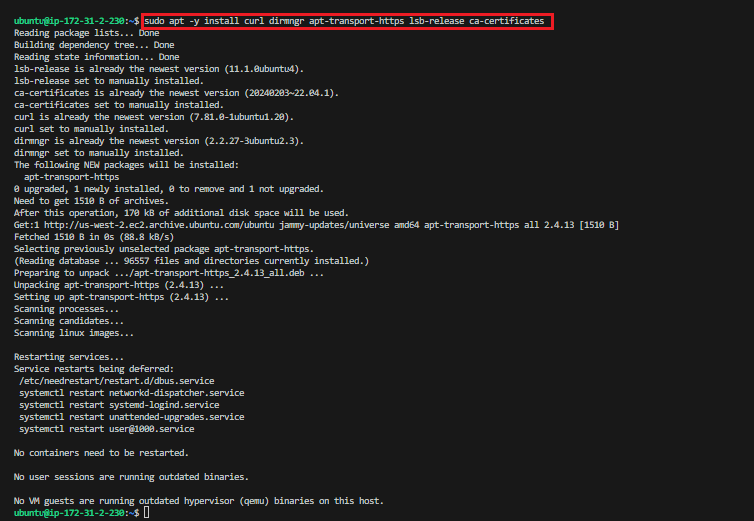
2. Add certificates
sudo apt -y install curl dirmngr apt-transport-https lsb-release ca-certificates
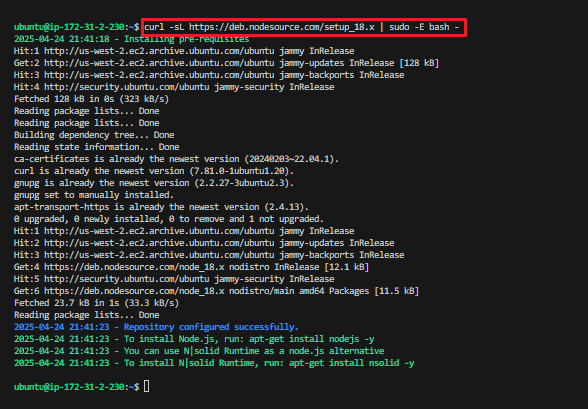
curl -sL https://deb.nodesource.com/setup_18.x | sudo -E bash -
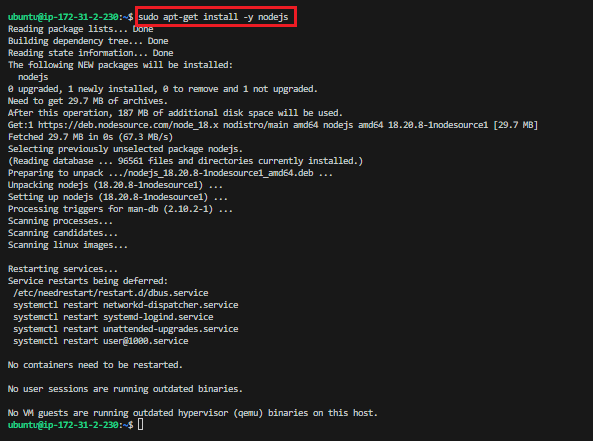
.3 Install NodeJS
sudo apt-get install -y nodejs
Step 2 - Install MongoDB
For this application, Book records were added to MongoDB that contain books name, ISBN number, author, and number of pages.
1. Download the MongoDB public GPG key
curl -fsSL https://pgp.mongodb.com/server-7.0.asc | sudo gpg --dearmor -o /usr/share/keyrings/mongodb-archive-keyring.gpg
2. Add the MongoDB repository
echo "deb [ signed-by=/usr/share/keyrings/mongodb-archive-keyring.gpg ] https://repo.mongodb.org/apt/ubuntu jammy/mongodb-org/7.0 multiverse" | sudo tee /etc/apt/sources.list.d/mongodb-org-7.0.list

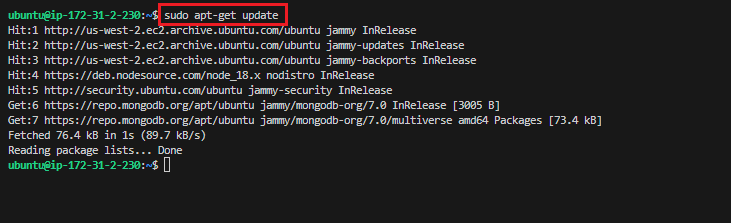
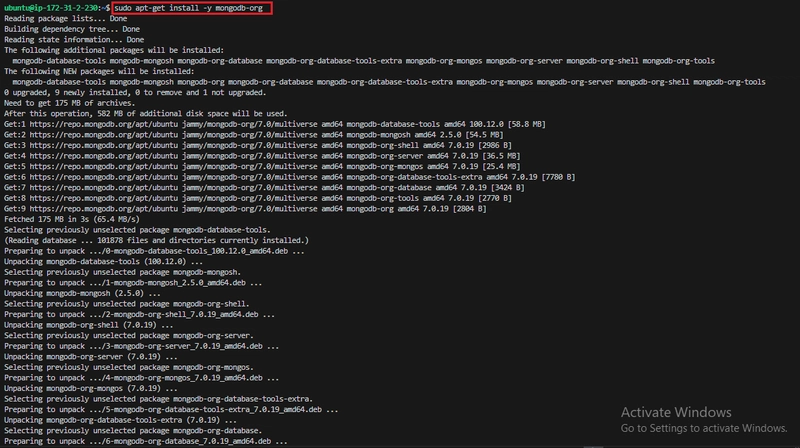
3. Update the package database and install MongoDB
sudo apt-get update
sudo apt-get install -y mongodb-org
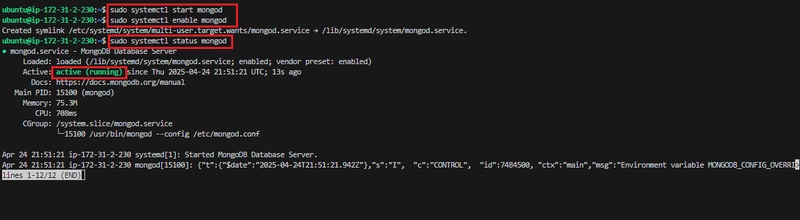
4. Start and enable MongoDB
sudo systemctl start mongod

sudo systemctl enable mongod

sudo systemctl status mongod
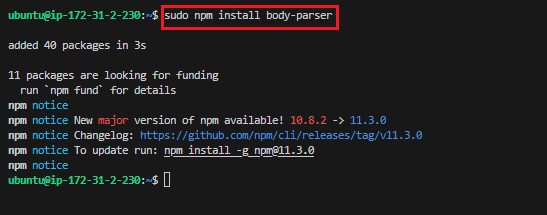
5. Install body-parser package
body-parser package is needed to help process JSON files passed in requests to the server.
sudo npm install body-parser
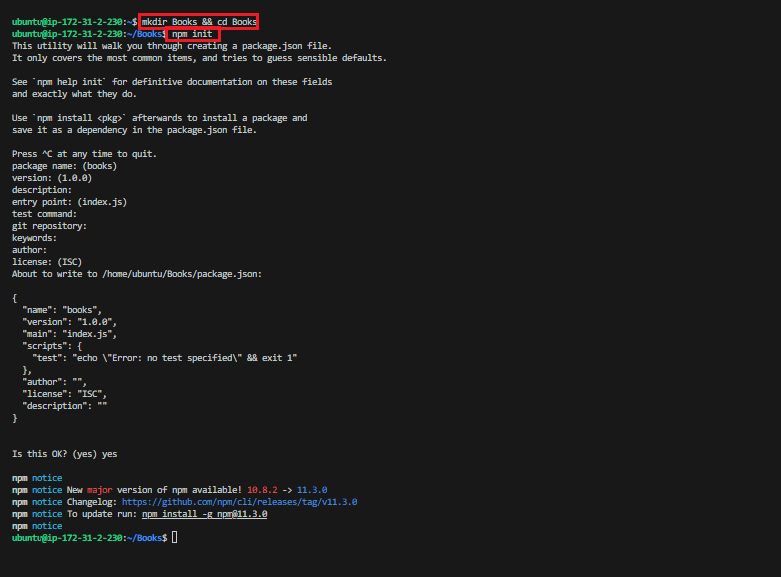
6. Create the project root folder named ‘Books’
mkdir Books && cd Books
Initialize the root folder
npm init
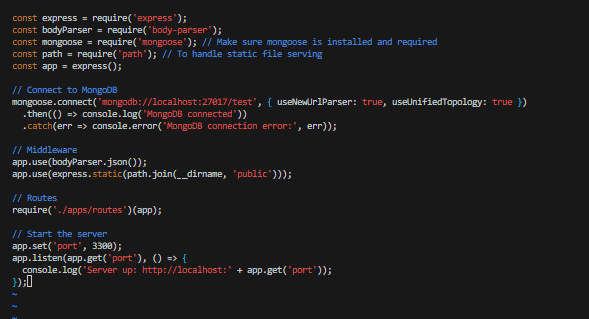
Add file named server.js to Books folder
vim server.js
Copy and paste the web server code below into the server.js file.
const express = require('express');
const bodyParser = require('body-parser');
const mongoose = require('mongoose'); // Make sure mongoose is installed and required
const path = require('path'); // To handle static file serving
const app = express();

// Connect to MongoDB
mongoose.connect('mongodb://localhost:27017/test')
  .then(() => console.log('MongoDB connected'))
  .catch(err => console.error('MongoDB connection error:', err));


// Middleware
app.use(bodyParser.json());
app.use(express.static(path.join(__dirname, 'public')));

// Routes
require('./apps/routes')(app);

// Start the server
app.set('port', 3300);
app.listen(app.get('port'), () => {
  console.log('Server up: http://localhost:' + app.get('port'));
});
Step 3 - Install Express and set up routes to the server
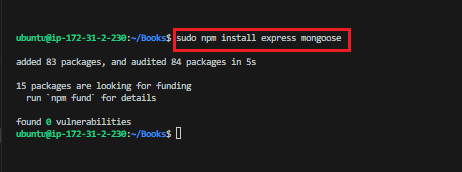
Express was used to pass book information to and from our MongoDB database.
Mongoose package provides a straightforward schema-based solution to model the application data. Mongoose was used to establish a schema for the database to store data of the book register.
1. Install express and mongoose
sudo npm install express mongoose
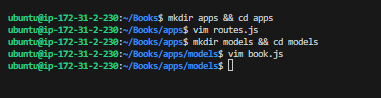
2. In Books folder, create a folder named ‘apps’
mkdir apps && cd apps
In apps, create a file named routes.js
vim routes.js
Copy and paste the code below into routes.js
const Book = require('./models/book');
const path = require('path');
module.exports = function(app) {
// Get all books
app.get('/book', async (req, res) => {
try {
const books = await Book.find({});
res.json(books);
} catch (err) {
console.error(err);
res.status(500).json({ error: 'Internal Server Error' });
}
});
// Add a new book
app.post('/book', async (req, res) => {
try {
const book = new Book({
name: req.body.name,
isbn: req.body.isbn,
author: req.body.author,
pages: req.body.pages
});
const result = await book.save();
res.json({
message: "Successfully added book",
book: result
});
} catch (err) {
console.error(err);
res.status(500).json({ error: 'Internal Server Error' });
}
});
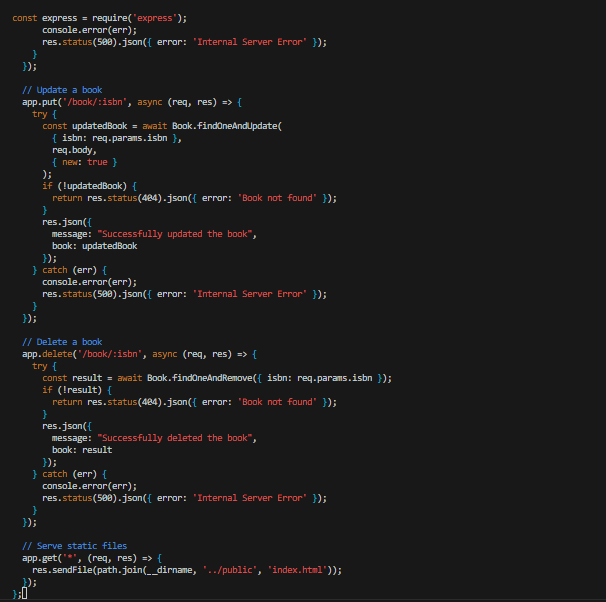
// Update a book
app.put('/book/:isbn', async (req, res) => {
try {
const updatedBook = await Book.findOneAndUpdate(
{ isbn: req.params.isbn },
req.body,
{ new: true }
);
if (!updatedBook) {
return res.status(404).json({ error: 'Book not found' });
}
res.json({
message: "Successfully updated the book",
book: updatedBook
});
} catch (err) {
console.error(err);
res.status(500).json({ error: 'Internal Server Error' });
}
});
// Delete a book
app.delete('/book/:isbn', async (req, res) => {
try {
const result = await Book.findOneAndRemove({ isbn: req.params.isbn });
if (!result) {
return res.status(404).json({ error: 'Book not found' });
}
res.json({
message: "Successfully deleted the book",
book: result
});
} catch (err) {
console.error(err);
res.status(500).json({ error: 'Internal Server Error' });
}
});
// Serve static files
app.get('*', (req, res) => {
res.sendFile(path.join(__dirname, '../public', 'index.html'));
});
};
3. In the ‘apps’ folder, create a folder named models
mkdir models && cd models
In models, create a file named book.js
vim book.js
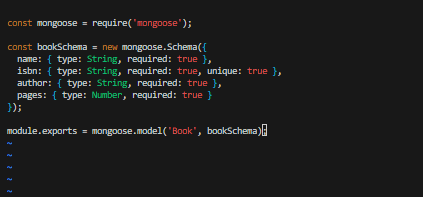
Copy and paste the code below into book.js
const mongoose = require('mongoose');

const bookSchema = new mongoose.Schema({
  name: { type: String, required: true },
  isbn: { type: String, required: true, unique: true },
  author: { type: String, required: true },
  pages: { type: Number, required: true }
});

module.exports = mongoose.model('Book', bookSchema);
Step 4 - Access the routes with AngularJS
In this project, AngularJS was used to connect the web page with Express and perform actions on the book register.
1. Change the directory back to ‘Books’ and create a folder named ‘public’
cd ../..

mkdir public && cd public
Add a file named script.js into public folder
vim script.js
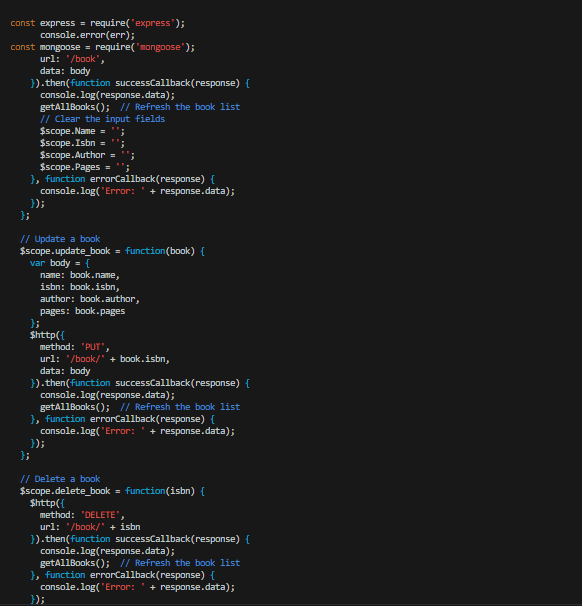
Copy and paste the code below (controller configuration defined) into the script.js file.
var app = angular.module('myApp', []);

app.controller('myCtrl', function($scope, $http) {
  // Get all books
  function getAllBooks() {
    $http({
      method: 'GET',
      url: '/book'
    }).then(function successCallback(response) {
      $scope.books = response.data;
    }, function errorCallback(response) {
      console.log('Error: ' + response.data);
    });
  }

  // Initial load of books
  getAllBooks();

  // Add a new book
  $scope.add_book = function() {
    var body = {
      name: $scope.Name,
      isbn: $scope.Isbn,
      author: $scope.Author,
      pages: $scope.Pages
    };
    $http({
      method: 'POST',
      url: '/book',
      data: body
    }).then(function successCallback(response) {
      console.log(response.data);
      getAllBooks();  // Refresh the book list
      // Clear the input fields
      $scope.Name = '';
      $scope.Isbn = '';
      $scope.Author = '';
      $scope.Pages = '';
    }, function errorCallback(response) {
      console.log('Error: ' + response.data);
    });
  };

  // Update a book
  $scope.update_book = function(book) {
    var body = {
      name: book.name,
      isbn: book.isbn,
      author: book.author,
      pages: book.pages
    };
    $http({
      method: 'PUT',
      url: '/book/' + book.isbn,
      data: body
    }).then(function successCallback(response) {
      console.log(response.data);
      getAllBooks();  // Refresh the book list
    }, function errorCallback(response) {
      console.log('Error: ' + response.data);
    });
  };

  // Delete a book
  $scope.delete_book = function(isbn) {
    $http({
      method: 'DELETE',
      url: '/book/' + isbn
    }).then(function successCallback(response) {
      console.log(response.data);
      getAllBooks();  // Refresh the book list
    }, function errorCallback(response) {
      console.log('Error: ' + response.data);
    });
  };
});
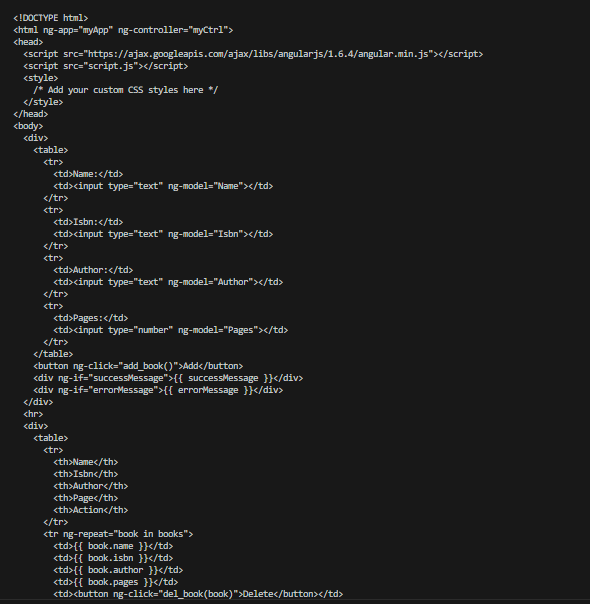
2. In ‘public’ folder, create a file named index.html
vim index.html
Copy and paste the code below into index.html file
Name:
Isbn:
Author:
Pages:
{{ successMessage }}
{{ errorMessage }}
Name
Isbn
Author
Page
Action
{{ book.name }}
{{ book.isbn }}
{{ book.author }}
{{ book.pages }}
3. Change the directory back up to ‘Books’ and start the server
cd ..

node server.js
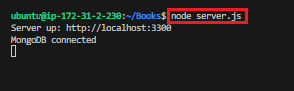
The server is now up and running, Connection to it is via port 3300. A separate Putty or SSH console to test what curl command returns locally can be launched.
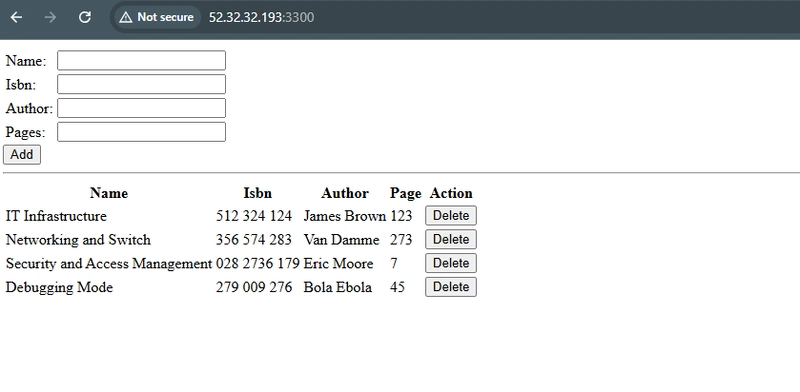
The Book Register web application can now be accessed from the internet with a browser using the Public IP address or Public DNS name.

Add more books to the register
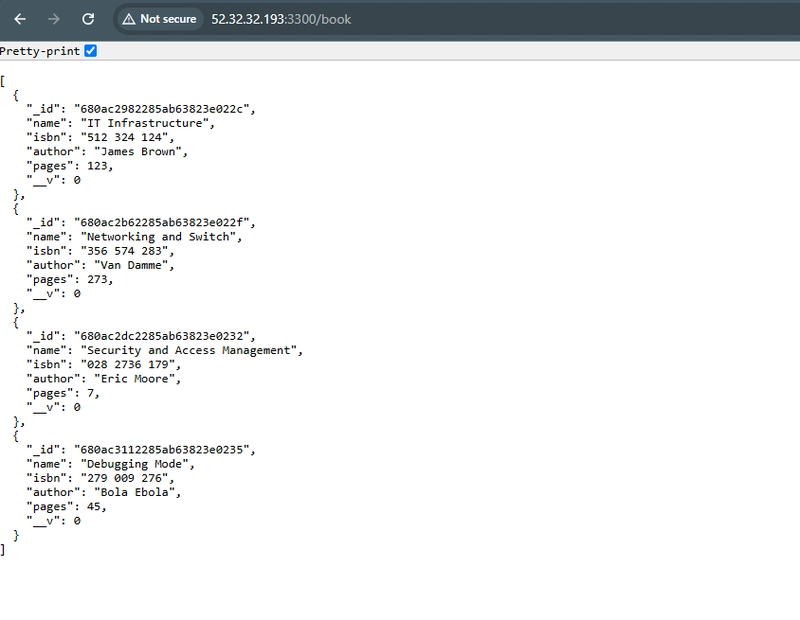
Get the JSON view
Conclusion
The MEAN stack—comprising MongoDB, Express.js, AngularJS (or Angular), and Node.js—provides a powerful and cohesive set of technologies for building modern web applications.
Together, these technologies allow developers to use JavaScript throughout the entire development process, from front-end to back-end, promoting a unified and streamlined development workflow.