


![[The AI Show Episode 145]: OpenAI Releases o3 and o4-mini, AI Is Causing “Quiet Layoffs,” Executive Order on Youth AI Education & GPT-4o’s Controversial Update](https://www.marketingaiinstitute.com/hubfs/ep%20145%20cover.png)


![From Art School Drop-out to Microsoft Engineer with Shashi Lo [Podcast #170]](https://cdn.hashnode.com/res/hashnode/image/upload/v1746203291209/439bf16b-c820-4fe8-b69e-94d80533b2df.png?#)


(1).jpg?#)


_Inge_Johnsson-Alamy.jpg?width=1280&auto=webp&quality=80&disable=upscale#)


![Apple to Split iPhone Launches Across Fall and Spring in Major Shakeup [Report]](https://www.iclarified.com/images/news/97211/97211/97211-640.jpg)
![Apple to Move Camera to Top Left, Hide Face ID Under Display in iPhone 18 Pro Redesign [Report]](https://www.iclarified.com/images/news/97212/97212/97212-640.jpg)
![Apple Developing Battery Case for iPhone 17 Air Amid Battery Life Concerns [Report]](https://www.iclarified.com/images/news/97208/97208/97208-640.jpg)
![AirPods 4 On Sale for $99 [Lowest Price Ever]](https://www.iclarified.com/images/news/97206/97206/97206-640.jpg)


![[Updated] Samsung’s 65-inch 4K Smart TV Just Crashed to $299 — That’s Cheaper Than an iPad](https://www.androidheadlines.com/wp-content/uploads/2025/05/samsung-du7200.jpg)


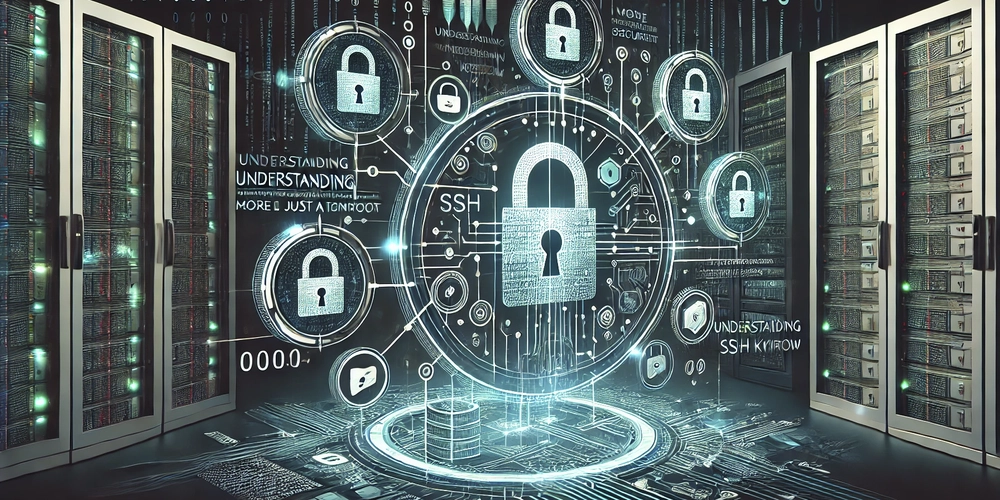
Mastering SSH Key-Based Authentication: Secure Passwordless Login for Linux and Windows
When managing remote servers, SSH (Secure Shell) is the standard for encrypted and secure communication. However, relying on passwords for SSH access leaves your systems vulnerable to: Credential stuffing Phishing attacks Keylogging and malware Man-in-the-middle (MitM) attacks Password reuse threats Brute-force dictionary attacks Table of Contents Introduction: Why SSH Key-Based Authentication Matters Why Use SSH Keys? Generating SSH Keys For Linux Users (OpenSSH) For Windows Users (PuTTYgen) Configuring SSH Clients On Linux (~/.ssh/config) On Windows (PuTTY) Testing Your SSH Connection More SSH Features to Explore Troubleshooting SSH Key Issues Bonus: Security Tips for SSH Hardening Final Thoughts If you're looking for a safer, faster, and more reliable way to access your servers, SSH key-based authentication is the solution. In this guide, we’ll show you how to set up passwordless SSH login for Linux and Windows (via PuTTY) and share tips to boost your SSH security posture. Why Use SSH Keys? SSH keys are a pair of cryptographic files—a private key and a public key—that authenticate users without a password. This offers several advantages: Enhanced security (especially with stronger keys like 4096-bit RSA or modern Ed25519) Improved convenience (no passwords to remember or type repeatedly) Resilience against common attack vectors When you connect to a server, your client offers the public key. If the server recognizes it and verifies the corresponding private key, access is granted—no password required. Let’s walk through setting this up step-by-step. 1. How to Generate SSH Keys On Linux (OpenSSH) Open your terminal. Generate your SSH key pair: ssh-keygen -t rsa -b 4096 -C "your_email@example.com" -t rsa: Specifies the algorithm (RSA). -b 4096: Sets key length for stronger encryption. -C: Optional comment for identifying the key. Press Enter to accept the default file location (~/.ssh/id_rsa). Choose an optional passphrase for added protection. Verify your keys: ls -l ~/.ssh/id_rsa* You’ll see: id_rsa (your private key — keep it safe!) id_rsa.pub (your public key — upload this to servers) Upload your public key to the server: ssh-copy-id user@server_name This adds the key to the server’s ~/.ssh/authorized_keys file. On Windows (Using PuTTYgen) Download PuTTY and open PuTTYgen. Choose: Key type: RSA Number of bits: 4096 Click Generate and move your mouse to create entropy. Save your: Private key (id_rsa.ppk) securely (e.g., C:\Users\your_username\ssh) Public key by copying it from the PuTTYgen window SSH into your server using a password, then: echo "your-copied-public-key" >> ~/.ssh/authorized_keys 2. Configuring SSH Clients Linux: ~/.ssh/config Simplify server access by creating an SSH config file: vi ~/.ssh/config Add: Host your_server_alias HostName your.server.com User your_username Port 22 IdentityFile ~/.ssh/id_rsa Now connect with: ssh your_server_alias Windows: PuTTY Open PuTTY. In the Session tab: Host Name: your server’s IP or hostname Port: 22 Go to Connection > SSH > Auth and browse to your .ppk private key. (Optional) Save the session for quick access later. 3. Testing Your SSH Connection Linux: ssh your_server_alias If configured correctly, you’ll connect without a password prompt. Windows (PuTTY): Load your saved session and click Open. 4. More SSH Features to Explore SSH does more than log you in—here are a few powerful extras: Run remote commands: ssh user@server "uptime" Secure file transfers with SCP: Upload: scp file.txt user@server:/remote/path/ Download: scp user@server:/remote/path/file.txt . Create SSH tunnels (port forwarding): ssh -L 8080:example.com:80 user@server Use an SSH agent (Linux): eval "$(ssh-agent -s)" ssh-add ~/.ssh/id_rsa 5. Troubleshooting SSH Key Issues "Permission denied" errors? Ensure correct file permissions: chmod 700 ~/.ssh chmod 600 ~/.ssh/authorized_keys PuTTY not connecting? Make sure you're using the .ppk format Check PuTTY's Event Log for specific errors 6. Bonus Security Tips for SSH Hardening Want enterprise-grade security? Consider: Use Ed25519 keys instead of RSA: ssh-keygen -t ed25519 -C "your_email@example.com" Disable password authentication: Edit /etc/ssh/sshd_config: PasswordAuthentication no ChallengeResponseAuthentication no Then: sudo systemctl restart sshd Restrict SSH access to specific users: AllowUsers your_username Install Fail2Ban or SSHGuard for intrusion detection and brute-force protection.
When managing remote servers, SSH (Secure Shell) is the standard for encrypted and secure communication. However, relying on passwords for SSH access leaves your systems vulnerable to:
- Credential stuffing
- Phishing attacks
- Keylogging and malware
- Man-in-the-middle (MitM) attacks
- Password reuse threats
- Brute-force dictionary attacks
Table of Contents
- Introduction: Why SSH Key-Based Authentication Matters
- Why Use SSH Keys?
- Generating SSH Keys
- For Linux Users (OpenSSH)
-
For Windows Users (PuTTYgen)
- Configuring SSH Clients
On Linux (
~/.ssh/config)-
On Windows (PuTTY)
- Testing Your SSH Connection
- More SSH Features to Explore
- Troubleshooting SSH Key Issues
- Bonus: Security Tips for SSH Hardening
- Final Thoughts
If you're looking for a safer, faster, and more reliable way to access your servers, SSH key-based authentication is the solution. In this guide, we’ll show you how to set up passwordless SSH login for Linux and Windows (via PuTTY) and share tips to boost your SSH security posture.
Why Use SSH Keys?
SSH keys are a pair of cryptographic files—a private key and a public key—that authenticate users without a password. This offers several advantages:
- Enhanced security (especially with stronger keys like 4096-bit RSA or modern Ed25519)
- Improved convenience (no passwords to remember or type repeatedly)
- Resilience against common attack vectors
When you connect to a server, your client offers the public key. If the server recognizes it and verifies the corresponding private key, access is granted—no password required.
Let’s walk through setting this up step-by-step.
1. How to Generate SSH Keys
On Linux (OpenSSH)
- Open your terminal.
- Generate your SSH key pair:
ssh-keygen -t rsa -b 4096 -C "your_email@example.com"
-
-t rsa: Specifies the algorithm (RSA). -
-b 4096: Sets key length for stronger encryption. -
-C: Optional comment for identifying the key.
- Press Enter to accept the default file location (
~/.ssh/id_rsa). - Choose an optional passphrase for added protection.
- Verify your keys:
ls -l ~/.ssh/id_rsa*
You’ll see:
-
id_rsa(your private key — keep it safe!) -
id_rsa.pub(your public key — upload this to servers)
- Upload your public key to the server:
ssh-copy-id user@server_name
This adds the key to the server’s ~/.ssh/authorized_keys file.
On Windows (Using PuTTYgen)
- Download PuTTY and open PuTTYgen.
-
Choose:
- Key type: RSA
- Number of bits: 4096
Click Generate and move your mouse to create entropy.
-
Save your:
-
Private key (
id_rsa.ppk) securely (e.g.,C:\Users\your_username\ssh) - Public key by copying it from the PuTTYgen window
-
Private key (
SSH into your server using a password, then:
echo "your-copied-public-key" >> ~/.ssh/authorized_keys
2. Configuring SSH Clients
Linux: ~/.ssh/config
Simplify server access by creating an SSH config file:
vi ~/.ssh/config
Add:
Host your_server_alias
    HostName your.server.com
    User your_username
    Port 22
    IdentityFile ~/.ssh/id_rsa
Now connect with:
ssh your_server_alias
Windows: PuTTY
- Open PuTTY.
-
In the Session tab:
- Host Name: your server’s IP or hostname
- Port: 22
Go to Connection > SSH > Auth and browse to your
.ppkprivate key.(Optional) Save the session for quick access later.
3. Testing Your SSH Connection
- Linux:
ssh your_server_alias
If configured correctly, you’ll connect without a password prompt.
-
Windows (PuTTY):
- Load your saved session and click Open.
4. More SSH Features to Explore
SSH does more than log you in—here are a few powerful extras:
Run remote commands:
ssh user@server "uptime"
Secure file transfers with SCP:
- Upload:
scp file.txt user@server:/remote/path/
- Download:
scp user@server:/remote/path/file.txt .
Create SSH tunnels (port forwarding):
ssh -L 8080:example.com:80 user@server
Use an SSH agent (Linux):
eval "$(ssh-agent -s)"
ssh-add ~/.ssh/id_rsa
5. Troubleshooting SSH Key Issues
- "Permission denied" errors? Ensure correct file permissions:
   chmod 700 ~/.ssh
   chmod 600 ~/.ssh/authorized_keys
-
PuTTY not connecting?
- Make sure you're using the
.ppkformat - Check PuTTY's Event Log for specific errors
- Make sure you're using the
6. Bonus Security Tips for SSH Hardening
Want enterprise-grade security? Consider:
- Use Ed25519 keys instead of RSA:
ssh-keygen -t ed25519 -C "your_email@example.com"
-
Disable password authentication:
Edit
/etc/ssh/sshd_config:
   PasswordAuthentication no
   ChallengeResponseAuthentication no
Then:
sudo systemctl restart sshd
- Restrict SSH access to specific users:
AllowUsers your_username
- Install Fail2Ban or SSHGuard for intrusion detection and brute-force protection.
Final Thoughts
SSH key authentication is an essential skill for anyone working with servers—from home labs to production environments. It significantly improves security, eliminates password fatigue, and opens the door to more advanced remote workflows.
Take the time to set it up properly—your systems (and your future self) will be better protected for it.
Have questions or want to dive deeper into SSH agent forwarding, key rotation strategies, or enterprise hardening? Drop a comment or reach out—we’re here to help.