How Clerk integrates with Supabase
While Supabase Auth is the default choice for Supabase-powered apps, Clerk is a drop-in replacement offering the same simplicity with an enhanced feature set at your disposal and takes less time to implement. On top of reducing development time, Clerk offers much more than just authentication, from beautifully designed UI components to our suite of B2B tools for multi-tenant applications. In this article, we’ll compare Supabase Auth with Clerk, looking at the differences in implementation and covering some of the additional capabilities offered by Clerk. To follow along with this post, you should have a basic understanding of Supabase, ideally having built an application with Supabase as the backend. How Supabase Auth works Supabase provides an easy approach to add authentication into your application. To properly compare it with Clerk, it’s important to understand how Supabase Auth is implemented. A default Supabase project comes pre-configured with an auth schema in the underlying Postgres instance that stores a list of users and their credentials. This schema is used by the Supabase client SDK, specifically the helper functions which are used with your own forms to simplify the sign up and sign in processes. The following snippet demonstrates the respective functions used with those forms: // Sign-up const { error } = await supabase.auth.signUp({ email, password, options: { emailRedirectTo: `${location.origin}/auth/callback`, }, }) // Sign-in const { error } = await supabase.auth.signInWithPassword({ email, password, }) Upon signing in, the service will mint a JWT and return it to the caller, which is automatically stored locally by the client SDK. Subsequent requests to Supabase will include the JWT so that the Supabase backend can authenticate the request. When Supabase receives an authenticated request, it will parse the claims from the JWT so it can be used with Row Level Security to prevent unauthorized access to data within the database. The following diagram shows what this flow looks like: The user signs in using Clerk Clerk issues JWT to the user User makes request to Supabase, including JWT Supabase verifies with the Clerk application JWKS endpoint Clerk verifies token Supabase response to the user with the requested data How Row Level Security works with Supabase Auth Row Level Security (RLS) is a feature of Postgres that allows you to control access to data by requiring certain criteria to match before the query will be processed. RLS is enabled and configured on a per-table basis. When enabled, you can define RLS policies which will be evaluated by the database engine before any data in that table is read or modified. The following snippet defines an RLS policy on the articles table that ensures only records with “published” in the status column are returned: create policy "Users can read published articles" on public.articles for select using (status = 'published'); Using the above policy as an example, Postgres will effectively transform the following query: select * from articles; Into: select * from articles where status = 'published'; Supabase Auth uses RLS policies in a similar fashion but uses a helper function to identify who is making the request. When you’re using Supabase Auth, you have access to the auth.uid() function which returns the unique identifier for the user currently signed-in. Building on the same example policy above, the following RLS policy verifies the user ID and only returns data belonging to that user: create policy "Users can view their own articles" on public.articles for select using (auth.uid()::text = user_id); Why RLS? Traditional applications have a dedicated backend system with custom logic to verify the requests being sent. This is normally where you parse the session or user ID from the request and adjust your queries (whether using SQL or an ORM) accordingly to prevent the user from accessing data they shouldn’t. If you want to further understand how authentication is implemented in a traditional configuration, check out our article on Building a React login page template, which walks you through building session-based authentication from scratch. While this same configuration can be set up with Supabase, most developers take advantage of the PostgREST API built into Supabase to save on the hours they’d otherwise spend building and maintaining the backend. PostgREST is a feature of Postgres that provides an API to access the database tables directly over HTTP. The tradeoff of using PostgREST is that you don’t have access to modify the API logic itself. You instead have to rely on RLS to prevent users from accessing data they shouldn’t. Clerk as a drop-in replacement to Supabase Auth Clerk’s integration with Supabase functions almost exactly like Supabase Auth with a few minor differences that are transparent when
While Supabase Auth is the default choice for Supabase-powered apps, Clerk is a drop-in replacement offering the same simplicity with an enhanced feature set at your disposal and takes less time to implement. On top of reducing development time, Clerk offers much more than just authentication, from beautifully designed UI components to our suite of B2B tools for multi-tenant applications.
In this article, we’ll compare Supabase Auth with Clerk, looking at the differences in implementation and covering some of the additional capabilities offered by Clerk.
To follow along with this post, you should have a basic understanding of Supabase, ideally having built an application with Supabase as the backend.
How Supabase Auth works
Supabase provides an easy approach to add authentication into your application. To properly compare it with Clerk, it’s important to understand how Supabase Auth is implemented.
A default Supabase project comes pre-configured with an auth schema in the underlying Postgres instance that stores a list of users and their credentials. This schema is used by the Supabase client SDK, specifically the helper functions which are used with your own forms to simplify the sign up and sign in processes.
The following snippet demonstrates the respective functions used with those forms:
// Sign-up
const { error } = await supabase.auth.signUp({
  email,
  password,
  options: {
    emailRedirectTo: `${location.origin}/auth/callback`,
  },
})

// Sign-in
const { error } = await supabase.auth.signInWithPassword({
  email,
  password,
})
Upon signing in, the service will mint a JWT and return it to the caller, which is automatically stored locally by the client SDK. Subsequent requests to Supabase will include the JWT so that the Supabase backend can authenticate the request. When Supabase receives an authenticated request, it will parse the claims from the JWT so it can be used with Row Level Security to prevent unauthorized access to data within the database.
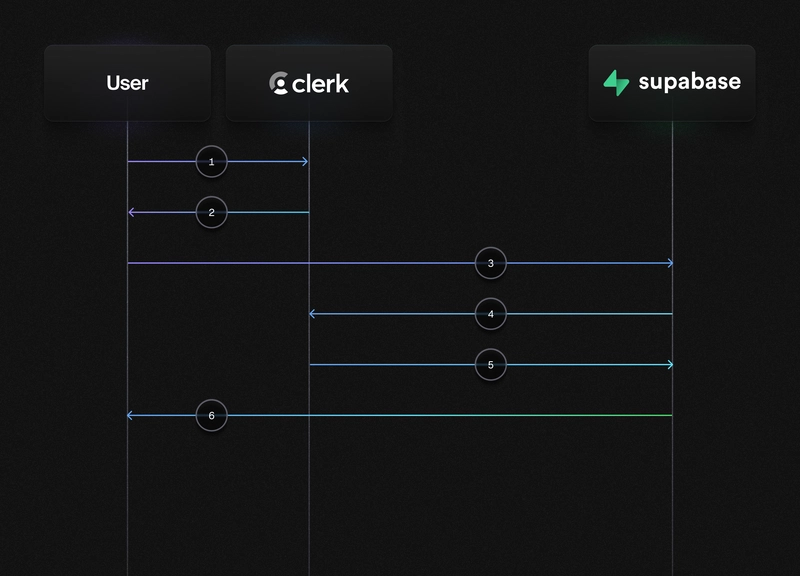
The following diagram shows what this flow looks like:
- The user signs in using Clerk
- Clerk issues JWT to the user
- User makes request to Supabase, including JWT
- Supabase verifies with the Clerk application JWKS endpoint
- Clerk verifies token
- Supabase response to the user with the requested data
How Row Level Security works with Supabase Auth
Row Level Security (RLS) is a feature of Postgres that allows you to control access to data by requiring certain criteria to match before the query will be processed.
RLS is enabled and configured on a per-table basis. When enabled, you can define RLS policies which will be evaluated by the database engine before any data in that table is read or modified.
The following snippet defines an RLS policy on the articles table that ensures only records with “published” in the status column are returned:
create policy "Users can read published articles"
  on public.articles
  for select
  using (status = 'published');
Using the above policy as an example, Postgres will effectively transform the following query:
select * from articles;
Into:
select * from articles where status = 'published';
Supabase Auth uses RLS policies in a similar fashion but uses a helper function to identify who is making the request. When you’re using Supabase Auth, you have access to the auth.uid() function which returns the unique identifier for the user currently signed-in.
Building on the same example policy above, the following RLS policy verifies the user ID and only returns data belonging to that user:
create policy "Users can view their own articles"
  on public.articles
  for select
  using (auth.uid()::text = user_id);
Why RLS?
Traditional applications have a dedicated backend system with custom logic to verify the requests being sent. This is normally where you parse the session or user ID from the request and adjust your queries (whether using SQL or an ORM) accordingly to prevent the user from accessing data they shouldn’t.
If you want to further understand how authentication is implemented in a traditional configuration, check out our article on Building a React login page template, which walks you through building session-based authentication from scratch.
While this same configuration can be set up with Supabase, most developers take advantage of the PostgREST API built into Supabase to save on the hours they’d otherwise spend building and maintaining the backend. PostgREST is a feature of Postgres that provides an API to access the database tables directly over HTTP.
The tradeoff of using PostgREST is that you don’t have access to modify the API logic itself. You instead have to rely on RLS to prevent users from accessing data they shouldn’t.
Clerk as a drop-in replacement to Supabase Auth
Clerk’s integration with Supabase functions almost exactly like Supabase Auth with a few minor differences that are transparent when configured properly.
Supabase Auth automatically uses its own keys used to mint JWTs. Like Supabase Auth, Clerk employs application-specific JWT keys. Since they are different keys, they are incompatible with each other without additional configuration.
Fortunately, Supabase allows you to provide a JSON Web Key Set (JWKS) URL that Supabase can to verify incoming JWTs, and each Clerk application has a dedicated JWKS endpoint with these keys publicly available for this purpose.
A JSON Web Key Set (JWKS) is a JSON object that contains a set of keys used to verify the authenticity of JWTs. The JWKS is available by identity providers (like Clerk) through a public URL to be used with third party services for integrations.
Connecting Clerk with Supabase
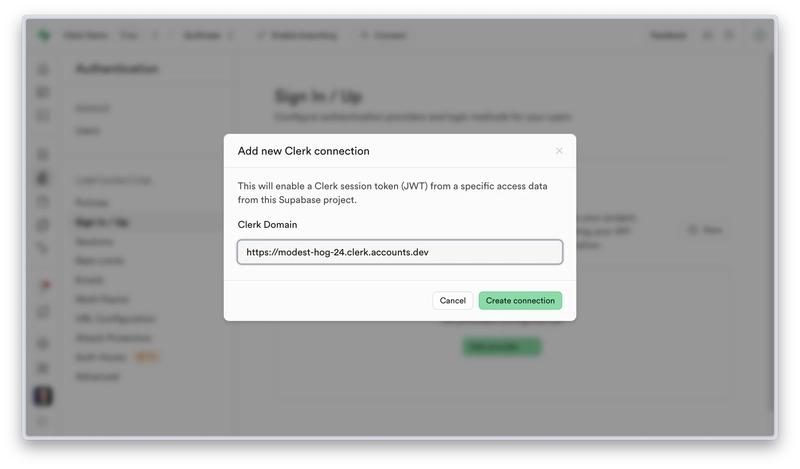
Clerk is a supported third-party authentication provider for Supabase which can be added in the Supabase dashboard, via Authentication > Sign In/Up > Third Party Auth. When adding Clerk as a provider, a modal will appear asking for the Clerk Domain, which is used to access the JWKS endpoint for your application.
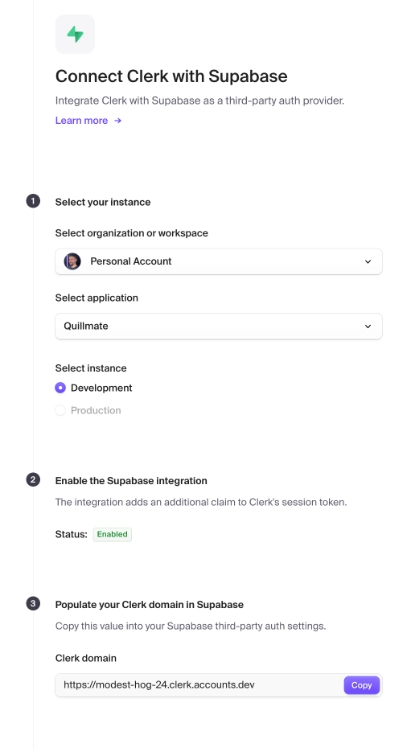
From that modal, you can access Clerk's Supabase Integration Setup page, where you can select your application and enable the integration. Once you enable the Supabase integration, all JWTs created by Clerk will include the "role": "authenticated" claim which Supabase uses to determine whether the user is authenticated.
The following image shows the setup page with the integration enabled:
You can then use the domain provided in the Clerk Domain field (pictured above) when prompted. Supabase will automatically verify JWTs with Clerk instead of its own keys going forward.
Another difference is in the way that the user ID is referenced within RLS policies. Clerk uses string-based identifiers whereas Supabase uses UUIDs. Since the auth.uid() function returns the UUID for the current user, this function cannot be used when accessing Supabase data with Clerk.
You’d instead use the auth.jwt() function to access data within the JWT, specifically the sub claim which corresponds to the ID of the user:
create policy "Users can view their own articles"
  on public.articles
  for select
  using (auth.jwt()->>'sub' = user_id);
Finally, when creating the Supabase client within your application, you’d use the Clerk session object to request a JWT that is compatible with Supabase, which is the JWT template that uses your Supabase signing key.
When using session.getToken() for the accessToken parameter, requests to Supabase will use the correct JWT created by Clerk:
import { createClient } from '@supabase/supabase-js'
import { useSession } from '@clerk/clerk-react'

const { session } = useSession()

const client = createClient(
  process.env.NEXT_PUBLIC_SUPABASE_URL!,
  process.env.NEXT_PUBLIC_SUPABASE_KEY!,
  {
    accessToken: () => session?.getToken(),
  },
)
To learn how to access the session object from other frameworks, check out our docs.
What other benefits does Clerk include?
Using Clerk provides a host of other benefits layered on top of adding authentication to your application.
As a developer, you can quickly configure various authentication strategies, including social sign-ons, passkeys, and email links, beyond the traditional username and password, accommodating your users based on their preferences.
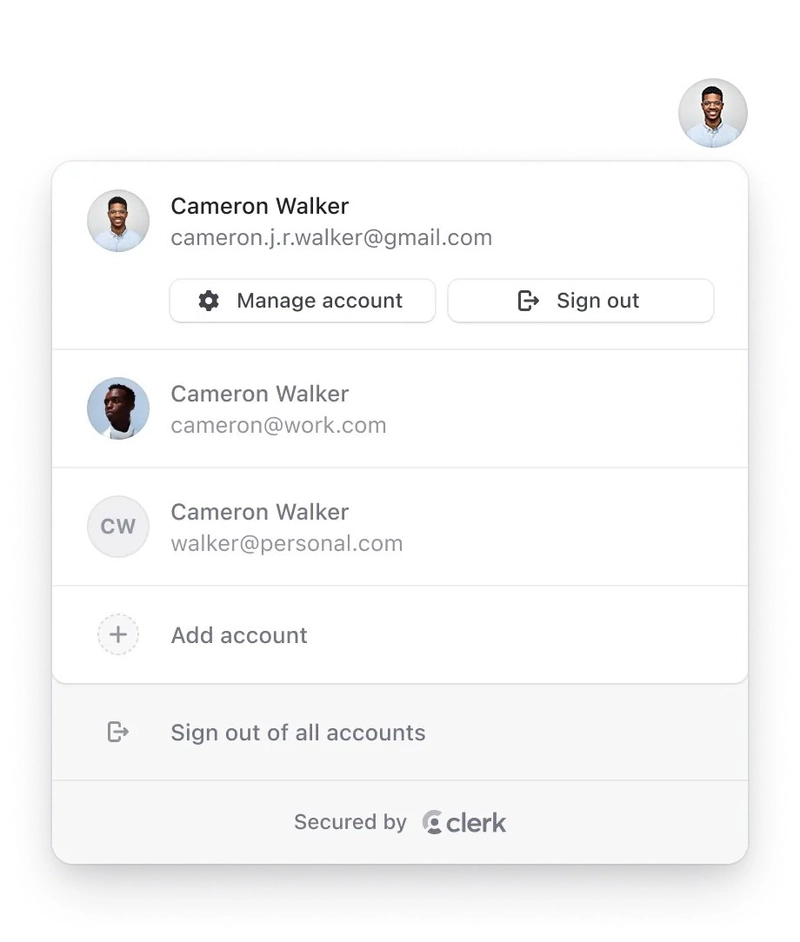
Clerk also provides drop-in UI components that make it easy to extend user management in your application, often with just a single line of code. For example, adding our
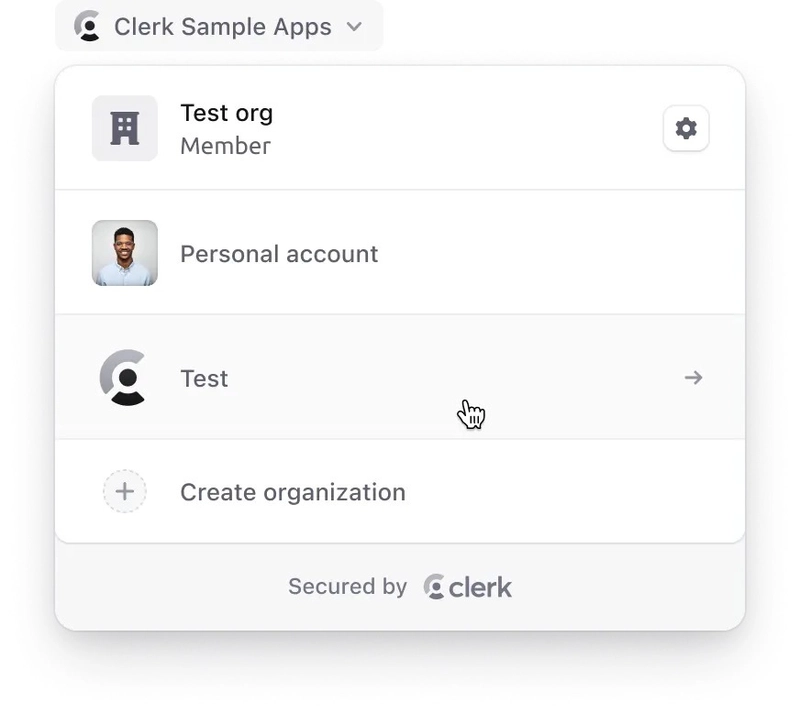
If you are building a multi-tenant application, our suite of B2B tools makes it easy for you to quickly add teams and organizations to your application. The
Conclusion
With just a bit more configuration, Clerk can not only act as a drop-in replacement for Supabase Auth but also provides more capabilities out of the box with access to a large number of commonly required user management features.
And because of our component-first approach to features built with Clerk, you can get up and running with authentication in as little as 2 minutes.


![[The AI Show Episode 142]: ChatGPT’s New Image Generator, Studio Ghibli Craze and Backlash, Gemini 2.5, OpenAI Academy, 4o Updates, Vibe Marketing & xAI Acquires X](https://www.marketingaiinstitute.com/hubfs/ep%20142%20cover.png)




.jpg?#)




![YouTube Announces New Creation Tools for Shorts [Video]](https://www.iclarified.com/images/news/96923/96923/96923-640.jpg)

![Apple Faces New Tariffs but Has Options to Soften the Blow [Kuo]](https://www.iclarified.com/images/news/96921/96921/96921-640.jpg)


