


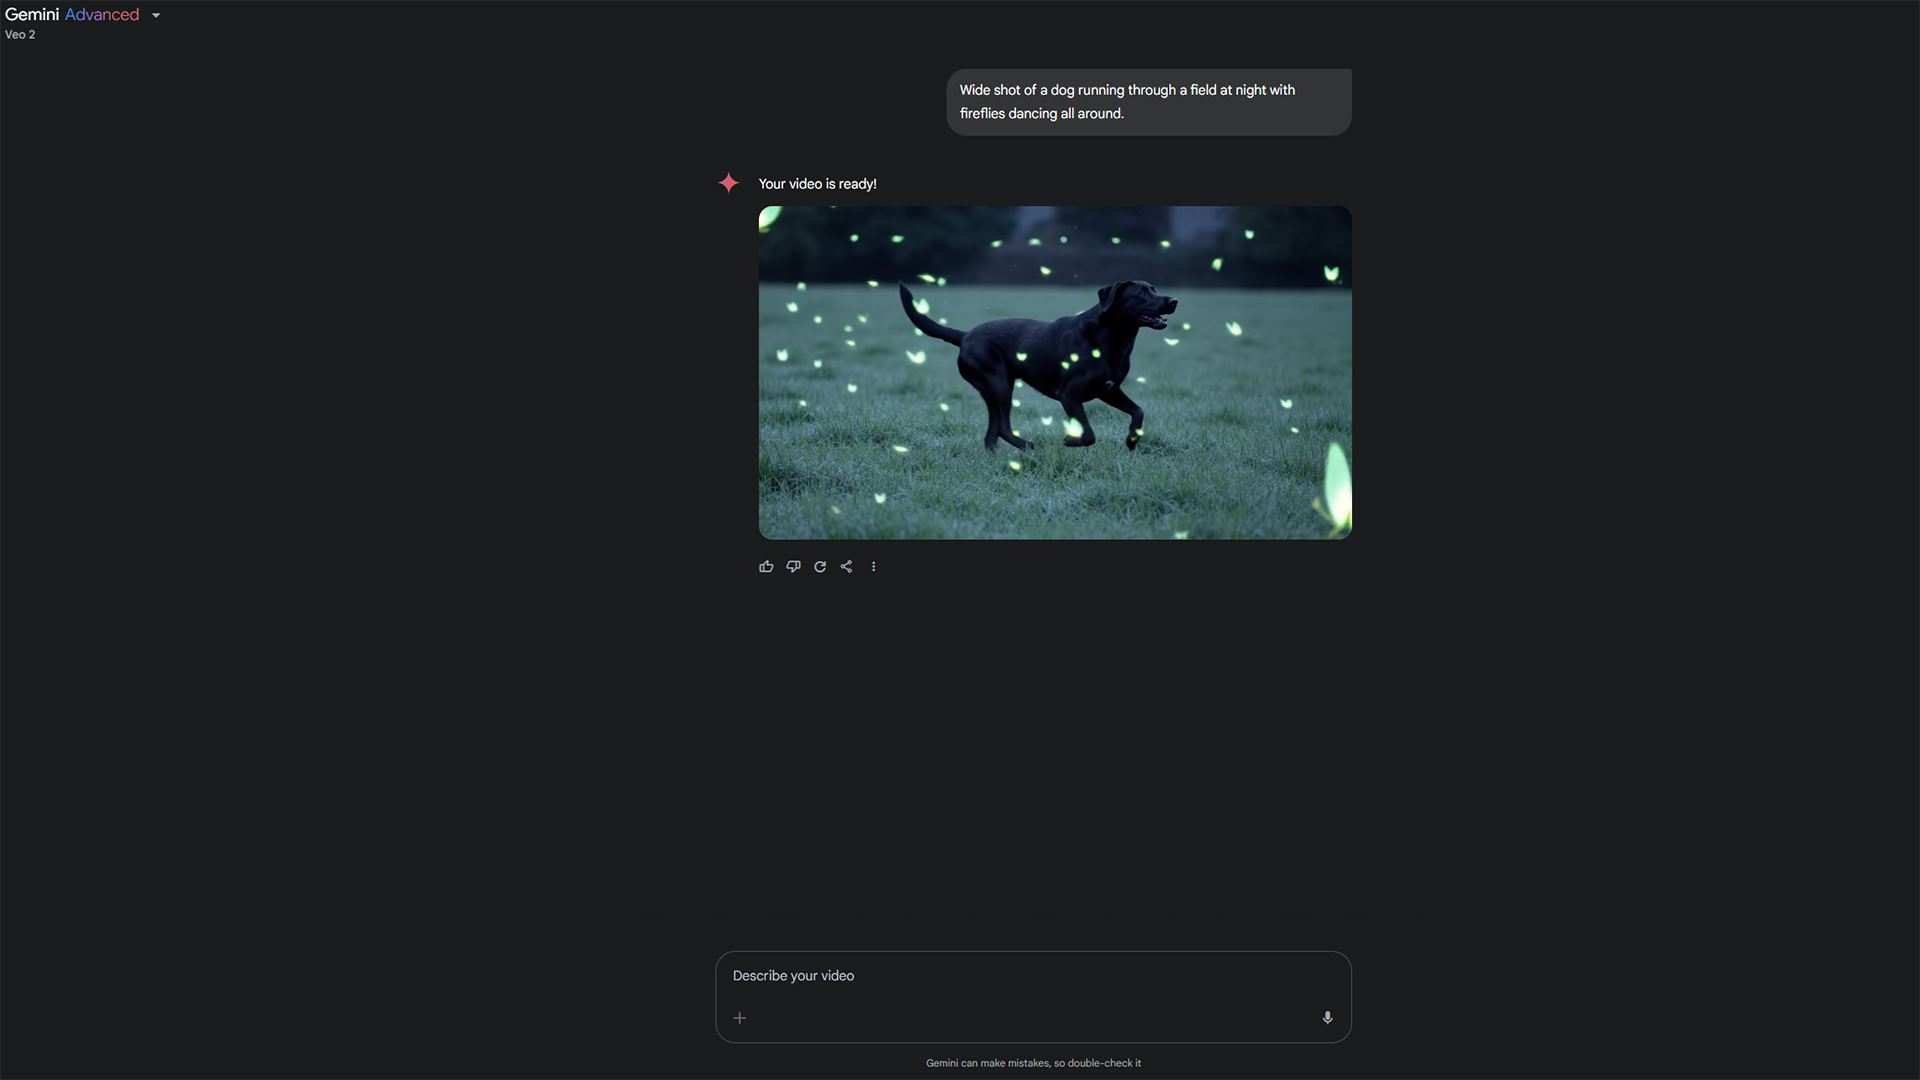
![[The AI Show Episode 144]: ChatGPT’s New Memory, Shopify CEO’s Leaked “AI First” Memo, Google Cloud Next Releases, o3 and o4-mini Coming Soon & Llama 4’s Rocky Launch](https://www.marketingaiinstitute.com/hubfs/ep%20144%20cover.png)


.png?#)


-Baldur’s-Gate-3-The-Final-Patch---An-Animated-Short-00-03-43.png?width=1920&height=1920&fit=bounds&quality=70&format=jpg&auto=webp#)


_Aleksey_Funtap_Alamy.jpg?width=1280&auto=webp&quality=80&disable=upscale#)


![Apple's Foldable iPhone May Cost Between $2100 and $2300 [Rumor]](https://www.iclarified.com/images/news/97028/97028/97028-640.jpg)
![Apple Releases Public Betas of iOS 18.5, iPadOS 18.5, macOS Sequoia 15.5 [Download]](https://www.iclarified.com/images/news/97024/97024/97024-640.jpg)
![Apple to Launch In-Store Recycling Promotion Tomorrow, Up to $20 Off Accessories [Gurman]](https://www.iclarified.com/images/news/97023/97023/97023-640.jpg)


Hosting .NET Web API on Raspberry Pi - Part 2
In the previous part we covered configuration of Nginx as a reverse proxy on Raspberry Pi. This part will cover packaging the .NET API application and running the application as a background service. Linux Deployment (using Kestrel and NGINX) For Linux, there is no .exe file. Instead, you will be copying the .NET application binaries (such as .dll files) and using Kestrel/Nginx to serve the app. a. Publish Your .NET Application To publish your .NET Web API to Linux, run the following command: bash dotnet publish --configuration Release --output ./publish --runtime linux-arm64 b. Copy Files to Your Raspberry Pi Server /var directory is used to store content and log files by Nginx. Copy the published Files to appropriate directory. bash sudo cp -a ~/yourapp/bin/Debug/net5.0/publish/ /var/www/yourapp/ use sudo before the copy command, standard users don't have write permission to /var directory. Therefore, you must run the command as a superuser. To run your application from a published folder, run the following command: dotnet /var/www/yourapp/yourapp.dll If you want, you can run tests by using the curl and wget commands. This application will listen on port 5000 for HTTP requests. c. Ensure permissions Ensure that the application folder has the correct permissions for your web server or user to execute the application: bash sudo chmod -R 755 /var/www/yourapp d. Create Service File For production, you would want to run your application as a service using systemd or another process manager to keep it running in the background. This will restart the services even if it fails due to unknown issues. Here's an example of how you might create a systemd service file for your .NET application: Create a file like /etc/systemd/system/yourapp.service: ini [Unit] Description=Your .NET Web API After=network.target [Service] WorkingDirectory=/var/www/yourapp ExecStart=/usr/bin/dotnet /var/www/yourapp/yourapp.dll Restart=always User=www-data Environment=ASPNETCORE_ENVIRONMENT=Production Environment=DOTNET_PRINT_TELEMETRY_MESSAGE=false [Install] WantedBy=multi-user.target After creating this service, enable and start it with: bash sudo systemctl enable yourapp sudo systemctl start yourapp using journalctlgives detailed messages and can be helpful in trouble shooting. sudo journalctl -fu yourapp.service Once your application is running, NGINX (as described previously) will forward incoming requests to your .NET Web API application. Summary Location of Application Files: On Linux, choose a standard location for your application files, such as /var/www/yourapp (or any other appropriate directory). Process Management: For a production environment on Linux, you should always run your .NET application as a service so it will automatically start when the server boots and will be restarted if it crashes. Use systemd, supervisord, or forever (for Node.js apps) to manage the application processes. Security: Ensure the appropriate file permissions and user ownership for the application folder. For production applications, run the application as a non-root user, and configure your firewall to allow traffic only on the necessary ports (e.g., 80 and 443 for HTTP and HTTPS).
In the previous part we covered configuration of Nginx as a reverse proxy on Raspberry Pi.
This part will cover packaging the .NET API application and running the application as a background service.
Linux Deployment (using Kestrel and NGINX)
For Linux, there is no .exe file. Instead, you will be copying the .NET application binaries (such as .dll files) and using Kestrel/Nginx to serve the app.
a. Publish Your .NET Application
To publish your .NET Web API to Linux, run the following command:
bash

dotnet publish --configuration Release --output ./publish --runtime linux-arm64
b. Copy Files to Your Raspberry Pi Server
/var directory is used to store content and log files by Nginx. Copy the published Files to appropriate directory.
bash

sudo cp -a ~/yourapp/bin/Debug/net5.0/publish/ /var/www/yourapp/
use sudo before the copy command, standard users don't have write permission to /var directory. Therefore, you must run the command as a superuser.
To run your application from a published folder, run the following command:
dotnet /var/www/yourapp/yourapp.dll
If you want, you can run tests by using the curl and wget commands.
This application will listen on port 5000 for HTTP requests.
c. Ensure permissions
Ensure that the application folder has the correct permissions for your web server or user to execute the application:
bash
sudo chmod -R 755 /var/www/yourapp
d. Create Service File
For production, you would want to run your application as a service using systemd or another process manager to keep it running in the background. This will restart the services even if it fails due to unknown issues.
Here's an example of how you might create a systemd service file for your .NET application:
Create a file like /etc/systemd/system/yourapp.service:
ini
[Unit]
Description=Your .NET Web API
After=network.target

[Service]
WorkingDirectory=/var/www/yourapp
ExecStart=/usr/bin/dotnet /var/www/yourapp/yourapp.dll
Restart=always
User=www-data
Environment=ASPNETCORE_ENVIRONMENT=Production
Environment=DOTNET_PRINT_TELEMETRY_MESSAGE=false

[Install]
WantedBy=multi-user.target
After creating this service, enable and start it with:
bash
sudo systemctl enable yourapp
sudo systemctl start yourapp
using journalctlgives detailed messages and can be helpful in trouble shooting.
sudo journalctl -fu yourapp.service
Once your application is running, NGINX (as described previously) will forward incoming requests to your .NET Web API application.
Summary
-
Location of Application Files: On Linux, choose a standard location for your application files, such as
/var/www/yourapp(or any other appropriate directory). - Process Management: For a production environment on Linux, you should always run your .NET application as a service so it will automatically start when the server boots and will be restarted if it crashes. Use systemd, supervisord, or forever (for Node.js apps) to manage the application processes.
- Security: Ensure the appropriate file permissions and user ownership for the application folder. For production applications, run the application as a non-root user, and configure your firewall to allow traffic only on the necessary ports (e.g., 80 and 443 for HTTP and HTTPS).