Deploying an Azure Virtual Machine with Terraform: A Beginner's Guide
Table of Contents Introduction Prerequisites Installing and Configuring Terraform Setting Up Your Terraform Project in VS Code Writing the Terraform Configuration Initializing and Applying the Terraform Configuration Retrieving the VM's Public IP and Connecting via SSH Destroying the VM Conclusion Introduction This guide walks you through the step-by-step process of provisioning Azure resources using Terraform, deploying a virtual machine, retrieving its IP, connecting via SSH, and finally destroying the VM. We'll use VS Code to edit our Terraform scripts for a smooth development experience. Prerequisites Before we begin, ensure you have the following installed on your machine: Terraform (Download here) Azure CLI (Download here) VS Code (Download here) An active Azure subscription Installing and Configuring Terraform First, verify that Terraform is installed by running: terraform -v If Terraform is not installed, download and install it from Terraform's official site. Log in to Azure with: az login Set your default subscription (replace your-sub-id with your actual subscription ID): az account set --subscription your-sub-id Setting Up Your Terraform Project in VS Code Open VS Code Create a new folder (e.g., azure-terraform-vm) Open the folder in VS Code Create a new file named main.tf Writing the Terraform Configuration Copy the following Terraform code into main.tf. Replace your-VM-name, your-Vnet-name, etc., with meaningful names of your choice. Don't forget to replace the username and password as well, that's what you will use to SSH into your VM terraform { required_providers { azurerm = { source = "hashicorp/azurerm" version = "4.3.0" } } } provider "azurerm" { features {} subscription_id = "your-sub-id" } resource "azurerm_resource_group" "your-rg-name" { name = "your-rg-name" location = "East US" } resource "azurerm_virtual_network" "your-Vnet-name" { name = "your-Vnet-name" address_space = ["10.0.0.0/16"] location = azurerm_resource_group.your-rg-name.location resource_group_name = azurerm_resource_group.your-rg-name.name } resource "azurerm_subnet" "your-Subnet-name" { name = "your-Subnet-name" resource_group_name = azurerm_resource_group.your-rg-name.name virtual_network_name = azurerm_virtual_network.your-Vnet-name.name address_prefixes = ["10.0.1.0/24"] } resource "azurerm_public_ip" "your-ip-name" { name = "your-ip-name" location = azurerm_resource_group.your-rg-name.location resource_group_name = azurerm_resource_group.your-rg-name.name allocation_method = "Static" } resource "azurerm_network_interface" "your-NIC-name" { name = "your-NIC-name" location = azurerm_resource_group.your-rg-name.location resource_group_name = azurerm_resource_group.your-rg-name.name ip_configuration { name = "internal" subnet_id = azurerm_subnet.your-Subnet-name.id private_ip_address_allocation = "Static" private_ip_address = "10.0.1.4" public_ip_address_id = azurerm_public_ip.your-ip-name.id } } resource "azurerm_linux_virtual_machine" "your-VM-name" { name = "your-VM-name" location = azurerm_resource_group.your-rg-name.location resource_group_name = azurerm_resource_group.your-rg-name.name size = "Standard_B2ms" admin_username = "your-admin-username" admin_password = "YourSecurePassword!" network_interface_ids = [azurerm_network_interface.your-NIC-name.id] disable_password_authentication = false os_disk { name = "your-OsDisk-name" caching = "ReadWrite" storage_account_type = "Standard_LRS" } source_image_reference { publisher = "Canonical" offer = "0001-com-ubuntu-server-jammy" sku = "22_04-lts-gen2" version = "latest" } } output "public_ip_address" { description = "The public IP address of the virtual machine" value = azurerm_public_ip.your-ip-name.ip_address } Initializing and Applying the Terraform Configuration Run the following commands in the terminal inside VS Code: terraform init terraform plan terraform apply -auto-approve Terraform will create all the specified resources in Azure. Retrieving the VM's Public IP and Connecting via SSH Get the public IP: echo $(terraform output -raw public_ip_address) Use SSH to connect to the VM: ssh your-admin-username@your-vm-public-ip Destroying the VM Once you're done, destroy the VM to avoid unnecessary charges: terraform destroy -auto-approve Conclusion Congratulations!
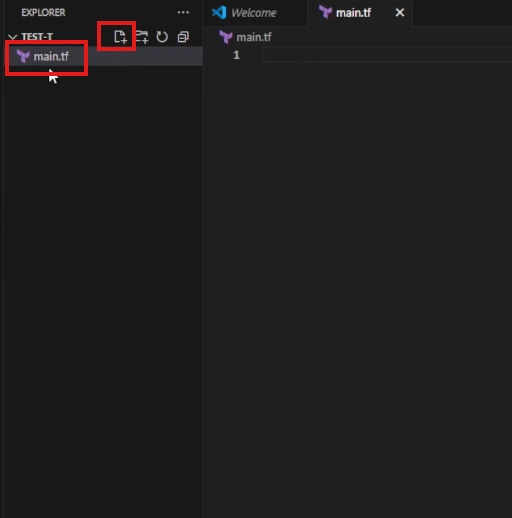
Table of Contents
- Introduction
- Prerequisites
- Installing and Configuring Terraform
- Setting Up Your Terraform Project in VS Code
- Writing the Terraform Configuration
- Initializing and Applying the Terraform Configuration
- Retrieving the VM's Public IP and Connecting via SSH
- Destroying the VM
- Conclusion
Introduction
This guide walks you through the step-by-step process of provisioning Azure resources using Terraform, deploying a virtual machine, retrieving its IP, connecting via SSH, and finally destroying the VM. We'll use VS Code to edit our Terraform scripts for a smooth development experience.
Prerequisites
Before we begin, ensure you have the following installed on your machine:
- Terraform (Download here)
- Azure CLI (Download here)
- VS Code (Download here)
- An active Azure subscription
Installing and Configuring Terraform
First, verify that Terraform is installed by running:
terraform -v
If Terraform is not installed, download and install it from Terraform's official site.
Log in to Azure with:
az login
Set your default subscription (replace your-sub-id with your actual subscription ID):
az account set --subscription your-sub-id
Setting Up Your Terraform Project in VS Code
- Open VS Code
-
Create a new folder (e.g.,
azure-terraform-vm) - Open the folder in VS Code
-
Create a new file named
main.tf
Writing the Terraform Configuration
Copy the following Terraform code into main.tf. Replace your-VM-name, your-Vnet-name, etc., with meaningful names of your choice. Don't forget to replace the username and password as well, that's what you will use to SSH into your VM
terraform {
  required_providers {
    azurerm = {
      source  = "hashicorp/azurerm"
      version = "4.3.0"
    }
  }
}

provider "azurerm" {
  features {}
  subscription_id = "your-sub-id"
}

resource "azurerm_resource_group" "your-rg-name" {
  name     = "your-rg-name"
  location = "East US"
}

resource "azurerm_virtual_network" "your-Vnet-name" {
  name                = "your-Vnet-name"
  address_space       = ["10.0.0.0/16"]
  location            = azurerm_resource_group.your-rg-name.location
  resource_group_name = azurerm_resource_group.your-rg-name.name
}

resource "azurerm_subnet" "your-Subnet-name" {
  name                 = "your-Subnet-name"
  resource_group_name  = azurerm_resource_group.your-rg-name.name
  virtual_network_name = azurerm_virtual_network.your-Vnet-name.name
  address_prefixes     = ["10.0.1.0/24"]
}

resource "azurerm_public_ip" "your-ip-name" {
  name                = "your-ip-name"
  location            = azurerm_resource_group.your-rg-name.location
  resource_group_name = azurerm_resource_group.your-rg-name.name
  allocation_method   = "Static"
}

resource "azurerm_network_interface" "your-NIC-name" {
  name                = "your-NIC-name"
  location            = azurerm_resource_group.your-rg-name.location
  resource_group_name = azurerm_resource_group.your-rg-name.name

  ip_configuration {
    name                          = "internal"
    subnet_id                     = azurerm_subnet.your-Subnet-name.id
    private_ip_address_allocation = "Static"
    private_ip_address            = "10.0.1.4"
    public_ip_address_id          = azurerm_public_ip.your-ip-name.id
  }
}

resource "azurerm_linux_virtual_machine" "your-VM-name" {
  name                  = "your-VM-name"
  location              = azurerm_resource_group.your-rg-name.location
  resource_group_name   = azurerm_resource_group.your-rg-name.name
  size                  = "Standard_B2ms"
  admin_username        = "your-admin-username"
  admin_password        = "YourSecurePassword!"
  network_interface_ids = [azurerm_network_interface.your-NIC-name.id]
  disable_password_authentication = false

  os_disk {
    name              = "your-OsDisk-name"
    caching           = "ReadWrite"
    storage_account_type = "Standard_LRS"
  }

  source_image_reference {
    publisher = "Canonical"
    offer     = "0001-com-ubuntu-server-jammy"
    sku       = "22_04-lts-gen2"
    version   = "latest"
  }
}

output "public_ip_address" {
  description = "The public IP address of the virtual machine"
  value       = azurerm_public_ip.your-ip-name.ip_address
}
Initializing and Applying the Terraform Configuration
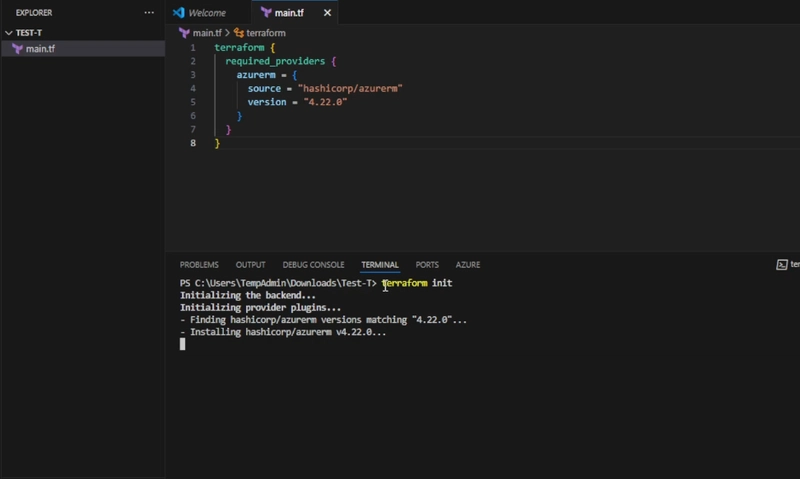
Run the following commands in the terminal inside VS Code:
terraform init
terraform plan
terraform apply -auto-approve
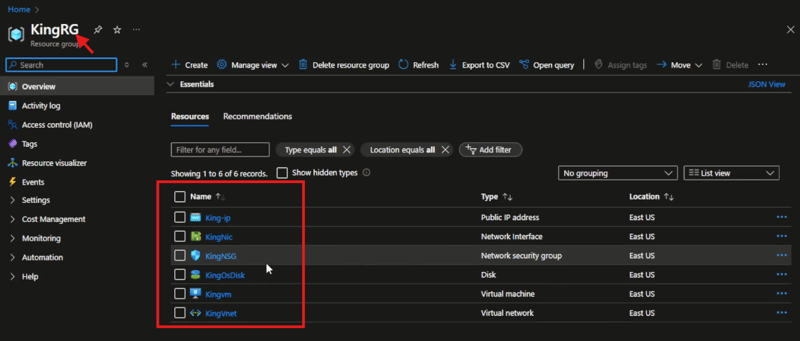
Terraform will create all the specified resources in Azure.
Retrieving the VM's Public IP and Connecting via SSH
Get the public IP:
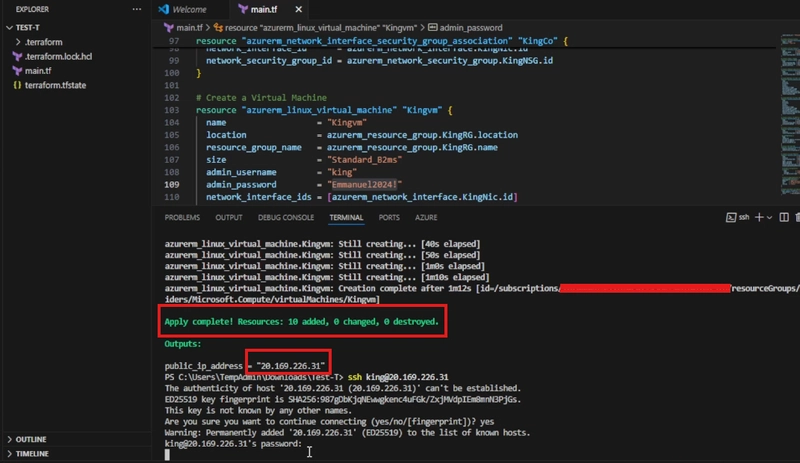
echo $(terraform output -raw public_ip_address)
Use SSH to connect to the VM:
ssh your-admin-username@your-vm-public-ip
Destroying the VM
Once you're done, destroy the VM to avoid unnecessary charges:
terraform destroy -auto-approve
Conclusion
Congratulations!


%20Abstract%20Background%20112024%20SOURCE%20Amazon.jpg)


![[The AI Show Episode 142]: ChatGPT’s New Image Generator, Studio Ghibli Craze and Backlash, Gemini 2.5, OpenAI Academy, 4o Updates, Vibe Marketing & xAI Acquires X](https://www.marketingaiinstitute.com/hubfs/ep%20142%20cover.png)




-Nintendo-Switch-2-–-Overview-trailer-00-00-10.png?width=1920&height=1920&fit=bounds&quality=80&format=jpg&auto=webp#)


_Anna_Berkut_Alamy.jpg?#)








![YouTube Announces New Creation Tools for Shorts [Video]](https://www.iclarified.com/images/news/96923/96923/96923-640.jpg)


![[Weekly funding roundup March 29-April 4] Steady-state VC inflow pre-empts Trump tariff impact](https://images.yourstory.com/cs/2/220356402d6d11e9aa979329348d4c3e/WeeklyFundingRoundupNewLogo1-1739546168054.jpg)


