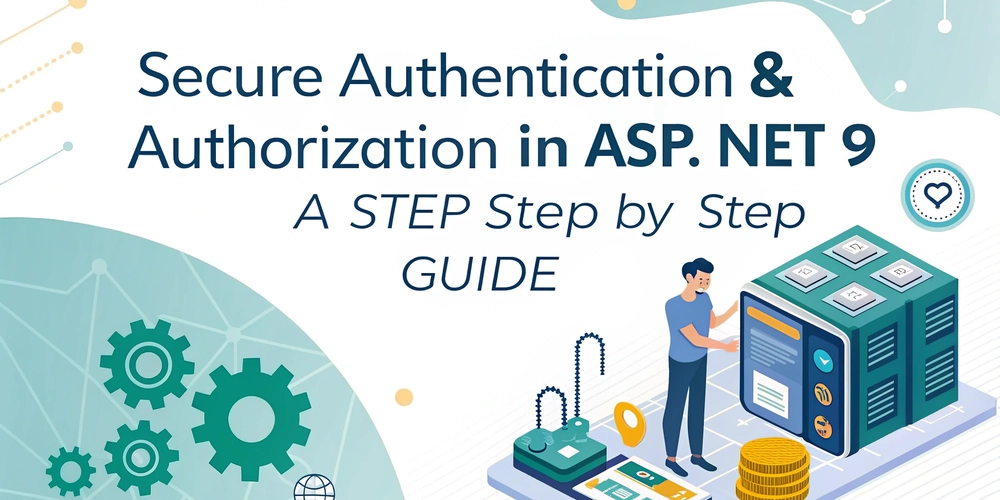
Secure Authentication & Authorization in ASP.NET Core 9.0: A Step-by-Step Guide
In this post, we’ll walk through how to implement robust and secure authentication and authorization in ASP.NET Core 9.0. You’ll learn to leverage the newest APIs, configure JWT and cookie authentication, define fine‑grained policies, and apply best practices to protect your web apps and APIs. Table of Contents Introduction What’s New in ASP.NET Core 9.0 Auth Setting Up Authentication JWT Bearer Authentication Cookie Authentication Configuring Authorization Policies Securing Minimal APIs & MVC Endpoints Best Practices for Secure Auth Conclusion Introduction Authentication verifies who a user is, while authorization controls what they can do. ASP.NET Core 9.0 introduces more streamlined and secure defaults for both. In this guide, we'll: Explain new authentication/authorization APIs Show code examples for JWT and cookie auth Define policy‑ and role‑based access Apply auth to Minimal APIs and MVC controllers Cover best practices to harden your application What’s New in ASP.NET Core 9.0 Auth ASP.NET Core 9.0 enhances the security and developer experience by: Simplified Configuration: New extension overloads reduce boilerplate in Program.cs. Built‑In Secure Defaults: Enforces HTTPS, SameSite cookie mode, and stricter token validation by default. Endpoint‑Level Authorization: Fine‑grained RequireAuthorization with policy chaining for Minimal APIs. Improved DI for Auth Handlers: Custom handlers can now request scoped services directly, making policies more powerful. Setting Up Authentication In Program.cs, add authentication services before building the app: var builder = WebApplication.CreateBuilder(args); // 1. Add Authentication & configure schemes builder.Services.AddAuthentication(options => { options.DefaultAuthenticateScheme = JwtBearerDefaults.AuthenticationScheme; options.DefaultChallengeScheme = JwtBearerDefaults.AuthenticationScheme; }) .AddJwtBearer(options => { options.TokenValidationParameters = new TokenValidationParameters { ValidateIssuer = true, ValidateAudience = true, ValidateLifetime = true, ValidIssuer = builder.Configuration["Jwt:Issuer"], ValidAudience = builder.Configuration["Jwt:Audience"], IssuerSigningKey = new SymmetricSecurityKey( Encoding.UTF8.GetBytes(builder.Configuration["Jwt:Key"])) }; }) .AddCookie("MyCookie", options => { options.Cookie.HttpOnly = true; options.Cookie.SameSite = SameSiteMode.Strict; options.LoginPath = "/account/login"; options.ExpireTimeSpan = TimeSpan.FromMinutes(30); }); JWT Bearer Authentication Issue tokens from your auth controller and validate them: app.MapPost("/token", ([FromServices] IConfiguration config, UserCredentials creds) => { if (ValidateUser(creds)) { var claims = new[] { new Claim(ClaimTypes.Name, creds.Username), new Claim(ClaimTypes.Role, "Admin") }; var key = new SymmetricSecurityKey(Encoding.UTF8.GetBytes(config["Jwt:Key"])); var token = new JwtSecurityToken( issuer: config["Jwt:Issuer"], audience: config["Jwt:Audience"], claims: claims, expires: DateTime.UtcNow.AddMinutes(15), signingCredentials: new SigningCredentials(key, SecurityAlgorithms.HmacSha256)); return Results.Ok(new { token = new JwtSecurityTokenHandler().WriteToken(token) }); } return Results.Unauthorized(); }); Cookie Authentication For server‑rendered apps or safe XSRF flows, use cookies: app.MapPost("/account/login", async (HttpContext http, UserCredentials creds) => { if (ValidateUser(creds)) { var claims = new List { new Claim(ClaimTypes.Name, creds.Username), new Claim(ClaimTypes.Role, "User") }; var claimsIdentity = new ClaimsIdentity(claims, "MyCookie"); await http.SignInAsync("MyCookie", new ClaimsPrincipal(claimsIdentity)); return Results.Redirect("/"); } return Results.Unauthorized(); }); Configuring Authorization Policies Define policies in Program.cs before builder.Build(): builder.Services.AddAuthorization(options => { options.AddPolicy("AdminOnly", policy => policy.RequireAuthenticatedUser() .RequireRole("Admin")); options.AddPolicy("Over18", policy => policy.RequireClaim("DateOfBirth") .RequireAssertion(context => { var dob = DateTime.Parse(context.User.FindFirstValue("DateOfBirth")!); return (DateTime.Today - dob).TotalDays >= 18 * 365; })); }); Use custom authorization handlers for complex logic: public class MinimumAgeHandler : AuthorizationHandler { protected override Task HandleRequirementAsync( AuthorizationHandlerContext context, MinimumAgeRequirement requirement) { if (contex

In this post, we’ll walk through how to implement robust and secure authentication and authorization in ASP.NET Core 9.0. You’ll learn to leverage the newest APIs, configure JWT and cookie authentication, define fine‑grained policies, and apply best practices to protect your web apps and APIs.
Table of Contents
- Introduction
- What’s New in ASP.NET Core 9.0 Auth
-
Setting Up Authentication
- JWT Bearer Authentication
- Cookie Authentication
- Configuring Authorization Policies
- Securing Minimal APIs & MVC Endpoints
- Best Practices for Secure Auth
- Conclusion
Introduction
Authentication verifies who a user is, while authorization controls what they can do. ASP.NET Core 9.0 introduces more streamlined and secure defaults for both. In this guide, we'll:
- Explain new authentication/authorization APIs
- Show code examples for JWT and cookie auth
- Define policy‑ and role‑based access
- Apply auth to Minimal APIs and MVC controllers
- Cover best practices to harden your application
What’s New in ASP.NET Core 9.0 Auth
ASP.NET Core 9.0 enhances the security and developer experience by:
- Simplified Configuration: New extension overloads reduce boilerplate in Program.cs.
- Built‑In Secure Defaults: Enforces HTTPS, SameSite cookie mode, and stricter token validation by default.
-
Endpoint‑Level Authorization: Fine‑grained
RequireAuthorizationwith policy chaining for Minimal APIs. - Improved DI for Auth Handlers: Custom handlers can now request scoped services directly, making policies more powerful.
Setting Up Authentication
In Program.cs, add authentication services before building the app:
var builder = WebApplication.CreateBuilder(args);

// 1. Add Authentication & configure schemes
builder.Services.AddAuthentication(options =>
{
    options.DefaultAuthenticateScheme = JwtBearerDefaults.AuthenticationScheme;
    options.DefaultChallengeScheme = JwtBearerDefaults.AuthenticationScheme;
})
.AddJwtBearer(options =>
{
    options.TokenValidationParameters = new TokenValidationParameters
    {
        ValidateIssuer = true,
        ValidateAudience = true,
        ValidateLifetime = true,
        ValidIssuer = builder.Configuration["Jwt:Issuer"],
        ValidAudience = builder.Configuration["Jwt:Audience"],
        IssuerSigningKey = new SymmetricSecurityKey(
            Encoding.UTF8.GetBytes(builder.Configuration["Jwt:Key"]))
    };
})
.AddCookie("MyCookie", options =>
{
    options.Cookie.HttpOnly = true;
    options.Cookie.SameSite = SameSiteMode.Strict;
    options.LoginPath = "/account/login";
    options.ExpireTimeSpan = TimeSpan.FromMinutes(30);
});
JWT Bearer Authentication
Issue tokens from your auth controller and validate them:
app.MapPost("/token", ([FromServices] IConfiguration config, UserCredentials creds) =>
{
    if (ValidateUser(creds))
    {
        var claims = new[]
        {
            new Claim(ClaimTypes.Name, creds.Username),
            new Claim(ClaimTypes.Role, "Admin")
        };

        var key = new SymmetricSecurityKey(Encoding.UTF8.GetBytes(config["Jwt:Key"]));
        var token = new JwtSecurityToken(
            issuer: config["Jwt:Issuer"],
            audience: config["Jwt:Audience"],
            claims: claims,
            expires: DateTime.UtcNow.AddMinutes(15),
            signingCredentials: new SigningCredentials(key, SecurityAlgorithms.HmacSha256));

        return Results.Ok(new { token = new JwtSecurityTokenHandler().WriteToken(token) });
    }
    return Results.Unauthorized();
});
Cookie Authentication
For server‑rendered apps or safe XSRF flows, use cookies:
app.MapPost("/account/login", async (HttpContext http, UserCredentials creds) =>
{
    if (ValidateUser(creds))
    {
        var claims = new List<Claim>
        {
            new Claim(ClaimTypes.Name, creds.Username),
            new Claim(ClaimTypes.Role, "User")
        };
        var claimsIdentity = new ClaimsIdentity(claims, "MyCookie");
        await http.SignInAsync("MyCookie", new ClaimsPrincipal(claimsIdentity));
        return Results.Redirect("/");
    }
    return Results.Unauthorized();
});
Configuring Authorization Policies
Define policies in Program.cs before builder.Build():
builder.Services.AddAuthorization(options =>
{
    options.AddPolicy("AdminOnly", policy =>
        policy.RequireAuthenticatedUser()
              .RequireRole("Admin"));

    options.AddPolicy("Over18", policy =>
        policy.RequireClaim("DateOfBirth")
              .RequireAssertion(context =>
    {
        var dob = DateTime.Parse(context.User.FindFirstValue("DateOfBirth")!);
        return (DateTime.Today - dob).TotalDays >= 18 * 365;
    }));
});
Use custom authorization handlers for complex logic:
public class MinimumAgeHandler : AuthorizationHandler<MinimumAgeRequirement>
{
    protected override Task HandleRequirementAsync(
      AuthorizationHandlerContext context,
      MinimumAgeRequirement requirement)
    {
        if (context.User.HasClaim(c => c.Type == ClaimTypes.DateOfBirth) &&
            DateTime.TryParse(context.User.FindFirstValue(ClaimTypes.DateOfBirth), out var dob))
        {
            var age = (DateTime.Today - dob).TotalDays / 365;
            if (age >= requirement.MinimumAge) context.Succeed(requirement);
        }
        return Task.CompletedTask;
    }
}
Securing Minimal APIs & MVC Endpoints
After app.UseAuthentication(); app.UseAuthorization();, apply policies:
Minimal API
app.MapGet("/admin/data", () => "Secret Data")
   .RequireAuthorization("AdminOnly");
MVC Controller
[Authorize(Policy = "Over18")]
public class ContentController : Controller
{
    public IActionResult AdultSection() => View();
}
Best Practices for Secure Auth
-
Use HTTPS Everywhere: Enforce
app.UseHttpsRedirection(). - Short‑Lived Tokens & Refresh: Limit exposure if a token is stolen.
-
Secure Cookie Flags:
HttpOnly,Secure,SameSite=Strict. - Validate Inputs & Claims: Never trust unvalidated data in claims.
- Centralize Policy Definitions: Keep auth rules in one place.
- Monitor & Log: Track failed logins, token validation errors, and policy denials.
Conclusion
Secure authentication and authorization are critical for any modern web application. ASP.NET Core 9.0’s new APIs make it easier to configure robust auth flows, from JWT to cookie schemes, plus powerful policy‑based authorization. By following the examples and best practices above, you can build applications that are both secure and maintainable.
Feel free to leave questions or feedback in the comments below—happy coding!


![[The AI Show Episode 144]: ChatGPT’s New Memory, Shopify CEO’s Leaked “AI First” Memo, Google Cloud Next Releases, o3 and o4-mini Coming Soon & Llama 4’s Rocky Launch](https://www.marketingaiinstitute.com/hubfs/ep%20144%20cover.png)


![[DEALS] The All-in-One Microsoft Office Pro 2019 for Windows: Lifetime License + Windows 11 Pro Bundle (89% off) & Other Deals Up To 98% Off](https://www.javacodegeeks.com/wp-content/uploads/2012/12/jcg-logo.jpg)


![Is this too much for a modular monolith system? [closed]](https://i.sstatic.net/pYL1nsfg.png)


_Andreas_Prott_Alamy.jpg?width=1280&auto=webp&quality=80&disable=upscale#)


![What features do you get with Gemini Advanced? [April 2025]](https://i0.wp.com/9to5google.com/wp-content/uploads/sites/4/2024/02/gemini-advanced-cover.jpg?resize=1200%2C628&quality=82&strip=all&ssl=1)


![Apple Shares Official Trailer for 'Long Way Home' Starring Ewan McGregor and Charley Boorman [Video]](https://www.iclarified.com/images/news/97069/97069/97069-640.jpg)
![Apple Watch Series 10 Back On Sale for $299! [Lowest Price Ever]](https://www.iclarified.com/images/news/96657/96657/96657-640.jpg)
![EU Postpones Apple App Store Fines Amid Tariff Negotiations [Report]](https://www.iclarified.com/images/news/97068/97068/97068-640.jpg)
![Apple Slips to Fifth in China's Smartphone Market with 9% Decline [Report]](https://www.iclarified.com/images/news/97065/97065/97065-640.jpg)


