How to Create Tables Using HTML
This post was originally published at thedevspace.io. Everything you need to master web development, all in one place. A basic HTML table has the following structure: John Doe 30 Software Engineer USA john.doe@example.com Jane Smith 28 Data Scientist Canada jane.smith@example.com . . . Each element defines a table row, and each element defines a table cell (td stands for table data). Sometimes, you might want to add a table header that gives information about the type of data that the row or column contains. Table header is defined with the element. Name Age Occupation Country Email John Doe 30 Software Engineer USA john.doe@example.com . . . To create a vertical header, place the element as the first child element inside each table row: Name John Doe . . . Age 30 . . . . . . ➡️ View Code Demo Table border Previously, we used the attribute border="1" to add a border for the table. However, in practice, it is best to use CSS to control the appearance of the table like this: table, th, td { border: 1px solid; } By default, the table has a double border. This is because both the table element () and each individual table cell () have their own borders. Using CSS, you may collapse them into one by setting a table-collapse property. table { border-collapse: collapse; } Aside from this small detail, the table border acts exactly like the border of any other HTML components we've discussed so far. For instance, you can customize the border width, color, and radius: ➡️ View Code Demo Cells that span multiple rows and columns By default, each table cell occupies one row and one column, but in this case, Name, Age, and Occupation spans over two rows, and Contact Information spans over two columns for this table to make sense. This effect can be achieved using the colspan and rowspan attributes. Name Age Occupation Contact Information Email Phone John Doe 30 Software Engineer john.doe@example.com 123-456-7890 Jane Smith 28 Data Scientist jane.smith@example.com 987-654-3210 ➡️ View Code Demo Styling your table Just like any other block-level element, you can define the width and height of the table and table cells. table, th, td { border: 1px solid; } table { border-collapse: collapse; width: 100%; } th, td { height: 50px; } As you can see, when there are extra spaces, the will be vertically centered and horizontally left-aligned. The will be centered both vertically and horizontally. You can customize the alignment using text-align and vertical-align properties. text-align changes the horizontal alignment, and vertical-align changes the vertical alignment. th, td { height: 50px; text-align: center; vertical-align: center; } We will discuss more about how to align elements later. Further readings How to Create Responsive Layout Using CSS What is a CSS Selector What are CSS Gradients If you found this guide helpful, follow us on social media for more tips, tutorials, and updates on web development:
This post was originally published at thedevspace.io. Everything you need to master web development, all in one place.
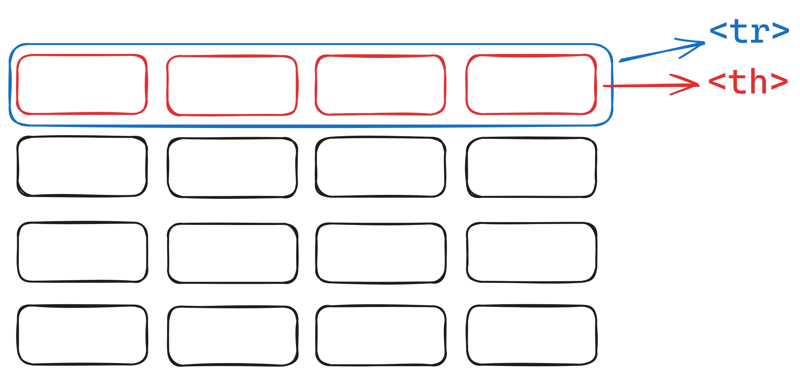
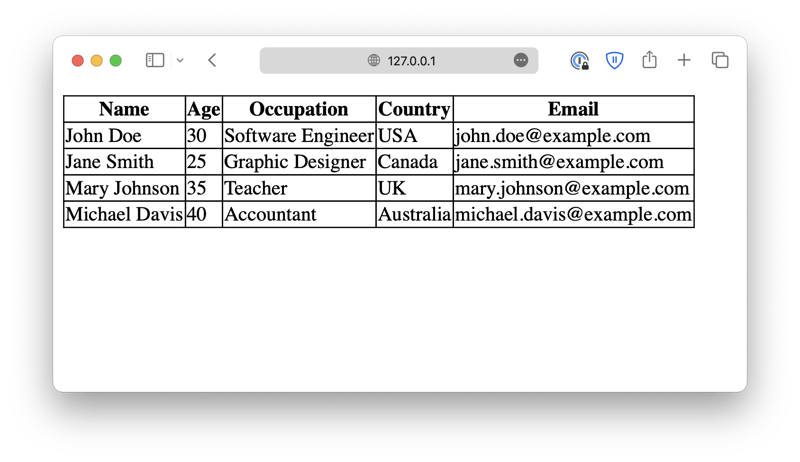
A basic HTML table has the following structure:
    John Doe
    30
    Software Engineer
    USA
    john.doe@example.com


    Jane Smith
    28
    Data Scientist
    Canada
    jane.smith@example.com

  . . .
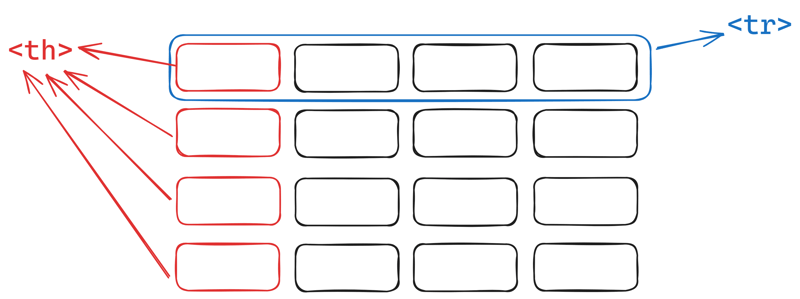
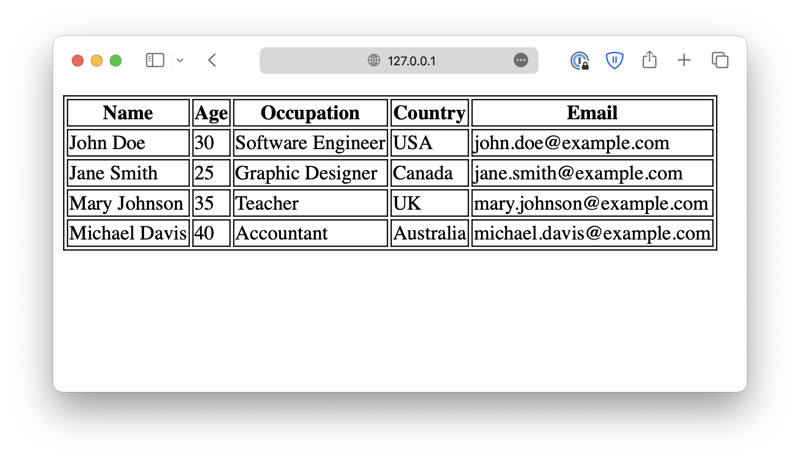
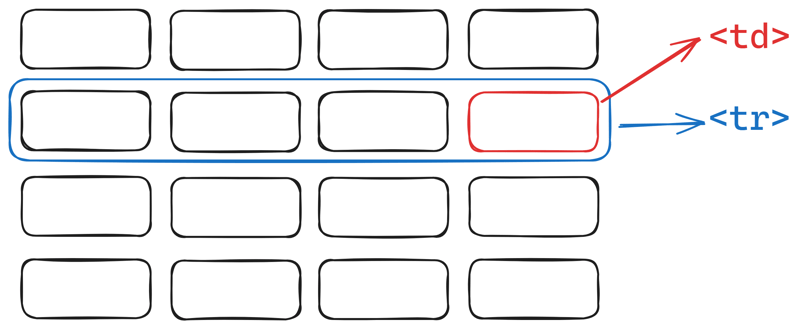
Each Sometimes, you might want to add a table header that gives information about the type of data that the row or column contains. Table header is defined with the To create a vertical header, place the Previously, we used the attribute By default, the table has a double border. This is because both the table element ( Aside from this small detail, the table border acts exactly like the border of any other HTML components we've discussed so far. For instance, you can customize the border width, color, and radius:
By default, each table cell occupies one row and one column, but in this case, Name, Age, and Occupation spans over two rows, and Contact Information spans over two columns for this table to make sense.
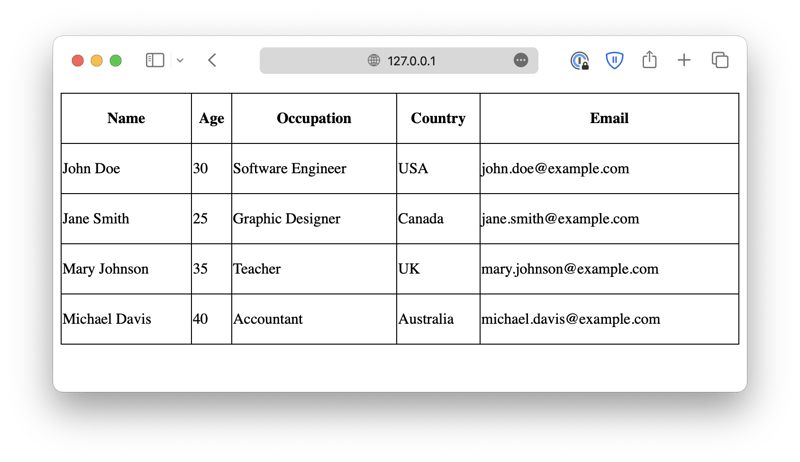
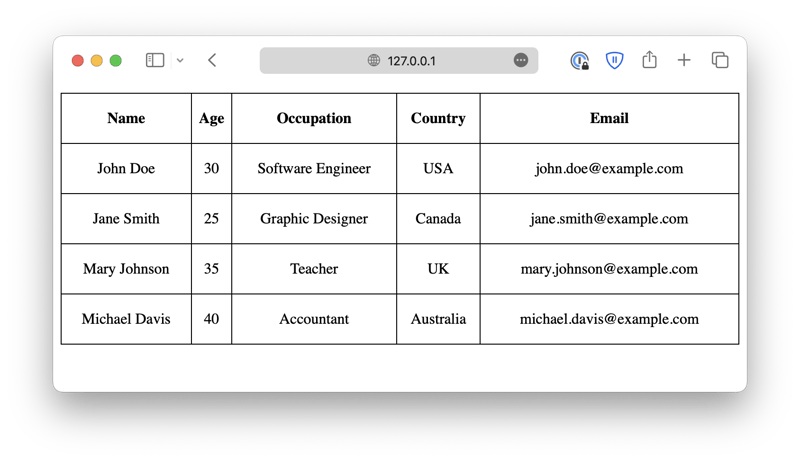
This effect can be achieved using the Just like any other block-level element, you can define the width and height of the table and table cells. As you can see, when there are extra spaces, the You can customize the alignment using We will discuss more about how to align elements later.
If you found this guide helpful, follow us on social media for more tips, tutorials, and updates on web development:
element defines a table row, and each element defines a table cell ( td stands for table data).
element.
Name
Age
Occupation
Country
Email
. . .
John Doe
30
Software Engineer
USA
john.doe@example.com
element as the first child element inside each table row:
Name
John Doe
. . .
. . .
Age
30
. . .
Table border
border="1" to add a border for the table. However, in practice, it is best to use CSS to control the appearance of the table like this:
table,
th,
td {
border: 1px solid;
}
) and each individual table cell (
) have their own borders. Using CSS, you may collapse them into one by setting a table-collapse property.
table {
border-collapse: collapse;
}
Cells that span multiple rows and columns
colspan and rowspan attributes.
Email
Phone
John Doe
30
Software Engineer
john.doe@example.com
123-456-7890
Jane Smith
28
Data Scientist
jane.smith@example.com
987-654-3210
Styling your table
table,
th,
td {
border: 1px solid;
}
table {
border-collapse: collapse;
width: 100%;
}
th,
td {
height: 50px;
}
will be vertically centered and horizontally left-aligned. The will be centered both vertically and horizontally.
text-align and vertical-align properties. text-align changes the horizontal alignment, and vertical-align changes the vertical alignment.
th,
td {
height: 50px;
text-align: center;
vertical-align: center;
}
Further readings


![[The AI Show Episode 142]: ChatGPT’s New Image Generator, Studio Ghibli Craze and Backlash, Gemini 2.5, OpenAI Academy, 4o Updates, Vibe Marketing & xAI Acquires X](https://www.marketingaiinstitute.com/hubfs/ep%20142%20cover.png)




![[DEALS] The Premium Learn to Code Certification Bundle (97% off) & Other Deals Up To 98% Off – Offers End Soon!](https://www.javacodegeeks.com/wp-content/uploads/2012/12/jcg-logo.jpg)


![From drop-out to software architect with Jason Lengstorf [Podcast #167]](https://cdn.hashnode.com/res/hashnode/image/upload/v1743796461357/f3d19cd7-e6f5-4d7c-8bfc-eb974bc8da68.png?#)


.png?#)


.jpg?#)





_Christophe_Coat_Alamy.jpg?#)
 (1).webp?#)




![Rapidus in Talks With Apple as It Accelerates Toward 2nm Chip Production [Report]](https://www.iclarified.com/images/news/96937/96937/96937-640.jpg)


