Fast-Track Your Static Site: Deploying Hugo with Pulumi on AWS S3
This is a submission for the Pulumi Deploy and Document Challenge: Fast Static Website Deployment What I Built In this tutorial, I'll guide you through deploying a static website using Hugo and Pulumi on AWS. Hugo is a fast and flexible static site generator, and Pulumi is an infrastructure-as-code tool that lets you define cloud resources using familiar programming languages like TypeScript. We'll set up a Hugo site, configure Pulumi to deploy it to an AWS S3 bucket, and make the site publicly accessible as a static website. Live Demo Link You can access the deployed static hugo website here Project Repo The complete code for this project, including a detailed README, is available in my GitHub repository: sojinsamuel / pulumi-hugo-aws A fast static website deployment using Hugo and Pulumi on AWS S3, with a step-by-step tutorial for the Pulumi Deploy and Document Challenge. Hugo and Pulumi Static Website Deployment on AWS S3 This project demonstrates how to deploy a static website using Hugo and Pulumi on AWS S3. Hugo is a fast static site generator, and Pulumi is an infrastructure-as-code tool that allows you to define cloud resources using TypeScript. The site is deployed to an S3 bucket configured as a static website, with public access enabled for viewing. Table of Contents Live Demo Project Overview Prerequisites Setup Instructions Step 1: Install Pulumi CLI Step 2: Set Up Your Project Directory Step 3: Create a Hugo Site Step 4: Create a Pulumi Project Step 5: Configure AWS Credentials Step 6: Install Dependencies Step 7: Write Pulumi Code Step 8: Build the Hugo Site Step 9: Deploy with Pulumi Step 10: Verify the Deployment Project Structure Troubleshooting Next Steps Contributing Live Demo You can view the deployed site here: http://site-bucket-657f8f1.s3-website-ap-southeast-2.amazonaws.com Project Overview This project… View on GitHub My Journey In this section, I’ll walk you through the entire process of setting up the project, configuring Pulumi, and deploying the static website to AWS S3. Along the way, I’ll highlight the challenges I faced and the solutions I found to ensure a smooth deployment. Before we begin, ensure you have the following installed: An AWS account with an IAM user that has permissions for S3 operations (s3:PutObject, s3:GetObject, s3:PutBucketPolicy, s3:PutPublicAccessBlock, s3:GetBucketPublicAccessBlock) Pulumi CLI installed Node.js (version 16 or higher recommended; I used v20.12.2). Hugo installed installed (I used v0.128.0). Step 1: Install Pulumi CLI Install the Pulumi CLI by running: curl -fsSL https://get.pulumi.com | sh This command downloads and installs the Pulumi CLI, which you’ll use to manage your cloud infrastructure. Verify the installation: pulumi version Step 2: Set Up Your Project Directory Create a new directory for your project and navigate into it: mkdir pulumi-hugo-aws && cd pulumi-hugo-aws This directory will hold all the files for your Hugo site and Pulumi project. Step 3: Create a Hugo Site Initialize a new Hugo site: hugo new site mysite && cd mysite This creates a new Hugo site in the mysite directory with the basic structure for your static site. Add a Theme: Hugo sites need a theme to render content. We'll use the Ananke theme for this tutorial: git init git submodule add https://github.com/budparr/gohugo-theme-ananke.git themes/ananke echo 'theme = "ananke"' >> hugo.toml Create a Sample Post: Add a sample post to ensure there’s content to display: hugo new content/posts/my-first-post.md Edit the post to add some content and ensure it's published: nano content/posts/my-first-post.md Update the file to look like this: +++ title = 'My First Post' date = 2025-04-04T23:41:34+05:30 draft = false +++ This is my first post on Hugo Save and exit (Ctrl+O, Enter, Ctrl+X in nano). Customize the Homepage: By default, the Ananke theme's homepage doesn't list posts. Let's customize it to show recent posts: mkdir -p layouts nano layouts/index.html Add the following content: {{ define "main" }} {{ .Site.Title }} Welcome to my Hugo site! Recent Posts {{ range first 5 (where .Site.RegularPages "Section" "posts") }} {{ .Title }} {{ .Date.Format "January 2, 2006" }} {{ end }} {{ end }} Save and exit (Ctrl+O, Enter, Ctrl+X in nano). This template displays the site title and a list of up to 5 recent posts from the posts section. Step 4: Create a Pulumi Project Initialize a new Pulumi project in the mysite directory: pulumi new aws-typescript --force --force is needed because the directory isn’t empty (Hugo already created files). Follow the prompts to set up your

This is a submission for the Pulumi Deploy and Document Challenge: Fast Static Website Deployment
What I Built
In this tutorial, I'll guide you through deploying a static website using Hugo and Pulumi on AWS. Hugo is a fast and flexible static site generator, and Pulumi is an infrastructure-as-code tool that lets you define cloud resources using familiar programming languages like TypeScript. We'll set up a Hugo site, configure Pulumi to deploy it to an AWS S3 bucket, and make the site publicly accessible as a static website.
Live Demo Link
You can access the deployed static hugo website here
Project Repo
The complete code for this project, including a detailed README, is available in my GitHub repository:
 sojinsamuel
/
pulumi-hugo-aws
A fast static website deployment using Hugo and Pulumi on AWS S3, with a step-by-step tutorial for the Pulumi Deploy and Document Challenge.
Hugo and Pulumi Static Website Deployment on AWS S3
This project demonstrates how to deploy a static website using Hugo and Pulumi on AWS S3. Hugo is a fast static site generator, and Pulumi is an infrastructure-as-code tool that allows you to define cloud resources using TypeScript. The site is deployed to an S3 bucket configured as a static website, with public access enabled for viewing.
Table of Contents
- Live Demo
- Project Overview
- Prerequisites
- Setup Instructions
- Project Structure
- Troubleshooting
- Next Steps
- Contributing
Live Demo
You can view the deployed site here: http://site-bucket-657f8f1.s3-website-ap-southeast-2.amazonaws.com
Project Overview
This project…
My Journey
In this section, I’ll walk you through the entire process of setting up the project, configuring Pulumi, and deploying the static website to AWS S3. Along the way, I’ll highlight the challenges I faced and the solutions I found to ensure a smooth deployment.
Before we begin, ensure you have the following installed:
-
An AWS account with an IAM user that has permissions for S3 operations (
s3:PutObject,s3:GetObject,s3:PutBucketPolicy,s3:PutPublicAccessBlock,s3:GetBucketPublicAccessBlock) - Pulumi CLI installed
- Node.js (version 16 or higher recommended; I used v20.12.2).
- Hugo installed installed (I used v0.128.0).
Step 1: Install Pulumi CLI
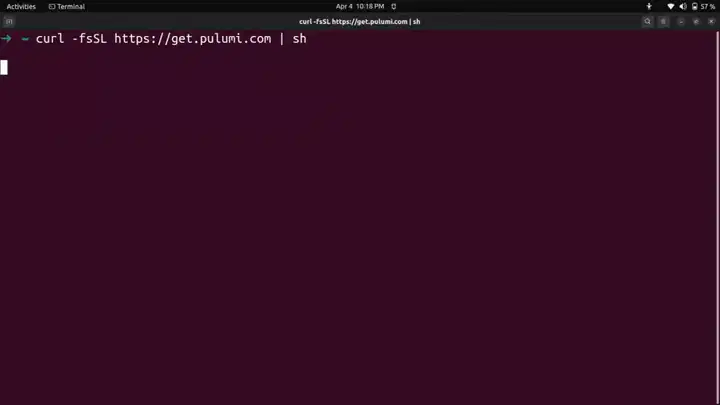
Install the Pulumi CLI by running:
curl -fsSL https://get.pulumi.com | sh
This command downloads and installs the Pulumi CLI, which you’ll use to manage your cloud infrastructure.
Verify the installation:
pulumi version
Step 2: Set Up Your Project Directory
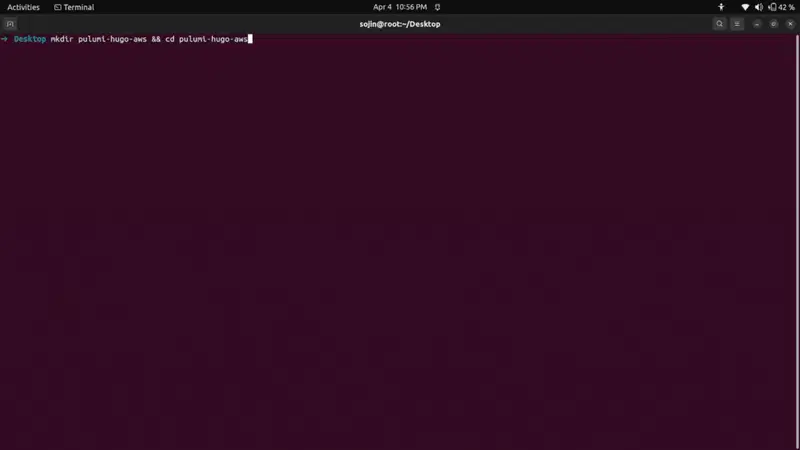
Create a new directory for your project and navigate into it:
mkdir pulumi-hugo-aws && cd pulumi-hugo-aws
This directory will hold all the files for your Hugo site and Pulumi project.
Step 3: Create a Hugo Site
Initialize a new Hugo site:
hugo new site mysite && cd mysite
This creates a new Hugo site in the mysite directory with the basic structure for your static site.
Add a Theme:
Hugo sites need a theme to render content. We'll use the Ananke theme for this tutorial:
git init
git submodule add https://github.com/budparr/gohugo-theme-ananke.git themes/ananke
echo 'theme = "ananke"' >> hugo.toml
Create a Sample Post:
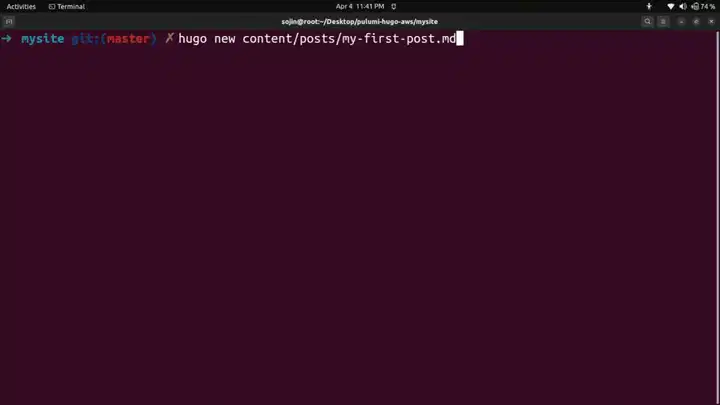
Add a sample post to ensure there’s content to display:
hugo new content/posts/my-first-post.md
Edit the post to add some content and ensure it's published:
nano content/posts/my-first-post.md
Update the file to look like this:
+++
title = 'My First Post'
date = 2025-04-04T23:41:34+05:30
draft = false
+++

This is my first post on Hugo
Save and exit (Ctrl+O, Enter, Ctrl+X in nano).
Customize the Homepage:
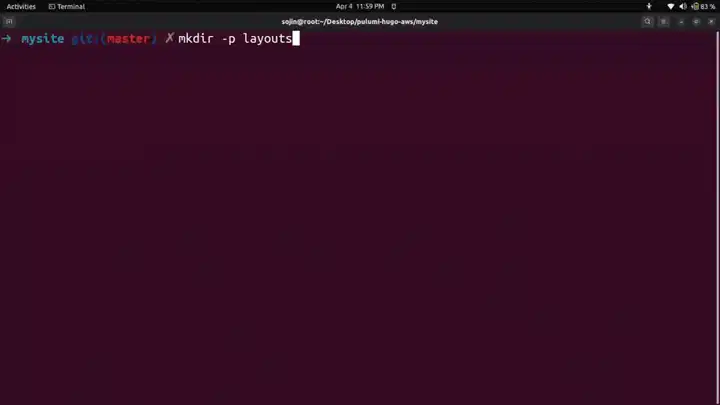
By default, the Ananke theme's homepage doesn't list posts. Let's customize it to show recent posts:
mkdir -p layouts
nano layouts/index.html
Add the following content:
{{ define "main" }}
   class="container">
    {{ .Site.Title }}
    Welcome to my Hugo site!
    Recent Posts

      {{ range first 5 (where .Site.RegularPages "Section" "posts") }}

           href="{{ .RelPermalink }}">{{ .Title }}
          {{ .Date.Format "January 2, 2006" }}

      {{ end }}
Save and exit (Ctrl+O, Enter, Ctrl+X in nano).
This template displays the site title and a list of up to 5 recent posts from the posts section.
Step 4: Create a Pulumi Project
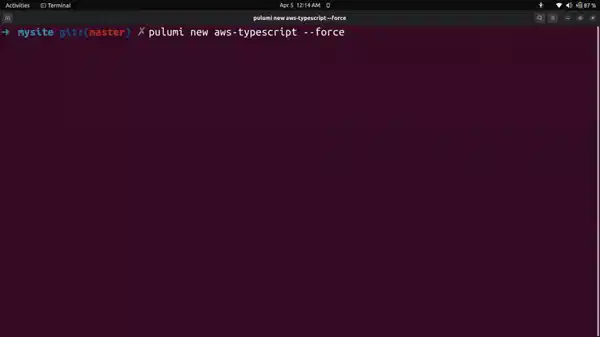
Initialize a new Pulumi project in the mysite directory:
pulumi new aws-typescript --force
-
--forceis needed because the directory isn’t empty (Hugo already created files).
Follow the prompts to set up your Pulumi project. This command initializes a new Pulumi project using the AWS TypeScript template, which provides a starting point for deploying AWS resources using TypeScript.
Sure, here's a corrected version using active voice and EQ:
P.S: If you want to learn why pulumi new expects us to always start from an empty directory, check out this GitHub discussion.
Step 5: Configure AWS Credentials
Make sure your AWS credentials are configured. You can do this by running:
aws configure
This command sets up your AWS credentials, which are necessary for Pulumi to interact with AWS services. You will be prompted to enter your AWS Access Key ID, Secret Access Key, and default region. Your IAM user must have permissions for S3 operations (see Prerequisites).
Step 6: Install Dependencies
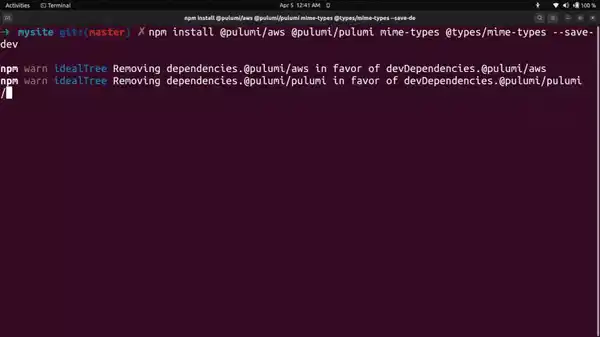
Install the necessary Pulumi packages and mime-types for handling file types:
npm install @pulumi/aws @pulumi/pulumi mime-types @types/mime-types --save-dev
@pulumi/awsand@pulumi/pulumiare required for AWS resource management.mime-typeshelps set correct MIME types for uploaded files.
Step 7: Write Pulumi Code
Replace the default index.ts with the following code to set up an S3 bucket, configure it as a website, and upload the Hugo site:
import * as aws from "@pulumi/aws";
import * as pulumi from "@pulumi/pulumi";
import * as fs from "fs";
import * as path from "path";
import * as mime from "mime-types";

// Create an S3 bucket
const siteBucket = new aws.s3.Bucket("site-bucket", {});

// Configure the bucket as a website
const website = new aws.s3.BucketWebsiteConfigurationV2("website", {
    bucket: siteBucket.id,
    indexDocument: {
        suffix: "index.html",
    },
});

// Configure public access block to allow public access
const publicAccessBlock = new aws.s3.BucketPublicAccessBlock("public-access-block", {
    bucket: siteBucket.id,
    blockPublicAcls: false,
    blockPublicPolicy: false,
    ignorePublicAcls: false,
    restrictPublicBuckets: false,
});

// Add a bucket policy to allow public read access
const bucketPolicy = new aws.s3.BucketPolicy("bucketPolicy", {
    bucket: siteBucket.bucket,
    policy: siteBucket.bucket.apply(bucketName => JSON.stringify({
        Version: "2012-10-17",
        Statement: [{
            Effect: "Allow",
            Principal: "*",
            Action: ["s3:GetObject"],
            Resource: [`arn:aws:s3:::${bucketName}/*`],
        }],
    })),
}, { dependsOn: [publicAccessBlock] });

// Function to recursively upload files from a directory
function uploadDirectory(dirPath: string, bucket: aws.s3.Bucket) {
    fs.readdirSync(dirPath, { withFileTypes: true }).forEach((dirent) => {
        const filePath = path.join(dirPath, dirent.name);
        if (dirent.isDirectory()) {
            uploadDirectory(filePath, bucket);
        } else {
            const relativePath = path.relative("./public", filePath);
            new aws.s3.BucketObject(relativePath, {
                bucket: siteBucket,
                source: new pulumi.asset.FileAsset(filePath),
                contentType: mime.lookup(filePath) || "application/octet-stream",
                key: relativePath,
            }, { dependsOn: [publicAccessBlock, website, bucketPolicy] });
        }
    });
}

// Upload all files from the Hugo 'public' directory
uploadDirectory("./public", siteBucket);

// Export the website URL
export const bucketEndpoint = pulumi.interpolate`http://${website.websiteEndpoint}`;
Save and exit (Ctrl+O, Enter, Ctrl+X in nano).
This code:
Creates an S3 bucket and configures it as a website with
index.htmlas the default page.Disables S3 Block Public Access settings to allow public access.
Applies a bucket policy to make all objects publicly readable.
Recursively uploads all files from the
public/directory, preserving the directory structure and setting correct MIME types.
Step 8: Build Hugo Site
Generate the static files for your Hugo site:
hugo
This creates the public/ directory with your site’s static files, including index.html and the post at posts/my-first-post/.
Step 9: Deploy with Pulumi
pulumi up
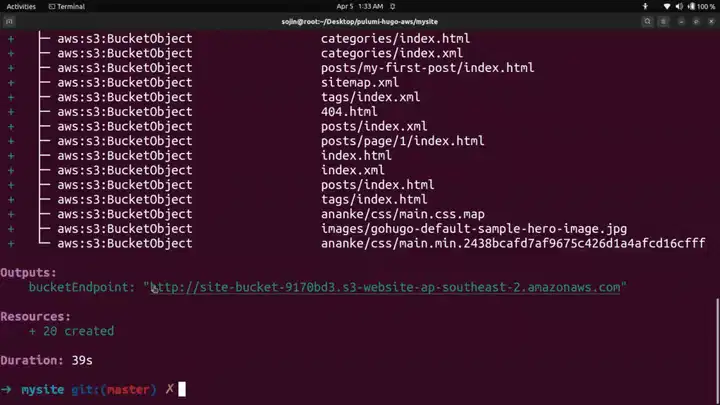
Pulumi will preview the changes, showing the resources to be created (S3 bucket, website configuration, bucket policy, and objects).
Select
yesto deploy.Once complete, the output will include
bucketEndpoint(e.g.,http://site-bucket-9170bd3.s3-website-ap-southeast-2.amazonaws.com).
Step 10: Verify the Deployment
Open the bucketEndpoint URL in a browser. You should see your Hugo site with the Ananke theme, displaying the site title ("My New Hugo Site") and a "Recent Posts" section listing "My First Post" with a link to the full post.
Project Structure (Key Files Only)
pulumi-hugo-aws/
└── mysite/
    ├── archetypes/         # Hugo archetypes for new content
    ├── content/            # Hugo content files (e.g., posts/)
    │   └── posts/
    │       └── my-first-post.md
    ├── layouts/            # Custom Hugo templates
    │   └── index.html
    ├── public/             # Generated static files
    ├── themes/             # Hugo themes (e.g., ananke/)
    ├── hugo.toml           # Hugo configuration
    ├── index.ts            # Pulumi deployment script
    ├── package.json        # Node.js dependencies
    ├── Pulumi.yaml         # Pulumi project configuration
    └── tsconfig.json       # TypeScript configuration
Wrap Up
In this tutorial, we successfully deployed a static website using Hugo and Pulumi on AWS S3. We covered setting up a Hugo site with a theme, customizing the homepage to display posts, configuring Pulumi to deploy to S3, and ensuring the site is publicly accessible.
Using Pulumi
Pulumi made this project much easier to manage. I was able to define and deploy AWS infrastructure using TypeScript, which I already use daily. That let me stay in one workflow without needing to switch between tools or learn a new configuration language. Here's how Pulumi helped me get the Hugo site up and running on S3:
TypeScript for Infrastructure: Writing infrastructure in TypeScript meant fewer surprises. I could catch issues like incorrect resource properties before deployment and stay consistent with the rest of the project. Compared to YAML or JSON-based tools, the development process felt more natural.
AWS Setup with Less Friction: Pulumi’s AWS provider (
@pulumi/aws) gave me a direct way to create what I needed in S3. Buckets, static website configs, policies. it all came together in a clear and code-first way. I didn't have to spend extra time wrestling with CloudFormation or the AWS console.Helpful Copilot Tooling: The Pulumi Copilot helped me troubleshoot faster. When I ran into public access issues, it explained how the
BucketPublicAccessBlockresource worked and gave an example I could use. It also clarified some TypeScript syntax issues and pointed me to the right docs for deeper reading on S3 configs.Smarter State Management: Pulumi's state tracking meant that when I updated the Hugo
public/directory, only the changed files were uploaded. That saved time and made updates feel more reliable.
There were a few moments where I had to figure things out, but the tooling and docs helped me get through them:
Nested Folder Uploads: Hugo’s output includes nested directories and my first attempt didn’t handle those correctly. I ended up writing a recursive function on
index.tsto upload all the files while keeping the structure. The assets and archives guide helped with that.Public Access Errors: At first, S3’s Block Public Access settings blocked my custom bucket policy, which caused
AccessDeniederrors. Pulumi Copilot helped me fix this by showing how to useBucketPublicAccessBlock. The example policy in the docs also gave me a solid reference.Homepage Didn't Show Posts: Hugo’s default setup doesn’t display posts on the homepage, so I had to create a custom
layouts/index.html. This part was more of a Hugo issue, but once I rebuilt the site, Pulumi picked up the changes and deployed them without extra work on my end.
In the end, Pulumi let me stay close to my code and avoid bouncing between services and dashboards. Hugo handled the content and site structure, and Pulumi made sure it reached the web with minimal overhead.
What's Next?
Now that your Hugo site is live, consider these next steps:
Add More Content: Create additional posts or pages in Hugo to expand your site.
Enable HTTPS: Set up AWS CloudFront with an SSL certificate to serve your site over HTTPS (S3 websites are HTTP-only by default).
CI/CD Integration: Automate deployments with Pulumi's automation API and a CI/CD pipeline (e.g., GitHub Actions).
Notes
Recursive File Uploads: Always account for nested directories when uploading static sites to S3. Use a recursive function to preserve the directory structure.
IAM Permissions: Verify your AWS IAM user has the necessary permissions for S3 operations to avoid AccessDenied errors.
By following this tutorial, you can leverage Pulumi and Hugo to deploy scalable, efficient static websites with ease.
Feel free to reach out on linkedin if you have any questions.
Happy coding champs


.jpg)
%20Abstract%20Background%20112024%20SOURCE%20Amazon.jpg)


![[The AI Show Episode 142]: ChatGPT’s New Image Generator, Studio Ghibli Craze and Backlash, Gemini 2.5, OpenAI Academy, 4o Updates, Vibe Marketing & xAI Acquires X](https://www.marketingaiinstitute.com/hubfs/ep%20142%20cover.png)




![From drop-out to software architect with Jason Lengstorf [Podcast #167]](https://cdn.hashnode.com/res/hashnode/image/upload/v1743796461357/f3d19cd7-e6f5-4d7c-8bfc-eb974bc8da68.png?#)


.png?#)


.jpg?#)


_Christophe_Coat_Alamy.jpg?#)




![Rapidus in Talks With Apple as It Accelerates Toward 2nm Chip Production [Report]](https://www.iclarified.com/images/news/96937/96937/96937-640.jpg)


