Easily Perform AI-powered Code Reviews In Minutes (CodeRabbit + GitHub)
TL;DR In this article, you will learn how to perform AI-powered code reviews using CodeRabbit and GitHub to catch bugs and potential issues in your code. Before we jump in, here is what we will cover: What are code reviews? What is CodeRabbit? Performing code reviews using CodeRabbit What are Code Reviews? Imagine you’ve just written some code for a project—like a feature for a website or an app. You’re proud of it, but before it gets added to the main project (often called "merging" into the "main branch"), someone else on your team takes a look at it. That’s a code review! It’s like having a friend proofread your homework before you turn it in. The goal is to make sure your code works well, is easy to understand, and doesn’t accidentally break anything. You can learn more about code reviews here on GitLab What is CodeRabbit? Now, let’s talk about CodeRabbit. Imagine instead of waiting for a busy teammate to review your code, you had a super-smart robot helper who could do it instantly. That’s what CodeRabbit is—an AI-powered tool that reviews your code for you! You can learn more about CodeRabbit here on CodeRabbit docs Prerequisites To fully understand this tutorial, you need to have a basic understanding of React or Next.js. Let's jump in. Getting Started with CodeRabbit In this section, we will create a Blog app and add it to a repository. Then, we will integrate the repository with CodeRabbit, an AI-powered code review tool, to get a review for each commit in a pull request. Let's get started. Step 1: Create a Next.js application by running the code snippet below in your terminal. npx create-next-app@latest blogapp Step 2: Select your preferred configuration settings. For this tutorial, we'll be using TypeScript and Next.js App Router. Step 3: Create a blogapp repository and push the Blog app code into the repository, as shown below. Step 4: To integrate CodeRabbit into your workflow, visit coderabbit.ai and click the Get a free trial button. Step 5: Next, sign up with your Git provider. In this case, I will use GitHub as my Git provider. Step 6: Authorize coderabbitai to access your account and click the Add Repositories button at the top right corner to connect your repository to CodeRabbit. Step 7: Select the repository you want to add to CodeRabbit, as shown below. Then click the Install & Authorize button. Once the installation is done, you should see that your repository was added to the Repositories section. Now, CodeRabbit is fully integrated into our repositories and ready to review code changes. It is as simple as that. Creating sample pull requests In this section, we will create a new branch in the blogapp repository and switch to the branch. Then we will update the codebase with the Blog app functionality that contains potential issues such as, Code Quality Issues Logical & Functional Errors Security vulnerabilities Performance Bottlenecks Best Practices & Code Standards Documentation & Readability Issues Dependency & Compatibility Issues After that, we will create a pull request and review it using CodeRabbit. Let’s get started. Step 1: Create a new branch named todoapp using the command below in the command line. git checkout -b blogapp-functionality Step 2: Create a src/components/Header.tsx file and paste the following code into the file. import Link from "next/link"; export const Header = () => { return ( Home Login Create Post ); }; export default Header Step 3: Create a src/app/api/login/route.ts file and paste the following code into the file. import { NextResponse } from "next/server"; import jwt from "jsonwebtoken"; const SECRET_KEY = "my-secret-key"; export async function POST(request: Request) { const { username, password } = await request.json(); if (username === "admin" && password === "password") { const token = jwt.sign({ username }, SECRET_KEY, { expiresIn: "1h" }); return NextResponse.json({ success: true, token }); } else { return NextResponse.json( { success: false, message: "Invalid credentials" }, { status: 401 } ); } } Step 4: Create a src/app/api/posts/route.ts file and paste the following code into the file. import { NextResponse } from "next/server"; import { PrismaClient } from "@prisma/client"; const prisma = new PrismaClient(); export async function GET() { try { const posts = await prisma.post.findMany(); return NextResponse.json(posts); } catch (error) { return NextResponse.json( { error: "Error fetching posts" }, { status: 500 } ); } } export async function POST(request: Request) { const { title, content } = await re
TL;DR
In this article, you will learn how to perform AI-powered code reviews using CodeRabbit and GitHub to catch bugs and potential issues in your code.
Before we jump in, here is what we will cover:
- What are code reviews?
- What is CodeRabbit?
- Performing code reviews using CodeRabbit
What are Code Reviews?
Imagine you’ve just written some code for a project—like a feature for a website or an app.
You’re proud of it, but before it gets added to the main project (often called "merging" into the "main branch"), someone else on your team takes a look at it.
That’s a code review!
It’s like having a friend proofread your homework before you turn it in. The goal is to make sure your code works well, is easy to understand, and doesn’t accidentally break anything.
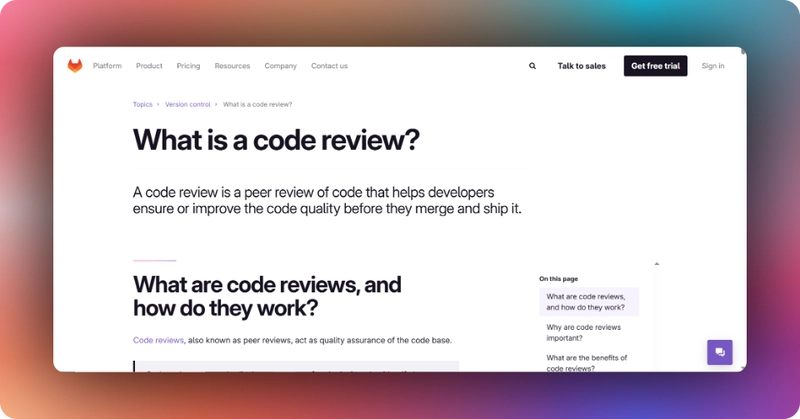
You can learn more about code reviews here on GitLab

What is CodeRabbit?
Now, let’s talk about CodeRabbit.
Imagine instead of waiting for a busy teammate to review your code, you had a super-smart robot helper who could do it instantly.
That’s what CodeRabbit is—an AI-powered tool that reviews your code for you!
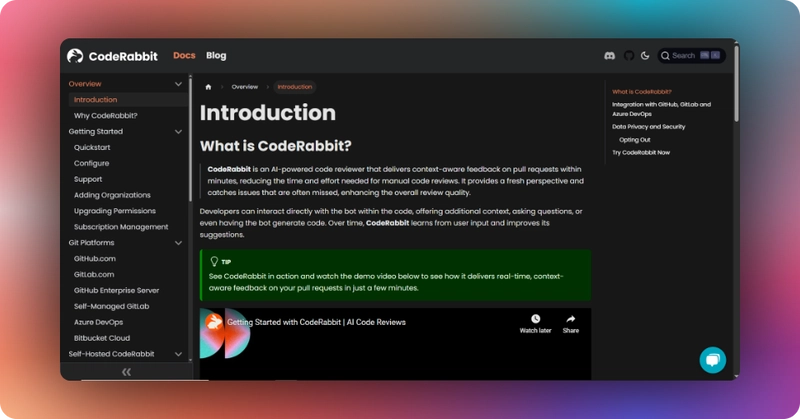
You can learn more about CodeRabbit here on CodeRabbit docs
Prerequisites
To fully understand this tutorial, you need to have a basic understanding of React or Next.js.
Let's jump in.
Getting Started with CodeRabbit
In this section, we will create a Blog app and add it to a repository. Then, we will integrate the repository with CodeRabbit, an AI-powered code review tool, to get a review for each commit in a pull request.
Let's get started.
Step 1: Create a Next.js application by running the code snippet below in your terminal.
npx create-next-app@latest blogapp
Step 2: Select your preferred configuration settings. For this tutorial, we'll be using TypeScript and Next.js App Router.

blogapp repository and push the Blog app code into the repository, as shown below.


Creating sample pull requests
In this section, we will create a new branch in the blogapp repository and switch to the branch. Then we will update the codebase with the Blog app functionality that contains potential issues such as,
Code Quality Issues
Logical & Functional Errors
Security vulnerabilities
Performance Bottlenecks
Best Practices & Code Standards
Documentation & Readability Issues
Dependency & Compatibility Issues
After that, we will create a pull request and review it using CodeRabbit.
Let’s get started.
Step 1: Create a new branch named todoapp using the command below in the command line.
git checkout -b blogapp-functionality
Step 2: Create a src/components/Header.tsx file and paste the following code into the file.
import Link from "next/link";

export const Header = () => {
  return (
    <header className="bg-white shadow-md">
      <nav className="container mx-auto px-4 py-4">
        <ul className="flex space-x-4">
          <li>
            <Link href="/" className="text-primary hover:text-primary-dark">
              Home
            </Link>
          </li>
          <li>
            <Link
              href="/login"
              className="text-primary hover:text-primary-dark">
              Login
            </Link>
          </li>
          <li>
            <Link
              href="/createPost"
              className="text-primary hover:text-primary-dark">
              Create Post
            </Link>
          </li>
        </ul>
      </nav>
    </header>
  );
};

export default Header
Step 3: Create a src/app/api/login/route.ts file and paste the following code into the file.
import { NextResponse } from "next/server";
import jwt from "jsonwebtoken";

const SECRET_KEY = "my-secret-key";

export async function POST(request: Request) {
  const { username, password } = await request.json();

  if (username === "admin" && password === "password") {
    const token = jwt.sign({ username }, SECRET_KEY, { expiresIn: "1h" });
    return NextResponse.json({ success: true, token });
  } else {
    return NextResponse.json(
      { success: false, message: "Invalid credentials" },
      { status: 401 }
    );
  }
}
Step 4: Create a src/app/api/posts/route.ts file and paste the following code into the file.
import { NextResponse } from "next/server";
import { PrismaClient } from "@prisma/client";

const prisma = new PrismaClient();

export async function GET() {
  try {
    const posts = await prisma.post.findMany();
    return NextResponse.json(posts);
  } catch (error) {
    return NextResponse.json(
      { error: "Error fetching posts" },
      { status: 500 }
    );
  }
}

export async function POST(request: Request) {
  const { title, content } = await request.json();

  const result = await prisma.$queryRaw`
    INSERT INTO Post (title, content) VALUES (${title}, ${content})
  `;

  return NextResponse.json(result, { status: 201 });
}
Step 5: Create a src/app/createPost/page.tsx file and paste the following code into the file.
"use client";

import type React from "react";
import { useState } from "react";
import axios from "axios";

const CreatePost = () => {
  const [title, setTitle] = useState("");
  const [content, setContent] = useState("");

  const handleSubmit = async (e: React.FormEvent) => {
    e.preventDefault();
    try {
      await axios.post("/api/posts", { title, content });
    } catch (error) {
      console.error("Error creating post:", error);
    }
  };

  return (
    <form onSubmit={handleSubmit} className="max-w-md mx-auto space-y-4">
      <h1 className="text-3xl font-bold text-center mb-6">Create Post</h1>
      <input
        type="text"
        value={title}
        onChange={(e) => setTitle(e.target.value)}
        placeholder="Title"
        className="w-full p-2 border rounded"
      />
      <textarea
        value={content}
        onChange={(e) => setContent(e.target.value)}
        placeholder="Content"
        className="w-full p-2 border rounded h-32"
      />
      <button
        type="submit"
        className="w-full bg-primary text-white p-2 rounded">
        Create Post
      </button>
    </form>
  );
};

export default CreatePost;
Step 6: Create a src/app/login/page.tsx file and paste the following code into the file.
"use client";

import type React from "react";
import { useState } from "react";
import { useRouter } from "next/navigation";
import axios from "axios";

const Login = () => {
  const [username, setUsername] = useState("");
  const [password, setPassword] = useState("");
  const router = useRouter();

  const handleLogin = async (e: React.FormEvent) => {
    e.preventDefault();
    try {
      const response = await axios.post("/api/login", { username, password });
      if (response.data.success) {
        localStorage.setItem("token", response.data.token);
        router.push("/");
      }
    } catch (error) {
      alert("Login failed");
    }
  };

  return (
    <form onSubmit={handleLogin} className="max-w-md mx-auto space-y-4">
      <h1 className="text-3xl font-bold text-center mb-6">Login</h1>
      <input
        type="text"
        value={username}
        onChange={(e) => setUsername(e.target.value)}
        placeholder="Username"
        className="w-full p-2 border rounded"
      />
      <input
        type="password"
        value={password}
        onChange={(e) => setPassword(e.target.value)}
        placeholder="Password"
        className="w-full p-2 border rounded"
      />
      <button
        type="submit"
        className="w-full bg-primary text-white p-2 rounded">
        Login
      </button>
    </form>
  );
};

export default Login;
Step 7: Go to the src/app/page.tsx file and paste the following code into the file.
import { useState, useEffect } from "react";
import axios from "axios";

const Home = () => {
  const [posts, setPosts] = useState([]);
  const [loading, setLoading] = useState(true);

  useEffect(() => {
    const fetchPosts = async () => {
      try {
        const response = await axios.get("/api/posts");
        setPosts(response.data);
      } catch (error) {
        console.log("Error fetching posts:", error);
      } finally {
        setLoading(false);
      }
    };
    fetchPosts();
  });

  const handleRefresh = () => {
    setLoading(true);

    axios
      .get("/api/posts")
      .then((response) => {
        setPosts(response.data);
        setLoading(false);
      })
      .catch((error) => {
        console.log("Error refreshing posts:", error);
        setLoading(false);
      });
  };

  if (loading) return <div className="text-center text-2xl">Loading...</div>;

  return (
    <div className="space-y-6">
      <h1 className="text-4xl font-bold text-center mb-8">Blog Posts</h1>
      <button onClick={handleRefresh} className="w-full mb-4">
        Refresh
      </button>
      {posts.map((post: any) => (
        <div key={post.id} className="bg-white shadow-md rounded-lg p-6">
          <h2 className="text-2xl font-semibold mb-2">{post.title}</h2>
          <p className="text-gray-600">{post.content}</p>
        </div>
      ))}
    </div>
  );
};

export default Home;
Step 8: Go to src/app/layout.tsx file and paste the following code into the file.
import type React from "react";
import { Header } from "@/components/Header";
import "./globals.css";

export default function RootLayout({
  children,
}: {
  children: React.ReactNode;
}) {
  return (
    <html lang="en">
      <body className="min-h-screen bg-gray-100">
        <Header />
        <main className="container mx-auto mt-8 px-4">{children}</main>
      </body>
    </html>
  );
}
Step 9: Push the changes into the blogapp repository. Then click the Compare & Pull Request button if you are using GitHub as your Git provider.


Analyzing CodeRabbit's Feedback
After the Coderabbit bot processes new code changes, CodeRabbit automatically generates a comprehensive pull request summary, as shown below.


a). Issues in the src/components/Header.tsx file
First, CodeRabbit identifies an issue in which the Header component has both named and default exports, which is unnecessary and could lead to confusion. CodeRabbit then recommends choosing one export pattern.


First, CodeRabbit identifies authentication security issues and suggests several security improvements that are needed.


CodeRabbit identifies a SQL Injection vulnerability issue. Then it suggests using Prisma's built-in methods instead of using template literals with $queryRaw which is unsafe.


CodeRabbit identifies an issue with form validation. Then it suggests adding form submission validation and better error handling.


CodeRabbit identifies a potential issue. Then it suggests enhancing security and error handling in login flow.


CodeRabbit identifies infinite re-renders, error handling with console.log, and error state management issues.

Advanced CodeRabbit Features
In this section, we will explore CodeRabbit features such as Committable Suggestions, Chat functionality, Custom review instructions, and Integration with existing CI/CD pipelines.
Committable Suggestions
CodeRabbit provides actionable suggestions, including a Committable Suggestion feature that allows you to apply suggested changes directly by clicking the Commit Suggestion button.
For example, CodeRabbit provides a code snippet that you can add to your code to fix the issue of hardcoded sensitive values.
CodeRabbit provides chat functionality where there are three ways to chat with the CodeRabbit bot, as shown below.

Custom review instructions
CodeRabbit provides an option for adding custom review instructions to your project. The custom review instructions should be based on the patterns in your codebase to help maintain consistency across the project.
To add custom instructions in the Blog app codebase, create a .github/coderabbit.yaml file in the blog app repository. Then copy and paste the YAML content below into the file.
review:
  path_instructions:
    - path: "src/app/api/**/*.ts"
      instructions: |
        - Ensure all API routes have proper error handling with appropriate status codes
        - Validate request bodies using TypeScript types
        - Use NextResponse for consistent response formatting
        - Implement authentication checks where required
        - Use try-catch blocks for database operations
        - Avoid raw SQL queries, prefer Prisma's query builder

    - path: "src/app/**/*.tsx"
      instructions: |
        - Components should be functional components using TypeScript
        - Use appropriate hooks for state management
        - Implement proper loading states for async operations
        - Follow the container/presentation pattern where applicable
        - Use Tailwind CSS classes consistently
        - Handle client-side errors gracefully with user feedback

    - path: "src/components/**/*.tsx"
      instructions: |
        - Keep components focused and reusable
        - Implement proper TypeScript props interface
        - Use semantic HTML elements
        - Ensure consistent styling with Tailwind CSS
        - Add JSDoc comments for component documentation

    - path: "src/lib/**/*.ts"
      instructions: |
        - Maintain pure utility functions
        - Add comprehensive TypeScript types
        - Include proper error handling
        - Add unit tests for utilities
        - Document complex logic with comments

  general_guidelines: |
    - Follow TypeScript best practices and maintain type safety
    - Use consistent error handling patterns
    - Implement proper authentication checks
    - Follow Next.js 13+ app router conventions
    - Keep components and functions small and focused
    - Use meaningful variable and function names
    - Add comments for complex business logic
    - Ensure proper error messages for user feedback
    - Follow REST API best practices
    - Use environment variables for sensitive data
After that, Commit and push the changes into the blogapp repository.
Integration with CI/CD pipelines
CodeRabbit can be integrated with CI/CD pipelines to perform static analysis, configuration checks automatically, and even suggest code fixes as part of your build and deployment process.
For example, to integrate CodeRabbit to GitHub actions CI/CD pipeline, create a .github/workflows/coderabbit.yml file and paste the following code into the file.
name: 'CodeRabbit PR Review'
on: [pull_request]
permissions:
  contents: read
  pull-requests: write
jobs:
  review:
    runs-on: ubuntu-latest
    steps:
      - uses: actions/checkout@v4
      - uses: coderabbitai/ai-pr-reviewer@latest
        env:
          GITHUB_TOKEN: ${{ secrets.GITHUB_TOKEN }}
          OPENAI_API_KEY: ${{ secrets.OPENAI_API_KEY }}  # Required for advanced features
After that, Commit and push the changes into the blogapp repository.
Conclusion
We covered a lot in this tutorial. I hope you learned what code reviews and CodeRabbit are, how to get started with CodeRabbit, and how to use it to perform AI-powered code reviews.
Feel free to leave your feedback in the comments.


![[The AI Show Episode 142]: ChatGPT’s New Image Generator, Studio Ghibli Craze and Backlash, Gemini 2.5, OpenAI Academy, 4o Updates, Vibe Marketing & xAI Acquires X](https://www.marketingaiinstitute.com/hubfs/ep%20142%20cover.png)







.jpg?#)




![YouTube Announces New Creation Tools for Shorts [Video]](https://www.iclarified.com/images/news/96923/96923/96923-640.jpg)

![Apple Faces New Tariffs but Has Options to Soften the Blow [Kuo]](https://www.iclarified.com/images/news/96921/96921/96921-640.jpg)


