


![[The AI Show Episode 144]: ChatGPT’s New Memory, Shopify CEO’s Leaked “AI First” Memo, Google Cloud Next Releases, o3 and o4-mini Coming Soon & Llama 4’s Rocky Launch](https://www.marketingaiinstitute.com/hubfs/ep%20144%20cover.png)


![Blue Archive tier list [April 2025]](https://media.pocketgamer.com/artwork/na-33404-1636469504/blue-archive-screenshot-2.jpg?#)


.png?#)


-Baldur’s-Gate-3-The-Final-Patch---An-Animated-Short-00-03-43.png?width=1920&height=1920&fit=bounds&quality=70&format=jpg&auto=webp#)


![Apple to Split Enterprise and Western Europe Roles as VP Exits [Report]](https://www.iclarified.com/images/news/97032/97032/97032-640.jpg)
![Nanoleaf Announces New Pegboard Desk Dock With Dual-Sided Lighting [Video]](https://www.iclarified.com/images/news/97030/97030/97030-640.jpg)

![Apple's Foldable iPhone May Cost Between $2100 and $2300 [Rumor]](https://www.iclarified.com/images/news/97028/97028/97028-640.jpg)


CREATING A PUBLIC STORAGE ACCOUNT ON AZURE
STEP 1 : Go to portal.azure.com search for storage account select 'create storage account' -Give the resource group a name -Give the storage account a name -Select region -In primary service, select 'Azure blob storage' -In performance select 'standard' -Under redundancy, select 'GRS', enable the 'make read access to data availability in the event of regional unavailability. -Then click on 'review and create' After clicking on the 'review and create button', the page below will be displayed Then click on 'create' Deployment is in progress Deployment is complete, click on 'Go to resource' STEP 2: Go to 'configuration' on the left pane enable 'allow blob anonymous access' enable 'allow storage account key access' click on 'save' button STEP 3: Go to 'container' on the left pane name the container 'public' select 'blob anonymous read access for blobs only) Then click on 'create' The container is created, click on the public container to upload an image To upload an image/file, click on 'upload' Click on 'Browse for files'. After selecting the file/image, click on upload The file is uploaded, click on the file name Click on the downloaded file, copy the URL address to the browser and press the search button (https://sapublic84.blob.core.windows.net/public/13221573_972006292897303_8444556955887658365_n.jpg) The downloaded file is now publicly available STEP 4: Object replication On the container overview page, tick the public box, select 'data management' then 'object replication' Create replication rules
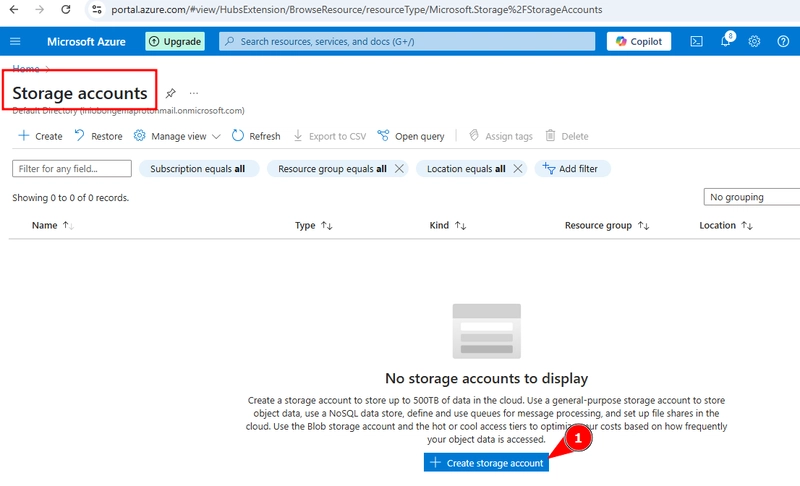
STEP 1 : Go to portal.azure.com
- search for storage account
- select 'create storage account'
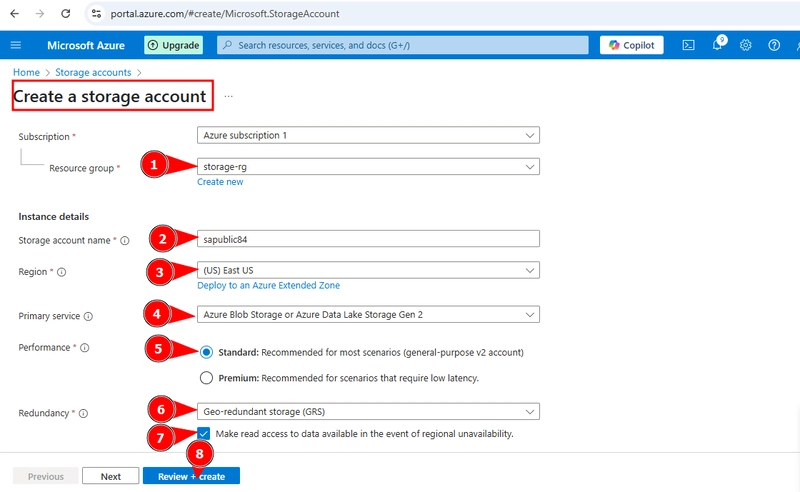
-Give the resource group a name
-Give the storage account a name
-Select region
-In primary service, select 'Azure blob storage'
-In performance select 'standard'
-Under redundancy, select 'GRS', enable the 'make read access to data
availability in the event of regional unavailability.
-Then click on 'review and create'
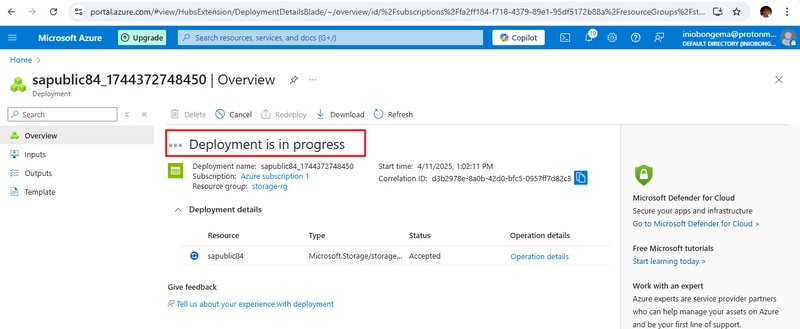
After clicking on the 'review and create button', the page below will be displayed
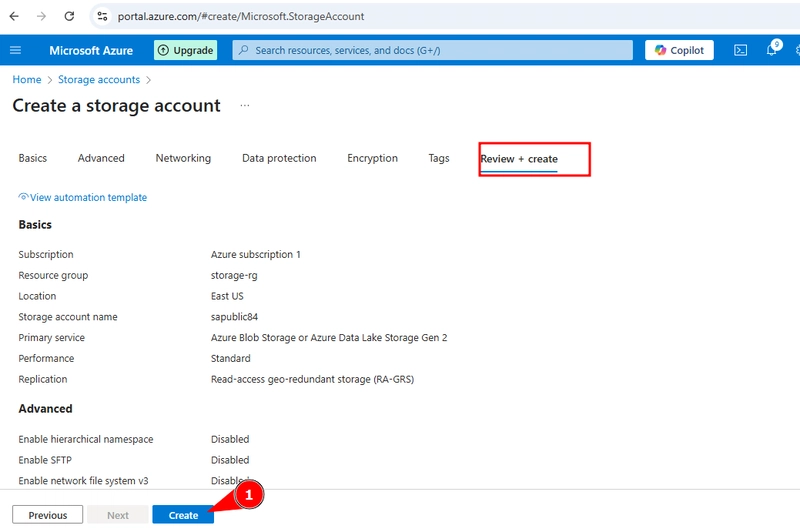
Then click on 'create'
- Deployment is in progress
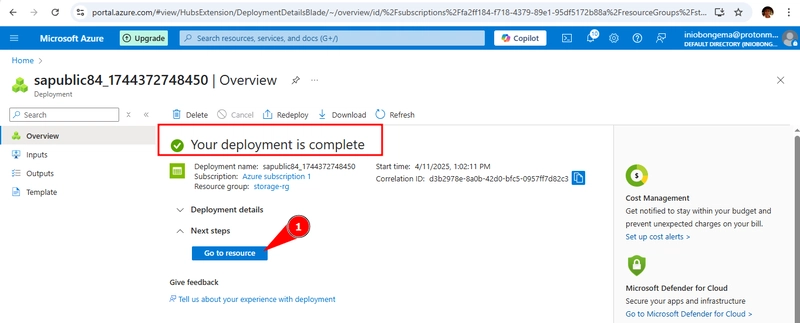
Deployment is complete, click on 'Go to resource'
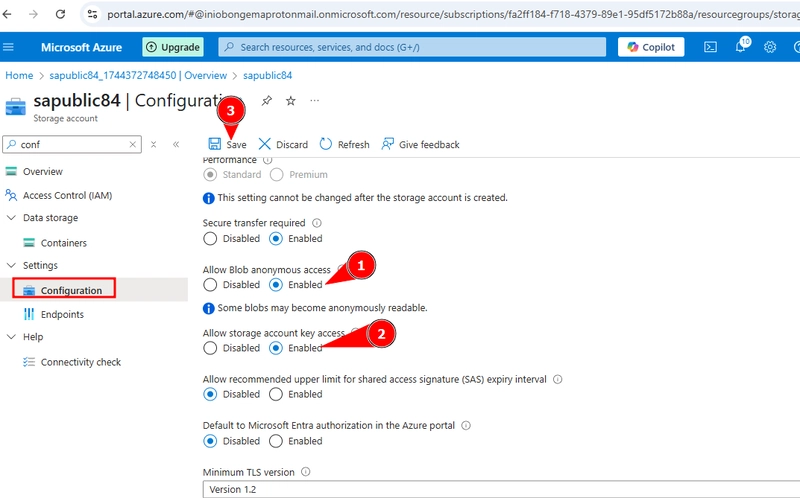
STEP 2: Go to 'configuration' on the left pane
- enable 'allow blob anonymous access'
- enable 'allow storage account key access'
- click on 'save' button
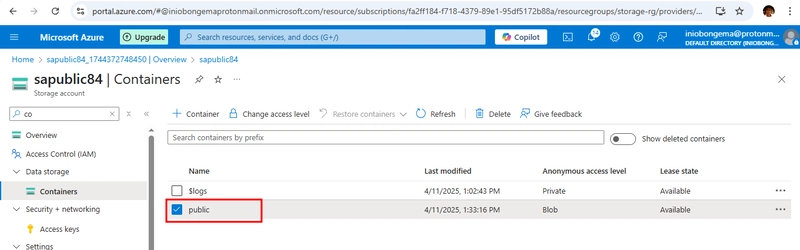
STEP 3: Go to 'container' on the left pane
- name the container 'public'
- select 'blob anonymous read access for blobs only)
- Then click on 'create'
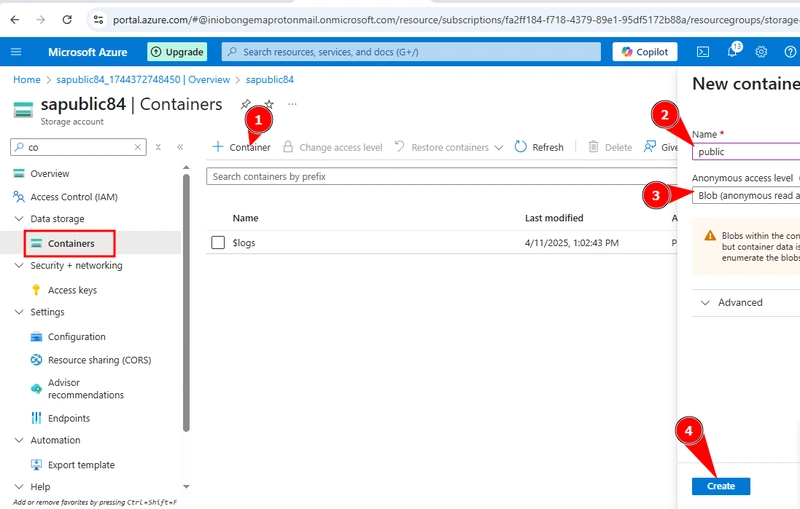
The container is created, click on the public container to upload an image
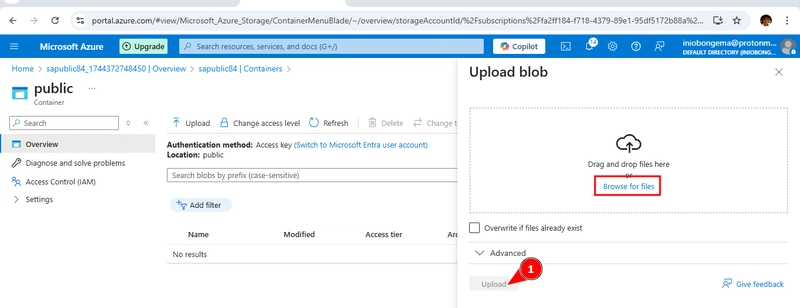
To upload an image/file, click on 'upload'

Click on 'Browse for files'. After selecting the file/image, click on upload
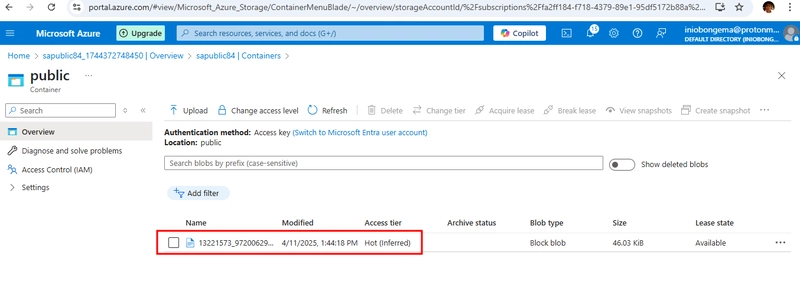
The file is uploaded, click on the file name
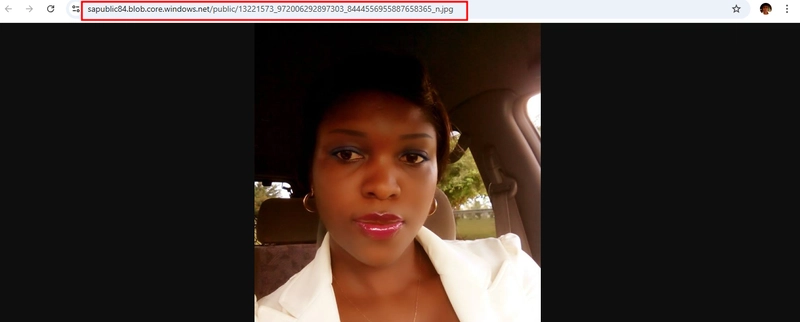
Click on the downloaded file, copy the URL address to the browser and press the search button
(https://sapublic84.blob.core.windows.net/public/13221573_972006292897303_8444556955887658365_n.jpg)
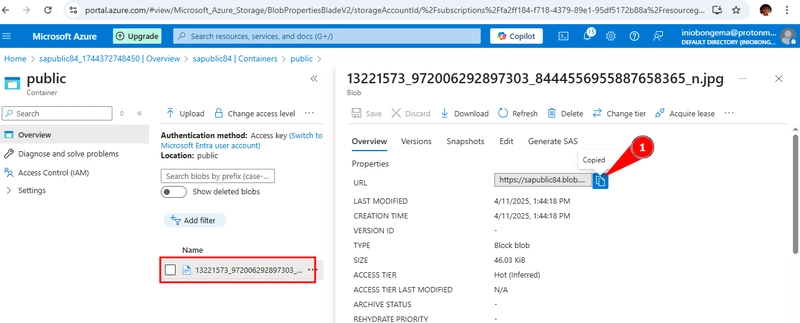
The downloaded file is now publicly available
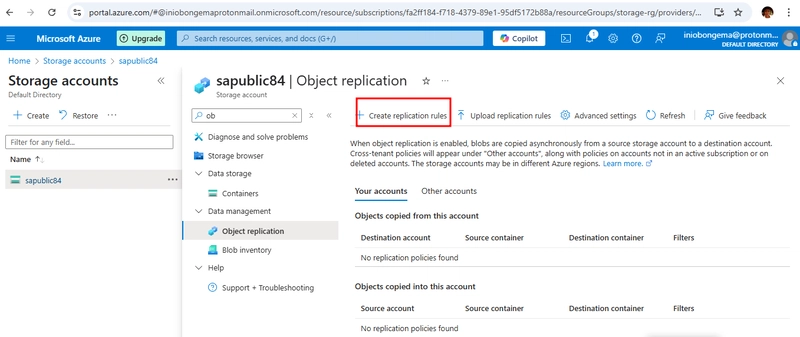
STEP 4: Object replication
On the container overview page, tick the public box, select 'data management' then 'object replication'
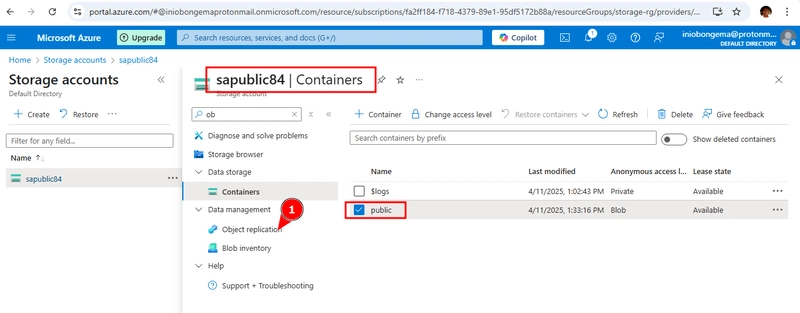
Create replication rules


