


![[The AI Show Episode 144]: ChatGPT’s New Memory, Shopify CEO’s Leaked “AI First” Memo, Google Cloud Next Releases, o3 and o4-mini Coming Soon & Llama 4’s Rocky Launch](https://www.marketingaiinstitute.com/hubfs/ep%20144%20cover.png)


.jpg?width=1920&height=1920&fit=bounds&quality=70&format=jpg&auto=webp#)


_Olekcii_Mach_Alamy.jpg?width=1280&auto=webp&quality=80&disable=upscale#)


![Apple Drops New Immersive Adventure Episode for Vision Pro: 'Hill Climb' [Video]](https://www.iclarified.com/images/news/97133/97133/97133-640.jpg)

![Most iPhones Sold in the U.S. Will Be Made in India by 2026 [Report]](https://www.iclarified.com/images/news/97130/97130/97130-640.jpg)
![Apple to Shift Robotics Unit From AI Division to Hardware Engineering [Report]](https://www.iclarified.com/images/news/97128/97128/97128-640.jpg)


Azure Applied Skills: Configure network routing
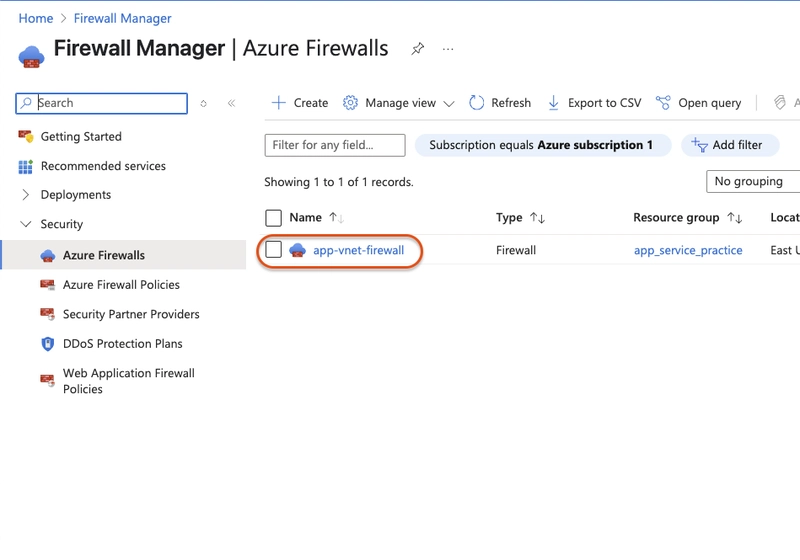
In this article series, I will be walking though the process of configuring secure access to workloads using Azure virtual networking. In this exercise, we will: Create and configure a route table. Link a route table to a subnet. We will be building on what was done in this exercise so make sure you have it done before attempting this one Exercise 04: Configure network routing In the search box at the top of the portal, search for and select Firewalls. Select app-vnet-firewall (created in previous exercise) Select Overview and record the Private IP address. Search for and select Route tables Click create route table Enter these properties: Subscription: Select your subscription Resource group: Your resource group Region: East US Name: app-vnet-firewall-rt Select Review + create and then select Create. Wait for the route table to deploy, then select Go to resource. In the portal, continue working with the route table, select app-vnet-firewall-rt. Select Subnets and then + Associate. Select this configuration: Virtual network: app-vnet Subnet: frontend Again select + associate and add this configuration: Select this configuration: Virtual network: app-vnet Subnet: backend Select app-vnet-firewall-rt. in route tables In Settings, select Routes and then + Add. Configure: Route name: outbound-firewall Destination type: IP addresses Destination IP addresses/CIDR range: 0.0.0.0/0 Next hop type: Virtual appliance Next hop address: private IP address of the firewall You’ve now set up a route table and linked it to your subnets to direct all outbound traffic through the Azure Firewall. This ensures centralized control and enhanced security for your network traffic—an essential step in building a secure and well-managed Azure environment.
In this article series, I will be walking though the process of configuring secure access to workloads using Azure virtual networking. In this exercise, we will:
- Create and configure a route table.
- Link a route table to a subnet.
We will be building on what was done in this exercise so make sure you have it done before attempting this one
Exercise 04: Configure network routing
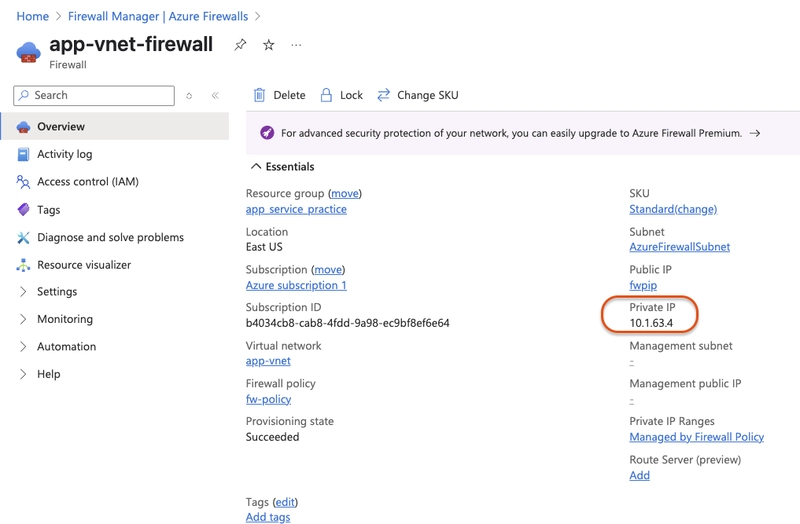
- In the search box at the top of the portal, search for and select Firewalls.
Select app-vnet-firewall (created in previous exercise)
Select Overview and record the Private IP address.
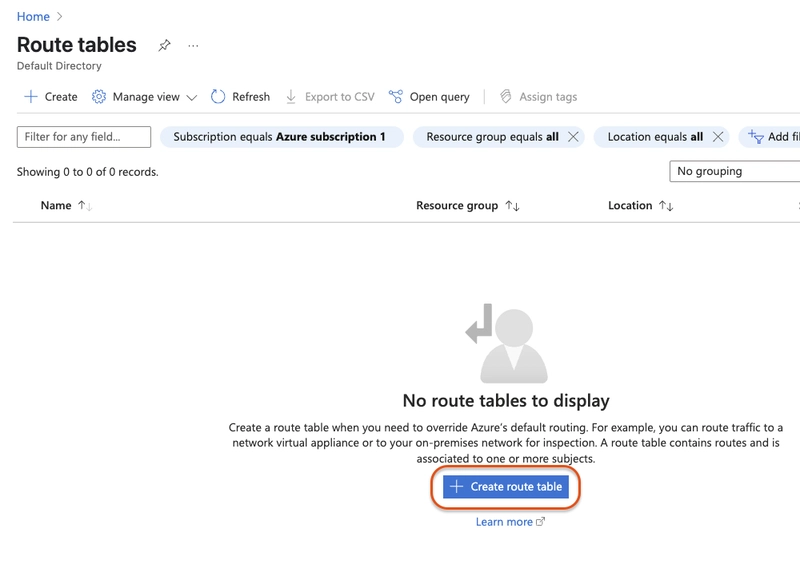
Search for and select Route tables
Click create route table
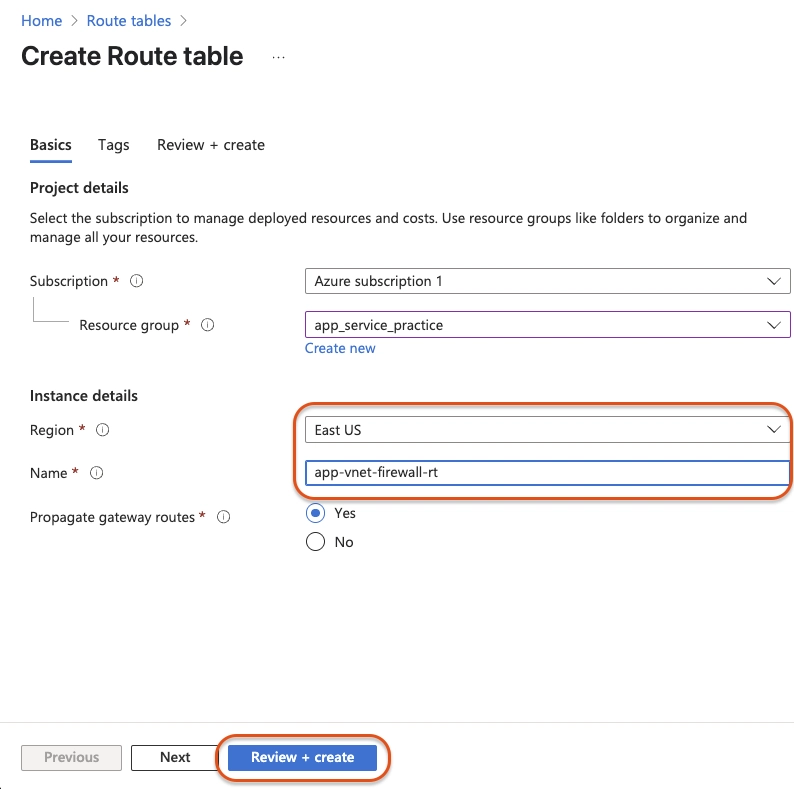
Enter these properties:
Subscription: Select your subscription
Resource group: Your resource group
Region: East US
Name:app-vnet-firewall-rtSelect Review + create and then select Create.
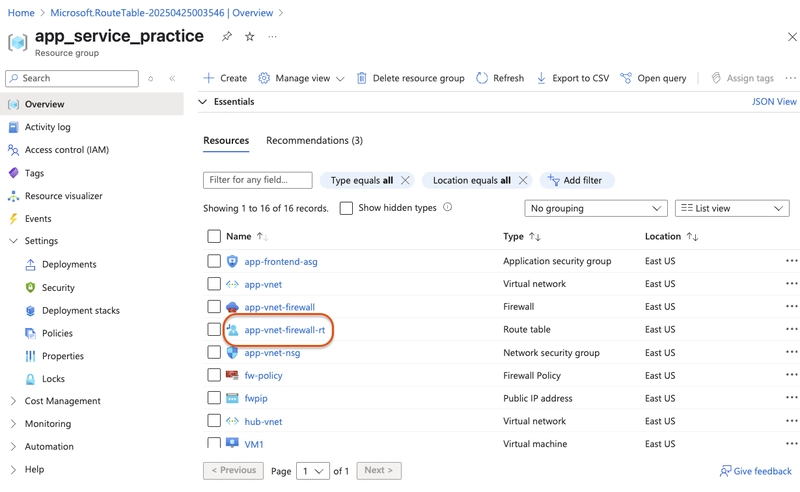
Wait for the route table to deploy, then select Go to resource.
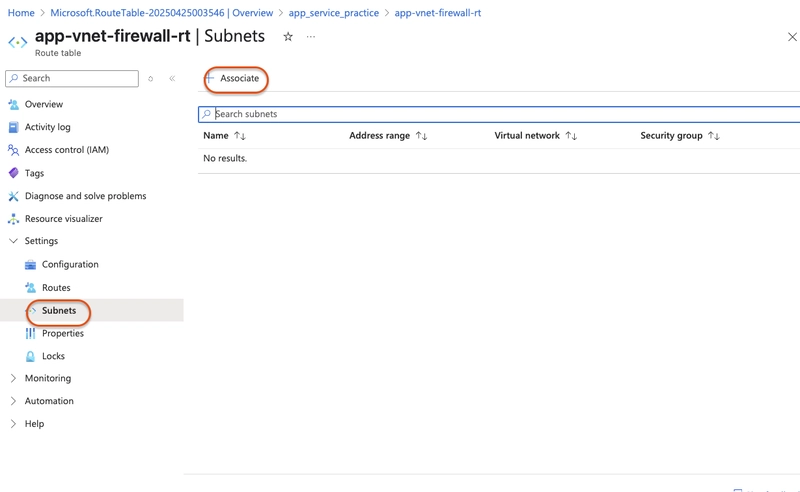
In the portal, continue working with the route table, select
app-vnet-firewall-rt.
Select Subnets and then + Associate.
-
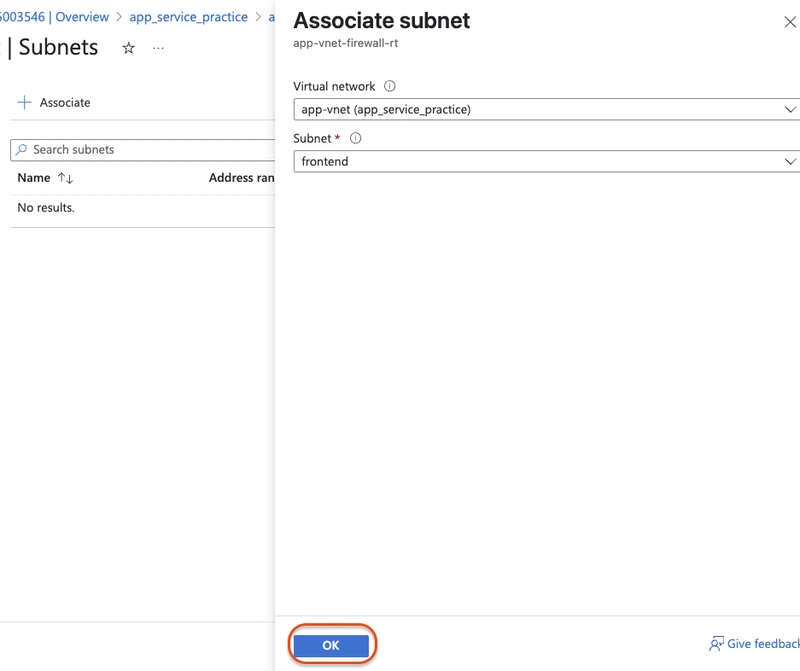
Select this configuration:
- Virtual network: app-vnet
- Subnet: frontend
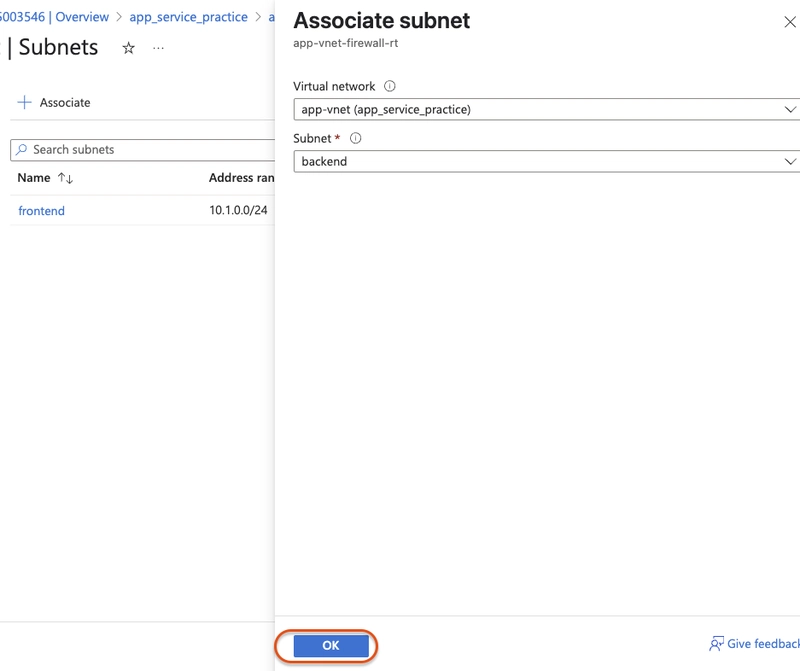
Again select + associate and add this configuration:
-
Select this configuration:
- Virtual network: app-vnet
- Subnet: backend
Select
app-vnet-firewall-rt.in route tablesIn Settings, select Routes and then + Add.
-
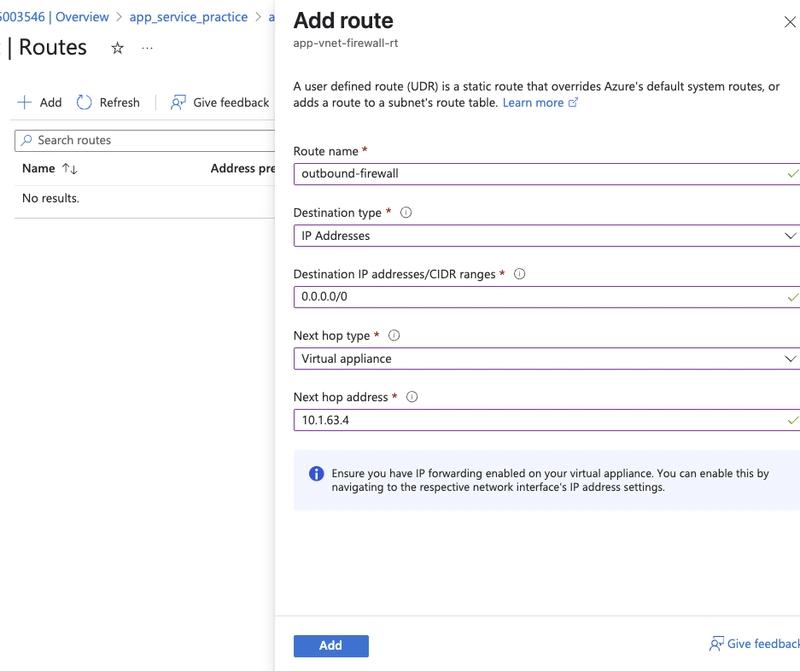
Configure:
- Route name: outbound-firewall
- Destination type: IP addresses
- Destination IP addresses/CIDR range: 0.0.0.0/0
- Next hop type: Virtual appliance
- Next hop address: private IP address of the firewall
You’ve now set up a route table and linked it to your subnets to direct all outbound traffic through the Azure Firewall. This ensures centralized control and enhanced security for your network traffic—an essential step in building a secure and well-managed Azure environment.