


![[The AI Show Episode 144]: ChatGPT’s New Memory, Shopify CEO’s Leaked “AI First” Memo, Google Cloud Next Releases, o3 and o4-mini Coming Soon & Llama 4’s Rocky Launch](https://www.marketingaiinstitute.com/hubfs/ep%20144%20cover.png)


_Olekcii_Mach_Alamy.jpg?width=1280&auto=webp&quality=80&disable=upscale#)


![M4 MacBook Air Drops to New All-Time Low of $912 [Deal]](https://www.iclarified.com/images/news/97108/97108/97108-640.jpg)
![New iPhone 17 Dummy Models Surface in Black and White [Images]](https://www.iclarified.com/images/news/97106/97106/97106-640.jpg)


5 best open source tools for cross-browser CSS testing
Written by Peter Aideloje✏️ Why is CSS so inconsistent across browsers? Picture this: You spend hours trying to perfect your website’s layout and ensure every element is pixel-perfect. It looks flawless in Chrome. But when you open it in Safari, the spacing is off. Then, in Firefox, a key animation doesn’t work at all. Frustrating right? Different browsers don’t always interpret CSS the same way. Chrome, Edge, Safari, and Firefox each use their own rendering engines, which can lead to unexpected differences in layout, spacing, and animations. Some browsers support the latest CSS features, while others take longer to catch up. On top of that, vendor-specific properties often force developers to write extra code just to keep styles consistent. Even reliable techniques like Flexbox and CSS Grid don’t always behave the same across browsers. That’s why cross-browser testing matters. Catching issues early saves hours of debugging and ensures users get a good experience and impression, no matter which browser they use. There are powerful tools that can do the heavy lifting so you don’t have to test manually on every browser and device: In this article, we’ll explore five free and open source tools that simplify CSS compatibility testing. These tools help identify rendering inconsistencies, debug layout issues, and ensure your styles work smoothly across different browsers. Each section will cover: What the tool does How it helps with CSS testing Key features Best use cases Installation and setup Playwright What Playwright does Playwright is an open source testing framework that automates browser interactions across Chromium (Chrome and Edge), WebKit (Safari), and Firefox. Playwright was specifically built for end-to-end testing, and it allows developers to test their applications across multiple browsers, operating systems, and devices. Playwright ensures that CSS renders consistently across different environments, whether running in a local environment or in a CI/CD pipeline. How Playwright helps with CSS testing Playwright provides several powerful features that make it an excellent tool for testing CSS across different browsers: Playwright can take screenshots of rendered pages, which allows developers to compare visual differences between browsers Playwright can also run visual regression tests to detect layout shifts and UI inconsistencies Playwright tests interactions like hover effects, responsive layouts, and media queries to ensure the CSS behaves as expected Playwright runs tests in both headless and headed modes, enabling automation without needing a visible browser window Key features of Playwright Multi-browser support: With Playwrite, you can test across Chrome, Edge, Safari, or Firefox Headless and headed testing: You can run tests in the background or visually inspect rendering UI consistency testing: The system captures screenshots and runs visual regression tests Mobile emulation: You can test styles in mobile Chrome and Safari without needing physical devices Parallel testing: You can run tests concurrently on different browsers to speed up testing Playwright installation and setup Installing Playwright is straightforward. You can install it using npm with the following command: npm install @playwright/test To set up Playwright in a new project, run: npm init playwright@latest This command initializes Playwright, creates necessary configuration files, and installs browsers needed for testing. How to use Playwright for cross-browser CSS testing Once you install Playwright, you can start writing tests to check for CSS consistency across different browsers. Here’s an example test that captures screenshots in Chromium, WebKit, and Firefox to compare rendering differences: const { test, expect } = require('@playwright/test'); test('Check CSS rendering across browsers', async ({ page }) => { await page.goto('https://example.com'); // Capture screenshots for comparison await page.screenshot({ path: `chromium.png`, fullPage: true }); await page.screenshot({ path: `webkit.png`, fullPage: true }); await page.screenshot({ path: `firefox.png`, fullPage: true }); // Example: Verify if a specific element is visible const button = await page.locator('.my-button'); await expect(button).toBeVisible(); }); The above script is written in JavaScript and is designed to automate cross-browser CSS testing. It starts by importing the test and expected functions from Playwright. Then, it defines a test named "Check CSS rendering across browsers." Inside this test, it opens a browser page and navigates to https://example.com. After loading the page, it captures full-page screenshots for three different browsers: Chromium, WebKit, and Firefox. Next, it locates a button with the class .my-button on the page. Finally, it checks if the button is visible
Written by Peter Aideloje✏️
Why is CSS so inconsistent across browsers?
Picture this: You spend hours trying to perfect your website’s layout and ensure every element is pixel-perfect. It looks flawless in Chrome. But when you open it in Safari, the spacing is off. Then, in Firefox, a key animation doesn’t work at all. Frustrating right?
Different browsers don’t always interpret CSS the same way. Chrome, Edge, Safari, and Firefox each use their own rendering engines, which can lead to unexpected differences in layout, spacing, and animations. Some browsers support the latest CSS features, while others take longer to catch up. On top of that, vendor-specific properties often force developers to write extra code just to keep styles consistent.
Even reliable techniques like Flexbox and CSS Grid don’t always behave the same across browsers.
That’s why cross-browser testing matters. Catching issues early saves hours of debugging and ensures users get a good experience and impression, no matter which browser they use. There are powerful tools that can do the heavy lifting so you don’t have to test manually on every browser and device:
In this article, we’ll explore five free and open source tools that simplify CSS compatibility testing. These tools help identify rendering inconsistencies, debug layout issues, and ensure your styles work smoothly across different browsers.
Each section will cover:
- What the tool does
- How it helps with CSS testing
- Key features
- Best use cases
- Installation and setup
Playwright
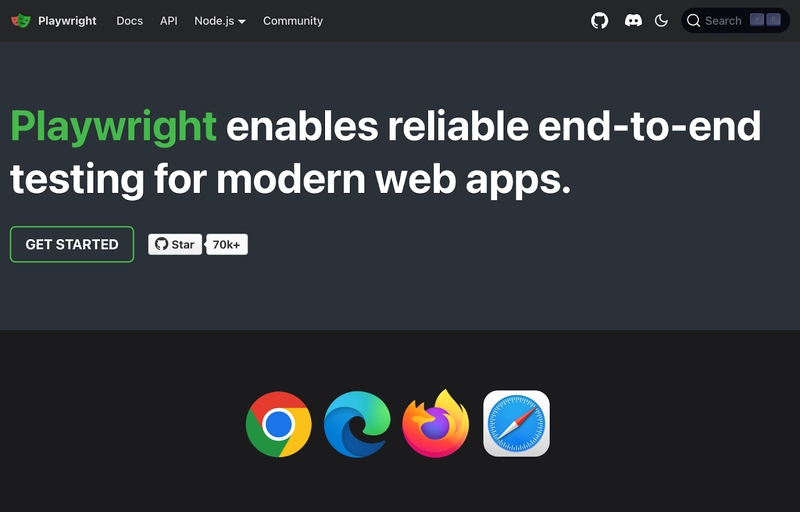
What Playwright does
Playwright is an open source testing framework that automates browser interactions across Chromium (Chrome and Edge), WebKit (Safari), and Firefox.
Playwright was specifically built for end-to-end testing, and it allows developers to test their applications across multiple browsers, operating systems, and devices. Playwright ensures that CSS renders consistently across different environments, whether running in a local environment or in a CI/CD pipeline.
How Playwright helps with CSS testing
Playwright provides several powerful features that make it an excellent tool for testing CSS across different browsers:
- Playwright can take screenshots of rendered pages, which allows developers to compare visual differences between browsers
- Playwright can also run visual regression tests to detect layout shifts and UI inconsistencies
- Playwright tests interactions like hover effects, responsive layouts, and media queries to ensure the CSS behaves as expected
- Playwright runs tests in both headless and headed modes, enabling automation without needing a visible browser window
Key features of Playwright
- Multi-browser support: With Playwrite, you can test across Chrome, Edge, Safari, or Firefox
- Headless and headed testing: You can run tests in the background or visually inspect rendering
- UI consistency testing: The system captures screenshots and runs visual regression tests
- Mobile emulation: You can test styles in mobile Chrome and Safari without needing physical devices
- Parallel testing: You can run tests concurrently on different browsers to speed up testing
Playwright installation and setup
Installing Playwright is straightforward. You can install it using npm with the following command:
npm install @playwright/test
To set up Playwright in a new project, run:
npm init playwright@latest
This command initializes Playwright, creates necessary configuration files, and installs browsers needed for testing.
How to use Playwright for cross-browser CSS testing
Once you install Playwright, you can start writing tests to check for CSS consistency across different browsers. Here’s an example test that captures screenshots in Chromium, WebKit, and Firefox to compare rendering differences:
const { test, expect } = require('@playwright/test');
test('Check CSS rendering across browsers', async ({ page }) => {
  await page.goto('https://example.com');
  // Capture screenshots for comparison
  await page.screenshot({ path: `chromium.png`, fullPage: true });
  await page.screenshot({ path: `webkit.png`, fullPage: true });
  await page.screenshot({ path: `firefox.png`, fullPage: true });
  // Example: Verify if a specific element is visible
  const button = await page.locator('.my-button');
  await expect(button).toBeVisible();
});
The above script is written in JavaScript and is designed to automate cross-browser CSS testing. It starts by importing the test and expected functions from Playwright. Then, it defines a test named "Check CSS rendering across browsers."
Inside this test, it opens a browser page and navigates to https://example.com. After loading the page, it captures full-page screenshots for three different browsers: Chromium, WebKit, and Firefox. Next, it locates a button with the class .my-button on the page. Finally, it checks if the button is visible using Playwright’s expect function:
What sets Playwright apart from other tools?
- Multi-browser testing in one framework: Unlike some testing tools that focus on a single engine, Playwright allows you to test Chromium, WebKit, and Firefox in one test suite
- Visual and interaction testing combined: Playwright doesn’t just check if an element exists; it lets you test how it looks and interacts across browsers, which makes it an important tool for CSS validation
- Native mobile emulation: Playwright supports mobile Chrome and Safari emulation, so you can test responsive designs without needing a physical device
- Headless and headed modes: Run tests in the background (headless) or inspect the UI visually (headed) based on your testing needs
Selenium WebDriver
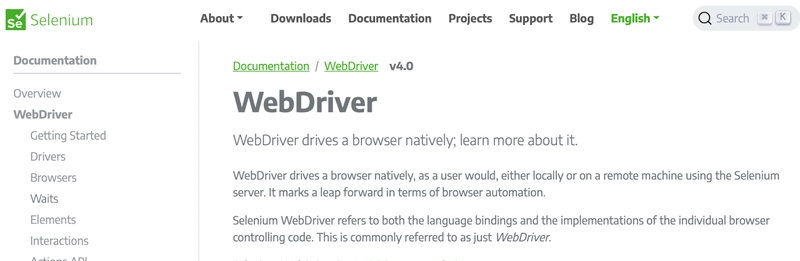
What Selenium WebDriver does
Selenium WebDriver is an open source automation framework that allows developers to programmatically control web browsers for testing purposes. It enables cross-browser testing by automating interactions with major browsers like Chrome, Firefox, Edge, and Safari. Selenium WebDriver is widely used for functional UI testing, browser compatibility testing, and automating repetitive web tasks.
Selenium WebDriver makes it easy to test how your web application behaves across different browsers. It automates real user interactions like clicking buttons, filling out forms, and navigating between pages so you can catch layout issues, broken functionality, or unexpected behavior before users do.
Key features of Selenium WebDriver
- Works with multiple browsers: You can test on Chrome, Firefox, Edge, Safari, and Opera
- Headless testing: You can easily run tests without opening a browser for faster execution
- Cross-platform support: Selenium WebDriver works on Windows, macOS, and Linux
- Supports multiple programming languages: You can write tests in Java, Python, JavaScript, C#, and more
- Integrates with popular test frameworks: The WebDriver works with JUnit, TestNG, PyTest, Mocha, and others
Selenium WebDriver installation and setup
1. Install Selenium WebDriver
Install Selenium in your preferred programming language. For example, in Python:
pip install selenium
For Java, add the Selenium dependency in pom.xml (Maven):
For JavaScript (Node.js):
npm install selenium-webdriver
2. Download the browser driver
Each browser requires a specific WebDriver. Download and set up the appropriate Selenium web driver:
- Chrome – ChromeDriver
- Firefox – GeckoDriver
- Edge – Edge WebDriver
How to use Selenium WebDriver for cross-browser testing
Once installed, you can start writing Selenium tests to check UI consistency across different browsers. Here’s an example test using Python that validates a button’s visibility across browsers:
from selenium import webdriver
from selenium.webdriver.common.by import By
from selenium.webdriver.chrome.service import Service
from webdriver_manager.chrome import ChromeDriverManager
# Launch browsers
browsers = ['chrome', 'firefox', 'edge']
for browser in browsers:
    if browser == 'chrome':
        driver = webdriver.Chrome(service=Service(ChromeDriverManager().install()))
    elif browser == 'firefox':
        driver = webdriver.Firefox()
    elif browser == 'edge':
        driver = webdriver.Edge()
    driver.get("https://example.com")
    # Capture screenshots for comparison
    driver.save_screenshot(f"{browser}.png")
    # Verify if a button is visible
    button = driver.find_element(By.CLASS_NAME, "my-button")
    assert button.is_displayed(), f"{browser}: Button is not visible"
    driver.quit()
The script above launches Chrome, Firefox, and Edge browsers. Then it navigates to https://example.com. It then takes a screenshot for visual comparison. After that, it checks if a button with the class .my-button is visible. After which, it closes the browser after execution.
What sets Selenium apart from other tools?
- Selenium works with all major browsers via dedicated drivers
- You can use Java, Python, JavaScript, C#, Ruby, etc.
- Selenium works with JUnit, TestNG, PyTest, and Mocha
- It also supports clicking, typing, scrolling, and more
- You can run tests without opening a visible browser window
PostCSS + Stylelint
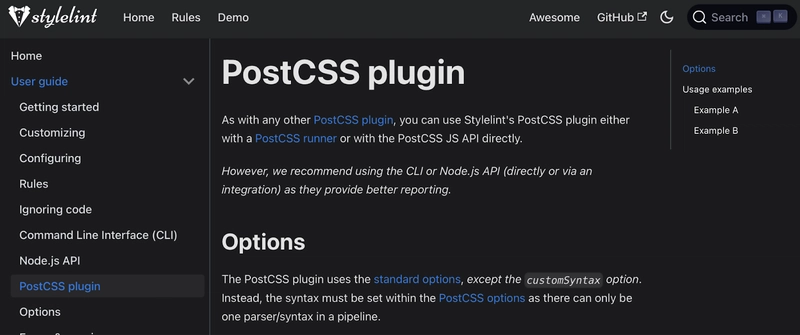
What PostCSS + Stylelint does
PostCSS and Stylelint work together to keep your CSS clean, error-free, and compatible across browsers.
PostCSS processes your styles using JavaScript plugins. One of its most important plugins, Autoprefixer, automatically adds missing vendor prefixes so your CSS works consistently in different browsers without you having to write extra code.
Stylelint is a modern CSS linter that catches errors, enforces best practices, and ensures your styles follow a consistent structure. It helps prevent common mistakes and keeps your code easy to maintain.
By using both tools, you can automate CSS fixes, catch invalid properties early, and make sure your styles work seamlessly across all browsers.
PostCSS + Stylelint key features
We have established that it can be tedious to handle CSS prefixes and ensure compatibility across different browsers.
Here’s how PostCSS and Stylelint simplify this process:
- PostCSS and Stylelint automatically add vendor prefixes: The PostCSS Autoprefixer plugin analyzes CSS and applies the necessary prefixes (e.g.,
webkit-,-moz-) based on browser support. Developers no longer need to remember which prefixes are required for different properties - PostCSS and Stylelint help to catch outdated or incorrect CSS: Stylelint flags invalid, duplicate, or deprecated CSS properties, helping developers avoid using styles that might break in modern browsers
- You can enforce consistency: By applying linting rules, teams can ensure that their CSS follows best practices and remains readable, reducing inconsistencies across a codebase
- Integrating into CI/CD pipelines: Both tools can be configured to run in automated build processes, preventing broken styles from being deployed to production
- PostCSS and Stylelint work with Modern CSS frameworks: PostCSS and Stylelint are compatible with popular frameworks like Tailwind CSS, Bootstrap, and Material UI. They help maintain styling integrity while ensuring that framework-specific styles don’t introduce unnecessary errors or compatibility problems
- Automated browser compatibility: PostCSS Autoprefixer scans CSS and applies vendor prefixes based on up-to-date browser data from Can I Use. This means developers don’t need to manually add prefixes or worry about outdated ones cluttering their stylesheets
- Redundant prefix removal: Not only does Autoprefixer add missing prefixes, but it also removes unnecessary ones, keeping CSS files clean and reducing file size
PostCSS + Stylelint installation and setup
Getting started with PostCSS and Stylelint is straightforward. You can install them using npm with the following command:
npm install postcss autoprefixer stylelint
To configure Autoprefixer, create a postcss.config.js file in your project and add:
module.exports = {
  plugins: [
    require('autoprefixer')
  ]
};
For Stylelint, add a .stylelintrc.json configuration file:
{
  "extends": "stylelint-config-standard",
  "rules": {
    "indentation": 2,
    "max-nesting-depth": 3
  }
}
Why use PostCSS + Stylelint?
Unlike traditional CSS preprocessors like Sass or Less, PostCSS operates at the post-processing level, modifying raw CSS based on plugin rules rather than requiring an entirely different syntax. When paired with Stylelint, it creates a powerful workflow that not only ensures cross-browser compatibility but also enforces styling consistency across a team.
BrowserStack
What BrowserStack does
BrowserStack is a testing platform that allows developers to test websites and mobile applications on real browsers and devices. It provides a cloud-based infrastructure that supports manual and automated testing across multiple environments. BrowserStack helps teams release high-quality applications faster with an emphasis on cross-browser testing, real device testing, and AI-powered insights.
How BrowserStack helps with testing
BrowserStack offers a wide range of features that streamline testing workflows and improve test coverage. It enables teams to:
- Perform manual cross-browser testing using real browsers to detect compatibility issues early
- Run automated tests with tools like Selenium, Cypress, and Playwright on a global cloud-based infrastructure
- Conduct visual regression testing with Percy to identify unintended UI changes
- Test mobile applications on real iOS and Android devices without needing a physical device lab
- Improve accessibility compliance by ensuring applications meet WCAG and ADA standards
Key features of BrowserStack
- Real browser and device testing: BrowserStack can test websites and apps on a variety of real browsers and operating systems
- Automated testing grid: BrowserStack can also run Selenium, Playwright, and Cypress tests in parallel for faster execution
- AI-powered test observability: You can gain insights into test failures and debugging through detailed logs, screenshots, and video recordings
- Visual testing with Percy: BrowserStack detects UI changes across browsers and devices with automated visual testing
- Accessibility testing: Ensure web applications meet accessibility standards and comply with WCAG and ADA guidelines
- Seamless CI/CD integration: Connect with Jenkins, GitHub Actions, GitLab CI/CD, and other DevOps tools for automated testing
BrowserStack installation and setup
Getting started with BrowserStack is simple. You can sign up for a free trial and integrate it into your test suite using tools like Selenium, Cypress, Playwright, and Appium. For automated testing, install the BrowserStack SDK with:
npm install -g browserstack-cli
To run Selenium tests, set up your credentials and execute tests using the following command:
browserstack --username <your-username> --key <your-access-key> run tests
Why choose BrowserStack?
- 150+ integrations: BrowserStack works with the most popular testing frameworks, CI/CD tools, and project management platforms
- Trusted by 50,000+ teams: BrowserStack is used by companies like Nykaa, Optimizely, and The Weather Company to streamline their testing workflows
- Faster test execution: Parallelization and test automation reduce testing time by up to 73%
- Scalability: BrowserStack supports large-scale testing, running thousands of tests simultaneously
Visual regression testing with BackstopJS
BackstopJS is another open source solution used to detect unintended CSS changes across different browsers:
How BackstopJS works
BackstopJS captures screenshots of a web application before and after a change, then compares them to detect visual differences. This automated approach eliminates the need for manual inspection (which can be time-consuming and prone to human error). Instead of sifting through multiple browser versions and devices to catch inconsistencies, BackstopJS provides a clear visual report highlighting areas that have changed.
Key features of BackstopJS
- Baseline image comparisons: BackstopJS captures reference screenshots and compares them to new versions, highlighting any differences in layout, spacing, colors, or other visual elements
- Headless browser support for fast testing: It uses headless browsers like Puppeteer or Playwright to run tests quickly without launching a full browser UI
- CI/CD integration to prevent CSS regressions: By integrating with CI/CD pipelines, BackstopJS prevents CSS regressions by automatically running visual tests whenever new code is deployed
- Multiple viewport testing: BackstopJS allows testing across various screen sizes (mobile, tablet, desktop) to ensure responsiveness and consistency across devices
Best use cases
You can use BackstopJS to:
- Verify that CSS updates do not introduce unintended layout shifts across different browsers
- Ensure that UI components maintain their expected appearance after framework or dependency upgrades
- Detects visual changes in web applications when browser rendering engines update
- Automate regression testing for static sites and single-page applications (SPAs)
- Capture high-quality browser-rendered screenshots for visual comparison
- Automate UI testing for web applications across different browsers and screen resolutions
- Generate consistent visual test results by rendering pages in controlled browser environments
- Validate changes before deployment by running headless browser tests in CI/CD pipelines
BackstopJS installation and setup
Setting up BackstopJS is straightforward. You can install it via npm with the following command:
npm install -g backstopjs
Then, initialize a new BackstopJS project:
backstop init
How to pick the right tool for cross-browser testing
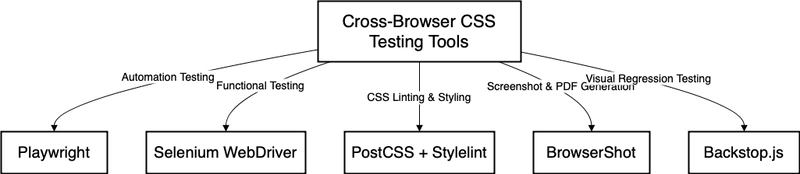
When choosing a cross-browser testing tool, it's essential to consider the type of testing you need to perform, the level of automation required, and the specific browsers, devices, or platforms you need to support. Below is a comparison of the testing tools we have highlighted so you can understand which one will be right for your use case.
Key considerations when choosing a cross-browser testing tool
- Automation vs. manual testing: Do you need a tool that automates browser interactions, or are you testing visual aspects manually?
- Supported browsers and devices: Does the tool provide broad compatibility across multiple browsers, or does it focus on specific environments?
- Ease of integration: Can the tool integrate seamlessly with your CI/CD pipeline and existing workflow?
- Visual vs. functional testing: Are you testing UI/visual regressions, or do you need a tool that focuses on backend interactions?
- Performance and s*calability:* Do you require cloud-based solutions that support parallel execution for large-scale testing?
Comparison of cross-browser testing tools
| Feature | Playwright | Selenium WebDriver | PostCSS + Stylelint | BrowserStack | BackstopJS |
|---|---|---|---|---|---|
| Use case | End-to-end automation testing | Functional testing across multiple browsers | CSS linting and styling checks | Capturing webpages as images/PDFs | Visual regression testing |
| Automation level | Fully automated | Fully automated | Static code analysis (CSS) | Manual or automated | Automated (visual) |
| Supported browsers | Chrome, Firefox, Safari, Edge | Chrome, Firefox, Safari, Edge, IE | CSS-focused (not browser-specific) | Chromium-based (Chrome, Edge) | Chrome, Firefox |
| Best for | UI automation and performance testing | Functional testing in various browsers | CSS code quality enforcement | Generating screenshots/PDFs | Detecting UI layout changes |
| CI/CD integration | Yes (Jenkins, GitHub Actions, CircleCI) | Yes (Selenium Grid, Jenkins) | Yes (Prettier, ESLint) | Yes (Node.js-based) | Yes (Jenkins, GitHub Actions) |
| Ease of setup | Moderate | Moderate to difficult | Easy | Easy | Moderate |
| Parallel execution | Yes | Yes (via Selenium Grid) | No | No | Yes |
| Headless mode | Yes | Yes | No | Yes | Yes |
| Best for teams using | JavaScript, TypeScript, Python | Java, Python, C#, JavaScript | Frontend developers | PHP, Node.js | JavaScript, frontend teams |
| Learning curve | Moderate | Steep | Easy | Easy | Moderate |
Which cross-browser testing tool should you use?
Need to automate browser interactions?
Go with Playwright or Selenium WebDriver if you're testing web app functionality:
- Pick Playwright if you need fast, reliable end-to-end testing across modern browsers. It supports parallel execution, runs in headless mode, and integrates smoothly with CI/CD pipelines
- Choose Selenium WebDriver if you need to test a wide range of browsers, including Internet Explorer, or if your team already uses Selenium’s ecosystem
Testing UI or styling instead of functionality?
If you're not testing interactions but want to enforce consistent styles, go for PostCSS + Stylelint:
- This tool checks CSS code quality and ensures design consistency across your project
- It doesn’t run tests in browsers, so use it if your main concern is clean, maintainable CSS, not browser behavior
Need high-quality screenshots or PDFs?
Use BrowserStack if you want to capture web pages as images or PDFs:
- Works best for PHP-based projects that need automated screenshot generation
- If you’re building reports, previews, or printable web content, this is the right tool
Worried about UI changes breaking your design?
Go for BackstopJS if you want visual regression testing that can catch unwanted layout shifts and style changes:
- It compares screenshots over time to detect UI differences
- Great for teams working on frontend-heavy applications where small design changes matter:
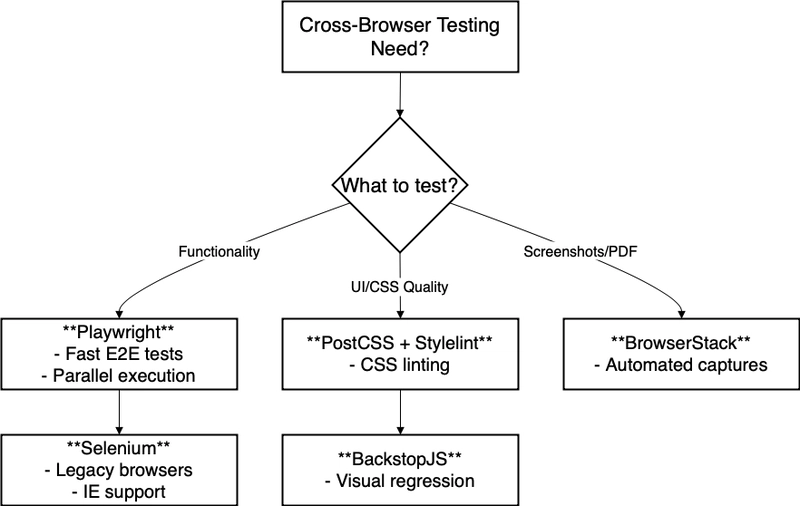
Choosing the right tool depends on what you’re testing. Are you checking for functional correctness, UI consistency, or styling errors?
Conclusion
In this article, we explored five of the best open source tools for cross-browser CSS testing. We broke down how Playwright and Selenium WebDriver help automate functional testing across multiple browsers, why PostCSS + Stylelint is essential for enforcing consistent styles, and how BrowserStack makes it easy to generate high-quality screenshots and PDFs. We also looked at BackstopJS, which catches UI inconsistencies before they reach production.
These tools are free, powerful, and built to streamline your workflow. Why not try them out and see which one fits your development process best?
Is your frontend hogging your users' CPU?
As web frontends get increasingly complex, resource-greedy features demand more and more from the browser. If you’re interested in monitoring and tracking client-side CPU usage, memory usage, and more for all of your users in production, try LogRocket.

LogRocket is like a DVR for web and mobile apps, recording everything that happens in your web app, mobile app, or website. Instead of guessing why problems happen, you can aggregate and report on key frontend performance metrics, replay user sessions along with application state, log network requests, and automatically surface all errors.
Modernize how you debug web and mobile apps — start monitoring for free.