Understanding WebSockets: Real-Time Data Transfer Made Easy
WebSockets provide a full-duplex communication channel between the client and server. Unlike traditional HTTP requests, where the client has to repeatedly poll the server for updates, WebSockets enable real-time data transfer with minimal latency. A great use case for WebSockets is payment processing. In traditional systems, the frontend would need to keep checking the payment status through repeated API calls. With WebSockets, the server can emit events as soon as the payment is processed, reducing unnecessary API calls and improving efficiency. Breaking Down the WebSockets Implementation Frontend 1. Initializing WebSocket Connection import { io } from "socket.io-client"; const socket = io(process.env.API_BASE_URL, { autoConnect: false }); The frontend initializes a WebSocket connection to the backend using io(process.env.API_BASE_URL, { autoConnect: false }). autoConnect: false ensures that the socket does not connect automatically until explicitly called. 2. Handling Connection and Events useEffect(() => { socket.connect(); socket.on("socket-id", setSocketId); socket.on("payment-status", setPaymentStatus); return () => { socket.off("socket-id"); socket.off("payment-status"); socket.disconnect(); }; }, []); socket.connect() establishes the connection. Listens for: socket-id: Receives and stores the unique identifier assigned by the server. payment-status: Updates the payment status in real-time. Cleanup: socket.off(...) ensures that event listeners are removed when the component unmounts. socket.disconnect() properly closes the connection. 3. Sending Data to Backend await axios.post( `${process.env.API_BASE_URL}/api/payments/make-payment-with-socket`, { amount: 1000, socketId } ); The client sends a payment request to the backend API, including the socketId. This ensures the server knows which client to send the payment status update to. Backend 1. Setting Up WebSockets (socket.js) const { Server } = require("socket.io"); let io; const setupSocket = (server) => { io = new Server(server, { cors: { origin: "http://localhost:3000" }, }); io.on("connection", (socket) => { console.log(`User connected: ${socket.id}`); socket.emit("socket-id", socket.id); socket.on("disconnect", () => console.log(`User disconnected: ${socket.id}`) ); }); }; const emitPaymentStatus = (socketId, status) => { if (io) io.to(socketId).emit("payment-status", status); }; module.exports = { setupSocket, emitPaymentStatus }; setupSocket(server): Initializes the WebSocket server. Handles Connections: When a client connects, it assigns a unique socket.id. It sends the socket-id back to the client. It listens for disconnection events. Emitting Events: The emitPaymentStatusfunction emits the payment-status event to a specific client using their socketId. 2. Integrating WebSockets with Express (index.js) const express = require("express"); const http = require("http"); const { setupSocket } = require("./socket"); const app = express(); const server = http.createServer(app); setupSocket(server); server.listen(PORT, () => { console.log(`Backend server running on port ${PORT}`); }); http.createServer(app): Creates an HTTP server to attach WebSockets to. setupSocket(server): Passes the server to the WebSocket setup function. server.listen(PORT): Starts the backend server. 3. Emitting Events After Payment (paymentRoutes.js) const { emitPaymentStatus } = require("../socket"); router.post("/make-payment-with-socket", (req, res) => { const { socketId } = req.body; setTimeout(() => { emitPaymentStatus(socketId, true); }, 10000); res.status(200).json({ message: "Payment received, processing request" }); }); The backend receives the socketIdfrom the frontend. Simulates payment processing with setTimeout(). Calls emitPaymentStatus(socketId, true) to notify the client of a successful payment. Check Payment status - Without WebSocket Check Payment status - With WebSocket Code Frontend Backend Conclusion WebSockets enable real-time, event-driven communication between the client and server, significantly reducing the need for repeated API polling. This improves efficiency, reduces server load, and enhances user experience. By implementing WebSockets in the payment processing system, we eliminate unnecessary requests and enable instant status updates.
WebSockets provide a full-duplex communication channel between the client and server. Unlike traditional HTTP requests, where the client has to repeatedly poll the server for updates, WebSockets enable real-time data transfer with minimal latency.
A great use case for WebSockets is payment processing. In traditional systems, the frontend would need to keep checking the payment status through repeated API calls. With WebSockets, the server can emit events as soon as the payment is processed, reducing unnecessary API calls and improving efficiency.
Breaking Down the WebSockets Implementation
Frontend
1. Initializing WebSocket Connection
import { io } from "socket.io-client";

const socket = io(process.env.API_BASE_URL, { autoConnect: false });
The frontend initializes a WebSocket connection to the backend using
io(process.env.API_BASE_URL, { autoConnect: false }).autoConnect: falseensures that the socket does not connect automatically until explicitly called.
2. Handling Connection and Events
useEffect(() => {
  socket.connect();

  socket.on("socket-id", setSocketId);
  socket.on("payment-status", setPaymentStatus);

  return () => {
    socket.off("socket-id");
    socket.off("payment-status");
    socket.disconnect();
  };
}, []);
socket.connect()establishes the connection.-
Listens for:
-
socket-id: Receives and stores the unique identifier assigned by the server. -
payment-status: Updates the payment status in real-time.
-
-
Cleanup:
-
socket.off(...)ensures that event listeners are removed when the component unmounts. -
socket.disconnect()properly closes the connection.
-
3. Sending Data to Backend
await axios.post(
  `${process.env.API_BASE_URL}/api/payments/make-payment-with-socket`,
  { amount: 1000, socketId }
);
The client sends a payment request to the backend API, including the
socketId.This ensures the server knows which client to send the payment status update to.
Backend
1. Setting Up WebSockets (socket.js)
const { Server } = require("socket.io");

let io;

const setupSocket = (server) => {
  io = new Server(server, {
    cors: { origin: "http://localhost:3000" },
  });

  io.on("connection", (socket) => {
    console.log(`User connected: ${socket.id}`);
    socket.emit("socket-id", socket.id);

    socket.on("disconnect", () =>
      console.log(`User disconnected: ${socket.id}`)
    );
  });
};

const emitPaymentStatus = (socketId, status) => {
  if (io) io.to(socketId).emit("payment-status", status);
};

module.exports = { setupSocket, emitPaymentStatus };
setupSocket(server): Initializes the WebSocket server.-
Handles Connections:
- When a client connects, it assigns a unique
socket.id. - It sends the
socket-idback to the client. - It listens for disconnection events.
- When a client connects, it assigns a unique
-
Emitting Events:
- The
emitPaymentStatusfunction emits thepayment-statusevent to a specific client using theirsocketId.
- The
2. Integrating WebSockets with Express (index.js)
const express = require("express");
const http = require("http");
const { setupSocket } = require("./socket");

const app = express();
const server = http.createServer(app);
setupSocket(server);

server.listen(PORT, () => {
  console.log(`Backend server running on port ${PORT}`);
});
http.createServer(app): Creates an HTTP server to attach WebSockets to.setupSocket(server): Passes the server to the WebSocket setup function.server.listen(PORT): Starts the backend server.
3. Emitting Events After Payment (paymentRoutes.js)
const { emitPaymentStatus } = require("../socket");

router.post("/make-payment-with-socket", (req, res) => {
  const { socketId } = req.body;

  setTimeout(() => {
    emitPaymentStatus(socketId, true);
  }, 10000);

  res.status(200).json({ message: "Payment received, processing request" });
});
The backend receives the
socketIdfrom the frontend.Simulates payment processing with
setTimeout().Calls
emitPaymentStatus(socketId, true)to notify the client of a successful payment.
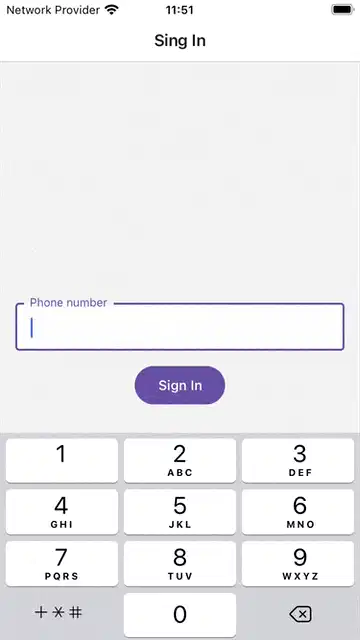
Check Payment status - Without WebSocket
Check Payment status - With WebSocket
Conclusion
WebSockets enable real-time, event-driven communication between the client and server, significantly reducing the need for repeated API polling. This improves efficiency, reduces server load, and enhances user experience. By implementing WebSockets in the payment processing system, we eliminate unnecessary requests and enable instant status updates.





![[The AI Show Episode 142]: ChatGPT’s New Image Generator, Studio Ghibli Craze and Backlash, Gemini 2.5, OpenAI Academy, 4o Updates, Vibe Marketing & xAI Acquires X](https://www.marketingaiinstitute.com/hubfs/ep%20142%20cover.png)




![[FREE EBOOKS] The Kubernetes Bible, The Ultimate Linux Shell Scripting Guide & Four More Best Selling Titles](https://www.javacodegeeks.com/wp-content/uploads/2012/12/jcg-logo.jpg)


![From drop-out to software architect with Jason Lengstorf [Podcast #167]](https://cdn.hashnode.com/res/hashnode/image/upload/v1743796461357/f3d19cd7-e6f5-4d7c-8bfc-eb974bc8da68.png?#)


.png?#)


.jpg?#)


_Christophe_Coat_Alamy.jpg?#)






![Rapidus in Talks With Apple as It Accelerates Toward 2nm Chip Production [Report]](https://www.iclarified.com/images/news/96937/96937/96937-640.jpg)


