![[The AI Show Episode 142]: ChatGPT’s New Image Generator, Studio Ghibli Craze and Backlash, Gemini 2.5, OpenAI Academy, 4o Updates, Vibe Marketing & xAI Acquires X](https://www.marketingaiinstitute.com/hubfs/ep%20142%20cover.png)


![From drop-out to software architect with Jason Lengstorf [Podcast #167]](https://cdn.hashnode.com/res/hashnode/image/upload/v1743796461357/f3d19cd7-e6f5-4d7c-8bfc-eb974bc8da68.png?#)


.png?#)


.webp?#)


_Christophe_Coat_Alamy.jpg?#)
 (1).webp?#)


![Apple Considers Delaying Smart Home Hub Until 2026 [Gurman]](https://www.iclarified.com/images/news/96946/96946/96946-640.jpg)
![iPhone 17 Pro Won't Feature Two-Toned Back [Gurman]](https://www.iclarified.com/images/news/96944/96944/96944-640.jpg)
![Tariffs Threaten Apple's $999 iPhone Price Point in the U.S. [Gurman]](https://www.iclarified.com/images/news/96943/96943/96943-640.jpg)


Mastering Supabase RLS - "Row Level Security" as a Beginner
Introduction Row Level Security (RLS) is one of Supabase's most powerful features, allowing developers to implement robust security controls directly at the database level. Unlike traditional application-level security, RLS enforces access rules within the database itself, ensuring that users can only access the data they're authorized to see, regardless of how they connect to your application. TL;DR: What RLS is and why it's essential How to set up RLS policies for database tables Implementing RLS for Supabase Storage Real-world examples and patterns Common mistakes and how to avoid them What is Row Level Security? Row Level Security is a PostgreSQL feature that Supabase leverages to control which rows in a table a user can access. It works by defining policies that filter the rows a user can see based on their identity or other attributes. Why Use RLS? Security at the Data Layer: Security rules are enforced at the database level, not just in your application code. Simplified Application Logic: Your frontend code doesn't need to implement complex filtering logic. Consistent Security: The same security rules apply regardless of how data is accessed (API, direct database access, etc.). Reduced Risk of Data Leaks: Even if there's a bug in your application code, the database will still enforce access controls. Setting Up RLS for Database Tables Before we start All the RLS policies need to be added/modified using the SQL editor on your Supabase project dashboard, you can find it on the sidebar SQL Editor - And for Storage policies, go to Storage > Policies > Click on New Policy button and then finally choose Create from scratch, it will open up the editor as a popup for you - Step 1: Enable RLS on Your Tables RLS is enabled by default on tables created with the Table Editor in the dashboard. If you create one in raw SQL or with the SQL editor, you will have to enables RLS yourself. The first step is to enable it: -- Enable RLS on a table ALTER TABLE schema_name.table_name ENABLE ROW LEVEL SECURITY; Once RLS is enabled, the table becomes inaccessible to all users (including authenticated ones) until you define policies that grant access. Step 2: Create RLS Policies Policies define the conditions under which a user can perform operations (SELECT, INSERT, UPDATE, DELETE) on rows in a table. While creating RLS policie you need to keep in mind the design and structure of your application logic. Basic Policy Structure CREATE POLICY policy_name ON table_name FOR operation TO role USING (expression); policy_name: A descriptive name for your policy table_name: The table this policy applies to operation: Can be SELECT, INSERT, UPDATE, DELETE, or ALL role: Usually 'authenticated' or 'anon' in Supabase expression: A boolean expression that determines which rows are accessible (this is the main logic for row access) Example 1: Simple User-Based Access Let's create a policy for a todos table where users can only access their own todos: -- Enable RLS ALTER TABLE todos ENABLE ROW LEVEL SECURITY; -- Create policy for users to see only their own todos CREATE POLICY "Users can view their own todos" ON todos FOR SELECT TO authenticated USING (auth.uid() = user_id); -- user_id is the column that stores the owner's user ID and auth.uid() is the currently authenticated user's ID -- Allow users to insert their own todos CREATE POLICY "Users can insert their own todos" ON todos FOR INSERT TO authenticated WITH CHECK (auth.uid() = user_id); -- Allow users to update their own todos CREATE POLICY "Users can update their own todos" ON todos FOR UPDATE TO authenticated USING (auth.uid() = user_id); -- Allow users to delete their own todos CREATE POLICY "Users can delete their own todos" ON todos FOR DELETE TO authenticated USING (auth.uid() = user_id); In this example: auth.uid() is a Supabase function that returns the ID of the currently authenticated user user_id is a column in the todos table that stores the owner's user ID Example 2: Role-Based Access Control For more complex scenarios, you might want to implement role-based access: -- Enable RLS ALTER TABLE projects ENABLE ROW LEVEL SECURITY; -- Create policy for admins to see all projects CREATE POLICY "Admins can view all projects" ON projects FOR SELECT TO authenticated USING ( EXISTS ( SELECT 1 FROM user_roles WHERE user_roles.user_id = auth.uid() AND user_roles.role = 'admin' ) ); -- Create policy for regular users to see only their projects CREATE POLICY "Users can view their own projects" ON projects FOR SELECT TO authenticated USING ( auth.uid() = owner_id OR EXISTS ( SELECT 1 FROM project_members WHERE project_members.project_id = projects.id AND project_members.user_id = auth.uid() ) ); This example shows how to implement more complex access patterns whe
Introduction
Row Level Security (RLS) is one of Supabase's most powerful features, allowing developers to implement robust security controls directly at the database level. Unlike traditional application-level security, RLS enforces access rules within the database itself, ensuring that users can only access the data they're authorized to see, regardless of how they connect to your application.
TL;DR:
- What RLS is and why it's essential
- How to set up RLS policies for database tables
- Implementing RLS for Supabase Storage
- Real-world examples and patterns
- Common mistakes and how to avoid them
What is Row Level Security?
Row Level Security is a PostgreSQL feature that Supabase leverages to control which rows in a table a user can access. It works by defining policies that filter the rows a user can see based on their identity or other attributes.
Why Use RLS?
- Security at the Data Layer: Security rules are enforced at the database level, not just in your application code.
- Simplified Application Logic: Your frontend code doesn't need to implement complex filtering logic.
- Consistent Security: The same security rules apply regardless of how data is accessed (API, direct database access, etc.).
- Reduced Risk of Data Leaks: Even if there's a bug in your application code, the database will still enforce access controls.
Setting Up RLS for Database Tables
Before we start
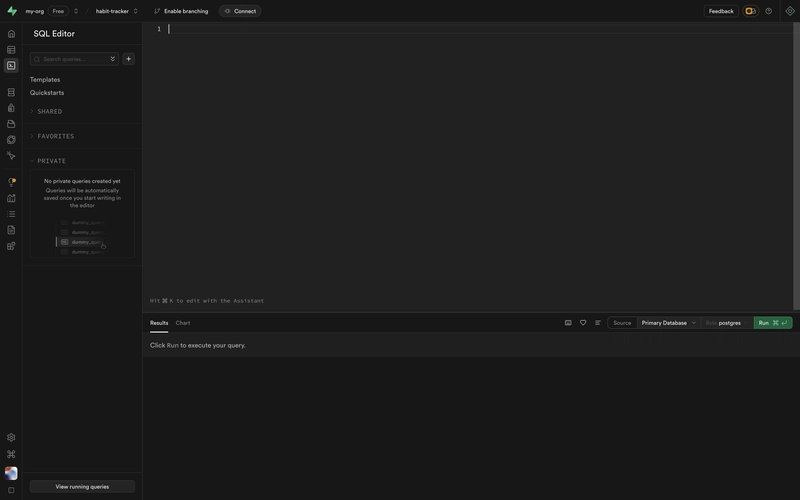
All the RLS policies need to be added/modified using the SQL editor on your Supabase project dashboard, you can find it on the sidebar SQL Editor -
And for Storage policies, go to Storage > Policies > Click on New Policy button and then finally choose Create from scratch, it will open up the editor as a popup for you -

Step 1: Enable RLS on Your Tables
RLS is enabled by default on tables created with the Table Editor in the dashboard. If you create one in raw SQL or with the SQL editor, you will have to enables RLS yourself. The first step is to enable it:
-- Enable RLS on a table
ALTER TABLE schema_name.table_name ENABLE ROW LEVEL SECURITY;
Once RLS is enabled, the table becomes inaccessible to all users (including authenticated ones) until you define policies that grant access.
Step 2: Create RLS Policies
Policies define the conditions under which a user can perform operations (SELECT, INSERT, UPDATE, DELETE) on rows in a table. While creating RLS policie you need to keep in mind the design and structure of your application logic.
Basic Policy Structure
CREATE POLICY policy_name
ON table_name
FOR operation
TO role
USING (expression);
-
policy_name: A descriptive name for your policy -
table_name: The table this policy applies to -
operation: Can be SELECT, INSERT, UPDATE, DELETE, or ALL -
role: Usually 'authenticated' or 'anon' in Supabase -
expression: A boolean expression that determines which rows are accessible (this is the main logic for row access)
Example 1: Simple User-Based Access
Let's create a policy for a todos table where users can only access their own todos:
-- Enable RLS
ALTER TABLE todos ENABLE ROW LEVEL SECURITY;

-- Create policy for users to see only their own todos
CREATE POLICY "Users can view their own todos"
ON todos
FOR SELECT
TO authenticated
USING (auth.uid() = user_id); -- user_id is the column that stores the owner's user ID and auth.uid() is the currently authenticated user's ID

-- Allow users to insert their own todos
CREATE POLICY "Users can insert their own todos"
ON todos
FOR INSERT
TO authenticated
WITH CHECK (auth.uid() = user_id);

-- Allow users to update their own todos
CREATE POLICY "Users can update their own todos"
ON todos
FOR UPDATE
TO authenticated
USING (auth.uid() = user_id);

-- Allow users to delete their own todos
CREATE POLICY "Users can delete their own todos"
ON todos
FOR DELETE
TO authenticated
USING (auth.uid() = user_id);
In this example:
-
auth.uid()is a Supabase function that returns the ID of the currently authenticated user -
user_idis a column in thetodostable that stores the owner's user ID
Example 2: Role-Based Access Control
For more complex scenarios, you might want to implement role-based access:
-- Enable RLS
ALTER TABLE projects ENABLE ROW LEVEL SECURITY;

-- Create policy for admins to see all projects
CREATE POLICY "Admins can view all projects"
ON projects
FOR SELECT
TO authenticated
USING (
  EXISTS (
    SELECT 1 FROM user_roles
    WHERE user_roles.user_id = auth.uid()
    AND user_roles.role = 'admin'
  )
);

-- Create policy for regular users to see only their projects
CREATE POLICY "Users can view their own projects"
ON projects
FOR SELECT
TO authenticated
USING (
  auth.uid() = owner_id
  OR
  EXISTS (
    SELECT 1 FROM project_members
    WHERE project_members.project_id = projects.id
    AND project_members.user_id = auth.uid()
  )
);
This example shows how to implement more complex access patterns where:
- Admins can see all projects
- Regular users can only see projects they own or are members of
Example 3: Public and Private Data
For applications with both public and private data:
-- Enable RLS
ALTER TABLE posts ENABLE ROW LEVEL SECURITY;

-- Anyone can read public posts
CREATE POLICY "Public posts are viewable by everyone"
ON posts
FOR SELECT
USING (is_public = true);

-- Users can read their own private posts
CREATE POLICY "Users can view their own private posts"
ON posts
FOR SELECT
TO authenticated
USING (auth.uid() = author_id);

-- Users can update their own posts
CREATE POLICY "Users can update their own posts"
ON posts
FOR UPDATE
TO authenticated
USING (auth.uid() = author_id);
RLS for Supabase Storage
Supabase Storage also supports RLS-like access controls. While not technically PostgreSQL RLS, it follows similar principles.
Setting Up Storage Policies
Storage policies are defined through the Supabase dashboard or via SQL. By default Storage does not allow any uploads to buckets without RLS policies. You selectively allow certain operations by creating RLS policies on the storage.objects table.
This creates confusions among new users a lot when they try to upload files to storage and they get RLS error. But it is important to understand that this is a security feature and needs to be configured properly.
For example, if you want to allow users to upload files to a specific bucket, you can create a policy like this:
create policy "Allow upload on your-bucket-id"
on storage.objects for insert
with check ( bucket_id = 'your-bucket-id' );
Now we can modify this policy to allow only authenticated users to upload files to the bucket:
create policy "Allow upload on your-bucket-id"
on storage.objects for insert
to authenticated
with check ( bucket_id = 'your-bucket-id' );
Now, let's further modify this policy to allow both insert and select operations on the bucket for authenticated users:
create policy "Allow upload and select on your-bucket-id"
on storage.objects for insert, select
to authenticated
with check ( bucket_id = 'your-bucket-id' );
Let's look at some more complex patterns for storage access control:
-- Create a policy to allow users to upload their own profile pictures
CREATE POLICY "Users can upload their own profile pictures"
ON storage.objects
FOR INSERT
TO authenticated
WITH CHECK (
  bucket_id = 'profile_pictures' AND
  (storage.foldername(name))[1] = auth.uid()::text
);

-- Create a policy to allow users to view their own profile pictures
CREATE POLICY "Users can view their own profile pictures"
ON storage.objects
FOR SELECT
TO authenticated
USING (
  bucket_id = 'profile_pictures' AND
  (storage.foldername(name))[1] = auth.uid()::text
);

-- Create a policy to allow public access to public images
CREATE POLICY "Public access to public images"
ON storage.objects
FOR SELECT
USING (
  bucket_id = 'public' AND
  storage.extension(name) IN ('png', 'jpg', 'jpeg', 'gif')
);
In these examples:
- We're using the
storage.foldername()function to extract parts of the file path - We're organizing files by user ID to enforce ownership
- We're restricting access based on file extensions for public files
Implementing Storage RLS in Your Application
When using storage with RLS, you'll typically organize your storage structure to facilitate security rules:
// Upload a file to a user-specific folder
const { data, error } = await supabase.storage
  .from('profile_pictures')
  .upload(`${user.id}/avatar.png`, file);

// Access a file from a user-specific folder
const { data, error } = await supabase.storage
  .from('profile_pictures')
  .download(`${user.id}/avatar.png`);
Advanced RLS Patterns
Pattern 1: Tenant Isolation for SaaS Applications
For multi-tenant SaaS applications:
-- Enable RLS
ALTER TABLE tenant_data ENABLE ROW LEVEL SECURITY;

-- Create policy for tenant access
CREATE POLICY "Tenants can access their own data"
ON tenant_data
FOR ALL
TO authenticated
USING (
  tenant_id = (
    SELECT tenant_id FROM users
    WHERE users.id = auth.uid()
  )
);
This pattern ensures complete isolation between tenants in a multi-tenant application.
Pattern 2: Time-Based Access
For content with time-limited access:
-- Enable RLS
ALTER TABLE premium_content ENABLE ROW LEVEL SECURITY;

-- Create policy for premium access
CREATE POLICY "Premium users can access content during subscription"
ON premium_content
FOR SELECT
TO authenticated
USING (
  EXISTS (
    SELECT 1 FROM subscriptions
    WHERE subscriptions.user_id = auth.uid()
    AND subscriptions.expires_at > now()
  )
);
Pattern 3: Row-Level Permissions
For granular permission control:
-- Enable RLS
ALTER TABLE documents ENABLE ROW LEVEL SECURITY;

-- Create policy for document access
CREATE POLICY "Users can access documents they have permission for"
ON documents
FOR SELECT
TO authenticated
USING (
  EXISTS (
    SELECT 1 FROM document_permissions
    WHERE document_permissions.document_id = documents.id
    AND document_permissions.user_id = auth.uid()
    AND document_permissions.can_read = true
  )
);

-- Create policy for document updates
CREATE POLICY "Users can update documents they have permission for"
ON documents
FOR UPDATE
TO authenticated
USING (
  EXISTS (
    SELECT 1 FROM document_permissions
    WHERE document_permissions.document_id = documents.id
    AND document_permissions.user_id = auth.uid()
    AND document_permissions.can_write = true
  )
);
Testing RLS Policies
It's crucial to thoroughly test your RLS policies. Here's how:
Using the Supabase Dashboard
The Supabase dashboard allows you to impersonate users and test queries:
- Go to the SQL Editor
- Click on "User Management" in the dropdown
- Select a user to impersonate
- Run your queries to verify the policies work as expected
Testing in Your Application
// Test as a specific user
const { data: userATodos } = await supabaseClientForUserA
  .from('todos')
  .select('*');

// Test as another user
const { data: userBTodos } = await supabaseClientForUserB
  .from('todos')
  .select('*');

// Verify that each user only sees their own todos
console.assert(
  userATodos.every(todo => todo.user_id === userA.id),
  'User A should only see their own todos'
);
Common Pitfalls and How to Avoid Them
Pitfall 1: Forgetting to Enable RLS
If you create tables but forget to enable RLS, they'll be publicly accessible. Always enable RLS on all tables:
-- Script to enable RLS on all tables in the public schema
DO $$
DECLARE
  r RECORD;
BEGIN
  FOR r IN (SELECT tablename FROM pg_tables WHERE schemaname = 'public')
  LOOP
    EXECUTE format('ALTER TABLE %I ENABLE ROW LEVEL SECURITY;', r.tablename);
  END LOOP;
END
$$;
Pitfall 2: Overly Permissive Policies
Be careful with policies that might be too broad or not restrictive enough:
-- BAD: This policy allows any authenticated user to see all rows
CREATE POLICY "Too permissive"
ON sensitive_data
FOR SELECT
TO authenticated
USING (true);

-- GOOD: This policy restricts access properly
CREATE POLICY "Properly restricted"
ON sensitive_data
FOR SELECT
TO authenticated
USING (auth.uid() = owner_id);
Pitfall 3: Forgetting About JOIN Queries
RLS applies to each table individually. When performing JOINs, make sure all tables have appropriate policies:
-- If a user can access 'projects' but not 'project_details',
-- this JOIN might not return the expected results
SELECT p.name, pd.description
FROM projects p
JOIN project_details pd ON p.id = pd.project_id;
Pitfall 4: Performance Considerations
Complex RLS policies can impact performance. Consider indexing columns used in policy expressions:
-- Add an index to improve RLS policy performance
CREATE INDEX ON todos(user_id);
Conclusion
Row Level Security is necessary for building secure applications with Supabase. By implementing RLS policies correctly, you can ensure that your data remains secure while simplifying your application code.
Remember these key points:
- Always enable RLS on all tables
- Design your database schema with RLS in mind
- Test your policies thoroughly
- Consider performance implications for complex policies
- Use RLS for both database tables and storage
With these practices in place, you can build applications that are both secure and scalable, leveraging the full power of Supabase's security features.