


![[The AI Show Episode 143]: ChatGPT Revenue Surge, New AGI Timelines, Amazon’s AI Agent, Claude for Education, Model Context Protocol & LLMs Pass the Turing Test](https://www.marketingaiinstitute.com/hubfs/ep%20143%20cover.png)


![Is this too much for a modular monolith system? [closed]](https://i.sstatic.net/pYL1nsfg.png)


_roibu_Alamy.jpg?width=1280&auto=webp&quality=80&disable=upscale#)


 CISO’s Core Focus.webp?#)


![M4 MacBook Air Drops to Just $849 - Act Fast! [Lowest Price Ever]](https://www.iclarified.com/images/news/97140/97140/97140-640.jpg)
![Apple Smart Glasses Not Close to Being Ready as Meta Targets 2025 [Gurman]](https://www.iclarified.com/images/news/97139/97139/97139-640.jpg)
![iPadOS 19 May Introduce Menu Bar, iOS 19 to Support External Displays [Rumor]](https://www.iclarified.com/images/news/97137/97137/97137-640.jpg)


How to Secure a Website with a Free SSL Certificate (Let's Encrypt)
Why SSL? Why Now? You might be thinking, “But my site doesn’t handle passwords or credit cards, do I really need SSL?” Yes. Yes, you do. Here's why: 1. Encryption: SSL encrypts the data between your website and your visitors. That means no one can spy on what users type, view, or interact with. 2. Trust: Users trust that little padlock in the browser. Without it? Red flags everywhere. 3. SEO Boost: Google prefers secure websites and ranks them higher. 4. Browser Warnings: Modern browsers flag HTTP sites as “Not Secure.” That’s not the message you want to send. So, whether you’re building a web-based app, a WordPress blog, or the next big SaaS platform, SSL is non-negotiable. What is Let’s Encrypt? Let’s Encrypt is a non-profit certificate authority that gives you free SSL certificates. That’s right: free. As in no credit card required. Their mission is to make HTTPS the default, and with over 300 million websites secured (and counting), they’re doing a stellar job. Best part? They make the whole process automated. Once it’s set up, renewals happen without you lifting a finger. Key Benefits of Let’s Encrypt 1. It’s Free Forever Why pay for something when you can get it free and securely? Let's Encrypt certificates are completely free—no catch, no trial, no limited version. 1. Automated Renewal Certificates renew every 90 days, and automation tools make sure you don’t have to remember or manually intervene. 3. Widely Trusted Let’s Encrypt certificates are recognized and trusted by all modern browsers—Chrome, Safari, Firefox, you name it. 4. Secure by Default They use industry-standard encryption, keeping your traffic safe and sound. How to Install Let’s Encrypt SSL on Your Server (Step-by-Step) Let’s roll up our sleeves and get this done. Prerequisites: A server (like DigitalOcean, Linode, etc.) SSH access A registered domain name pointed to your server IP We’ll use Certbot, the recommended tool from Let’s Encrypt. Step 1: SSH into Your Server ssh your-user@your-server-ip Make sure your domain is already pointing to this server. If you don’t have a domain you can read this article that shows how to buy one. Step 2: Install Certbot For Ubuntu with Nginx: sudo apt update sudo apt install certbot python3-certbot-nginx For Apache: sudo apt install certbot python3-certbot-apache Step 3: Get Your SSL Certificate For Nginx: sudo certbot --nginx -d yourdomain.com -d www.yourdomain.com For Apache: sudo certbot --apache -d yourdomain.com -d www.yourdomain.com You’ll be asked to provide an email for recovery and agree to terms. If everything goes well, your site will now be HTTPS-enabled! Automate the Renewal Let’s Encrypt certs are valid for 90 days. But don’t worry—Certbot installs a cron job to renew it automatically. If you want to test it manually, you can run the following code. sudo certbot renew --dry-run Force HTTPS (Optional but Recommended) Make sure all HTTP traffic is redirected to HTTPS. Certbot usually does this for you, but you can double-check. For Nginx, check this block: server { listen 80; server_name yourdomain.com www.yourdomain.com; return 301 https://$host$request_uri; } For Apache, Certbot will handle it with a redirect rule. Troubleshooting Common Issues 1. Port 80 or 443 Blocked Make sure your firewall allows HTTP and HTTPS traffic. sudo ufw allow 'Nginx Full' # or 'Apache Full' 2. Domain Not Pointed Correctly Use the ping command on your terminal ping yourdomain.com to confirm it resolves to your server IP. 3. Renewal Fails Check the logs: sudo cat /var/log/letsencrypt/letsencrypt.log For Laravel Users: A Bonus Tip If you're hosting a Laravel app, modify the APP_URL to start with https. Once SSL is enabled, also consider using security headers and rate-limiting middleware to boost protection. You can even go the extra mile with: Route::middleware(['throttle:60,1', 'verified'])->group(function () { // Secure routes here }); Combine that with HTTPS, and you’re golden. Is Free SSL Enough? Short answer: For most websites, YES. Long answer: If you're handling highly sensitive data (like healthcare or banking), you might want Extended Validation (EV) certificates. But for 95% of use cases, Let’s Encrypt is perfect. Inspire Confidence in Your Visitors A secure site isn’t just about stopping hackers—it’s about making your users feel safe, respected, and protected. And the best part? You don’t need to pay extra for that. Let’s Encrypt gives you the peace of mind and professionalism you deserve. Final Thoughts There’s something genuinely empowering about securing your own site—especially when you do it for free. You’re not only protecting your work but building trust with every vi
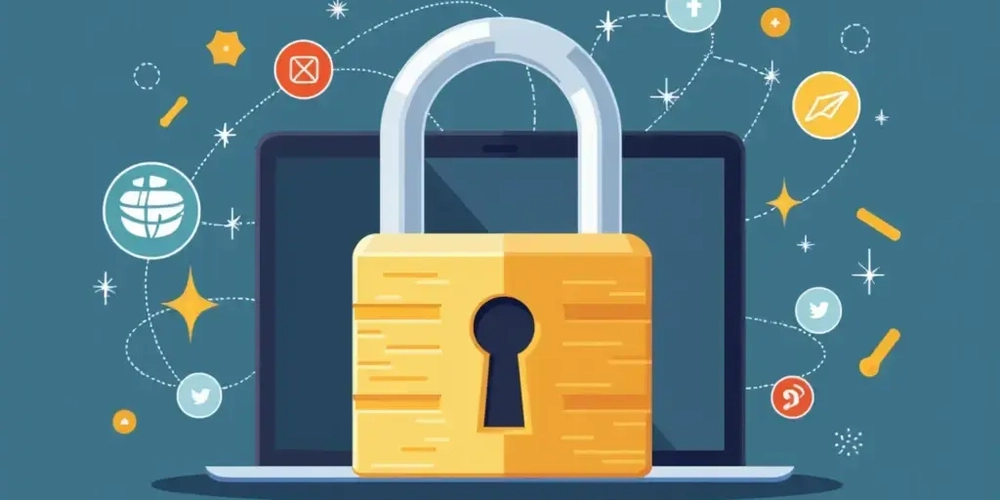
Why SSL? Why Now?
You might be thinking, “But my site doesn’t handle passwords or credit cards, do I really need SSL?”
Yes. Yes, you do. Here's why:
1. Encryption: SSL encrypts the data between your website and your visitors. That means no one can spy on what users type, view, or interact with.
2. Trust: Users trust that little padlock in the browser. Without it? Red flags everywhere.
3. SEO Boost: Google prefers secure websites and ranks them higher.
4. Browser Warnings: Modern browsers flag HTTP sites as “Not Secure.” That’s not the message you want to send.
So, whether you’re building a web-based app, a WordPress blog, or the next big SaaS platform, SSL is non-negotiable.
What is Let’s Encrypt?
Let’s Encrypt is a non-profit certificate authority that gives you free SSL certificates. That’s right: free. As in no credit card required.
Their mission is to make HTTPS the default, and with over 300 million websites secured (and counting), they’re doing a stellar job.
Best part? They make the whole process automated. Once it’s set up, renewals happen without you lifting a finger.
Key Benefits of Let’s Encrypt
1. It’s Free Forever
Why pay for something when you can get it free and securely? Let's Encrypt certificates are completely free—no catch, no trial, no limited version.
1. Automated Renewal
Certificates renew every 90 days, and automation tools make sure you don’t have to remember or manually intervene.
3. Widely Trusted
Let’s Encrypt certificates are recognized and trusted by all modern browsers—Chrome, Safari, Firefox, you name it.
4. Secure by Default
They use industry-standard encryption, keeping your traffic safe and sound.
How to Install Let’s Encrypt SSL on Your Server (Step-by-Step)
Let’s roll up our sleeves and get this done.
Prerequisites:
- A server (like DigitalOcean, Linode, etc.)
- SSH access
- A registered domain name pointed to your server IP
We’ll use Certbot, the recommended tool from Let’s Encrypt.
Step 1: SSH into Your Server
ssh your-user@your-server-ip
Make sure your domain is already pointing to this server. If you don’t have a domain you can read this article that shows how to buy one.
Step 2: Install Certbot
For Ubuntu with Nginx:
sudo apt update
sudo apt install certbot python3-certbot-nginx
For Apache:
sudo apt install certbot python3-certbot-apache
Step 3: Get Your SSL Certificate
For Nginx:
sudo certbot --nginx -d yourdomain.com -d www.yourdomain.com
For Apache:
sudo certbot --apache -d yourdomain.com -d www.yourdomain.com
You’ll be asked to provide an email for recovery and agree to terms.
If everything goes well, your site will now be HTTPS-enabled!
Automate the Renewal
Let’s Encrypt certs are valid for 90 days. But don’t worry—Certbot installs a cron job to renew it automatically. If you want to test it manually, you can run the following code.
sudo certbot renew --dry-run
Force HTTPS (Optional but Recommended)
Make sure all HTTP traffic is redirected to HTTPS. Certbot usually does this for you, but you can double-check.
For Nginx, check this block:
server {
    listen 80;
    server_name yourdomain.com www.yourdomain.com;
    return 301 https://$host$request_uri;
}
For Apache, Certbot will handle it with a redirect rule.
Troubleshooting Common Issues
1. Port 80 or 443 Blocked
Make sure your firewall allows HTTP and HTTPS traffic.
sudo ufw allow 'Nginx Full' # or 'Apache Full'
2. Domain Not Pointed Correctly
Use the ping command on your terminal ping yourdomain.com to confirm it resolves to your server IP.
3. Renewal Fails
Check the logs:
sudo cat /var/log/letsencrypt/letsencrypt.log
For Laravel Users: A Bonus Tip
If you're hosting a Laravel app, modify the APP_URL to start with https. Once SSL is enabled, also consider using security headers and rate-limiting middleware to boost protection.
You can even go the extra mile with:
Route::middleware(['throttle:60,1', 'verified'])->group(function () {
    // Secure routes here
});
Combine that with HTTPS, and you’re golden.
Is Free SSL Enough?
Short answer: For most websites, YES.
Long answer: If you're handling highly sensitive data (like healthcare or banking), you might want Extended Validation (EV) certificates. But for 95% of use cases, Let’s Encrypt is perfect.
Inspire Confidence in Your Visitors
A secure site isn’t just about stopping hackers—it’s about making your users feel safe, respected, and protected.
And the best part? You don’t need to pay extra for that. Let’s Encrypt gives you the peace of mind and professionalism you deserve.
Final Thoughts
There’s something genuinely empowering about securing your own site—especially when you do it for free. You’re not only protecting your work but building trust with every visitor.
So, whether you’re a junior dev testing things locally or a CTO overseeing production environments, remember:
Security is not optional, and SSL is the easiest place to start.
You've got this—and if you ever feel stuck, I’m right here, cheering you on like a mentor in your corner.
If you found this helpful, share it with a fellow dev. Or even better—go secure that site now and flex your new HTTPS padlock like a badge of honor