HOW TO CREATE A WINDOWS 11 VM ON AZURE
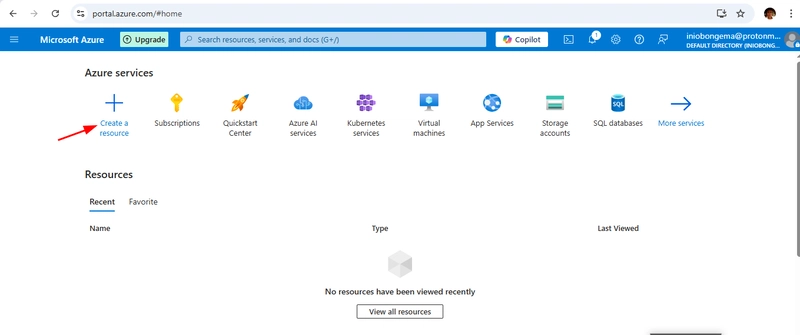
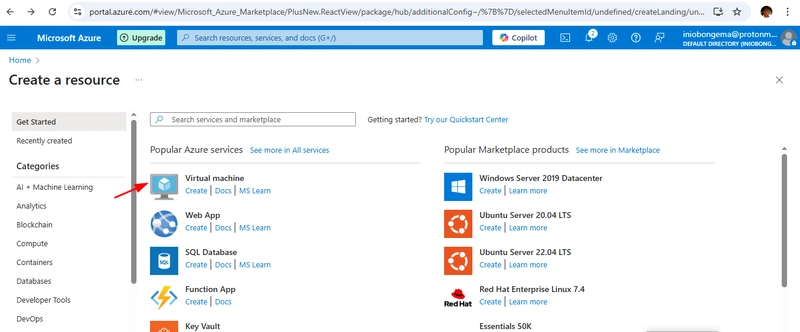
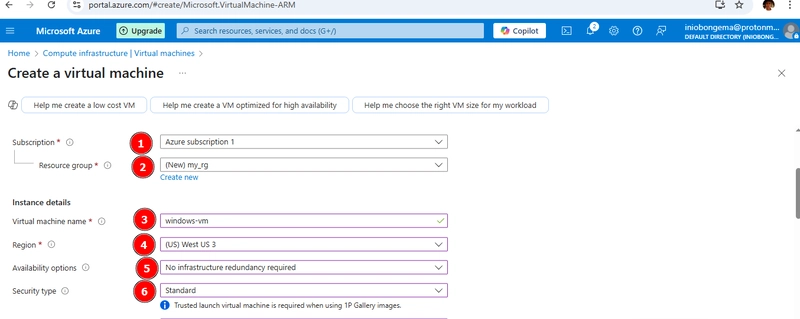
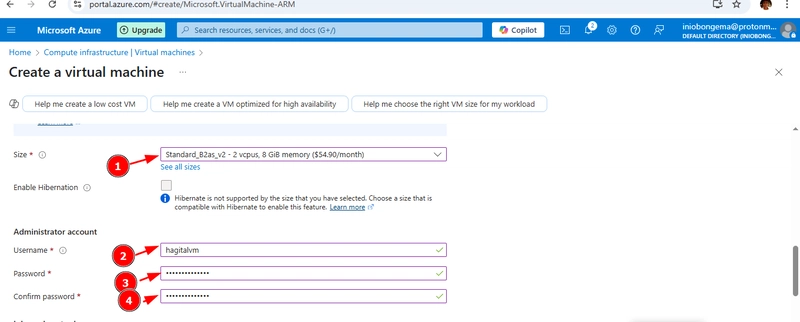
STEP 1: AZURE SIGN-IN Portal.azure.com input your credentials STEP 2: Overview of Azure App / STEP 3: Create a Resource STEP 4: Select 'Virtual Machine' After clicking on the VM, this page will be displayed / STEP 5: Configure Basics - Select subscription, resource group and VM name - Choose the region and availability options - Select the OS (Windows or Linux) as shown on the pics below STEP 6: Choose VM Size based on your required CPU, Memory and Storage STEP 7: Configure Settings - Set up administrator account - Configure networking, management and monitoring options as shown in the pics below To review the set-up, click on Net: Networking, all this will be created on default STEP 8: Review the configuration and create the VM STEP 9: Click on Create Deployment in progress STEP 10: When your deployment is complete, click on "go to resource" STEP 11: Click on "Connect". STEP 12: Click on 'download RDP file' My VM is virtually connected
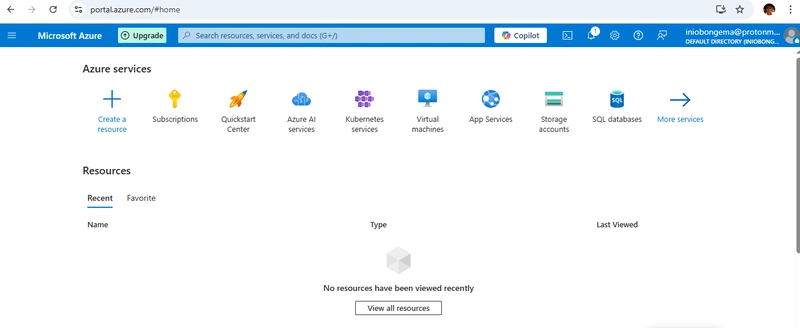
STEP 1: AZURE SIGN-IN
Portal.azure.com
input your credentials
STEP 2: Overview of Azure App
/

STEP 3: Create a Resource
STEP 4: Select 'Virtual Machine'
After clicking on the VM, this page will be displayed
/
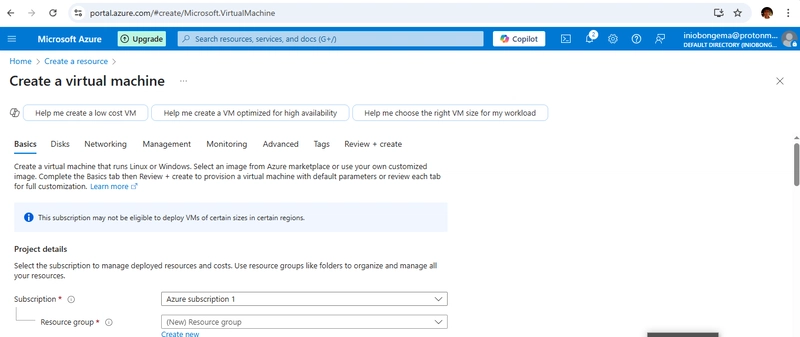
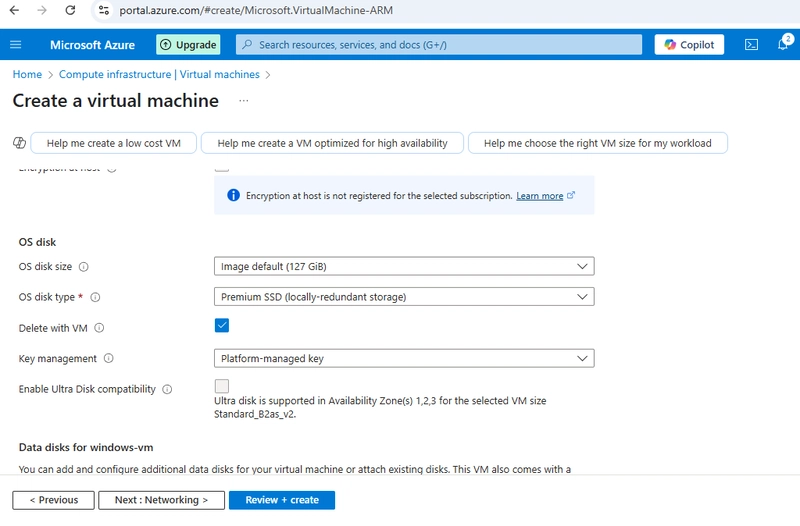
STEP 5: Configure Basics
- Select subscription, resource group and VM name
- Choose the region and availability options
- Select the OS (Windows or Linux) as shown on the pics below
STEP 6: Choose VM Size based on your required CPU, Memory and Storage
STEP 7: Configure Settings
- Set up administrator account
- Configure networking, management and monitoring options as
shown in the pics below
To review the set-up, click on Net: Networking, all this will be created on default
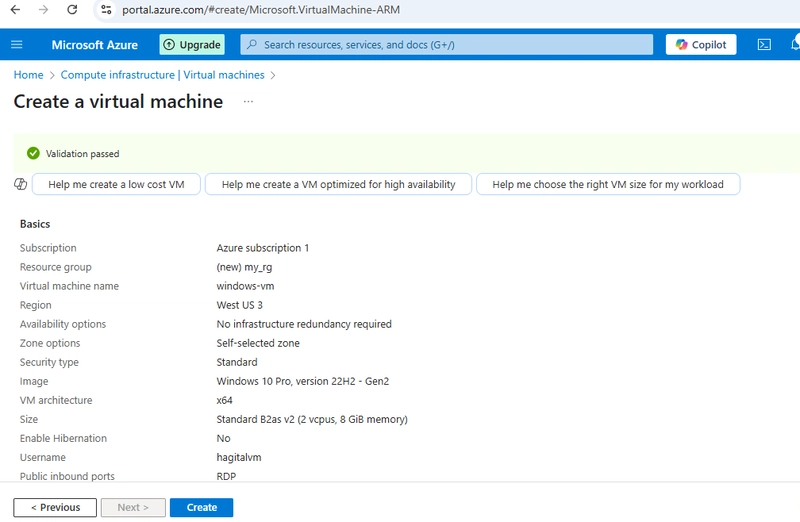
STEP 8: Review the configuration and create the VM
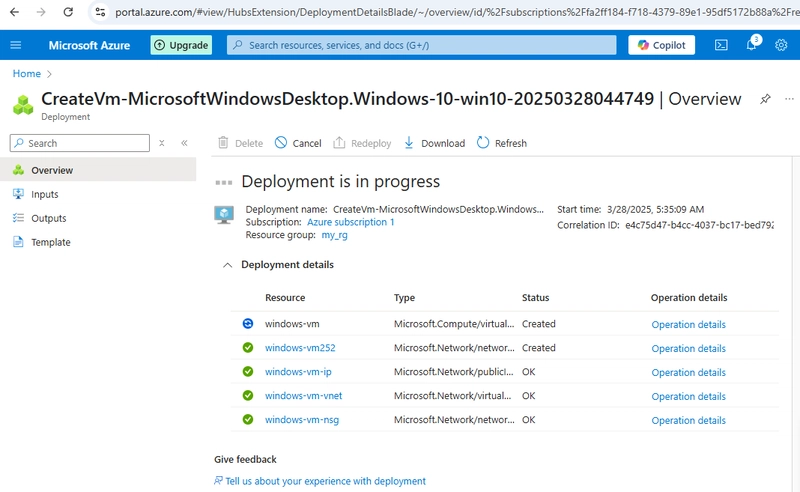
STEP 9: Click on Create
- Deployment in progress
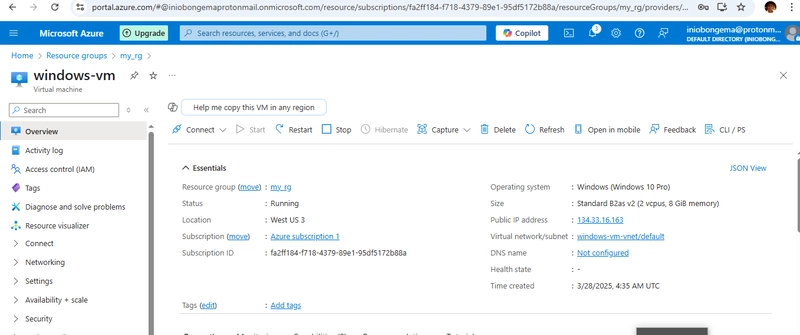
STEP 10: When your deployment is complete, click on "go to resource"
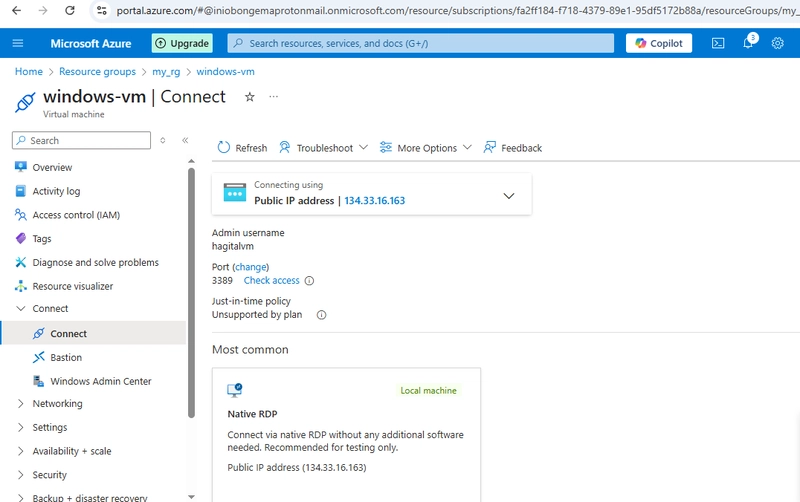
STEP 11: Click on "Connect".
STEP 12: Click on 'download RDP file'
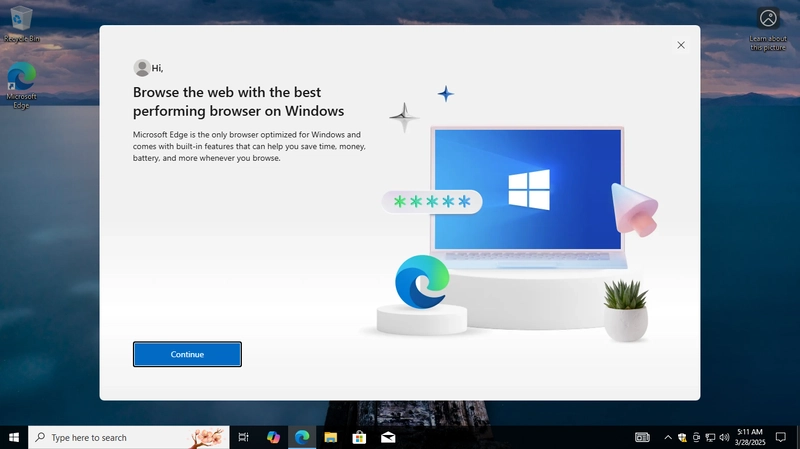
My VM is virtually connected


![[The AI Show Episode 142]: ChatGPT’s New Image Generator, Studio Ghibli Craze and Backlash, Gemini 2.5, OpenAI Academy, 4o Updates, Vibe Marketing & xAI Acquires X](https://www.marketingaiinstitute.com/hubfs/ep%20142%20cover.png)




![[FREE EBOOKS] The Kubernetes Bible, The Ultimate Linux Shell Scripting Guide & Four More Best Selling Titles](https://www.javacodegeeks.com/wp-content/uploads/2012/12/jcg-logo.jpg)


![From drop-out to software architect with Jason Lengstorf [Podcast #167]](https://cdn.hashnode.com/res/hashnode/image/upload/v1743796461357/f3d19cd7-e6f5-4d7c-8bfc-eb974bc8da68.png?#)


.png?#)


.jpg?#)


_Christophe_Coat_Alamy.jpg?#)




![Rapidus in Talks With Apple as It Accelerates Toward 2nm Chip Production [Report]](https://www.iclarified.com/images/news/96937/96937/96937-640.jpg)


