![[The AI Show Episode 142]: ChatGPT’s New Image Generator, Studio Ghibli Craze and Backlash, Gemini 2.5, OpenAI Academy, 4o Updates, Vibe Marketing & xAI Acquires X](https://www.marketingaiinstitute.com/hubfs/ep%20142%20cover.png)


![From drop-out to software architect with Jason Lengstorf [Podcast #167]](https://cdn.hashnode.com/res/hashnode/image/upload/v1743796461357/f3d19cd7-e6f5-4d7c-8bfc-eb974bc8da68.png?#)


.png?#)


_Christophe_Coat_Alamy.jpg?#)
 (1).webp?#)


![Apple Considers Delaying Smart Home Hub Until 2026 [Gurman]](https://www.iclarified.com/images/news/96946/96946/96946-640.jpg)
![iPhone 17 Pro Won't Feature Two-Toned Back [Gurman]](https://www.iclarified.com/images/news/96944/96944/96944-640.jpg)
![Tariffs Threaten Apple's $999 iPhone Price Point in the U.S. [Gurman]](https://www.iclarified.com/images/news/96943/96943/96943-640.jpg)


How to Build a Live Streaming App using ZEGOCLOUD in React.js
Live streaming has exploded in popularity — from gaming and concerts to webinars and social media. If you’ve ever wanted to build your own live streaming platform, now’s your chance. In this guide, I’ll walk you through creating a fully functional live streaming app using ZEGOCLOUD’s SDK in React.js. By the end, you’ll have a working app where hosts can stream, co-hosts can join, and audiences can watch — all in real time. No prior streaming experience? No problem. I’ll break it down step by step. What You’ll Need Before coding, make sure you have: Node.js installed (Download from https://nodejs.org/) A ZEGOCLOUD account (Free sign-up https://zegocloud.com/ ) Basic React knowledge (You don’t need to be an expert) Got everything? Great. Let’s move on. Step 1: Set Up Your ZEGOCLOUD Account ZEGOCLOUD provides the backend infrastructure for real-time streaming. Here’s how to get started: Go to https://zegocloud.com/ and sign up. You’ll get 10,000 free minutes (more than enough for testing). Create a new project in the dashboard. Choose “Live Streaming” as your use case. Scroll down, click Next. Note your App ID and Server Secret. You’ll need these later to connect your React app. Step 2: Set Up Your React Project We’ll use Vite for a faster setup than Create React App. Open your terminal and run: npx create vite@latest Move into your project folder: cd my-app Install dependencies: npm install Add ZEGOCLOUD’s SDK: npm install @zegocloud/zego-uikit-prebuilt Start the development server: npm run dev Press Ctrl + Click the link to open your app in the browser. Your React project is now running! Step 3: Get Your ZEGOCLOUD Credentials Remember the App ID and Server Secret from earlier? Go back to your ZEGOCLOUD Console. Find your project and copy the credentials. Keep them secure — they authenticate your app with ZEGOCLOUD’s servers. Step 4: Implement the Live Streaming Feature Now, the exciting part — building the live stream! Replace the code in App.jsx with this: import * as React from 'react'; import { ZegoUIKitPrebuilt } from '@zegocloud/zego-uikit-prebuilt'; function randomID(len) { let result = ''; if (result) return result; var chars = '12345qwertyuiopasdfgh67890jklmnbvcxzMNBVCZXASDQWERTYHGFUIOLKJP', maxPos = chars.length, i; len = len || 5; for (i = 0; i < len; i++) { result += chars.charAt(Math.floor(Math.random() * maxPos)); } return result; } export function getUrlParams( url = window.location.href ) { let urlStr = url.split('?')[1]; return new URLSearchParams(urlStr); } export default function App() { const roomID = getUrlParams().get('roomID') || randomID(5); let role_str = getUrlParams(window.location.href).get('role') || 'Host'; const role = role_str === 'Host' ? ZegoUIKitPrebuilt.Host : role_str === 'Cohost' ? ZegoUIKitPrebuilt.Cohost : ZegoUIKitPrebuilt.Audience; let sharedLinks = []; if (role === ZegoUIKitPrebuilt.Host || role === ZegoUIKitPrebuilt.Cohost) { sharedLinks.push({ name: 'Join as co-host', url: window.location.protocol + '//' + window.location.host + window.location.pathname + '?roomID=' + roomID + '&role=Cohost', }); } sharedLinks.push({ name: 'Join as audience', url: window.location.protocol + '//' + window.location.host + window.location.pathname + '?roomID=' + roomID + '&role=Audience', }); // generate Kit Token const appID = YOUR_APP_ID; const serverSecret = "YOUR_APP_SECRET"; const kitToken = ZegoUIKitPrebuilt.generateKitTokenForTest(appID, serverSecret, roomID, randomID(5), randomID(5)); // start the call let myMeeting = async (element) => { // Create instance object from Kit Token. const zp = ZegoUIKitPrebuilt.create(kitToken); // start the call zp.joinRoom({ container: element, scenario: { mode: ZegoUIKitPrebuilt.LiveStreaming, config: { role, }, }, sharedLinks, }); }; return ( ); } Key Features of This Code: Random Room ID Generation — Each stream gets a unique ID. Role-Based Access — Host, Cohost, and Audience have different permissions. Shareable Links — Viewers can join via generated URLs. Built-In UI Controls — ZEGOCLOUD handles camera, mic, and screen sharing. Step 5: Test Your Live Streaming App Replace YOUR_APP_ID and YOUR_SERVER_SECRET with your actual credentials. Run the app: npm run dev Open two browser tabs: One as Host (default) One as Audience (use the shared link) Start streaming! You should now see: Host view (with camera/mic controls) Audience view (watch-only mode) Next Steps: Customize & Improve Want to make this even better? Try the
Live streaming has exploded in popularity — from gaming and concerts to webinars and social media. If you’ve ever wanted to build your own live streaming platform, now’s your chance.
In this guide, I’ll walk you through creating a fully functional live streaming app using ZEGOCLOUD’s SDK in React.js. By the end, you’ll have a working app where hosts can stream, co-hosts can join, and audiences can watch — all in real time.
No prior streaming experience? No problem. I’ll break it down step by step.
What You’ll Need
Before coding, make sure you have:
- Node.js installed (Download from https://nodejs.org/)
- A ZEGOCLOUD account (Free sign-up https://zegocloud.com/ )
- Basic React knowledge (You don’t need to be an expert) Got everything? Great. Let’s move on.
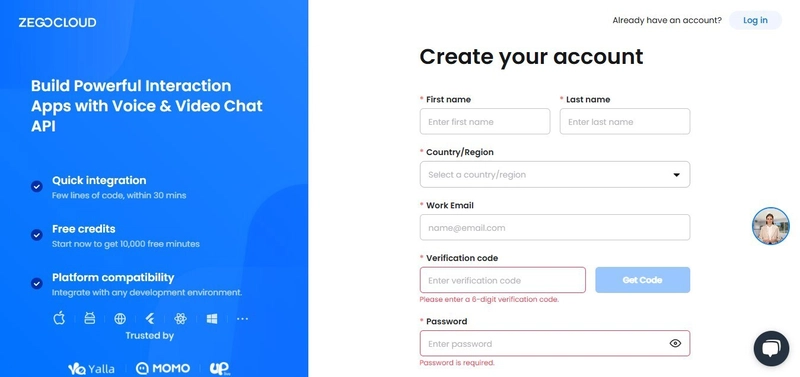
Step 1: Set Up Your ZEGOCLOUD Account
ZEGOCLOUD provides the backend infrastructure for real-time streaming. Here’s how to get started:
- Go to https://zegocloud.com/ and sign up.
You’ll get 10,000 free minutes (more than enough for testing).
- Create a new project in the dashboard.
- Choose “Live Streaming” as your use case.

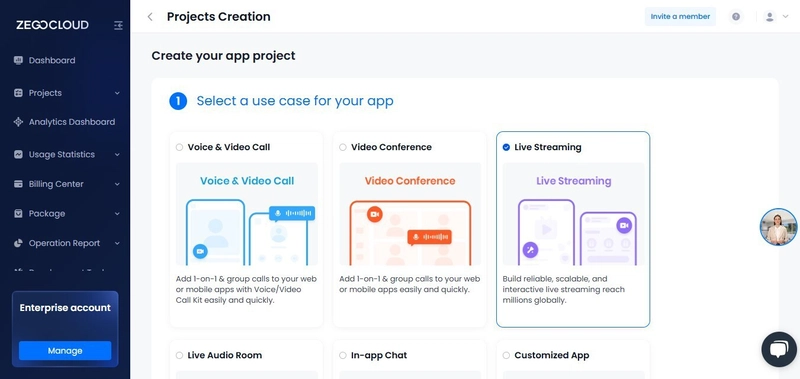
Scroll down, click Next.
- Note your App ID and Server Secret.
- You’ll need these later to connect your React app.

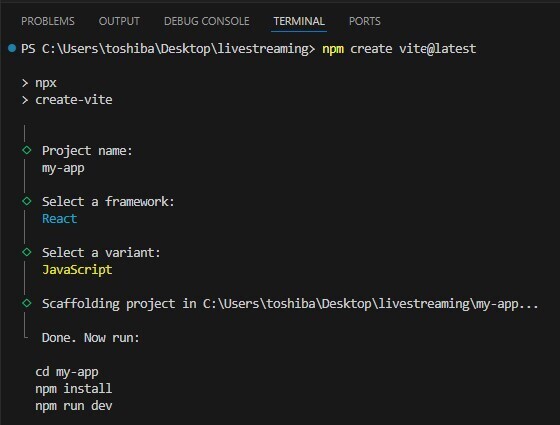
Step 2: Set Up Your React Project
We’ll use Vite for a faster setup than Create React App.
- Open your terminal and run:
npx create vite@latest
- Move into your project folder:
cd my-app
- Install dependencies:
npm install
- Add ZEGOCLOUD’s SDK:
npm install @zegocloud/zego-uikit-prebuilt
- Start the development server:
npm run dev
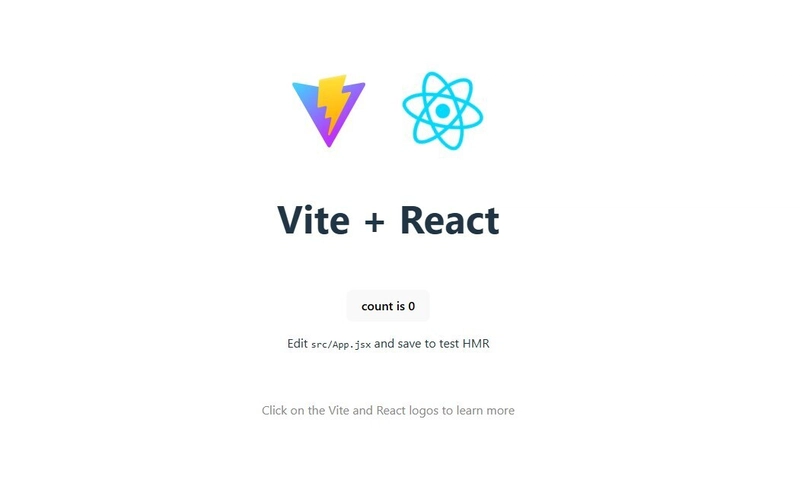
Press Ctrl + Click the link to open your app in the browser.
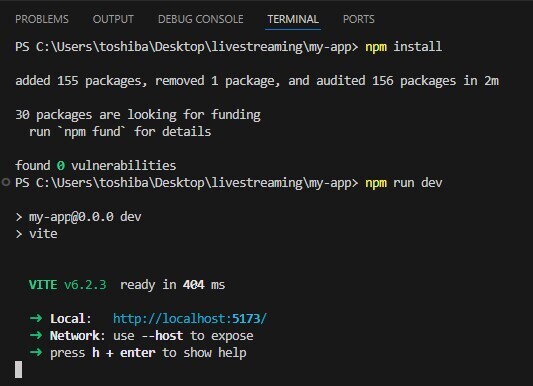
Your React project is now running!
Step 3: Get Your ZEGOCLOUD Credentials
Remember the App ID and Server Secret from earlier?
Go back to your ZEGOCLOUD Console.
Find your project and copy the credentials.
Keep them secure — they authenticate your app with ZEGOCLOUD’s servers.
Step 4: Implement the Live Streaming Feature
Now, the exciting part — building the live stream!
Replace the code in App.jsx with this:
import * as React from 'react';
import { ZegoUIKitPrebuilt } from '@zegocloud/zego-uikit-prebuilt';

function randomID(len) {
  let result = '';
  if (result) return result;
  var chars = '12345qwertyuiopasdfgh67890jklmnbvcxzMNBVCZXASDQWERTYHGFUIOLKJP',
    maxPos = chars.length,
    i;
  len = len || 5;
  for (i = 0; i < len; i++) {
    result += chars.charAt(Math.floor(Math.random() * maxPos));
  }
  return result;
}

export function getUrlParams(
  url = window.location.href
) {
  let urlStr = url.split('?')[1];
  return new URLSearchParams(urlStr);
}

export default function App() {
  const roomID = getUrlParams().get('roomID') || randomID(5);
  let role_str = getUrlParams(window.location.href).get('role') || 'Host';
  const role =
    role_str === 'Host'
      ? ZegoUIKitPrebuilt.Host
      : role_str === 'Cohost'
      ? ZegoUIKitPrebuilt.Cohost
      : ZegoUIKitPrebuilt.Audience;

  let sharedLinks = [];
  if (role === ZegoUIKitPrebuilt.Host || role === ZegoUIKitPrebuilt.Cohost) {
    sharedLinks.push({
      name: 'Join as co-host',
      url:
        window.location.protocol + '//' +
        window.location.host + window.location.pathname +
        '?roomID=' +
        roomID +
        '&role=Cohost',
    });
  }
  sharedLinks.push({
    name: 'Join as audience',
    url:
     window.location.protocol + '//' +
     window.location.host + window.location.pathname +
      '?roomID=' +
      roomID +
      '&role=Audience',
  });
 // generate Kit Token
  const appID = YOUR_APP_ID;
  const serverSecret = "YOUR_APP_SECRET";
  const kitToken =  ZegoUIKitPrebuilt.generateKitTokenForTest(appID, serverSecret, roomID,  randomID(5),  randomID(5));


  // start the call
  let myMeeting = async (element) => {
      // Create instance object from Kit Token.
      const zp = ZegoUIKitPrebuilt.create(kitToken);
      // start the call
      zp.joinRoom({
        container: element,
        scenario: {
          mode: ZegoUIKitPrebuilt.LiveStreaming,
          config: {
            role,
          },
        },
        sharedLinks,
      });
  };

  return (

  );
}
Key Features of This Code:
- Random Room ID Generation — Each stream gets a unique ID.
- Role-Based Access — Host, Cohost, and Audience have different permissions.
- Shareable Links — Viewers can join via generated URLs.
- Built-In UI Controls — ZEGOCLOUD handles camera, mic, and screen sharing.
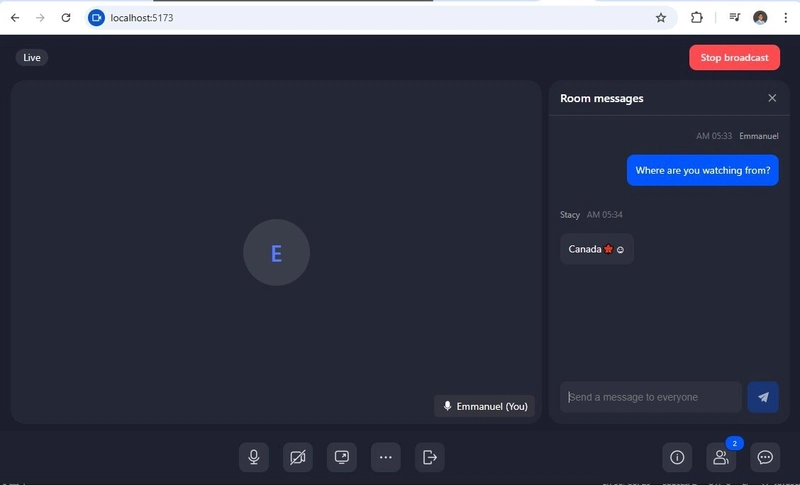
Step 5: Test Your Live Streaming App
Replace YOUR_APP_ID and YOUR_SERVER_SECRET with your actual credentials.
Run the app:
npm run dev
- Open two browser tabs:
- One as Host (default)
One as Audience (use the shared link)
Start streaming!
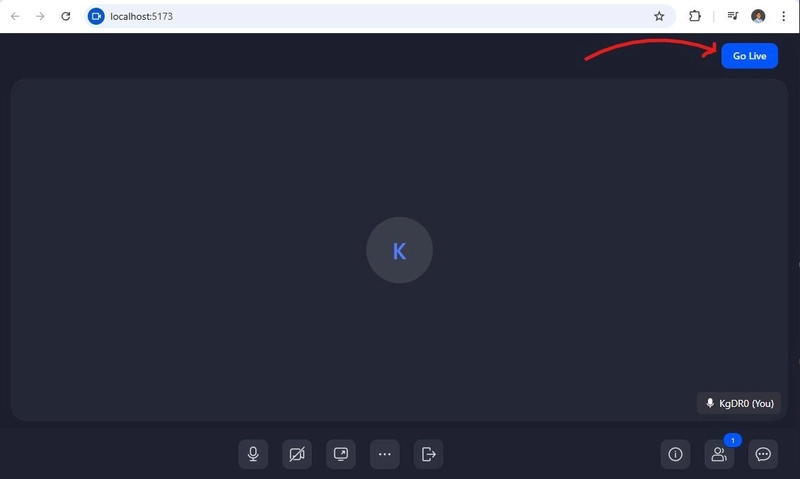
You should now see:
- Host view (with camera/mic controls)
- Audience view (watch-only mode)
Next Steps: Customize & Improve
Want to make this even better? Try these upgrades:
- Custom UI — Style the player to match your brand.
- Recording — Save streams for later viewing.
- Monetization — Add subscriptions or donations.
- Moderation — Kick users or restrict chats. ZEGOCLOUD’s docs (https://www.zegocloud.com/docs) have everything you need to expand your app.
Final Thoughts
You’ve just built a professional live streaming app in React with ZEGOCLOUD’s SDK. No complex server setup, no fuss — just a working live stream in minutes.
What will you create with it? A gaming platform? A webinar tool? The possibilities are endless.