


![[The AI Show Episode 145]: OpenAI Releases o3 and o4-mini, AI Is Causing “Quiet Layoffs,” Executive Order on Youth AI Education & GPT-4o’s Controversial Update](https://www.marketingaiinstitute.com/hubfs/ep%20145%20cover.png)


![From Art School Drop-out to Microsoft Engineer with Shashi Lo [Podcast #170]](https://cdn.hashnode.com/res/hashnode/image/upload/v1746203291209/439bf16b-c820-4fe8-b69e-94d80533b2df.png?#)


(1).jpg?#)


_Inge_Johnsson-Alamy.jpg?width=1280&auto=webp&quality=80&disable=upscale#)


![Apple Developing AI 'Vibe-Coding' Assistant for Xcode With Anthropic [Report]](https://www.iclarified.com/images/news/97200/97200/97200-640.jpg)
![Apple's New Ads Spotlight Apple Watch for Kids [Video]](https://www.iclarified.com/images/news/97197/97197/97197-640.jpg)


![[Weekly funding roundup April 26-May 2] VC inflow continues to remain downcast](https://images.yourstory.com/cs/2/220356402d6d11e9aa979329348d4c3e/WeeklyFundingRoundupNewLogo1-1739546168054.jpg)


A2A Python Tutorial - Comprehensive Guide
Table of Contents Introduction Set up Your Environment Creating A Project Agent Skills Agent Card A2A Server Interacting With Your A2A Server Adding Agent Capabilities Using a Local Ollama Model Next Steps Introduction In this tutorial, you will build a simple echo A2A server using Python. This barebones implementation will show you all the features A2A has to offer. Following this tutorial, you will be able to add agent functionality using Ollama or Google's Agent Development Kit. What you'll learn: The basic concepts behind A2A How to create an A2A server in Python Interacting with an A2A server Add a trained model to act as the agent Set up Your Environment What You'll Need A code editor such as Visual Studio Code (VS Code) A command prompt such as Terminal (Linux), iTerm (Mac) or just the Terminal in VS Code Python Environment We'll be using uv as our package manager and to set up our project. The A2A libraries we'll be using require python >= 3.12 which uv can install if you don't already have a matching version. We'll be using python 3.12. Check Run the following command to make sure you're ready for the next step: echo 'import sys; print(sys.version)' | uv run - If you see something similar to the following, you are ready to proceed! 3.12.3 (main, Feb 4 2025, 14:48:35) [GCC 13.3.0] Creating A Project Let's first create a project using uv. We'll add the --package flag in case you want to add tests, or publish your project later: uv init --package my-project cd my-project Using a Virtual Env We'll create a venv for this project. This only needs to be done once: uv venv .venv For this and any future terminal windows you open, you'll need to source this venv: source .venv/bin/activate If you're using a code editor such as VS Code, you'll want to set the Python Interpreter for code completions. In VS Code, press Ctrl-Shift-P and select Python: Select Interpreter. Then select your project my-project followed by the correct python interpreter Python 3.12.3 ('.venv':venv) ./.venv/bin/python The source code should now look similar to this: tree . . ├── pyproject.toml ├── README.md ├── src │ └── my-project │ ├── __init__.py Adding the Google-A2A Python Libraries Next we'll add the sample A2A python libraries from Google: uv add git+https://github.com/google/A2A#subdirectory=samples/python Setting up the project structure Let's now create some files we'll later be using: touch src/my_project/agent.py touch src/my_project/task_manager.py Test Run If everything is setup correctly, you should now be able to run your application: uv run my-project The output should look something like this: Hello from my-project! Agent Skills An agent skill is a set of capabilities the agent can perform. Here's an example of what it would look like for our echo agent: { id: "my-project-echo-skill" name: "Echo Tool", description: "Echos the input given", tags: ["echo", "repeater"], examples: ["I will see this echoed back to me"], inputModes: ["text"], outputModes: ["text"] } This conforms to the skills section of the Agent Card: { id: string; // unique identifier for the agent's skill name: string; //human readable name of the skill // description of the skill - will be used by the client or a human // as a hint to understand what the skill does. description: string; // Set of tag words describing classes of capabilities for this specific // skill (e.g. "cooking", "customer support", "billing") tags: string[]; // The set of example scenarios that the skill can perform. // Will be used by the client as a hint to understand how the skill can be // used. (e.g. "I need a recipe for bread") examples?: string[]; // example prompts for tasks // The set of interaction modes that the skill supports // (if different than the default) inputModes?: string[]; // supported mime types for input outputModes?: string[]; // supported mime types for output } Implementation Let's create this Agent Skill in code. Open up src/my-project/__init__.py and replace the contents with the following code: import google_a2a from google_a2a.common.types import AgentSkill def main(): skill = AgentSkill( id="my-project-echo-skill", name="Echo Tool", description="Echos the input given", tags=["echo", "repeater"], examples=["I will see this echoed back to me"], inputModes=["text"], outputModes=["text"], ) print(skill) if __name__ == "__main__": main() Test Run Let's give this a run: uv run my-project The output should look something like this: id='my-project-echo-skill' name='Echo Tool' description='Echos the input given' tags=['echo', 'repeater'] examples=['I will see this echoed back
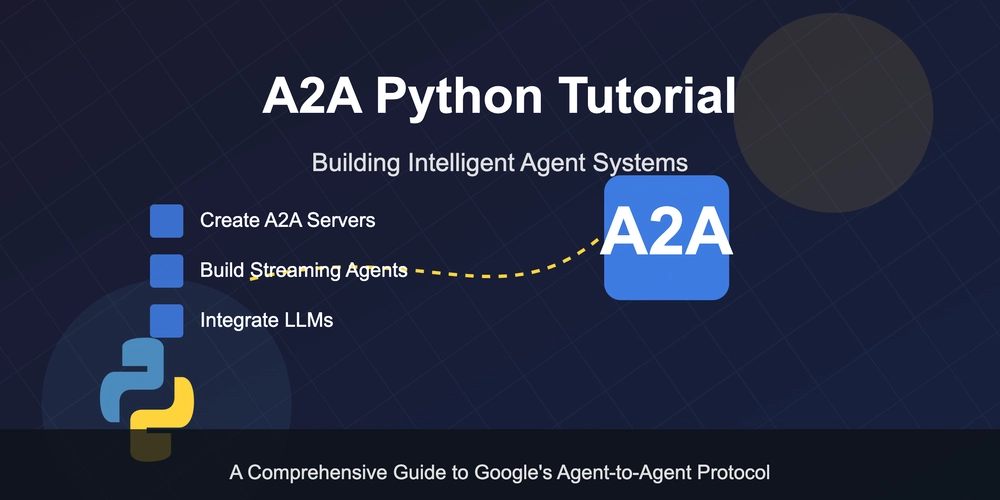
Table of Contents
- Introduction
- Set up Your Environment
- Creating A Project
- Agent Skills
- Agent Card
- A2A Server
- Interacting With Your A2A Server
- Adding Agent Capabilities
- Using a Local Ollama Model
- Next Steps
Introduction
In this tutorial, you will build a simple echo A2A server using Python. This barebones implementation will show you all the features A2A has to offer. Following this tutorial, you will be able to add agent functionality using Ollama or Google's Agent Development Kit.
What you'll learn:
- The basic concepts behind A2A
- How to create an A2A server in Python
- Interacting with an A2A server
- Add a trained model to act as the agent
Set up Your Environment
What You'll Need
- A code editor such as Visual Studio Code (VS Code)
- A command prompt such as Terminal (Linux), iTerm (Mac) or just the Terminal in VS Code
Python Environment
We'll be using uv as our package manager and to set up our project.
The A2A libraries we'll be using require python >= 3.12 which uv can install if you don't already have a matching version. We'll be using python 3.12.
Check
Run the following command to make sure you're ready for the next step:
echo 'import sys; print(sys.version)' | uv run -
If you see something similar to the following, you are ready to proceed!
3.12.3 (main, Feb 4 2025, 14:48:35) [GCC 13.3.0]
Creating A Project
Let's first create a project using uv. We'll add the --package flag in case you want to add tests, or publish your project later:
uv init --package my-project
cd my-project
Using a Virtual Env
We'll create a venv for this project. This only needs to be done once:
uv venv .venv
For this and any future terminal windows you open, you'll need to source this venv:
source .venv/bin/activate
If you're using a code editor such as VS Code, you'll want to set the Python Interpreter for code completions. In VS Code, press Ctrl-Shift-P and select Python: Select Interpreter. Then select your project my-project followed by the correct python interpreter Python 3.12.3 ('.venv':venv) ./.venv/bin/python
The source code should now look similar to this:
tree .
.
├── pyproject.toml
├── README.md
├── src
│   └── my-project
│       ├── __init__.py
Adding the Google-A2A Python Libraries
Next we'll add the sample A2A python libraries from Google:
uv add git+https://github.com/google/A2A#subdirectory=samples/python
Setting up the project structure
Let's now create some files we'll later be using:
touch src/my_project/agent.py
touch src/my_project/task_manager.py
Test Run
If everything is setup correctly, you should now be able to run your application:
uv run my-project
The output should look something like this:
Hello from my-project!
Agent Skills
An agent skill is a set of capabilities the agent can perform. Here's an example of what it would look like for our echo agent:
{
  id: "my-project-echo-skill"
  name: "Echo Tool",
  description: "Echos the input given",
  tags: ["echo", "repeater"],
  examples: ["I will see this echoed back to me"],
  inputModes: ["text"],
  outputModes: ["text"]
}
This conforms to the skills section of the Agent Card:
{
  id: string; // unique identifier for the agent's skill
  name: string; //human readable name of the skill
  // description of the skill - will be used by the client or a human
  // as a hint to understand what the skill does.
  description: string;
  // Set of tag words describing classes of capabilities for this specific
  // skill (e.g. "cooking", "customer support", "billing")
  tags: string[];
  // The set of example scenarios that the skill can perform.
  // Will be used by the client as a hint to understand how the skill can be
  // used. (e.g. "I need a recipe for bread")
  examples?: string[]; // example prompts for tasks
  // The set of interaction modes that the skill supports
  // (if different than the default)
  inputModes?: string[]; // supported mime types for input
  outputModes?: string[]; // supported mime types for output
}
Implementation
Let's create this Agent Skill in code. Open up src/my-project/__init__.py and replace the contents with the following code:
import google_a2a
from google_a2a.common.types import AgentSkill

def main():
  skill = AgentSkill(
    id="my-project-echo-skill",
    name="Echo Tool",
    description="Echos the input given",
    tags=["echo", "repeater"],
    examples=["I will see this echoed back to me"],
    inputModes=["text"],
    outputModes=["text"],
  )
  print(skill)

if __name__ == "__main__":
  main()
Test Run
Let's give this a run:
uv run my-project
The output should look something like this:
id='my-project-echo-skill' name='Echo Tool' description='Echos the input given' tags=['echo', 'repeater'] examples=['I will see this echoed back to me'] inputModes=['text'] outputModes=['text']
Agent Card
Now that we have defined our skills, we can create an Agent Card.
Remote Agents are required to publish an Agent Card in JSON format describing the agent's capabilities and skills in addition to authentication mechanisms. In other words, this lets the world know about your agent and how to interact with it.
Implementation
First lets add some helpers for parsing command line arguments. This will be helpful later for starting our server:
uv add click
And update our code:
import logging

import click
from dotenv import load_dotenv
import google_a2a
from google_a2a.common.types import AgentSkill, AgentCapabilities, AgentCard

logging.basicConfig(level=logging.INFO)
logger = logging.getLogger(__name__)

@click.command()
@click.option("--host", default="localhost")
@click.option("--port", default=10002)
def main(host, port):
  skill = AgentSkill(
    id="my-project-echo-skill",
    name="Echo Tool",
    description="Echos the input given",
    tags=["echo", "repeater"],
    examples=["I will see this echoed back to me"],
    inputModes=["text"],
    outputModes=["text"],
  )
  logging.info(skill)

if __name__ == "__main__":
  main()
Next we'll add our Agent Card:
# ...
def main(host, port):
  # ...
  capabilities = AgentCapabilities()
  agent_card = AgentCard(
    name="Echo Agent",
    description="This agent echos the input given",
    url=f"http://{host}:{port}/",
    version="0.1.0",
    defaultInputModes=["text"],
    defaultOutputModes=["text"],
    capabilities=capabilities,
    skills=[skill]
  )
  logging.info(agent_card)

if __name__ == "__main__":
  main()
Test Run
Let's give this a run:
uv run my-project
The output should look something like this:
INFO:root:name='Echo Agent' description='This agent echos the input given' url='http://localhost:10002/' provider=None version='0.1.0' documentationUrl=None capabilities=AgentCapabilities(streaming=False, pushNotifications=False, stateTransitionHistory=False) authentication=None defaultInputModes=['text'] defaultOutputModes=['text'] skills=[AgentSkill(id='my-project-echo-skill', name='Echo Tool', description='Echos the input given', tags=['echo', 'repeater'], examples=['I will see this echoed back to me'], inputModes=['text'], outputModes=['text'])]
A2A Server
We're almost ready to start our server! We'll be using the A2AServer class from Google-A2A which under the hood starts a uvicorn server.
Task Manager
Before we create our server, we need a task manager to handle incoming requests.
We'll be implementing the InMemoryTaskManager interface which requires us to implement two methods:
async def on_send_task(
  self,
  request: SendTaskRequest
) -> SendTaskResponse:
  """
  This method queries or creates a task for the agent.
  The caller will receive exactly one response.
  """
  pass

async def on_send_task_subscribe(
  self,
  request: SendTaskStreamingRequest
) -> AsyncIterable[SendTaskStreamingResponse] | JSONRPCResponse:
  """
  This method subscribes the caller to future updates regarding a task.
  The caller will receive a response and additionally receive subscription
  updates over a session established between the client and the server
  """
  pass
Open up src/my_project/task_manager.py and add the following code. We will simply return a direct echo response and immediately mark the task complete without any sessions or subscriptions:
from typing import AsyncIterable

import google_a2a
from google_a2a.common.server.task_manager import InMemoryTaskManager
from google_a2a.common.types import (
  Artifact,
  JSONRPCResponse,
  Message,
  SendTaskRequest,
  SendTaskResponse,
  SendTaskStreamingRequest,
  SendTaskStreamingResponse,
  Task,
  TaskState,
  TaskStatus,
  TaskStatusUpdateEvent,
)

class MyAgentTaskManager(InMemoryTaskManager):
  def __init__(self):
    super().__init__()

  async def on_send_task(self, request: SendTaskRequest) -> SendTaskResponse:
    # Upsert a task stored by InMemoryTaskManager
    await self.upsert_task(request.params)

    task_id = request.params.id
    # Our custom logic that simply marks the task as complete
    # and returns the echo text
    received_text = request.params.message.parts[0].text
    task = await self._update_task(
      task_id=task_id,
      task_state=TaskState.COMPLETED,
      response_text=f"on_send_task received: {received_text}"
    )

    # Send the response
    return SendTaskResponse(id=request.id, result=task)

  async def on_send_task_subscribe(
    self,
    request: SendTaskStreamingRequest
  ) -> AsyncIterable[SendTaskStreamingResponse] | JSONRPCResponse:
    pass

  async def _update_task(
    self,
    task_id: str,
    task_state: TaskState,
    response_text: str,
  ) -> Task:
    task = self.tasks[task_id]
    agent_response_parts = [
      {
        "type": "text",
        "text": response_text,
      }
    ]
    task.status = TaskStatus(
      state=task_state,
      message=Message(
        role="agent",
        parts=agent_response_parts,
      )
    )
    task.artifacts = [
      Artifact(
        parts=agent_response_parts,
      )
    ]
    return task
A2A Server
With a task manager complete, we can now create our server.
Open up src/my_project/__init__.py and add the following code:
# ...
from google_a2a.common.server import A2AServer
from my_project.task_manager import MyAgentTaskManager
# ...
def main(host, port):
  # ...

  task_manager = MyAgentTaskManager()
  server = A2AServer(
    agent_card=agent_card,
    task_manager=task_manager,
    host=host,
    port=port,
  )
  server.start()
Test Run
Let's give this a run:
uv run my-project
The output should look something like this:
INFO:     Started server process [20506]
INFO:     Waiting for application startup.
INFO:     Application startup complete.
INFO:     Uvicorn running on http://localhost:10002 (Press CTRL+C to quit)
Congratulations! Your A2A server is now running!
Interacting With Your A2A Server
First we'll use Google-A2A's command-line tool to send requests to our A2A server. After trying it out, we'll write our own basic client to see how this works under the hood.
Using Google-A2A's command-line tool
With your A2A server already running from the previous run:
# This should already be running in your terminal
$ uv run my-project
INFO:     Started server process [20538]
INFO:     Waiting for application startup.
INFO:     Application startup complete.
INFO:     Uvicorn running on http://localhost:10002 (Press CTRL+C to quit)
Open up a new terminal in the same directory:
source .venv/bin/activate
uv run google-a2a-cli --agent http://localhost:10002
Note: This will only work if you've installed google-a2a from this pull request as the cli was not exposed previously.
Otherwise you'll have to checkout the Google/A2A repository directly, navigate to the samples/python repository and run the cli directly.
You can then send messages to your server by typing and pressing Enter:
=========  starting a new task ========

What do you want to send to the agent? (:q or quit to exit): Hello!
If everything is working correctly you'll see this in the response:
"message":{"role":"agent","parts":[{"type":"text","text":"on_send_task received: Hello!"}]}
To exit type :q and press Enter.
Adding Agent Capabilities
Now that we have a basic A2A server running, let's add some more functionality. We'll explore how A2A can work asynchronously and stream responses.
Streaming
This allows clients to subscribe to the server and receive multiple updates instead of a single response. This can be useful for long running agent tasks, or where multiple Artifacts may be streamed back to the client.
First we'll declare our agent as ready for streaming. Open up src/my_project/__init__.py and update AgentCapabilities:
# ...
def main(host, port):
  # ...
  capabilities = AgentCapabilities(
    streaming=True
  )
  # ...
Now in src/my_project/task_manager.py we'll have to implement on_send_task_subscribe:
import asyncio
# ...
class MyAgentTaskManager(InMemoryTaskManager):
  # ...
  async def _stream_3_messages(self, request: SendTaskStreamingRequest):
    task_id = request.params.id
    received_text = request.params.message.parts[0].text

    text_messages = ["one", "two", "three"]
    for text in text_messages:
      parts = [
        {
          "type": "text",
          "text": f"{received_text}: {text}",
        }
      ]
      message = Message(role="agent", parts=parts)
      is_last = text == text_messages[-1]
      task_state = TaskState.COMPLETED if is_last else TaskState.WORKING
      task_status = TaskStatus(
        state=task_state,
        message=message
      )
      task_update_event = TaskStatusUpdateEvent(
        id=request.params.id,
        status=task_status,
        final=is_last,
      )
      await self.enqueue_events_for_sse(
        request.params.id,
        task_update_event
      )

  async def on_send_task_subscribe(
    self,
    request: SendTaskStreamingRequest
  ) -> AsyncIterable[SendTaskStreamingResponse] | JSONRPCResponse:
    # Upsert a task stored by InMemoryTaskManager
    await self.upsert_task(request.params)

    task_id = request.params.id
    # Create a queue of work to be done for this task
    sse_event_queue = await self.setup_sse_consumer(task_id=task_id)

    # Start the asynchronous work for this task
    asyncio.create_task(self._stream_3_messages(request))

    # Tell the client to expect future streaming responses
    return self.dequeue_events_for_sse(
      request_id=request.id,
      task_id=task_id,
      sse_event_queue=sse_event_queue,
    )
Restart your A2A server to pickup the new changes and then rerun the cli:
$ uv run google-a2a-cli --agent http://localhost:10002
=========  starting a new task ========

What do you want to send to the agent? (:q or quit to exit): Streaming?

"status":{"state":"working","message":{"role":"agent","parts":[{"type":"text","text":"Streaming?: one"}]}
"status":{"state":"working","message":{"role":"agent","parts":[{"type":"text","text":"Streaming?: two"}]}
"status":{"state":"completed","message":{"role":"agent","parts":[{"type":"text","text":"Streaming?: three"}]}
Sometimes the agent might need additional input. For example, maybe the agent will ask the client if they'd like to keep repeating the 3 messages. In this case, the agent will respond with TaskState.INPUT_REQUIRED to which the client will then resend send_task_streaming with the same task_id and session_id but with an updated message providing the input required by the agent. On the server-side we'll update on_send_task_subscribe to handle this case:
# ...

class MyAgentTaskManager(InMemoryTaskManager):
  # ...
  async def _stream_3_messages(self, request: SendTaskStreamingRequest):
    # ...
    async for message in messages:
      # ...
      # is_last = message == messages[-1] # Delete this line
      task_state = TaskState.WORKING
      # ...
      task_update_event = TaskStatusUpdateEvent(
        id=request.params.id,
        status=task_status,
        final=False,
      )
      # ...

    ask_message = Message(
      role="agent",
      parts=[
        {
          "type": "text",
          "text": "Would you like more messages? (Y/N)"
        }
      ]
    )
    task_update_event = TaskStatusUpdateEvent(
      id=request.params.id,
      status=TaskStatus(
        state=TaskState.INPUT_REQUIRED,
        message=ask_message
      ),
      final=True,
    )
    await self.enqueue_events_for_sse(
      request.params.id,
      task_update_event
    )
  # ...
  async def on_send_task_subscribe(
    self,
    request: SendTaskStreamingRequest
  ) -> AsyncIterable[SendTaskStreamingResponse] | JSONRPCResponse:
    task_id = request.params.id
    is_new_task = task_id in self.tasks
    # Upsert a task stored by InMemoryTaskManager
    await self.upsert_task(request.params)

    received_text = request.params.message.parts[0].text
    sse_event_queue = await self.setup_sse_consumer(task_id=task_id)
    if not is_new_task and received_text == "N":
      task_update_event = TaskStatusUpdateEvent(
        id=request.params.id,
        status=TaskStatus(
          state=TaskState.COMPLETED,
          message=Message(
            role="agent",
            parts=[
              {
                "type": "text",
                "text": "All done!"
              }
            ]
          )
        ),
        final=True,
      )
      await self.enqueue_events_for_sse(
        request.params.id,
        task_update_event,
      )
    else:
      asyncio.create_task(self._stream_3_messages(request))

    return self.dequeue_events_for_sse(
      request_id=request.id,
      task_id=task_id,
      sse_event_queue=sse_event_queue,
    )
Now after restarting the server and running the cli, we can see the task will keep running until we tell the agent N:
$ uv run google-a2a-cli --agent http://localhost:10002
=========  starting a new task ========

What do you want to send to the agent? (:q or quit to exit): Streaming?

"status":{"state":"working","message":{"role":"agent","parts":[{"type":"text","text":"Streaming?: one"}]}
"status":{"state":"working","message":{"role":"agent","parts":[{"type":"text","text":"Streaming?: two"}]}
"status":{"state":"working","message":{"role":"agent","parts":[{"type":"text","text":"Streaming?: three"}]}
"status":{"state":"input-required","message":{"role":"agent","parts":[{"type":"text","text":"Would you like more messages? (Y/N)"}]}

What do you want to send to the agent? (:q or quit to exit): N

"status":{"state":"completed","message":{"role":"agent","parts":[{"type":"text","text":"All done!"}]}
Congratulations! You now have an agent that is able to asynchronously perform work and ask users for input when needed.
Using a Local Ollama Model
Now we get to the exciting part. We're going to add AI to our A2A server.
In this tutorial, we'll be setting up a local Ollama model and integrating it with our A2A server.
Requirements
We'll be installing ollama, langchain as well as downloading an ollama model that supports MCP tools (for a future tutorial).
- Download ollama
- Run an ollama server:
# Note: if ollama is already running, you may get an error such as
# Error: listen tcp 127.0.0.1:11434: bind: address already in use
# On linux you can run systemctl stop ollama to stop ollama
ollama serve
- Download a model from this list. We'll be using
qwqas it supportstools(as shown by its tags) and runs on a 24GB graphics card:
ollama pull qwq
- Install
langchain:
uv add langchain langchain-ollama langgraph
Now with ollama setup, we can start integrating it into our A2A server.
Integrating Ollama into our A2A server
First open up src/my_project/__init__.py:
# ...

@click.command()
@click.option("--host", default="localhost")
@click.option("--port", default=10002)
@click.option("--ollama-host", default="http://127.0.0.1:11434")
@click.option("--ollama-model", default=None)
def main(host, port, ollama_host, ollama_model):
  # ...
  capabilities = AgentCapabilities(
    streaming=False # We'll leave streaming capabilities as an exercise for the reader
  )
  # ...
  task_manager = MyAgentTaskManager(
    ollama_host=ollama_host,
    ollama_model=ollama_mode,
  )
  # ..
Now let's add AI functionality in src/my_project/agent.py:
from langchain_ollama import ChatOllama
from langgraph.prebuilt import create_react_agent
from langgraph.graph.graph import CompiledGraph

def create_ollama_agent(ollama_base_url: str, ollama_model: str):
  ollama_chat_llm = ChatOllama(
    base_url=ollama_base_url,
    model=ollama_model,
    temperature=0.2
  )
  agent = create_react_agent(ollama_chat_llm, tools=[])
  return agent

async def run_ollama(ollama_agent: CompiledGraph, prompt: str):
  agent_response = await ollama_agent.ainvoke(
    {"messages": prompt }
  )
  message = agent_response["messages"][-1].content
  return str(message)
Finally let's call our ollama agent from src/my_project/task_manager.py:
# ...
from my_project.agent import create_ollama_agent, run_ollama

class MyAgentTaskManager(InMemoryTaskManager):
  def __init__(
    self,
    ollama_host: str,
    ollama_model: typing.Union[None, str]
  ):
    super().__init__()
    if ollama_model is not None:
      self.ollama_agent = create_ollama_agent(
        ollama_base_url=ollama_host,
        ollama_model=ollama_model
      )
    else:
      self.ollama_agent = None

  async def on_send_task(self, request: SendTaskRequest) -> SendTaskResponse:
    # ...
    received_text = request.params.message.parts[0].text
    response_text = f"on_send_task received: {received_text}"
    if self.ollama_agent is not None:
      response_text = await run_ollama(ollama_agent=self.ollama_agent, prompt=received_text)

    task = await self._update_task(
      task_id=task_id,
      task_state=TaskState.COMPLETED,
      response_text=response_text
    )

    # Send the response
    return SendTaskResponse(id=request.id, result=task)

  # ...
Let's test it out!
First rerun our A2A server replacing qwq with the ollama model you downloaded:
uv run my-project --ollama-host http://127.0.0.1:11434 --ollama-model qwq
And then rerun the cli:
uv run google-a2a-cli --agent http://localhost:10002
Note, if you're using a large model, it may take a while to load. The cli may timeout. In which case rerun the cli once the ollama server has finished loading the model.
You should see something like the following:
========= starting a new task ========
What do you want to send to the agent? (:q or quit to exit): hey
"message":{"role":"agent","parts":[{"type":"text","text":"