A step-by-step guide to creating an EC2 instance in AWS (using Ubuntu server as the image) to install nginx.
Table of contents Introduction Create an EC2 instance on AWS Install Ubuntu nginx server Conclusion Introduction Setting up an EC2 instance in AWS is crucial for deploying scalable and efficient applications. This guide will walk you through creating an EC2 instance using Ubuntu Server as the image. Once the instance is ready, you'll install Nginx, a powerful web server known for its speed and versatility. Whether you're new to AWS or a seasoned user, this guide ensures a smooth setup tailored to your needs. 2.0 Create an EC2 instance. Log in to AWS, create a free account, and sign in. Type EC2 in the search bar and click on it. 2.1. Click on Launch Instance 2.2. Type Nginx server in the Name & Tags session. You can also add tags if you so desire. 2.3. Click on Application and OS images and select Ubuntu server.(Ensure you select the free tier Ubuntu server) 2.4. Go to the instance type and select t2.micro 2.5. Go to Key Pair(login),click and create a key(nginxserverkey) 2.6. Go to the network settings and allow SSH and HTTP (Note that the configure storage session and advanced storage session remain the same). 2.7. Click on Launch instance 3.0. Installing Ubuntu(nginx) server 3.1. Click on Instance ID 3.2. Click on Connect 3.3. Navigate to the SSH Client session, and copy the link under the example(ssh -i "nginxserverkey.pem" ubuntu@ec2-18-130-8-197.eu-west-2.compute.amazonaws.com) 3.4. First, copy the downloaded file to your computer's home directory then, open your laptop terminal windows and type sudo space and paste the link you copied already (ssh -i "nginxserverkey.pem" ubuntu@ec2-18-130-8-197.eu-west-2.compute.amazonaws.com) and then click enter 3.5. Verify the Ubuntu nginx server Navigate to the E2 instance connect and click connect Congratulations! You've successfully created an EC2 instance in AWS, using Ubuntu Server as your base image, and installed Nginx to serve your applications. This setup empowers you with a scalable and efficient web server environment. Moving forward, ensure regular updates and monitoring to maintain security and performance for your instance and deployed applications.
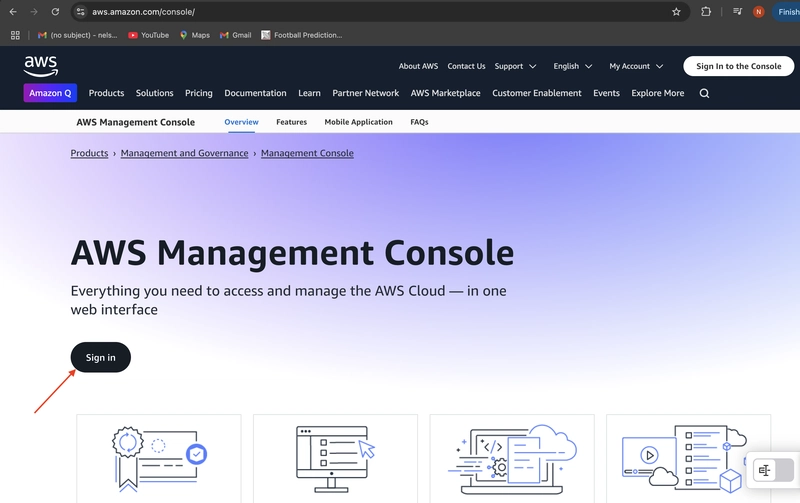
Table of contents
- Introduction
- Create an EC2 instance on AWS
- Install Ubuntu nginx server
- Conclusion
Introduction
Setting up an EC2 instance in AWS is crucial for deploying scalable and efficient applications. This guide will walk you through creating an EC2 instance using Ubuntu Server as the image. Once the instance is ready, you'll install Nginx, a powerful web server known for its speed and versatility. Whether you're new to AWS or a seasoned user, this guide ensures a smooth setup tailored to your needs.
2.0 Create an EC2 instance.
Log in to AWS, create a free account, and sign in.

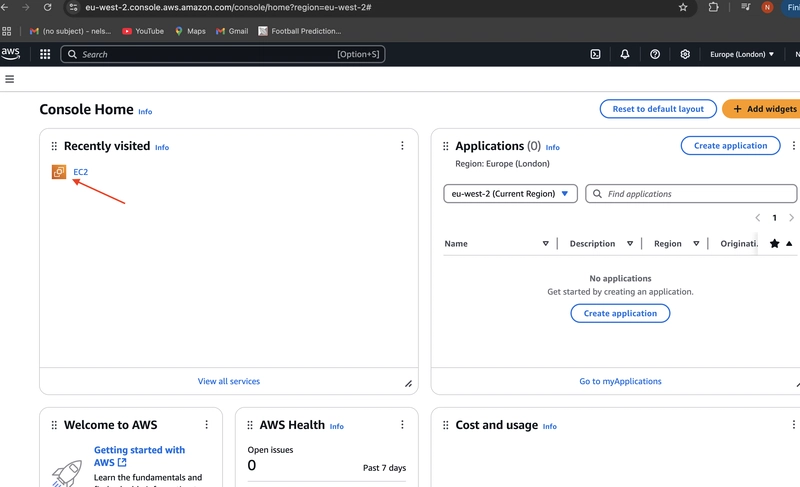
Type EC2 in the search bar and click on it.
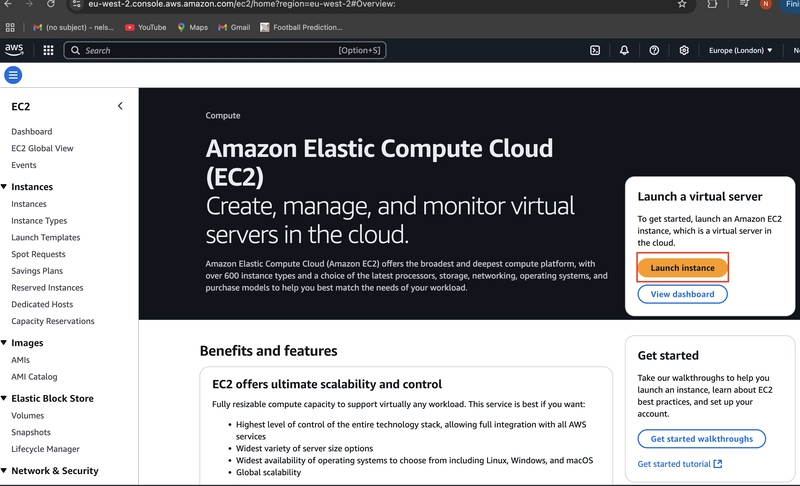
2.1. Click on Launch Instance
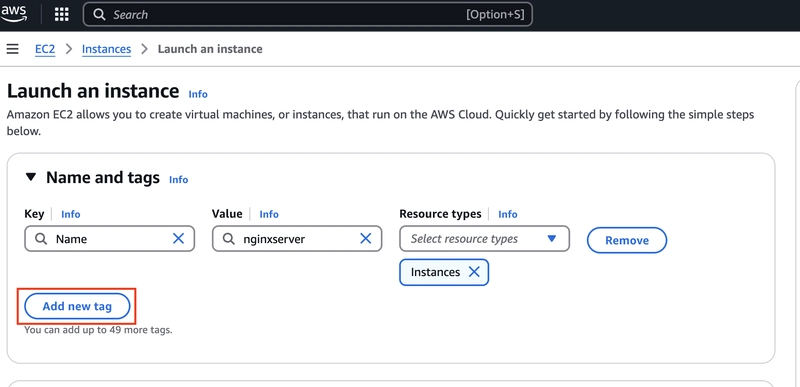
2.2. Type Nginx server in the Name & Tags session.
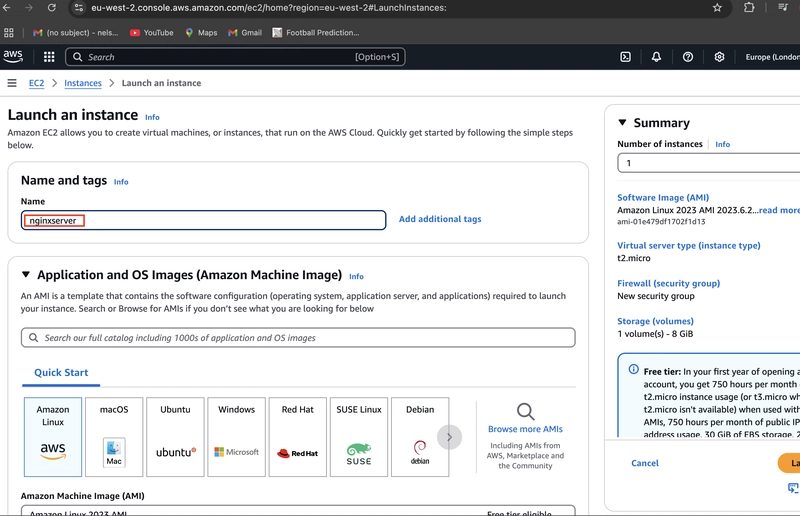
You can also add tags if you so desire.
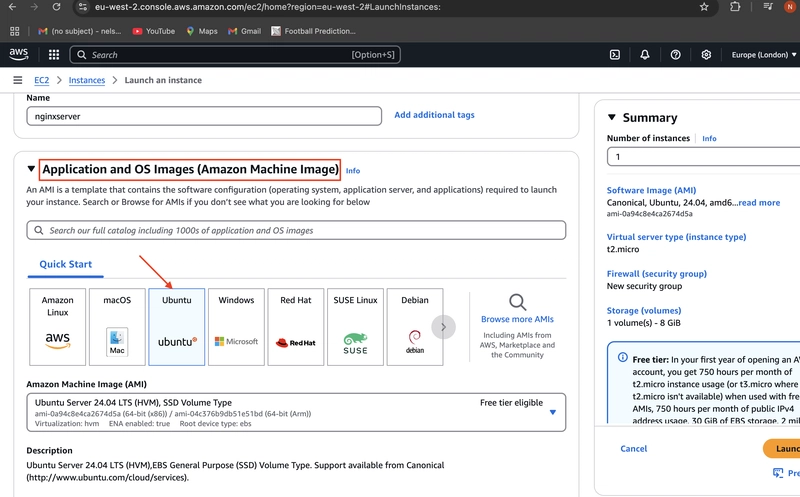
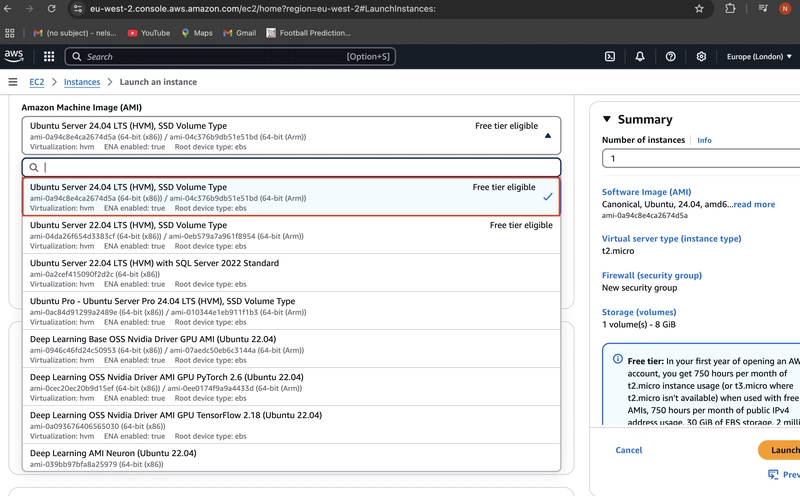
2.3. Click on Application and OS images and select Ubuntu server.(Ensure you select the free tier Ubuntu server)
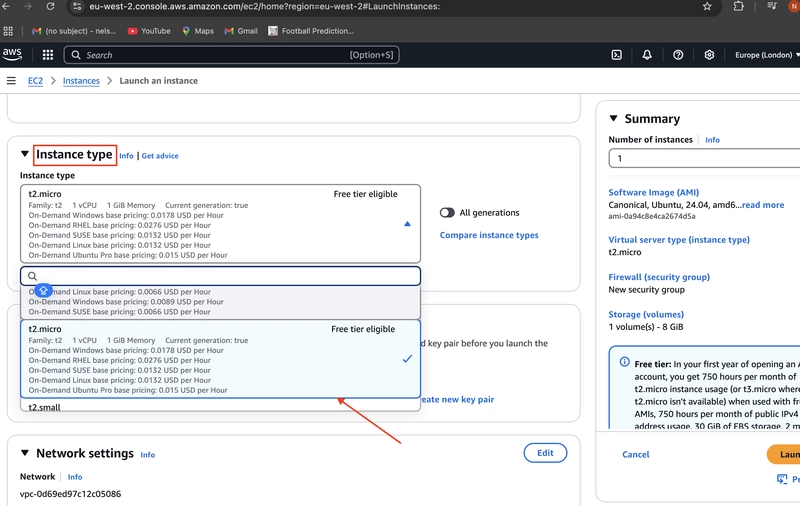
2.4. Go to the instance type and select t2.micro
2.5. Go to Key Pair(login),click and create a key(nginxserverkey)
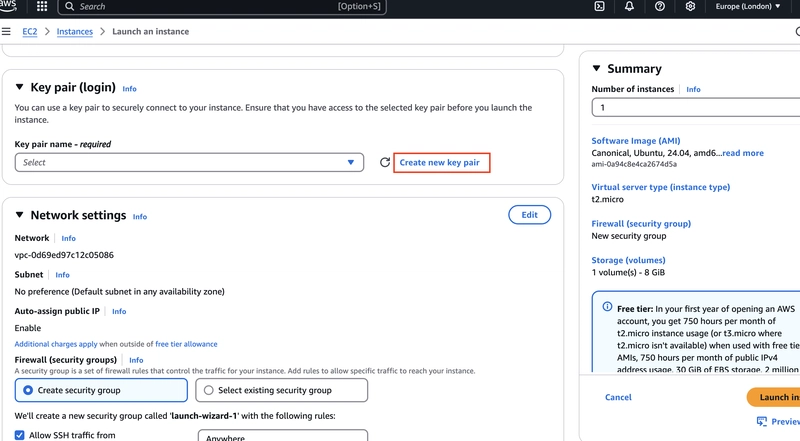
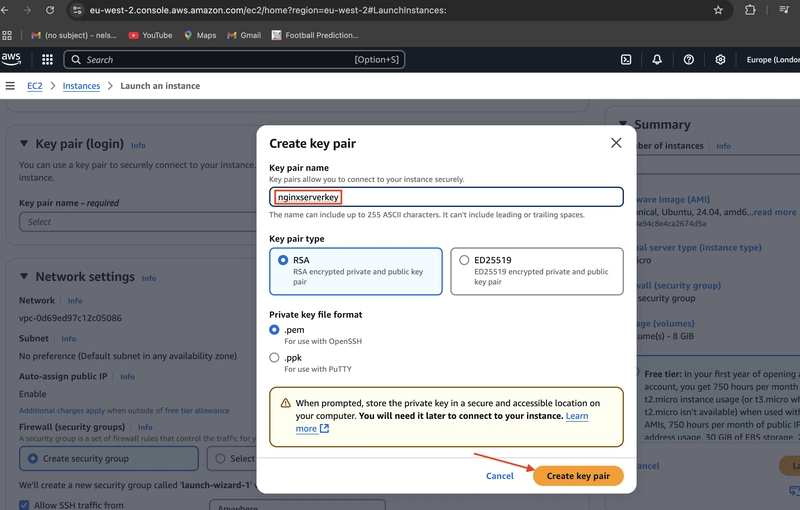
2.6. Go to the network settings and allow SSH and HTTP
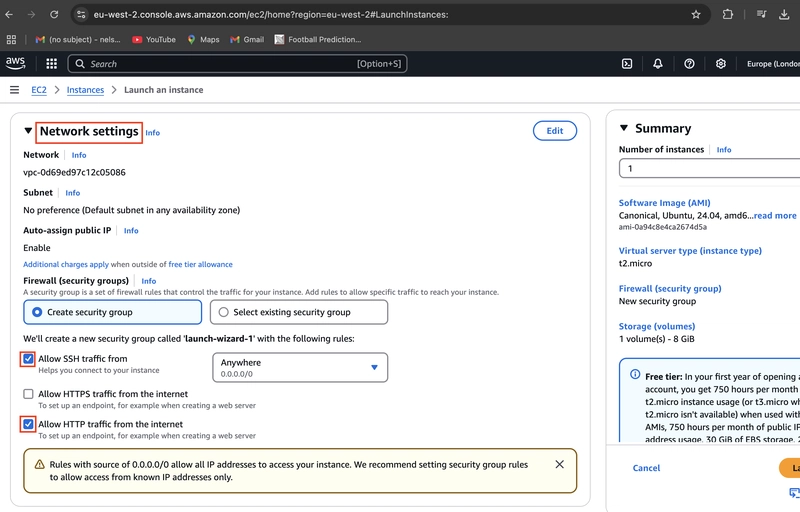
(Note that the configure storage session and advanced storage session remain the same).
2.7. Click on Launch instance
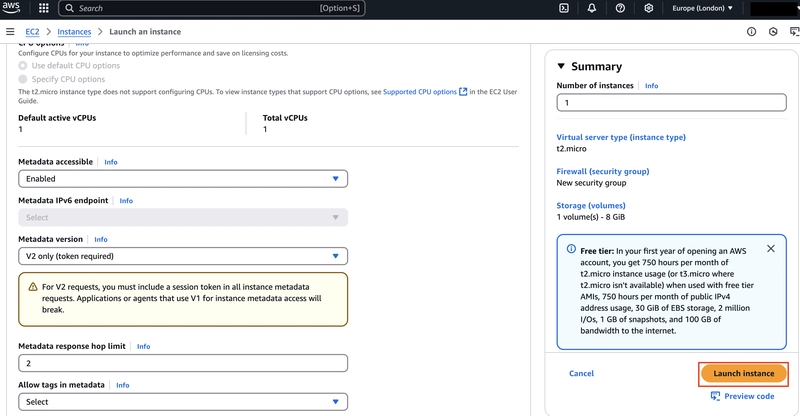
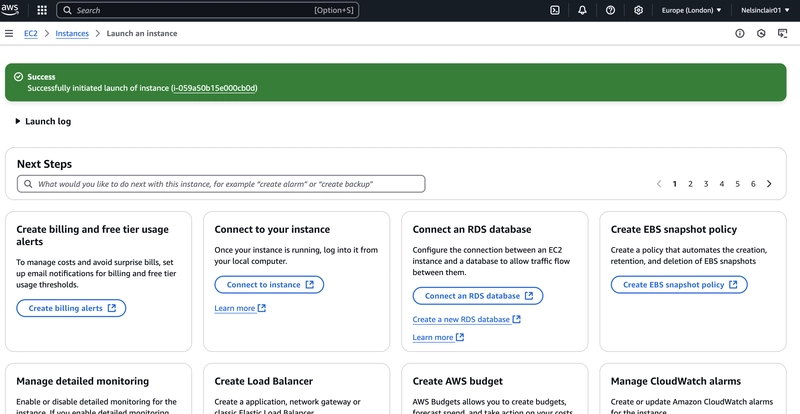
3.0. Installing Ubuntu(nginx) server
3.1. Click on Instance ID
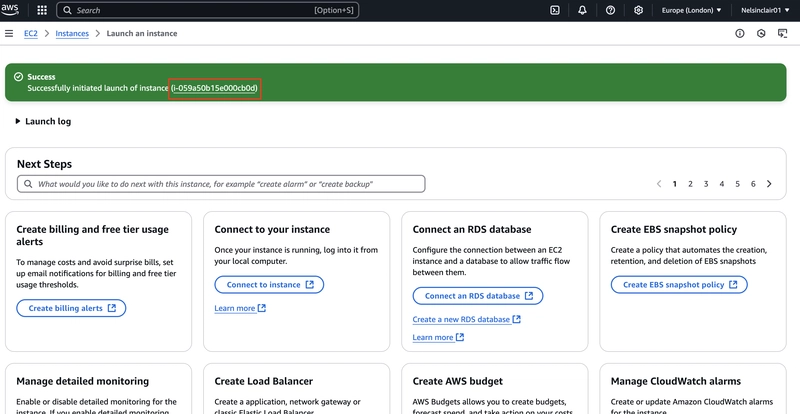
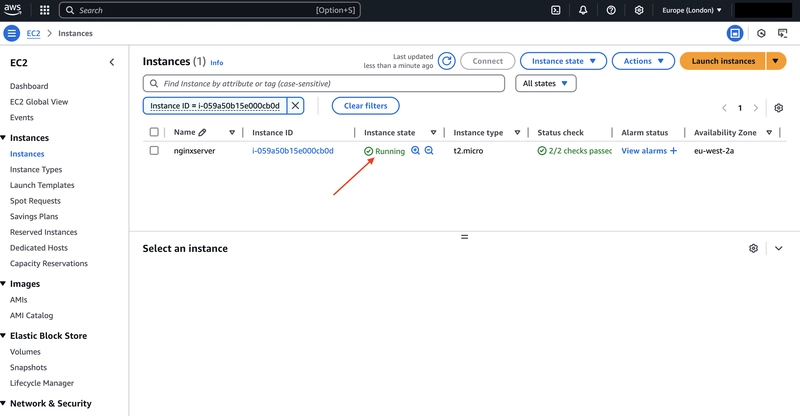
3.2. Click on Connect
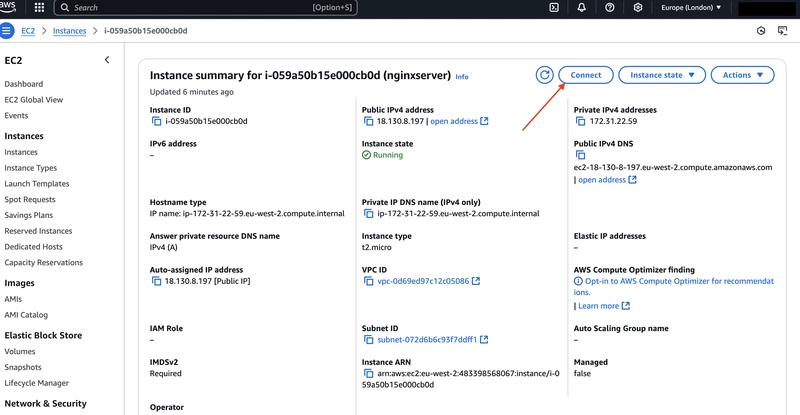
3.3. Navigate to the SSH Client session, and copy the link under the example(ssh -i "nginxserverkey.pem" ubuntu@ec2-18-130-8-197.eu-west-2.compute.amazonaws.com)
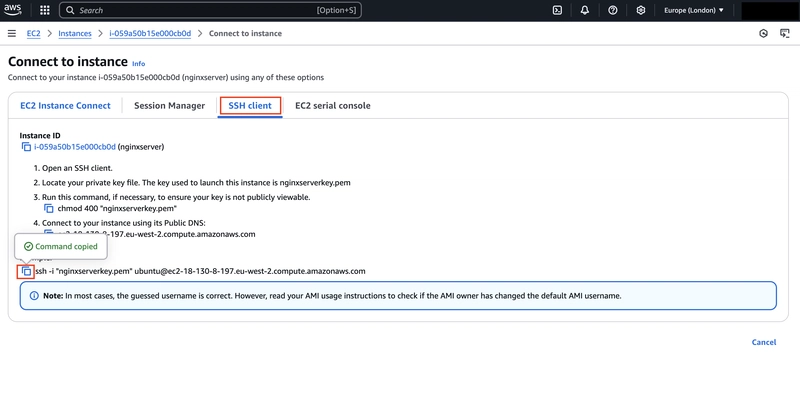
3.4. First, copy the downloaded file to your computer's home directory then, open your laptop terminal windows and type sudo space and paste the link you copied already (ssh -i "nginxserverkey.pem" ubuntu@ec2-18-130-8-197.eu-west-2.compute.amazonaws.com) and then click enter
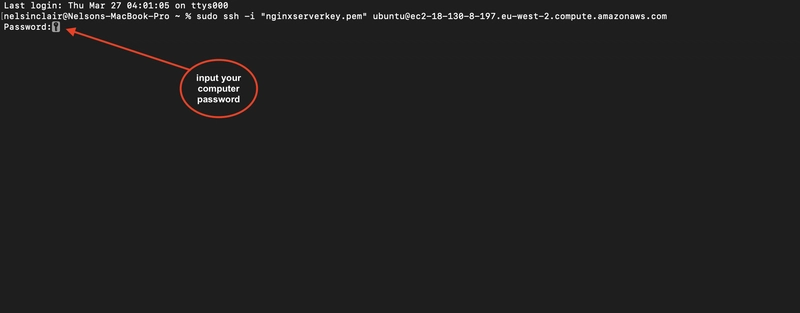
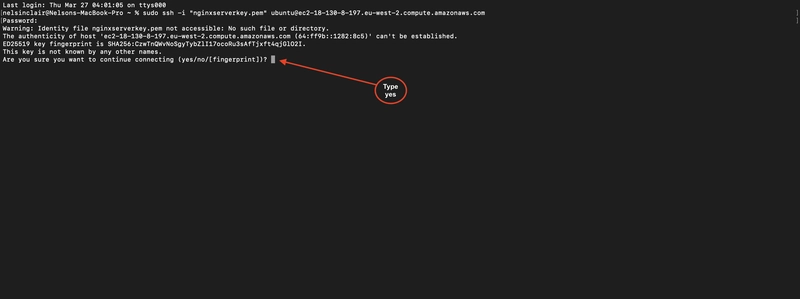
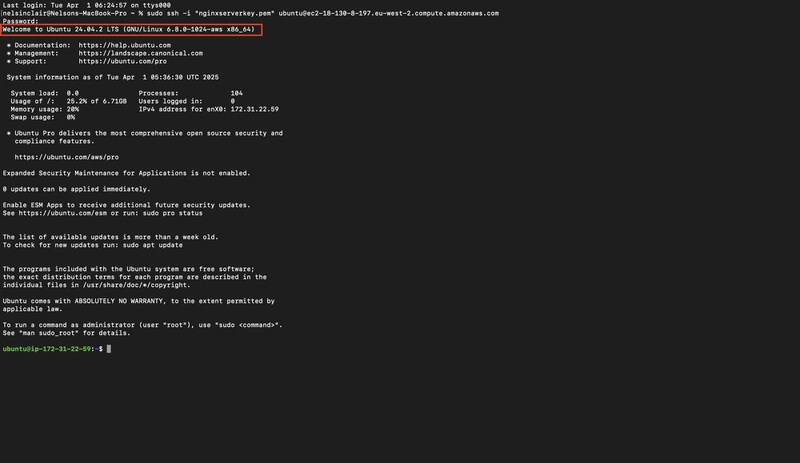
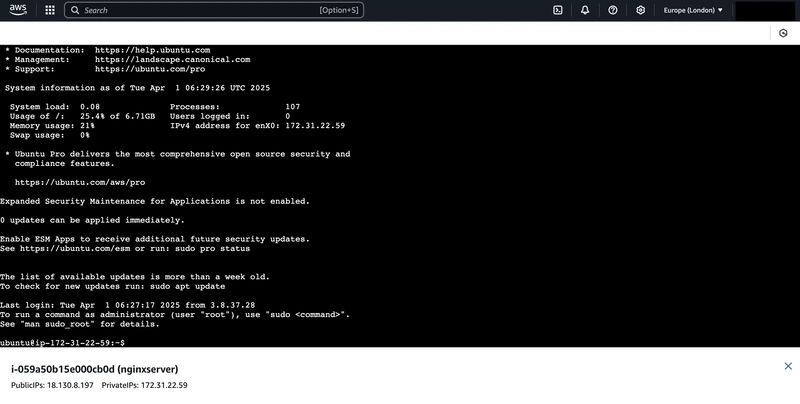
3.5. Verify the Ubuntu nginx server
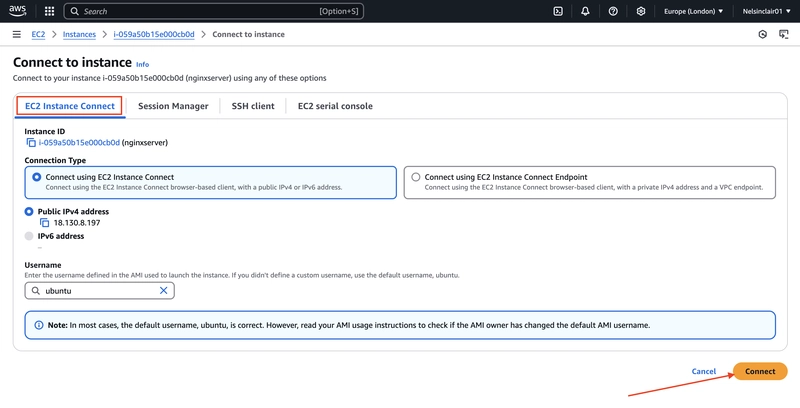
Navigate to the E2 instance connect and click connect
Congratulations! You've successfully created an EC2 instance in AWS, using Ubuntu Server as your base image, and installed Nginx to serve your applications. This setup empowers you with a scalable and efficient web server environment. Moving forward, ensure regular updates and monitoring to maintain security and performance for your instance and deployed applications.


![[The AI Show Episode 142]: ChatGPT’s New Image Generator, Studio Ghibli Craze and Backlash, Gemini 2.5, OpenAI Academy, 4o Updates, Vibe Marketing & xAI Acquires X](https://www.marketingaiinstitute.com/hubfs/ep%20142%20cover.png)




![[FREE EBOOKS] The Kubernetes Bible, The Ultimate Linux Shell Scripting Guide & Four More Best Selling Titles](https://www.javacodegeeks.com/wp-content/uploads/2012/12/jcg-logo.jpg)


![From drop-out to software architect with Jason Lengstorf [Podcast #167]](https://cdn.hashnode.com/res/hashnode/image/upload/v1743796461357/f3d19cd7-e6f5-4d7c-8bfc-eb974bc8da68.png?#)


.png?#)


.jpg?#)


_Christophe_Coat_Alamy.jpg?#)




![Rapidus in Talks With Apple as It Accelerates Toward 2nm Chip Production [Report]](https://www.iclarified.com/images/news/96937/96937/96937-640.jpg)


