


![[The AI Show Episode 144]: ChatGPT’s New Memory, Shopify CEO’s Leaked “AI First” Memo, Google Cloud Next Releases, o3 and o4-mini Coming Soon & Llama 4’s Rocky Launch](https://www.marketingaiinstitute.com/hubfs/ep%20144%20cover.png)


![GrandChase tier list of the best characters available [April 2025]](https://media.pocketgamer.com/artwork/na-33057-1637756796/grandchase-ios-android-3rd-anniversary.jpg?#)


.png?width=1920&height=1920&fit=bounds&quality=70&format=jpg&auto=webp#)


.webp?#)


![Quick Share redesign looks more like a normal app with prep for ‘Receive’ and ‘Send’ tabs [Gallery]](https://i0.wp.com/9to5google.com/wp-content/uploads/sites/4/2024/12/quick-share-1.jpg?resize=1200%2C628&quality=82&strip=all&ssl=1)


![New Beats USB-C Charging Cables Now Available on Amazon [Video]](https://www.iclarified.com/images/news/97060/97060/97060-640.jpg)

![Apple M4 13-inch iPad Pro On Sale for $200 Off [Deal]](https://www.iclarified.com/images/news/97056/97056/97056-640.jpg)
![Apple Shares New 'Mac Does That' Ads for MacBook Pro [Video]](https://www.iclarified.com/images/news/97055/97055/97055-640.jpg)


Vim Navigation
Table of Contents What Is Vim? Vim Modes Overview Opening and Creating Files with Vim Switching Insert Mode Switching back to Command Mode Accessing Extended Mode Saving and Quitting Files Showing Line Numbers Essential Vim Commands Scenario:Editing Configuration Files Conclusion Let’s Connect on LinkedIn What Is Vim? Vim (Vi Improved) is a powerful text editor used in Unix-like systems. It's an upgraded version of the vi editor with more features like syntax highlighting, better navigation, and plugin support. It’s used for creating and editing files Vim Modes Overview 1. Command Mode (default when you open Vim) You navigate, delete, copy, paste, etc. You cannot type text directly here. Example actions: dd (delete line), yy (copy line), u (undo) 2. Insert Mode (i) You type actual text. Enter it by pressing i, a, o, etc. Exit it using ESC to return to Command Mode. 3. Extended Mode (some call it Last Line Mode or Ex Mode) You issue commands like save, quit, search, etc. Access it by pressing : in Command Mode. You’ll see : appear at the bottom of Vim. Opening and Creating Files with Vim To start Vim, you need to open a terminal, use the command : vim filename.txt or vim /filename If the file doesn’t exist, Vim creates it. If it does, you open it for editing. Switching Insert Mode i You can now type text. Switching back to Command Mode ESC You're now back to navigating and issuing Vim commands. Accessing Extended Mode Access it with: "Shift" + ":" This lets you save, quit, and do more advanced operations. Saving and Quitting Files :w — Save :q — Quit (only if there are no unsaved changes) :wq — Save and Quit :q! — Quit Without Saving Scenario: You accidentally modified a config file. Use :q! to exit without applying those changes. Showing Line Numbers :set nu or :set number — Show line numbers :set nonu or :set nonumber — Hide line numbers In troubleshooting or editing long scripts, it's helpful to know what's on line 45, especially when error logs refer to line numbers. Essential Vim Commands Command Description yy Copy current line yw Copy current word nyy Copy n lines dd Delete current line dw Delete word from cursor ndd Delete n line gg Go to top of file G Go to bottom nG or ngg Go to line n p Paste below cursor u Undo last change Ctrl + r Redo Scenario: Editing Configuration File You're managing a Linux server and need to configure NGINX. vim /etc/nginx/nginx.conf Press i to start editing the config Paste server block using p Save with :wq Restart nginx with sudo systemctl restart nginx Conclusion Getting comfortable with Vim takes time, but once you do, it becomes an incredibly powerful tool for editing files efficiently. With practice, navigating between modes and mastering shortcuts will become second nature. Let’s Connect on LinkedIn As I automate my journey into RHCE and Ansible, I’d love to connect with fellow learners and professionals. Feel free to reach out and join me as I share tips, resources, and insights throughout this 30-day challenge. cloudwhistler #30daysLinuxchallenge
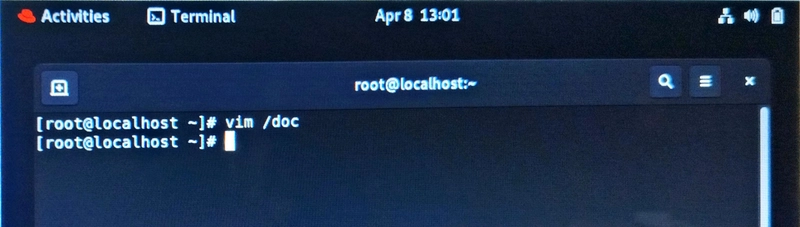
Table of Contents
- What Is Vim?
- Vim Modes Overview
- Opening and Creating Files with Vim
- Switching Insert Mode
- Switching back to Command Mode
- Accessing Extended Mode
- Saving and Quitting Files
- Showing Line Numbers
- Essential Vim Commands
- Scenario:Editing Configuration Files
- Conclusion
- Let’s Connect on LinkedIn
What Is Vim?
Vim (Vi Improved) is a powerful text editor used in Unix-like systems. It's an upgraded version of the vi editor with more features like syntax highlighting, better navigation, and plugin support.
It’s used for creating and editing files
Vim Modes Overview
1. Command Mode (default when you open Vim)
You navigate, delete, copy, paste, etc.
You cannot type text directly here.
Example actions: dd (delete line), yy (copy line), u (undo)
2. Insert Mode (i)
You type actual text.
Enter it by pressing i, a, o, etc.
Exit it using ESC to return to Command Mode.
3. Extended Mode (some call it Last Line Mode or Ex Mode)
You issue commands like save, quit, search, etc.
Access it by pressing : in Command Mode.
You’ll see : appear at the bottom of Vim.
Opening and Creating Files with Vim
To start Vim, you need to open a terminal, use the command :
vim filename.txt or vim /filename
If the file doesn’t exist, Vim creates it. If it does, you open it for editing.
Switching Insert Mode
i

You can now type text.
Switching back to Command Mode
ESC
You're now back to navigating and issuing Vim commands.
Accessing Extended Mode
Access it with:
"Shift" + ":"
This lets you save, quit, and do more advanced operations.
Saving and Quitting Files
:w — Save
:q — Quit (only if there are no unsaved changes)
:wq — Save and Quit
:q! — Quit Without Saving
Scenario: You accidentally modified a config file. Use :q! to exit without applying those changes.
Showing Line Numbers
- :set nu or :set number — Show line numbers

- :set nonu or :set nonumber — Hide line numbers
In troubleshooting or editing long scripts, it's helpful to know what's on line 45, especially when error logs refer to line numbers.
Essential Vim Commands
| Command | Description |
|---|---|
| yy | Copy current line |
| yw | Copy current word |
| nyy | Copy n lines |
| dd | Delete current line |
| dw | Delete word from cursor |
| ndd | Delete n line |
| gg | Go to top of file |
| G | Go to bottom |
| nG or ngg | Go to line n |
| p | Paste below cursor |
| u | Undo last change |
| Ctrl + r | Redo |
Scenario: Editing Configuration File
You're managing a Linux server and need to configure NGINX.
vim /etc/nginx/nginx.conf
Press i to start editing the config
Paste server block using p
Save with :wq
Restart nginx with sudo systemctl restart nginx
Conclusion
Getting comfortable with Vim takes time, but once you do, it becomes an incredibly powerful tool for editing files efficiently. With practice, navigating between modes and mastering shortcuts will become second nature.
Let’s Connect on LinkedIn
As I automate my journey into RHCE and Ansible, I’d love to connect with fellow learners and professionals. Feel free to reach out and join me as I share tips, resources, and insights throughout this 30-day challenge.