![[Webinar] AI Is Already Inside Your SaaS Stack — Learn How to Prevent the Next Silent Breach](https://blogger.googleusercontent.com/img/b/R29vZ2xl/AVvXsEiOWn65wd33dg2uO99NrtKbpYLfcepwOLidQDMls0HXKlA91k6HURluRA4WXgJRAZldEe1VReMQZyyYt1PgnoAn5JPpILsWlXIzmrBSs_TBoyPwO7hZrWouBg2-O3mdeoeSGY-l9_bsZB7vbpKjTSvG93zNytjxgTaMPqo9iq9Z5pGa05CJOs9uXpwHFT4/s1600/ai-cyber.jpg?#)


![[The AI Show Episode 144]: ChatGPT’s New Memory, Shopify CEO’s Leaked “AI First” Memo, Google Cloud Next Releases, o3 and o4-mini Coming Soon & Llama 4’s Rocky Launch](https://www.marketingaiinstitute.com/hubfs/ep%20144%20cover.png)


![Rogue Company Elite tier list of best characters [April 2025]](https://media.pocketgamer.com/artwork/na-33136-1657102075/rogue-company-ios-android-tier-cover.jpg?#)


_Andreas_Prott_Alamy.jpg?width=1280&auto=webp&quality=80&disable=upscale#)


![Apple Watch Series 10 Back On Sale for $299! [Lowest Price Ever]](https://www.iclarified.com/images/news/96657/96657/96657-640.jpg)
![EU Postpones Apple App Store Fines Amid Tariff Negotiations [Report]](https://www.iclarified.com/images/news/97068/97068/97068-640.jpg)
![Apple Slips to Fifth in China's Smartphone Market with 9% Decline [Report]](https://www.iclarified.com/images/news/97065/97065/97065-640.jpg)


Understanding Kubernetes by deploying a real-world application
Kubernetes is an open-source container orchestration platform that automates the deployment, scaling, and management of containerized applications. Originally developed by Google and now maintained by the Cloud Native Computing Foundation, Kubernetes has become the industry standard for managing applications in production. It allows developers and operations teams to focus more on building features rather than managing infrastructure, thanks to its ability to handle things like automatic scaling, self-healing, and service discovery out of the box. In this article, we’ll explore the core components of Kubernetes by walking through the process of deploying a full-stack Todo application. You'll learn how different Kubernetes objects—such as Deployments, Services, ConfigMaps, and Persistent Volumes—work together to run and maintain an application in a cluster. This hands-on project will help you better understand how Kubernetes manages containerized workloads and why it's such a powerful tool for modern DevOps practices. The project summary In this project, you’ll deploy a full-stack Todo application to a Kubernetes cluster using Minikube. The front end of the application is built with CSS and JavaScript, while the back end is powered by Node.js and Express.js. The application stores its data in a MongoDB database. To deploy this application in a Kubernetes cluster on Minikube, you'll follow these steps: Create a MongoDB ConfigMap to store the MongoDB environment variables. Create a MongoDB Deployment that defines how MongoDB pods should be configured. Create a Persistent Volume and a Persistent Volume Claim to ensure that MongoDB data persists even if the cluster is restarted. Create an internal service to expose MongoDB to the Todo application. Create a Deployment for the Todo application that defines how its pods should run. Create a ConfigMap for the Todo application to manage its environment variables. Create an external service to expose the Todo application to the outside world. All the configuration files for this tutorial can be found in the k8s folder of this GitHub repository: https://github.com/Iheanacho-ai/FullStack-Todo-List-Application Prerequisites What you will need to get started with this tutorial: Minikube. Run this command to check if you have Minikube installed: minikube version Refer to the official Minikube documentation to learn how to install Minikube if you do not have it installed. Basic knowledge of Docker and Docker compose. Definition of terms You need to understand the components that make up this project and how these components interact together. These components are: Pods: The smallest deployable unit in Kubernetes. Even though Kubernetes is a container orchestration tool, it doesn't manage containers directly — it manages Pods. A Pod typically holds one or two containers (or applications) that share the same storage, network, and lifecycle. Deployments: A Deployment manages the desired state of your Pods — at scale. Think of it as an instruction manual that tells Kubernetes how many replicas of your Pod should be running. It makes sure those Pods stay up and running, and handles updates seamlessly through rolling updates. ConfigMap: A ConfigMap lets you separate your configuration data from your application code. It’s like a .env file but managed by Kubernetes. This allows you to inject environment-specific settings into your Pods without touching the app itself. You can update the config as often as needed, and share it across multiple Pods. Service: A Service exposes a set of Pods as a network-accessible service. This matters because Pods are ephemeral — they restart often and get new IP addresses each time. Services give you a stable way to reach your Pods using consistent IPs and DNS names, no matter how often the underlying Pods change. Persistent Volume (PV): A Persistent Volume is a piece of storage within your cluster — either statically provisioned by an admin or created dynamically. Think of it as a hard drive that lives in your cluster. It helps ensure that your application’s data persists beyond your pod or cluster’s lifecycle. Persistent Volumes can come from different sources, such as hostPath (local storage), NFS (network file systems), cloud providers like AWS EBS, GCE Persistent Disks, or dynamic provisioning through CSI drivers. Persistent Volume Claim (PVC): A Persistent Volume Claim is a user's request for storage. With a PVC, you can ask for a specific size and type of storage without knowing how it’s provided. It connects your app to a Persistent Volume behind the scenes. Step 1: Setting up the project Create a folder where your project will live and change your current directory into the folder by running this: mkdir cd Step 2: Create a ConfigMap to store MongoDB environment variables Now that you've set up your project directory, the next step is to

Kubernetes is an open-source container orchestration platform that automates the deployment, scaling, and management of containerized applications. Originally developed by Google and now maintained by the Cloud Native Computing Foundation, Kubernetes has become the industry standard for managing applications in production. It allows developers and operations teams to focus more on building features rather than managing infrastructure, thanks to its ability to handle things like automatic scaling, self-healing, and service discovery out of the box.
In this article, we’ll explore the core components of Kubernetes by walking through the process of deploying a full-stack Todo application. You'll learn how different Kubernetes objects—such as Deployments, Services, ConfigMaps, and Persistent Volumes—work together to run and maintain an application in a cluster. This hands-on project will help you better understand how Kubernetes manages containerized workloads and why it's such a powerful tool for modern DevOps practices.
The project summary
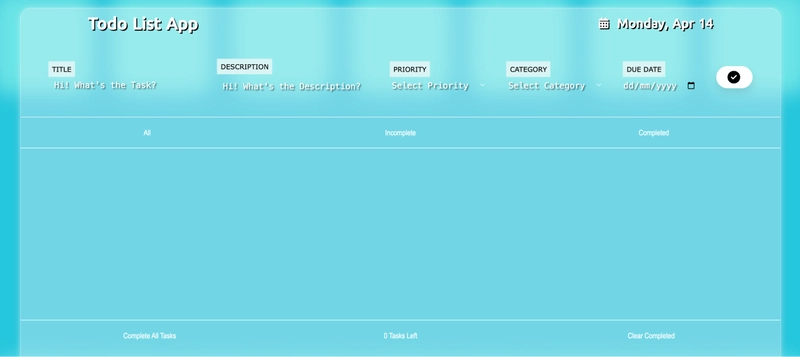
In this project, you’ll deploy a full-stack Todo application to a Kubernetes cluster using Minikube. The front end of the application is built with CSS and JavaScript, while the back end is powered by Node.js and Express.js. The application stores its data in a MongoDB database.
To deploy this application in a Kubernetes cluster on Minikube, you'll follow these steps:
- Create a MongoDB ConfigMap to store the MongoDB environment variables.
- Create a MongoDB Deployment that defines how MongoDB pods should be configured.
- Create a Persistent Volume and a Persistent Volume Claim to ensure that MongoDB data persists even if the cluster is restarted.
- Create an internal service to expose MongoDB to the Todo application.
- Create a Deployment for the Todo application that defines how its pods should run.
- Create a ConfigMap for the Todo application to manage its environment variables.
- Create an external service to expose the Todo application to the outside world.
All the configuration files for this tutorial can be found in the k8s folder of this GitHub repository:
https://github.com/Iheanacho-ai/FullStack-Todo-List-Application
Prerequisites
What you will need to get started with this tutorial:
- Minikube. Run this command to check if you have Minikube installed:
minikube version
Refer to the official Minikube documentation to learn how to install Minikube if you do not have it installed.
- Basic knowledge of Docker and Docker compose.
Definition of terms
You need to understand the components that make up this project and how these components interact together. These components are:
- Pods: The smallest deployable unit in Kubernetes. Even though Kubernetes is a container orchestration tool, it doesn't manage containers directly — it manages Pods. A Pod typically holds one or two containers (or applications) that share the same storage, network, and lifecycle.
- Deployments: A Deployment manages the desired state of your Pods — at scale. Think of it as an instruction manual that tells Kubernetes how many replicas of your Pod should be running. It makes sure those Pods stay up and running, and handles updates seamlessly through rolling updates.
- ConfigMap: A ConfigMap lets you separate your configuration data from your application code. It’s like a .env file but managed by Kubernetes. This allows you to inject environment-specific settings into your Pods without touching the app itself. You can update the config as often as needed, and share it across multiple Pods.
- Service: A Service exposes a set of Pods as a network-accessible service. This matters because Pods are ephemeral — they restart often and get new IP addresses each time. Services give you a stable way to reach your Pods using consistent IPs and DNS names, no matter how often the underlying Pods change.
- Persistent Volume (PV): A Persistent Volume is a piece of storage within your cluster — either statically provisioned by an admin or created dynamically. Think of it as a hard drive that lives in your cluster. It helps ensure that your application’s data persists beyond your pod or cluster’s lifecycle.
Persistent Volumes can come from different sources, such as hostPath (local storage), NFS (network file systems), cloud providers like AWS EBS, GCE Persistent Disks, or dynamic provisioning through CSI drivers.
- Persistent Volume Claim (PVC): A Persistent Volume Claim is a user's request for storage. With a PVC, you can ask for a specific size and type of storage without knowing how it’s provided. It connects your app to a Persistent Volume behind the scenes.
Step 1: Setting up the project
Create a folder where your project will live and change your current directory into the folder by running this:
mkdir
cd
Step 2: Create a ConfigMap to store MongoDB environment variables
Now that you've set up your project directory, the next step is to create a ConfigMap that stores configuration data for your MongoDB instance. Specifically, this ConfigMap will define the name of the database that MongoDB should create when it starts up.
To create the MongoDB ConfigMap:
- Create a new file named mongodb-configmap.yaml in your project’s root directory.
- Paste the following YAML into the file:
apiVersion: v1
kind: ConfigMap
metadata:
 name: mongodb-configmap
data:
 mongo-initdb-database: todo_list
What this file does:
-
apiVersion: v1: Specifies the API version used by Kubernetes for this resource. v1 is the standard version for ConfigMaps. -
kind: ConfigMap: Declares that this file defines a Kubernetes ConfigMap, which is used to store configuration data in key-value pairs. -
metadata: Contains metadata about the ConfigMap. Here, we set the name asmongodb-configmap, which you'll use to reference this ConfigMap in your MongoDB Deployment later. -
data: This section holds the actual configuration values. In this case, we’re setting a key namedmongo-initdb-databasewith a value of todo_list. This value will be passed as an environment variable to the MongoDB container, instructing it to create a database namedtodo_listwhen it initializes.
Step 3: Set up a Persistent Volume for storing MongoDB data
Next, you’ll define the Persistent Volume that MongoDB will use to store its data. In this setup, the volume will point to a folder on your local machine. However, you can also point this volume to a remote storage solution such as an NFS share or a cloud provider's block storage (like AWS EBS, Google Persistent Disk, or Azure Disk). Refer to Kubernetes documentation on Persistent Volume to learn more.
To create this Persistent Volume:
Create a file named
mongodb.yamlin the root directory of your project. This file will contain all the necessary Kubernetes configurations for MongoDB: the Persistent Volume, the Persistent Volume Claim, the Deployment, and the internal Service that your Todo application will communicate with.Paste the following YAML into your
mongodb.yamlfile to define the Persistent Volume:
apiVersion: v1
kind: PersistentVolume
metadata:
 name: mongodb-volume
 labels:
   type: local
spec:
 storageClassName: ""
 capacity:
   storage: 1Gi
 accessModes:
   - ReadWriteOnce
 hostPath:
   path: "/mnt/data"
Here’s what each part of the code means:
-
apiVersion: v1: This tells Kubernetes to use version 1 of its API, which is the standard for defining core resources like volumes. -
kind: PersistentVolume: This specifies that you’re creating a Persistent Volume (PV) — a reusable chunk of storage that exists outside of pods. -
metadata.name: mongodb-volume: This sets the name of the volume. You’ll refer to this name later when creating a PersistentVolumeClaim. -
labels: Labels are optional key-value tags that help organize and identify Kubernetes resources. -
type: local: This is a custom label you’ve added to indicate that this storage is local (on your own machine) rather than in the cloud. It’s just for your own reference — Kubernetes doesn’t enforce it. -
spec: This section defines how the volume behaves:-
storageClassName: "": Leaving this blank means you don’t want Kubernetes to automatically provision storage. Instead, you’re manually defining it. If someone wants to use this storage, they’ll need to request it by name (mongodb-volume). -
capacity.storage: 1Gi: This volume provides 1 gigabyte of storage space. -
accessModes: ReadWriteOnce: Only one pod can read and write to this volume at a time. -
hostPath.path: "/mnt/data": This tells Kubernetes to store MongoDB’s data in the/mnt/datafolder on your computer.
-
In simpler terms, the code block above is saying:
“I’m creating 1GB of storage on my local machine using the /mnt/data folder. This storage is named
mongodb-volume, and it can be used by only one pod at a time. MongoDB will store its data here, ensuring that even if the MongoDB pod crashes or restarts, the data remains safe."
Step 4: Create a PersistentVolumeClaim to request storage from the Persistent Volume
Creating a Persistent Volume (PV) alone is not enough to provide storage for your pods. Your pods must request a specific amount of storage from the PV, and this is done using a PersistentVolumeClaim (PVC).
To create a PVC, add the following YAML block to your mongodb.yaml file, directly below the Persistent Volume definition:
---
apiVersion: v1
kind: PersistentVolumeClaim
metadata:
 name: mongodb-volume-claim
spec:
 storageClassName: ""
 accessModes:
   - ReadWriteOnce
 resources:
   requests:
     storage: 50Mi
This configuration defines a PersistentVolumeClaim named mongodb-volume-claim that asks for 50 megabytes of storage.
As long as a matching Persistent volume (in this case, MongoDB) meets this requirement, Kubernetes will bind the two together, allowing your pod to use that space.
When you are done with this step, your mongodb.yaml file will look like this:
apiVersion: v1
kind: PersistentVolume
metadata:
 name: mongodb-volume
 labels:
   type: local
spec:
 storageClassName: ""
 capacity:
   storage: 1Gi
 accessModes:
   - ReadWriteOnce
 hostPath:
   path: "/mnt/data"


---
apiVersion: v1
kind: PersistentVolumeClaim
metadata:
 name: mongodb-volume-claim
spec:
 storageClassName: ""
 accessModes:
   - ReadWriteOnce
 resources:
   requests:
     storage: 50Mi
Step 5: Set up a MongoDB Deployment to manage your MongoDB pods
Now that you’ve created both the Persistent Volume and the PersistentVolumeClaim, it’s time to create the Deployment that will run your MongoDB pod.
Copy this YAML file block into your mongodb.yaml file to define the MongoDB Deployment:
apiVersion: apps/v1
kind: Deployment
metadata:
  name: todo-mongodb
  labels:
    app: todo-mongodb
spec:
  replicas: 1
  selector:
    matchLabels:
      app: todo-mongodb
  template:
    metadata:
      labels:
        app: todo-mongodb
    spec:
      containers:
      - name: todo-mongodb
        image: mongo
        ports:
        - containerPort: 27017
        env:
        - name: MONGO_INITDB_DATABASE
          valueFrom:
            configMapKeyRef:
              name: mongodb-configmap
              key: mongo-initdb-database
        volumeMounts:
        - name: mongodb-volume
          mountPath: /data/db
      volumes:
      - name: mongodb-volume
        persistentVolumeClaim:
          claimName: mongodb-volume-claim
The code block creates a Kubernetes Deployment for MongoDB named todo-mongodb that runs one replica of the MongoDB container. Here is the breakdown:
- API Version, Kind & Metadata
apiVersion: apps/v1
kind: Deployment
metadata:
  name: todo-mongodb
  labels:
    app: todo-mongodb
-
apiVersion: apps/v1: Tells Kubernetes to use version 1 of the apps API, which is designed for managing deployments and similar resources. -
kind: Deployment: This specifies that you are creating a Deployment, responsible for managing and scaling your MongoDB application. -
metadata.name: todo-mongodb: Sets the Deployment's name totodo-mongodb. -
metadata.labels: app: todo-mongodb: Assigns the labeltodo-mongodbto the Deployment.
/
- Deployment specification
spec:
  replicas: 1
  selector:
    matchLabels:
      app: todo-mongodb
  template:
    metadata:
      labels:
        app: todo-mongodb
-
replicas: 1: This tells Kubernetes to run only one instance (or copy) of the MongoDB pod at a time. -
selector.matchLabels: This defines which pods the Deployment should manage. It does this by matching a label. In this case, it's looking for pods with the labelapp: todo-mongodb. Only pods with this label will be controlled (i.e., created, updated, or deleted) by this Deployment. -
template.metadata.labels: These are the labels applied to any new pods created by the Deployment. This part ensures that each pod is given the labelapp: todo-mongodb, which matches the selector above — so Kubernetes knows these pods belong to this Deployment.
/
- Pod Specification (spec)
    spec:
      containers:
      - name: todo-mongodb
        image: mongo
        ports:
        - containerPort: 27017
-
Containers: This section defines the list of containers that will run in each pod.-
name: todo-mongodb: This assigns a name to the container within the pod. -
image: mongo: This tells Kubernetes to use the official MongoDB image from Docker Hub when creating the container. -
ports: This exposes port 27017 on the container, which is MongoDB’s default port.
-
/
- Environment Variable from ConfigMap
        env:
        - name: MONGO_INITDB_DATABASE
          valueFrom:
            configMapKeyRef:
              name: mongodb-configmap
              key: mongo-initdb-database
-
env: Sets environment variables for thetodo-mongodbcontainer. -
name: MONGO_INITDB_DATABASE: This environment variable specifies the default database MongoDB should create on startup. -
valueFrom.configMapKeyRef: Instructs Kubernetes to dynamically retrieve the environment variable’s value from from themongodb-configmapConfigMap you created earlier rather than hardcoding it.-
name: mongodb-configmap: Indicates the ConfigMap from which to fetch the data. -
key: mongo-initdb-database: Points to the specific key in the ConfigMap that holds the value for the environment variable.
-
/
- Mounting Storage into the Container
        volumeMounts:
        - name: mongodb-volume
          mountPath: /data/db
-
volumeMounts: Tells Kubernetes to attach a volume to this container.-
name: mongodb-volume: This references the PersistentVolume you created earlier as the volume to mount to this container
-
/
- Defining the Volume
      volumes:
      - name: mongodb-volume
        persistentVolumeClaim:
          claimName: mongodb-volume-claim
-
volumes: Defines the storage volumes available to the pod. -
name: mongodb-volume: Indicates that one of these volumes is namedmongodb-volume—this is the volume you later attach to the pod via thevolumeMountskey. -
persistentVolumeClaim: Tells Kubernetes to use a PersistentVolumeClaim for obtaining the storage resource. -
claimName: mongodb-volume-claim: Specifies the name of the PersistentVolumeClaim to use, which is the one you created to request storage from the PersistentVolume.
When you are done with this section, your mongodb.yaml file will look like this:
[https://gist.github.com/Iheanacho-ai/82d1072bf832f676623c847a70b9c420]
Step 6: Create an internal Service to connect MongoDB with the Todo application
For your application to work properly, the Todo application must connect to the MongoDB database. To allow this connection, we need to expose the MongoDB Pod using a Service.
Paste the following YAML block into your mongodb.yaml file to create the service:
---
apiVersion: v1
kind: Service
metadata:
  name: todo-mongodb-service
spec:
  selector:
    app: todo-mongodb
  ports:
    - protocol: TCP
      port: 27017
      targetPort: 27017
  clusterIP: None
The code block above:
-
apiVersion: v1: Specifies that this YAML uses version 1 of the Kubernetes API. -
kind: Service: Specifies that you're creating a Service resource, which helps expose a set of pods on the network. -
metadata: name: todo-mongodb-service: Sets the name of the Service totodo-mongodb-service. -
spec: Defines the desired behavior of the Service. -
selector: app: todo-mongodb: Tells the Service to target pods with the labelapp: todo-mongodb. -
ports: Lists the port configuration for the Service.-
protocol: TCP: Uses TCP as the communication protocol. -
port: 27017: Exposes port 27017 on the Service, which is the port clients connect to. -
targetPort: 27017: Directs the traffic to port 27017 on the selected Pods.
-
-
clusterIP: None: This makes the Service headless, which means Kubernetes won’t assign it a Cluster IP. Instead of routing traffic through a single, stable IP, the Service lets other Pods communicate directly with the IP addresses of individual MongoDB Pods. This is especially useful for databases, where each Pod might maintain its own state and needs to be reached directly—rather than through a load balancer.Refer to the Kubernetes documentation on Services to learn more about different Service types and use cases.
When you are done with this step, your
mongodb.yamlfile will look like this:
[https://gist.github.com/Iheanacho-ai/5376054e00cb9dc2571e364efc32e620]
Step 7: Apply the configuration to deploy your MongoDB application
Now that you’ve defined all the necessary components for MongoDB — including the ConfigMap, Deployment, Service, PersistentVolume, and PersistentVolumeClaim — it’s time to apply them and bring your MongoDB environment to life.
To do this, follow the steps below:
- Apply the ConfigMap first: The ConfigMap contains configuration data that the MongoDB deployment will need at startup. So, it must be created before the pod tries to read from it.
kubectl apply -f mongodb-configmap.yaml
2.Apply the MongoDB resources: This will create your MongoDB Deployment, Service, Persistent Volume, and PersistentVolumeClaim, all defined in your mongodb.yaml file.
kubectl apply -f mongodb.yaml
3.Check that everything is running correctly: Your pods and services may take a few moments to fully start. To check their status, run:
kubectl get pods
kubectl get svc

![]()
Step 8: Set up a ConfigMap to manage environment variables for your Todo application
Now that you have brought your MongoDB environment to life, you need to move on to the Todo application.
Similar to the MongoDB application, you would need to define the ConfigMap that will hold configuration values for the Todo application.
To create the ConfigMap for the Todo application:
- Create a
todo-configmap.yamlfile in your project’s root directory - Paste this YAML code block into the
todo-configmap.yamlfile.
apiVersion: v1
kind: ConfigMap
metadata:
  name: todo-configmap
data:
  deployment: "local"
  environment: "development"
  db: "mongodb://todo-mongodb-service:27017/todo_list"
  db_name: "todo_list"
In the ConfigMap above, you name the ConfigMap, todo-configmap and then define in it four environment variables:
-
deployment: "local": This explains that the application is deployed locally. -
environment: "development": Defines that the application is running in a development environment -
db: "mongodb://todo-mongodb-service:27017/todo_list": This is the MongoDB connection string. It tells your app:- Connect to the MongoDB Service called
todo-mongodb-service - Use port
27017 - Use the
todo_listdatabase
- Connect to the MongoDB Service called
-
db_name: This holds the name of the database
Step 9: Setting up a Deployment for your Todo application
Next, let’s create a Deployment to manage the pods for your Todo application.
Copy the YAML below into a file named todo-deployment.yaml:
apiVersion: apps/v1
kind: Deployment
metadata:
  name: todo-list
  labels:
    app: todo-list
spec:
  replicas: 2
  selector:
    matchLabels:
      app: todo-list
  template:
    metadata:
      labels:
        app: todo-list
    spec:
      containers:
      - name: todo-list
        image: amaraiheanacho/amaratodo:latest
        ports:
        - containerPort: 8000
        env:
        - name: DEPLOYMENT
          valueFrom:
            configMapKeyRef:
              name: todo-configmap
              key: deployment
        - name: ENVIRONMENT
          valueFrom:
            configMapKeyRef:
              name: todo-configmap
              key: environment
        - name: DB
          valueFrom:
            configMapKeyRef:
              name: todo-configmap
              key: db
        - name: DB_NAME
          valueFrom:
            configMapKeyRef:
                name: todo-configmap
                key: db_name
Breaking down this configuration into sections:
- ApiVersion, Kind, and Metadata
apiVersion: apps/v1
kind: Deployment
metadata:
  name: todo-list
  labels:
    app: todo-list
The configuration above tells Kubernetes that it defines a Deployment named todo-list.
- Deployment level Specification: This section defines how the Deployment should behave.
spec:
  replicas: 2
  selector:
    matchLabels:
      app: todo-list
  template:
    metadata:
      labels:
        app: todo-list
This bit of configuration does the following:
-
replicas: 2: Runs two pods of your Todo application for high availability. -
selector.matchLabels: Tells Kubernetes that this Deployment manages pods with the labelapp: todo-list. -
template: This is the blueprint Kubernetes uses to create the pods.-
metadata.labels: This gives every pod created by the Deployment a label ofapp: todo-list.
-
/
- Container Spec: This describes the containers the pods should run.
    spec:
      containers:
      - name: todo-list
        image: amaraiheanacho/amaratodo:latest
        ports:
        - containerPort: 8000
-
name: todo-list: The name of the container -
image: amaraiheanacho/amaratodo:latest: The Docker image used to run your app, pulled from Docker Hub. -
ports.containerPort: 8000: The port your app listens on inside the container.
/
-
Environment Variables: These are environment variables passed into your container from the
todo-configmapConfigMap you created earlier:
        env:
        - name: DEPLOYMENT
          valueFrom:
            configMapKeyRef:
              name: todo-configmap
              key: deployment
        - name: ENVIRONMENT
          valueFrom:
            configMapKeyRef:
              name: todo-configmap
              key: environment
        - name: DB
          valueFrom:
            configMapKeyRef:
              name: todo-configmap
              key: db
        - name: DB_NAME
          valueFrom:
            configMapKeyRef:
                name: todo-configmap
                key: db_name
This section retrieves values from your todo-configmap ConfigMap. These values are then injected into the container as environment variables, which include:
| Environment Variable | Value comes from key |
|---|---|
| DEPLOYMENT |
deployment in ConfigMap |
| ENVIRONMENT |
environment in ConfigMap |
| DB | db in ConfigMap |
| DB_NAME | db_name in ConfigMap |
Step 10: Create an external Service to expose your Todo application to external traffic
To access the Todo application from outside the cluster, you need to expose it using a Kubernetes Service — just like you did with MongoDB. However, unlike MongoDB, which only needs to be accessible to other pods in the cluster, the Todo app needs to be open to the Internet.
To do this, you’ll create an external Service.
Paste the following YAML block into your todo-deployment.yaml file to do so:
---
apiVersion: v1
kind: Service
metadata:
  name: todo-list-service
spec:
  selector:
    app: todo-list
  type: LoadBalancer
  ports:
    - protocol: TCP
      port: 8000
      targetPort: 8000
      nodePort: 30000
Here’s what this configuration does:
-
name: todo-list-service: This names the Service so you can refer to it easily. -
selector: app: todo-list: This Service routes traffic to any pod with the label app: todo-list. -
type: LoadBalancer: This exposes the Service to the outside world.- On cloud platforms, this would create a real Load Balancer (like AWS ELB).
- On Minikube, it actually creates a NodePort behind the scenes to simulate external access.
-
nodePort: 30000: This makes the Todo app accessible on port 30000 of your host machine (like your laptop or VM).- For example, you can open http://localhost:30000 to access the app.
Tip: To understand how this differs from the MongoDB Service, refer back to the MongoDB section.
When you are done with this section, this is how your todo-deployment.yaml file would look like:
[https://gist.github.com/Iheanacho-ai/39736da41c400cefb062bd26fd4eb191]
Step 11: Apply the configuration to launch your Todo application
Finally, let's bring your Todo application to life:
- First, apply your ConfigMap by running the command below. This will load the environment variables your Todo app needs:
kubectl apply -f todo-configmap.yaml
![]()
2.Next, deploy your Todo application pods and expose them via a service by applying the deployment YAML:
kubectl apply -f todo-deployment.yaml

3.Your pods may take a few moments to start fully. To check their status, run:
kubectl get pods

Look for a STATUS of Running for the todo-list pods.
4.To view all the services running in your cluster (including your Todo app), run:
kubectl get svc

5.Find the name of the Todo service (e.g., todo-list-service) and use it to start your app in the browser with:
minikube service
For example, if your service is called todo-list-service, run:
minikube service todo-list-service

This command will open your Todo application in your default browser.
You have deployed a Full stack Todo application into a mini Kubernetes Cluster using Minikube.
Wrapping up
This article explained the building blocks of understanding Kubernetes and stacked these blocks on top of each other to deploy a full-stack Todo application into a Kubernetes cluster propped up by Minikube. Check out the official Kubernetes documentation to dive deeper and explore all the possibilities.