


![[The AI Show Episode 144]: ChatGPT’s New Memory, Shopify CEO’s Leaked “AI First” Memo, Google Cloud Next Releases, o3 and o4-mini Coming Soon & Llama 4’s Rocky Launch](https://www.marketingaiinstitute.com/hubfs/ep%20144%20cover.png)


-Classic-Nintendo-GameCube-games-are-coming-to-Nintendo-Switch-2!-00-00-13.png?width=1920&height=1920&fit=bounds&quality=70&format=jpg&auto=webp#)


_Olekcii_Mach_Alamy.jpg?width=1280&auto=webp&quality=80&disable=upscale#)


![M4 MacBook Air Drops to New All-Time Low of $912 [Deal]](https://www.iclarified.com/images/news/97108/97108/97108-640.jpg)
![New iPhone 17 Dummy Models Surface in Black and White [Images]](https://www.iclarified.com/images/news/97106/97106/97106-640.jpg)


Transactional Emails in Convex with Bluefox and AWS SES
Table of Contents Introduction Setting Up Bluefox with Convex Create a Bluefox Account and Project Configure Your Environment Install and Run Convex Locally Integrating Bluefox with Convex Actions Setting Up the Bluefox Client Sending Transactional Emails Sending Triggered Emails Error Handling Best Practices Where to Trigger Emails (Mutations → Actions) Advanced: Handling Webhooks Features of Bluefox Webhooks Setting Up Bluefox Webhooks Verifying Webhook Requests Production Deployment Best Practices for Bluefox Troubleshooting Common Issues Conclusion Introduction Bluefox is a modern email API built on top of Amazon SES, designed for developers and SaaS teams. Whether you’re sending transactional emails or integrating real-time webhooks in a serverless Convex backend, Bluefox simplifies the process. By wrapping a usage-based, developer-friendly API around Amazon SES, you get excellent deliverability and scalability, without the complexity of managing SES directly. For Convexdevelopers, Bluefox integrates seamlessly with Convex actions, which make external calls to the Internet. This guide will walk you through setting up Bluefox with Convex, integrating it into your codebase, handling Bluefox webhooks, and outlining key considerations for deploying to production. Setting Up Bluefox with Convex 1. Create a Bluefox Account and Project Sign Up: Visit bluefox.email and create a new account. Add a Project: Once inside your dashboard, create a new Project. Connect AWS SES: Add a sending email address and link your AWS SES credentials (an IAM user with ses:SendEmail, ses:SendRawEmail, ses:GetSendQuota, ses:ListIdentities permissions). Automatic Management: Bluefox handles sending queues, email rendering, and analytics for you. 2. Configure Your Environment Obtain your API key from the Bluefox project settings. Then add BLUEFOX_API_KEY to your environment variables (via the Convex dashboard). 3. Install and Run Convex Locally npm install convex npx convex dev This installs Convex locally, ensuring any changes sync with the Convex cloud. (Note: Check npmjs.com for the latest bluefox-email version.) Integrating Bluefox with Convex Actions Convex organizes backend logic into queries, mutations, and actions. Only actions can perform external HTTP requests, making them ideal for sending emails via Bluefox. Setting Up the Bluefox Client Install the bluefox-email TypeScript library, which provides a typed interface, robust error handling, and webhook utilities: npm install bluefox-email Then create a reusable client (e.g., convex/bluefox.ts): // convex/bluefox.ts import { BluefoxClient } from "bluefox-email"; // Initialize the Bluefox client with your API key export const bluefox = new BluefoxClient({ apiKey: process.env.BLUEFOX_API_KEY!, // Ensure set in Convex dashboard debug: true // Optional debug logs }); Sending Transactional Emails Below is an example of sending a welcome email when a user signs up: // convex/actions/sendWelcomeEmail.ts import { internalAction } from "./_generated/server"; import { v } from "convex/values"; import { bluefox } from "../bluefox"; // Sends a welcome email using a transactional template export const sendWelcomeEmail = internalAction({ args: { email: v.string(), name: v.string() }, handler: async (_ctx, { email, name }) => { const result = await bluefox.email.sendTransactional({ to: email, transactionalId: "welcome-email", // Configured in the Bluefox dashboard data: { name } }); if (!result.ok) { console.error("Failed to send welcome email:", result.error.message); } }, }); The transactionalId maps to a pre-configured template in your Bluefox dashboard, and the data object passes dynamic fields (e.g., {name}). Sending Triggered Emails Triggered emails are ideal for automated lifecycle messages, such as re-engagement: // convex/actions/sendReengagementEmail.ts import { internalAction } from "./_generated/server"; import { v } from "convex/values"; import { bluefox } from "../bluefox"; // Sends an automated re-engagement email based on user inactivity export const sendReengagementEmail = internalAction({ args: { email: v.array(v.string()), lastActiveDate: v.string() }, handler: async (_ctx, { emails, lastActiveDate }) => { await bluefox.email.sendTriggered({ emails, triggeredId: "reengagement-email", // Configured in Bluefox dashboard data: { lastActive: lastActiveDate } }); }, }); Error Handling Best Practices bluefox-email returns a Result type for safer handling: const result = await bluefox.email.sendTransactional({ ... }); if (!result.ok) { switch (result.error.code) { case "VALIDATION_ERROR": console.error("Invalid email data:", resul
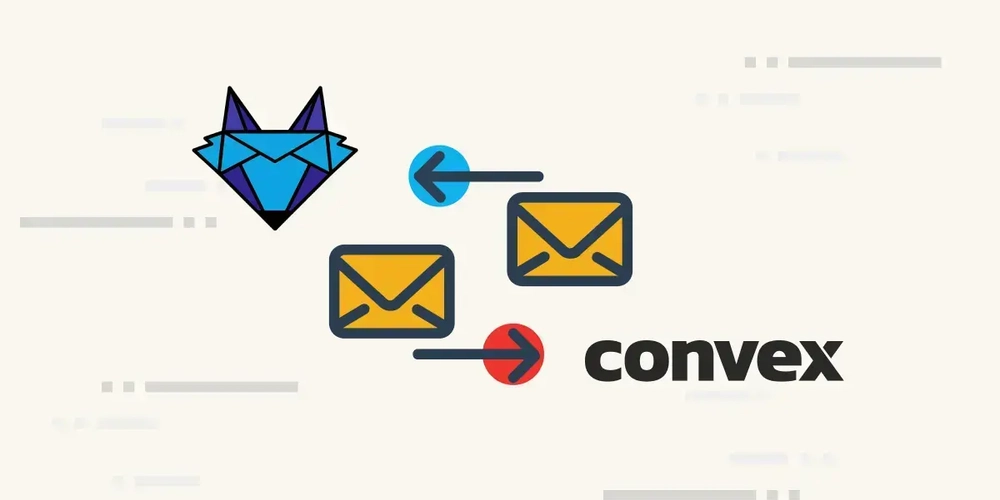
Table of Contents
- Introduction
-
Setting Up Bluefox with Convex
- Create a Bluefox Account and Project
- Configure Your Environment
- Install and Run Convex Locally
-
Integrating Bluefox with Convex Actions
- Setting Up the Bluefox Client
- Sending Transactional Emails
- Sending Triggered Emails
- Error Handling Best Practices
- Where to Trigger Emails (Mutations → Actions)
-
Advanced: Handling Webhooks
- Features of Bluefox Webhooks
- Setting Up Bluefox Webhooks
- Verifying Webhook Requests
- Production Deployment Best Practices for Bluefox
- Troubleshooting Common Issues
- Conclusion
Introduction
Bluefox is a modern email API built on top of Amazon SES, designed for developers and SaaS teams. Whether you’re sending transactional emails or integrating real-time webhooks in a serverless Convex backend, Bluefox simplifies the process. By wrapping a usage-based, developer-friendly API around Amazon SES, you get excellent deliverability and scalability, without the complexity of managing SES directly.
For Convexdevelopers, Bluefox integrates seamlessly with Convex actions, which make external calls to the Internet. This guide will walk you through setting up Bluefox with Convex, integrating it into your codebase, handling Bluefox webhooks, and outlining key considerations for deploying to production.
Setting Up Bluefox with Convex
1. Create a Bluefox Account and Project
- Sign Up: Visit bluefox.email and create a new account.
- Add a Project: Once inside your dashboard, create a new Project.
-
Connect AWS SES: Add a sending email address and link your AWS SES credentials (an IAM user with
ses:SendEmail,ses:SendRawEmail,ses:GetSendQuota,ses:ListIdentitiespermissions). - Automatic Management: Bluefox handles sending queues, email rendering, and analytics for you.
2. Configure Your Environment
Obtain your API key from the Bluefox project settings. Then add BLUEFOX_API_KEY to your environment variables (via the Convex dashboard).
3. Install and Run Convex Locally
npm install convex
npx convex dev
This installs Convex locally, ensuring any changes sync with the Convex cloud.
(Note: Check npmjs.com for the latest bluefox-email version.)
Integrating Bluefox with Convex Actions
Convex organizes backend logic into queries, mutations, and actions. Only actions can perform external HTTP requests, making them ideal for sending emails via Bluefox.
Setting Up the Bluefox Client
Install the bluefox-email TypeScript library, which provides a typed interface, robust error handling, and webhook utilities:
npm install bluefox-email
Then create a reusable client (e.g., convex/bluefox.ts):
// convex/bluefox.ts
import { BluefoxClient } from "bluefox-email";

// Initialize the Bluefox client with your API key
export const bluefox = new BluefoxClient({
  apiKey: process.env.BLUEFOX_API_KEY!, // Ensure set in Convex dashboard
  debug: true // Optional debug logs
});
Sending Transactional Emails
Below is an example of sending a welcome email when a user signs up:
// convex/actions/sendWelcomeEmail.ts
import { internalAction } from "./_generated/server";
import { v } from "convex/values";
import { bluefox } from "../bluefox";

// Sends a welcome email using a transactional template
export const sendWelcomeEmail = internalAction({
  args: { email: v.string(), name: v.string() },
  handler: async (_ctx, { email, name }) => {
    const result = await bluefox.email.sendTransactional({
      to: email,
      transactionalId: "welcome-email", // Configured in the Bluefox dashboard
      data: { name }
    });

    if (!result.ok) {
      console.error("Failed to send welcome email:", result.error.message);
    }
  },
});
The transactionalId maps to a pre-configured template in your Bluefox dashboard, and the data object passes dynamic fields (e.g., {name}).
Sending Triggered Emails
Triggered emails are ideal for automated lifecycle messages, such as re-engagement:
// convex/actions/sendReengagementEmail.ts
import { internalAction } from "./_generated/server";
import { v } from "convex/values";
import { bluefox } from "../bluefox";

// Sends an automated re-engagement email based on user inactivity
export const sendReengagementEmail = internalAction({
  args: { email: v.array(v.string()), lastActiveDate: v.string() },
  handler: async (_ctx, { emails, lastActiveDate }) => {
    await bluefox.email.sendTriggered({
      emails,
      triggeredId: "reengagement-email", // Configured in Bluefox dashboard
      data: { lastActive: lastActiveDate }
    });
  },
});
Error Handling Best Practices
bluefox-email returns a Result type for safer handling:
const result = await bluefox.email.sendTransactional({ ... });

if (!result.ok) {
  switch (result.error.code) {
    case "VALIDATION_ERROR":
      console.error("Invalid email data:", result.error.message);
      break;
    case "RATE_LIMIT_ERROR":
      console.error("Too many requests, try again later");
      break;
    default:
      console.error("Unexpected error:", result.error.message);
  }
}
Where to Trigger Emails (Mutations → Actions)
To maintain data consistency, use Convex mutation functions to call email-sending actions:
// convex/mutations/createUser.ts
import { mutation, internal } from "./_generated/server";
import { v } from "convex/values";

// Creates a new user record and then sends a welcome email
export const createUser = mutation({
  args: { email: v.string(), name: v.string() },
  handler: async (ctx, { email, name }) => {
    await ctx.db.insert("users", { email, name });
    // Schedule the welcome email to be sent after user creation
    await ctx.scheduler.runAfter(0, internal.actions.sendWelcomeEmail, {
      email,
      name,
    });
  },
});
Advanced: Handling Webhooks
Bluefox supports webhooks for real-time event notifications (opens, clicks, bounces, complaints). This allows you to track user interactions directly within your Convex application.
Features of Bluefox Webhooks
- Real-Time Updates: Receive immediate data about user activity.
- Customizable Events: Choose which events you want to listen for.
- Secure Communication: Validate incoming requests via API keys.
-
Easy Integration: Works seamlessly with Convex’s actions or
httpActionendpoints.
Setting Up Bluefox Webhooks
- Navigate to Webhooks: In your Bluefox Project Settings, find Webhooks.
-
Add Webhook URL: Provide a Convex
httpActionendpoint URL to handlePOSTrequests. - Select Events: Choose the events you want to track (opens, clicks, bounces, etc.).
- Secure Your API Key: After saving, note the key you’ll use to validate requests.
- Test Your Endpoint: Use the “Test Webhook” feature to confirm everything is working.
(For more details, see the Bluefox Webhook Docs.)
Verifying Webhook Requests
Webhook calls include an API key in the Authorization header (e.g., Bearer YOUR-SECRET-KEY). Verify that key against your stored keys.
// convex/httpActions/webhookHandler.ts
import { httpAction } from "./_generated/server";
import { bluefox } from "../bluefox";

// Handles incoming Bluefox webhook events
export const handleBluefoxWebhook = httpAction(async ({ request }) => {
  try {
    // Validate the webhook using one or more valid keys
    await bluefox.webhooks.validateWebhook({
      request,
      validApiKeys: ["primary-key", "secondary-key"]
    });

    // Parse the incoming event for further processing
    const event = await bluefox.webhooks.parseWebhookEvent(request);

    switch (event.type) {
      case "open":
        console.log(`Email opened by ${event.emailData?.to}`);
        break;
      case "click":
        console.log(`Link clicked: ${event.link}`);
        break;
      case "bounce":
        console.warn(`Email bounced: ${event.emailData?.to}`);
        break;
      // Handle other event types as needed
    }

    return new Response("OK", { status: 200 });
  } catch (error) {
    console.error("Webhook validation failed:", error);
    return new Response("Invalid webhook", { status: 400 });
  }
});
Production Deployment Best Practices for Bluefox
1. Configure Environment Variables per Deployment Stage
When deploying to different Convex environments (dev, staging, production), you’ll want to isolate your email configurations:
- Use Distinct API Keys: Create a separate Bluefox project (and associated API key) for each environment. This prevents test emails from accidentally sending to live users and keeps each environment’s data, template settings, and analytics separate.
-
Secure Access in Convex: Store
BLUEFOX_API_KEYand other sensitive credentials (like AWS Access Keys) in the Convex Dashboard’s environment settings. This avoids checking secrets into version control and ensures only authenticated project members can update them.
Proper isolation reduces risk. If your staging environment’s email-sending logic has a bug, you don’t risk spamming real users or impacting your production deliverability.
2. Leverage Bluefox's Multi-Environment Support
Bluefox makes it easy to manage multiple projects—one for each environment:
- Separate Projects: Create a “Dev” project, a “Staging” project, and a “Production” project in the Bluefox dashboard. This way, each environment has its templates, sender identities, and analytics.
- Template & Data Separation: By segregating templates, you can safely experiment with design or copy changes in a non-production environment without risking your live email campaigns.
This approach ensures a clear boundary between testing and live operations. It also simplifies debugging—if something fails in dev, you know exactly which key and project to inspect.
3. Ensure AWS SES Production Access
Bluefox relies on your AWS SES credentials, so you need to move out of the “sandbox” mode:
- Domain Verification: Verify your domain in the AWS SES console. This adds DNS records (SPF, DKIM) that prove you own the domain.
- Request Production Access: AWS requires a justification for sending emails outside the sandbox. Be clear about your use cases (transactional vs. marketing) and compliance practices in your support request.
- Monitor Sending Limits: Even in production, AWS imposes sending limits based on your account’s trust level. Keep an eye on your quota to avoid hitting a cap mid-campaign.
Proper SES configuration is essential for deliverability. If you forget to verify your domain or finalize production access, your emails may never leave the sandbox—or worse, land in spam.
4. Implement Bounce and Complaint Handling
Maintaining a good sender reputation is critical for high delivery rates:
- Real-Time Monitoring: Configure webhooks for bounce and complaint events in Bluefox. This allows your app to react immediately when an email fails or a user marks it as spam.
- Automated Suppression: Whenever you receive a bounce or complaint event, mark the email address as “unreachable” in your database. Sending again to these addresses can harm your domain reputation.
- User Feedback Loop: Consider notifying users with outdated or invalid emails to update their information.
Unchecked bounces and spam complaints degrade your sender reputation. Over time, this can lead to your emails being blocked or flagged as spam by major providers.
5. Authenticate Your Domain with SPF, DKIM, and DMARC
Proper domain authentication is crucial for email security and deliverability:
- SPF (Sender Policy Framework): Specifies which servers can send email on behalf of your domain.
- DKIM (DomainKeys Identified Mail): Uses cryptographic signatures to prove an email came from your domain.
- DMARC (Domain-based Message Authentication, Reporting, and Conformance): Builds on SPF and DKIM, telling receiving mail servers how to handle unauthenticated messages and providing feedback via DMARC reports.
These protocols prevent spoofing and boost trust. Many email providers (Gmail, Outlook, etc.) use authentication checks to decide if an email goes to the inbox or spam folder.
6. Provide Unsubscribe and Preference Management
Even if you’re mostly sending transactional messages, giving users control over what they receive is beneficial:
- Unsubscribe Links: For marketing or optional notifications, link users to a page where they can opt out.
- Preference Center: Provide a central place where users can pause certain emails or change frequency.
- Legal Compliance: Regulations like CAN-SPAM (in the US) and GDPR (in the EU) often require some form of opt-out for marketing emails.
Offering an easy way to unsubscribe or pause notifications reduces spam complaints and legal exposure. It also builds user trust by respecting their communication preferences.
7. Monitor and Optimize Your Email Metrics
Simply sending emails isn’t enough—continuous monitoring is key:
- Track Delivery, Open, and Click Rates: Bluefox offers dashboards to view engagement metrics in near real-time.
- Analyze Bounces and Complaints: A sudden spike can indicate deliverability issues or a poorly targeted list.
- A/B Testing Templates: Experiment with subject lines, content, and send times. Then compare open/click rates to refine your approach.
Ongoing analytics help you spot red flags early (e.g., deliverability drops). They also guide iterative improvements, ensuring your email performance keeps pace with user needs and business goals.
Conclusion
Bluefox is an excellent choice for anyone building a SaaS on Convex who needs a robust, developer-friendly email platform. By abstracting away the complexity of Amazon SES, it lets you focus on crafting great user experiences while still benefiting from SES’s world-class deliverability. Set up your Bluefox project, follow these best practices for webhooks and production, and you’ll be sending modern, scalable emails in no time!