![[The AI Show Episode 142]: ChatGPT’s New Image Generator, Studio Ghibli Craze and Backlash, Gemini 2.5, OpenAI Academy, 4o Updates, Vibe Marketing & xAI Acquires X](https://www.marketingaiinstitute.com/hubfs/ep%20142%20cover.png)


![From drop-out to software architect with Jason Lengstorf [Podcast #167]](https://cdn.hashnode.com/res/hashnode/image/upload/v1743796461357/f3d19cd7-e6f5-4d7c-8bfc-eb974bc8da68.png?#)


.png?#)


_Christophe_Coat_Alamy.jpg?#)
 (1).webp?#)


![Apple Considers Delaying Smart Home Hub Until 2026 [Gurman]](https://www.iclarified.com/images/news/96946/96946/96946-640.jpg)
![iPhone 17 Pro Won't Feature Two-Toned Back [Gurman]](https://www.iclarified.com/images/news/96944/96944/96944-640.jpg)
![Tariffs Threaten Apple's $999 iPhone Price Point in the U.S. [Gurman]](https://www.iclarified.com/images/news/96943/96943/96943-640.jpg)


The Frontend engineering
Introduction Over the past three weeks, I have embarked on an intense learning journey, focusing on improving my technical skills, refining my projects, and tackling new challenges. It has been a period of growth, both professionally and personally, as I explored various aspects of frontend development, and problem-solving. In this article, I reflect on the key lessons I have learned during this time. Starting with React and Building My Portfolio. Before diving into building projects, I first installed React on my system. React requires Node.js and npm to be installed. I used the following steps to set up a React project: Install Node.js Download and install Node.js from nodejs.org. Verify the installation by running: node -v npm -v **Create a new React app using Vite npm create vite@latest my-portfolio --template react cd my-portfolio npm install npm run dev Folder Structure After installation, the project structure includes: src/ – Contains components and main logic. public/ – Holds static files. package.json – Manages dependencies. With React successfully installed, I was ready to start building my portfolio. learning Tailwind CSS for Styling To enhance the styling of my portfolio, I explored Tailwind CSS. Using utility classes made styling more efficient and flexible. Instead of writing custom CSS, I could apply predefined classes directly in my components. For example, this is how I styled a button: Click Me Portfolio build I built a portfolio website to showcase my work. Through this process, I learned about component-based architecture and how to use React Router for navigation. One of the key challenges was managing imports efficiently, which I solved by ensuring that Home.jsx handled all component imports while App.jsx only imported Home.jsx and integrated React Router properly. how I structured my Home.jsx file: import React from 'react'; import NavBar from './NavBar'; import About from './About'; import Projects from './Projects'; import Contact from './Contact'; const Home = () => { return ( ); }; export default Home; The outcome Continued with Understanding Props, State Management, and Context API As I progressed, I focused on React’s state management techniques. I explored props for passing data between components, useState for managing local state, and Context API for global state management. State Props used to manage data within a component that can change over time used to pass data from one component to another mutable immutable controlled by the parent component controlled by the component itself Example of props usage const Greeting = ({ name }) => { return Hello, {name}!; }; Example of state usage import { useState } from 'react'; const Counter = () => { const [count, setCount] = useState(0); return ( Count: {count} setCount(count + 1)}>Increment ); }; Deplyoment of the portfolio on Vercel After completing my portfolio, I deployed it on Vercel. The process was smooth, and I learned how to link my GitHub repository for automatic deployment. The platform's continuous deployment feature ensures that any changes I push to my repository are automatically reflected on the live site. Seeing my project live was a great achievement! The analytics dashboard also helps me track visitor engagement and performance metrics. Moving to React Native After gaining confidence in React, I transitioned to React Native. What is React Native? React Native is a framework for building mobile applications using JavaScript and React. It enables developers to create cross-platform apps for both iOS and Android using a single codebase. React Native CLI vs. Expo React Native CLI provides full control over the project but requires manual setup and configuration. Expo is a framework built on React Native that simplifies development with pre-configured settings and managed workflows. I decided to use Expo because of its simplicity and built-in features. Installing Expo cd desktop npx create-expo-app@latest npx expo start After that you are able to run it on your real device using the expo app or a mobile emulator this is through a scan. Understanding Components in React Native React Native follows a component-based architecture similar to React for web development. The main components I worked with include: View: The basic container for layout and styling. Text: Used for displaying text. Image: Displays images. Button: Handles user interactions. TextInput: Captures user input. A Snippet of the structure import React from 'react'; import { View, Text, Button } from 'react-native'; const WelcomeScreen = () => { return ( Welcome to My App alert('Button Pressed')} /> ); }; export defa
Introduction
Over the past three weeks, I have embarked on an intense learning journey, focusing on improving my technical skills, refining my projects, and tackling new challenges. It has been a period of growth, both professionally and personally, as I explored various aspects of frontend development, and problem-solving. In this article, I reflect on the key lessons I have learned during this time.
Starting with React and Building My Portfolio.
Before diving into building projects, I first installed React on my system. React requires Node.js and npm to be installed. I used the following steps to set up a React project:
-
Install Node.js
Download and install Node.js from nodejs.org.
Verify the installation by running:
node -v
npm -v
**Create a new React app using Vite
npm create vite@latest my-portfolio --template react
cd my-portfolio
npm install
npm run dev
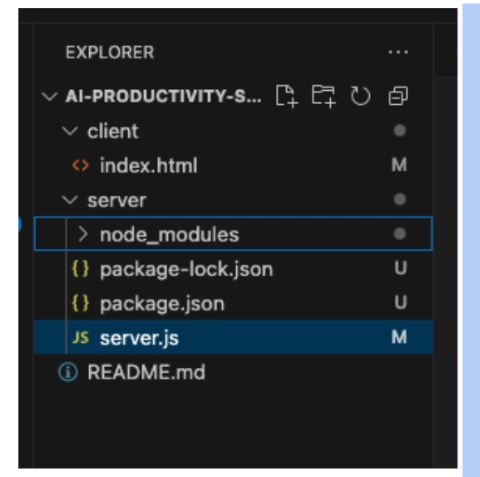
- Folder Structure
After installation, the project structure includes:
-
src/– Contains components and main logic. -
public/– Holds static files. -
package.json– Manages dependencies.
-
With React successfully installed, I was ready to start building my portfolio.
learning Tailwind CSS for Styling
To enhance the styling of my portfolio, I explored Tailwind CSS. Using utility classes made styling more efficient and flexible. Instead of writing custom CSS, I could apply predefined classes directly in my components. For example, this is how I styled a button:
<button className="bg-blue-500 text-white px-4 py-2 rounded-lg hover:bg-blue-700">
  Click Me
button>
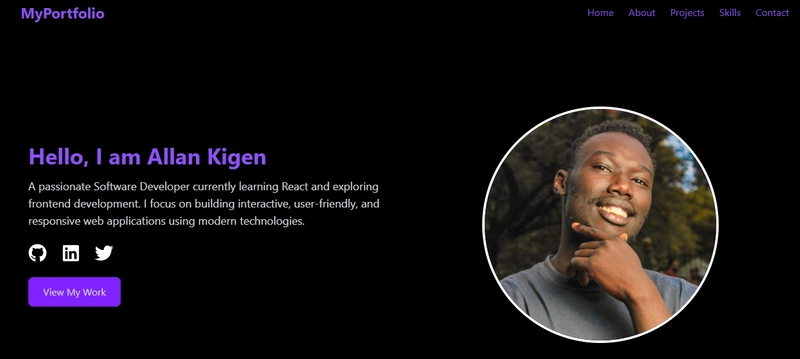
Portfolio build
I built a portfolio website to showcase my work. Through this process, I learned about component-based architecture and how to use React Router for navigation. One of the key challenges was managing imports efficiently, which I solved by ensuring that Home.jsx handled all component imports while App.jsx only imported Home.jsx and integrated React Router properly.
how I structured my Home.jsx file:
import React from 'react';
import NavBar from './NavBar';
import About from './About';
import Projects from './Projects';
import Contact from './Contact';

const Home = () => {
  return (
    <div>
      <NavBar />
      <About />
      <Projects />
      <Contact />
    div>
  );
};

export default Home;
The outcome
Continued with Understanding Props, State Management, and Context API
As I progressed, I focused on React’s state management techniques. I explored props for passing data between components, useState for managing local state, and Context API for global state management.
| State | Props |
|---|---|
| used to manage data within a component that can change over time | used to pass data from one component to another |
| mutable | immutable |
| controlled by the parent component | controlled by the component itself |
Example of props usage
const Greeting = ({ name }) => {
  return <h1>Hello, {name}!h1>;
};
Example of state usage
import { useState } from 'react';

const Counter = () => {
  const [count, setCount] = useState(0);
  return (
    <div>
      <p>Count: {count}p>
      <button onClick={() => setCount(count + 1)}>Incrementbutton>
    div>
  );
};
Deplyoment of the portfolio on Vercel
After completing my portfolio, I deployed it on Vercel. The process was smooth, and I learned how to link my GitHub repository for automatic deployment. The platform's continuous deployment feature ensures that any changes I push to my repository are automatically reflected on the live site. Seeing my project live was a great achievement! The analytics dashboard also helps me track visitor engagement and performance metrics.
Moving to React Native
After gaining confidence in React, I transitioned to React Native.
What is React Native?
React Native is a framework for building mobile applications using JavaScript and React. It enables developers to create cross-platform apps for both iOS and Android using a single codebase.
React Native CLI vs. Expo
- React Native CLI provides full control over the project but requires manual setup and configuration.
- Expo is a framework built on React Native that simplifies development with pre-configured settings and managed workflows.
I decided to use Expo because of its simplicity and built-in features.
Installing Expo
cd desktop
npx create-expo-app@latest
npx expo start
After that you are able to run it on your real device using the expo app or a mobile emulator this is through a scan.

Understanding Components in React Native
React Native follows a component-based architecture similar to React for web development. The main components I worked with include:
- View: The basic container for layout and styling.
- Text: Used for displaying text.
- Image: Displays images.
- Button: Handles user interactions.
- TextInput: Captures user input.
A Snippet of the structure
import React from 'react';
import { View, Text, Button } from 'react-native';

const WelcomeScreen = () => {
  return (
    <View>
      <Text>Welcome to My AppText>
      <Button title="Get Started" onPress={() => alert('Button Pressed')} />
    View>
  );
};

export default WelcomeScreen;
Moved to understanding typescript
TypeScript is a strongly typed, object-oriented, compiled programming language developed by Microsoft. It is a superset of JavaScript, meaning any valid JavaScript code is also valid TypeScript. However, TypeScript adds static typing and other powerful features that help developers build more scalable and maintainable applications.
Example using classes and Objects.
class Person {
  name: string;

  constructor(name: string) {
    this.name = name;
  }

  greet() {
    return `Hello, my name is ${this.name}`;
  }
}

const kigen = new Person("Kigen");
console.log(kigen.greet()); // Hello, my name is Kigen
Created a sign In and Sign up screen.
Built a simple sign in and sign Up with authentication.
import React, { useState } from 'react';
import { View, Text, TextInput, Button } from 'react-native';

const AuthScreen = () => {
  const [email, setEmail] = useState('');
  const [password, setPassword] = useState('');

  const handleSignIn = () => {
    alert(`Signing in with ${email}`);
  };

  return (
    <View>
      <Text>Sign InText>
      <TextInput placeholder="Email" onChangeText={setEmail} value={email} />
      <TextInput placeholder="Password" onChangeText={setPassword} value={password} secureTextEntry />
      <Button title="Sign In" onPress={handleSignIn} />
    View>
  );
};

export default AuthScreen;
On to Working with APIs in React Native
APIs (Application Programming Interfaces) allow mobile applications to communicate with backend servers to fetch or send data. React Native provides multiple ways to interact with APIs, including the built-in fetch method and third-party libraries like Axios.
Fetching Data Using fetch
The fetch method is a built-in JavaScript function that allows sending network requests.
Fetching Data Using Axios
Axios is a popular library for making HTTP requests. To use it, install Axios first:
npm install axios
Conclusion
Looking back at these , I am proud of the progress I have made. I have gained valuable technical skills, refined my project management approach, and improved my ability to solve problems efficiently. Moving forward, I plan to continue enhancing my React Native skills, complete my pending GitHub projects, and further develop the table banking solution.
This journey has reinforced my belief that continuous learning and perseverance are key to growth in the tech field. I am excited to see what the next phase of my learning brings!