


![[The AI Show Episode 144]: ChatGPT’s New Memory, Shopify CEO’s Leaked “AI First” Memo, Google Cloud Next Releases, o3 and o4-mini Coming Soon & Llama 4’s Rocky Launch](https://www.marketingaiinstitute.com/hubfs/ep%20144%20cover.png)


_Olekcii_Mach_Alamy.jpg?width=1280&auto=webp&quality=80&disable=upscale#)


![M4 MacBook Air Drops to New All-Time Low of $912 [Deal]](https://www.iclarified.com/images/news/97108/97108/97108-640.jpg)
![New iPhone 17 Dummy Models Surface in Black and White [Images]](https://www.iclarified.com/images/news/97106/97106/97106-640.jpg)


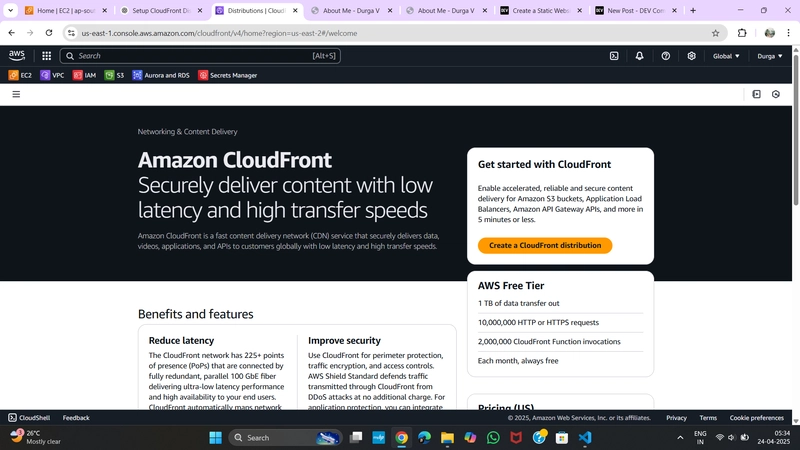
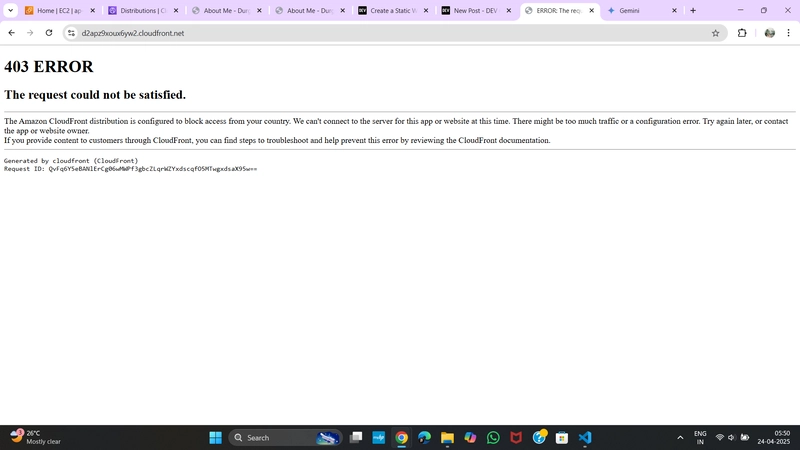
Set Up CloudFront Distribution with Geo Restriction (Country Blocking)
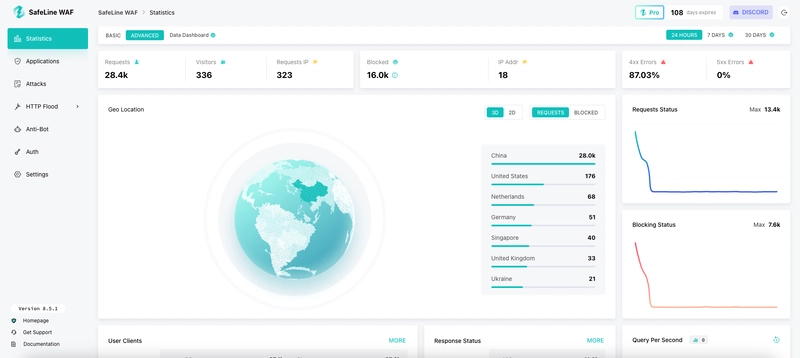
Content delivery networks (CDNs) like AWS CloudFront help serve your web content quickly and reliably across the globe. Sometimes, you might want to restrict access to your content by country—for compliance, licensing, or security reasons. This blog will guide you step-by-step on setting up a CloudFront distribution with geo restriction to block specific countries from accessing your content. Step 1: Prepare Your Origin Typically, your origin is an S3 bucket (for static websites) or an EC2 instance, Load Balancer, or custom origin server. Enable static website hosting in the S3 bucket. Ensure the bucket policy allows public reads. For detailed instructions on setting up a static website on S3, check out this article. Step 2: Go to CloudFront Console Open the CloudFront console in AWS. Click on “Create Distribution.” Step 3: Create Distribution Configure your distribution settings as needed. Click “Create Distribution.” Wait until the status changes to “Deployed” and “Enabled.” Step 4: Test Your CloudFront Distribution Use your CloudFront domain (e.g., d123abc456.cloudfront.net) to access your content. Example URL: https://d123abc456.cloudfront.net/index.html Step 5: Implement Geo Restriction (Block by Country) Once your distribution is deployed, click on it in the CloudFront console. Navigate to the Security section. Under Geo restriction, click Edit. Choose Blacklist. Select the countries you want to block (e.g., India). Click Save changes. Conclusion And there you have it! Your CloudFront distribution now restricts access by country, helping you control who can view your content. If needed, you can easily remove or update these geo restrictions by returning to the settings. This method is perfect for compliance, content licensing, or blocking unwanted traffic from certain regions. Pair this with custom error pages to provide a better user experience for blocked users.

Content delivery networks (CDNs) like AWS CloudFront help serve your web content quickly and reliably across the globe. Sometimes, you might want to restrict access to your content by country—for compliance, licensing, or security reasons. This blog will guide you step-by-step on setting up a CloudFront distribution with geo restriction to block specific countries from accessing your content.
Step 1: Prepare Your Origin
Typically, your origin is an S3 bucket (for static websites) or an EC2 instance, Load Balancer, or custom origin server.
- Enable static website hosting in the S3 bucket.
- Ensure the bucket policy allows public reads.
For detailed instructions on setting up a static website on S3, check out this article.
Step 2: Go to CloudFront Console
- Open the CloudFront console in AWS.
- Click on “Create Distribution.”
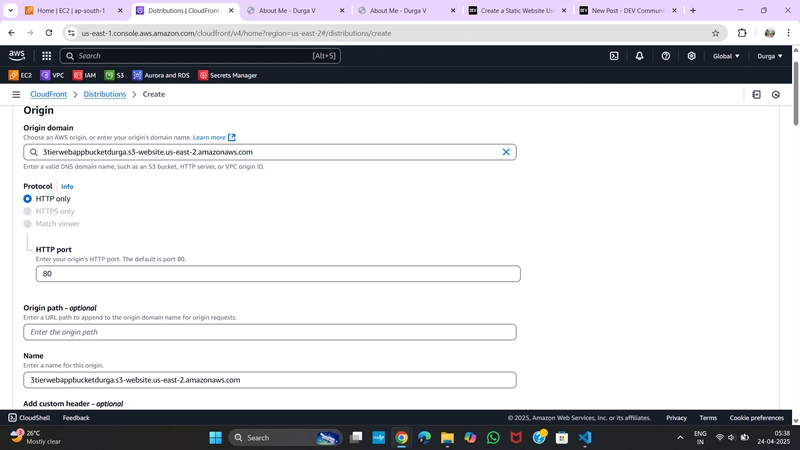
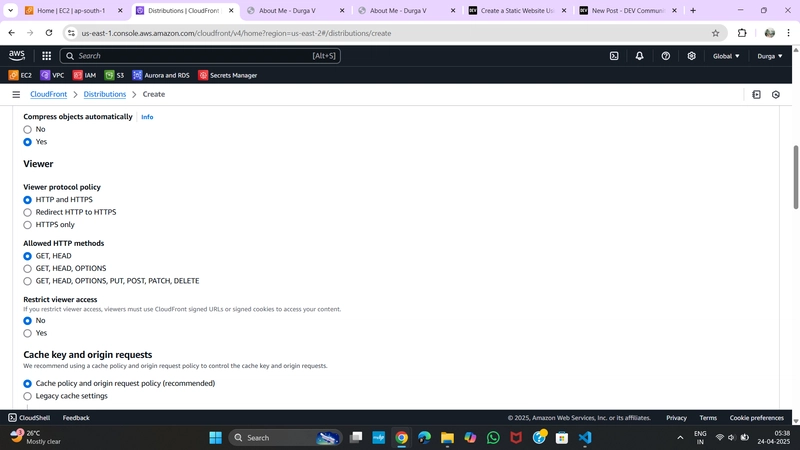
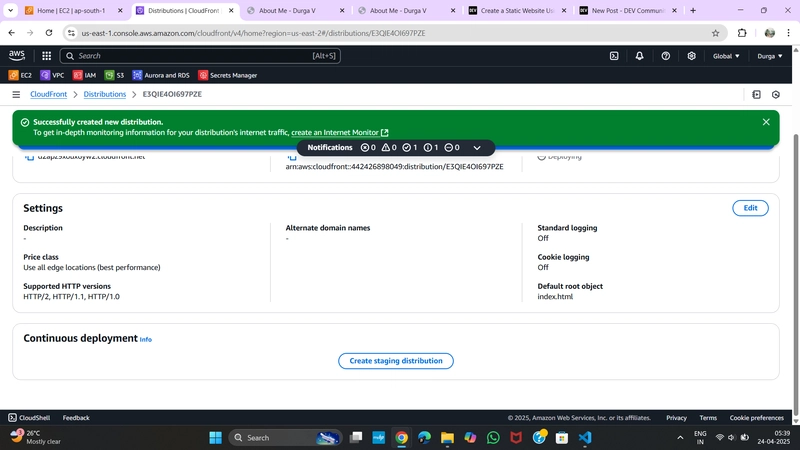
Step 3: Create Distribution
- Configure your distribution settings as needed.
- Click “Create Distribution.”
- Wait until the status changes to “Deployed” and “Enabled.”

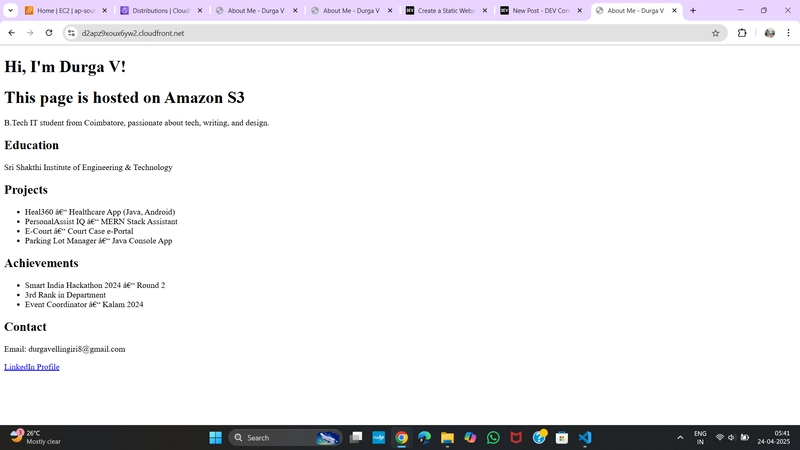
Step 4: Test Your CloudFront Distribution
Use your CloudFront domain (e.g., d123abc456.cloudfront.net) to access your content.
Example URL: https://d123abc456.cloudfront.net/index.html
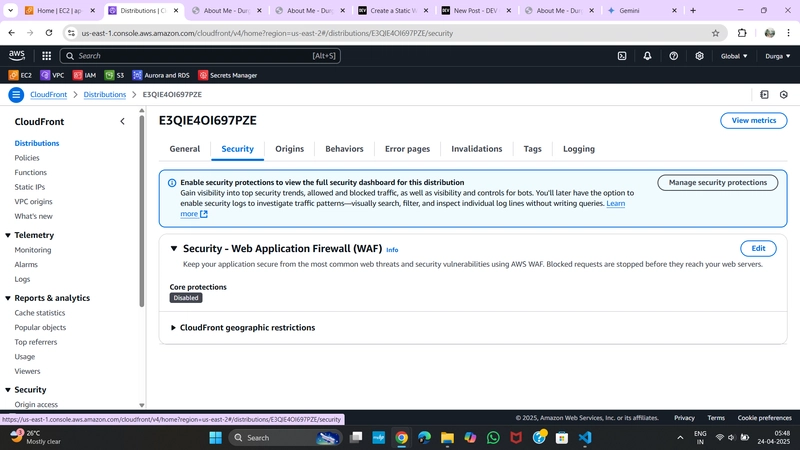
Step 5: Implement Geo Restriction (Block by Country)
- Once your distribution is deployed, click on it in the CloudFront console.
- Navigate to the Security section.
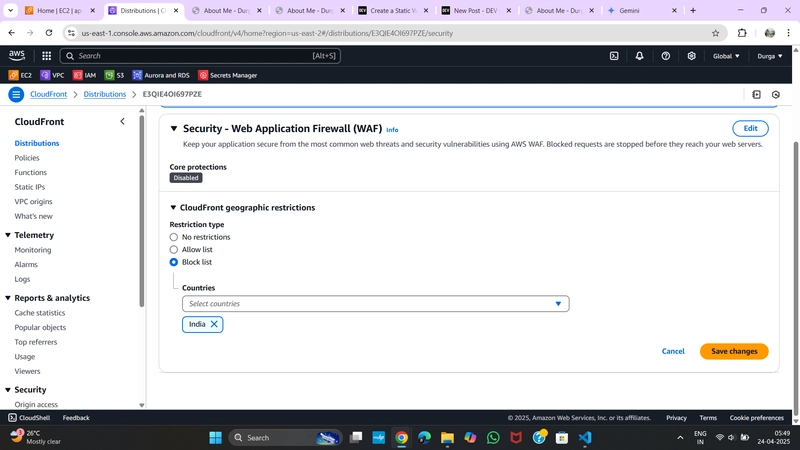
- Under Geo restriction, click Edit.
- Choose Blacklist.
- Select the countries you want to block (e.g., India).
- Click Save changes.
Conclusion
And there you have it! Your CloudFront distribution now restricts access by country, helping you control who can view your content. If needed, you can easily remove or update these geo restrictions by returning to the settings.
This method is perfect for compliance, content licensing, or blocking unwanted traffic from certain regions. Pair this with custom error pages to provide a better user experience for blocked users.