![[The AI Show Episode 142]: ChatGPT’s New Image Generator, Studio Ghibli Craze and Backlash, Gemini 2.5, OpenAI Academy, 4o Updates, Vibe Marketing & xAI Acquires X](https://www.marketingaiinstitute.com/hubfs/ep%20142%20cover.png)


![From drop-out to software architect with Jason Lengstorf [Podcast #167]](https://cdn.hashnode.com/res/hashnode/image/upload/v1743796461357/f3d19cd7-e6f5-4d7c-8bfc-eb974bc8da68.png?#)


.png?#)


_Christophe_Coat_Alamy.jpg?#)
 (1).webp?#)


![Apple Considers Delaying Smart Home Hub Until 2026 [Gurman]](https://www.iclarified.com/images/news/96946/96946/96946-640.jpg)
![iPhone 17 Pro Won't Feature Two-Toned Back [Gurman]](https://www.iclarified.com/images/news/96944/96944/96944-640.jpg)
![Tariffs Threaten Apple's $999 iPhone Price Point in the U.S. [Gurman]](https://www.iclarified.com/images/news/96943/96943/96943-640.jpg)


Phase 3: Securing Packages with AWS CodeArtifact
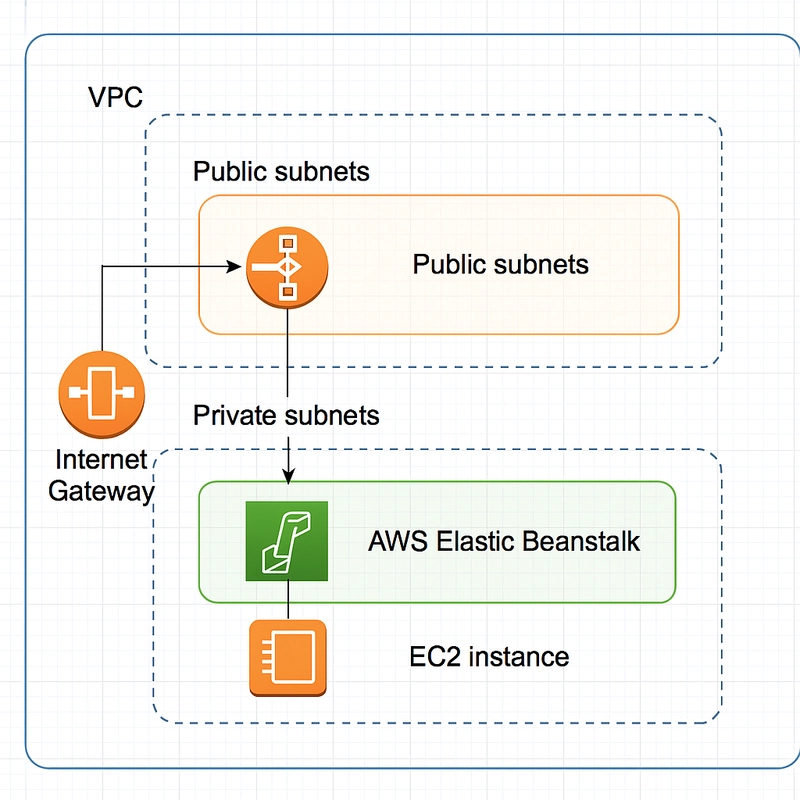
Overview In Phase 3 of the Seven Days DevOps Challenge, I'm taking my cloud infrastructure to the next level by implementing AWS CodeArtifact. After setting up an EC2 instance in Phase 1 and integrating with GitHub in Phase 2, this phase focuses on package management - a component of modern software development pipelines. CodeArtifact provides a secure, scalable artifact repository that integrates seamlessly with common build tools and package managers like Maven. This allowed me to store, publish, and share software packages securely. Key Learnings Through this phase, I gained valuable knowledge on: Package Management in AWS I learned how to create and configure a secure repository for storing Java packages. Repository Domains I understood how CodeArtifact organizes repositories within domains for better governance. Upstream Repositories I configured connections to public repositories like Maven Central to automatically pull and cache dependencies. Access Control for Packages I implemented proper IAM policies to secure access to package repositories. Key Tools and Concepts For this phase, I used the following tools and services: AWS CodeArtifact A fully managed artifact repository service that makes it easy to securely store and share software packages. Maven A build automation tool used primarily for Java projects to manage dependencies. AWS IAM Identity and Access Management that provides fine-grained access control to AWS services. Upstream repository A backup source where your repository looks for packages if they are not already stored locally. Steps Step 1: CodeArtifact repository The first step was to create a new CodeArtifact repository in the AWS Management Console. I navigated to the CodeArtifact service and set up a repository named "nextwork-devops-day3-kene." I added a description to specify that this repository would store packages related to a Java web application used in NextWork’s CI/CD pipeline series. To ensure dependency management, I selected Maven Central Store as an upstream repository, which allows automatic pulling of public dependencies when needed. To organize my repositories, I created a domain. I named it "nextwork" to match my organization’s naming convention. Step 2: Reviewing the Package Flow After setting up the domain and repository, I reviewed the package flow diagram provided by AWS. This helped me understand how packages would be managed within the system:External packages from public:maven-central flow into maven-central-store. My repository retrieves packages from maven-central-store. This ensures that packages are cached and verified before being used in my application. Step 3: Connecting to the Repository Once the domain and repository were set up, I needed to connect my local or cloud environment to CodeArtifact. I clicked on "View connection instructions" in the AWS console to get the setup details. The instructions provided steps to configure my package manager and authentication method. To authenticate and interact with the repository, I had to generate a CodeArtifact authorization token. The AWS console provided a command for exporting the token using the AWS CLI. However, I needed to ensure my AWS credentials were correctly configured on my system before running the command. Step 4: Connecting to the EC2 Instance To connect the ec2 instance I ran the following code on it in order to export the codeArtifact authorization token for authorization: export CODEARTIFACT_AUTH_TOKEN=`aws codeartifact get-authorization-token --domain nextwork --domain-owner 039612887229 --region eu-west-1 --query authorizationToken --output text` The code ran in an error because the ec2 instance didn't have the permission to interact with the Code Artifact. To solve this issue, I created an IAM role and policy for this purpose. This role allowed my EC2 instance to authenticate with CodeArtifact securely. Step 5: Creating of the Settings.xml To store the credentials securely in Maven, I created a settings.xml file. This file included the repository credentials, referencing the AWS authorization token dynamically Step 6: Compiling the Project with Maven With authentication configured, I proceeded to compile my Java web application using Maven mvn compile --settings settings.xml This process successfully pulled dependencies from the CodeArtifact repository Conclusion Phase 3 of the Seven Days DevOps Challenge demonstrates how to use AWS CodeArtifact to secure and manage dependencies for a web application.This phase builds on the previous work of setting up an EC2 instance and implementing version control with GitHub, adding component to the DevOps pipeline.
Overview
In Phase 3 of the Seven Days DevOps Challenge, I'm taking my cloud infrastructure to the next level by implementing AWS CodeArtifact. After setting up an EC2 instance in Phase 1 and integrating with GitHub in Phase 2, this phase focuses on package management - a component of modern software development pipelines.
CodeArtifact provides a secure, scalable artifact repository that integrates seamlessly with common build tools and package managers like Maven. This allowed me to store, publish, and share software packages securely.
Key Learnings
Through this phase, I gained valuable knowledge on:
Package Management in AWS
I learned how to create and configure a secure repository for storing Java packages.
Repository Domains
I understood how CodeArtifact organizes repositories within domains for better governance.
Upstream Repositories
I configured connections to public repositories like Maven Central to automatically pull and cache dependencies.
Access Control for Packages
I implemented proper IAM policies to secure access to package repositories.
Key Tools and Concepts
For this phase, I used the following tools and services:
AWS CodeArtifact
A fully managed artifact repository service that makes it easy to securely store and share software packages.
Maven
A build automation tool used primarily for Java projects to manage dependencies.
AWS IAM
Identity and Access Management that provides fine-grained access control to AWS services.
Upstream repository
A backup source where your repository looks for packages if they are not already stored locally.
Steps
Step 1: CodeArtifact repository
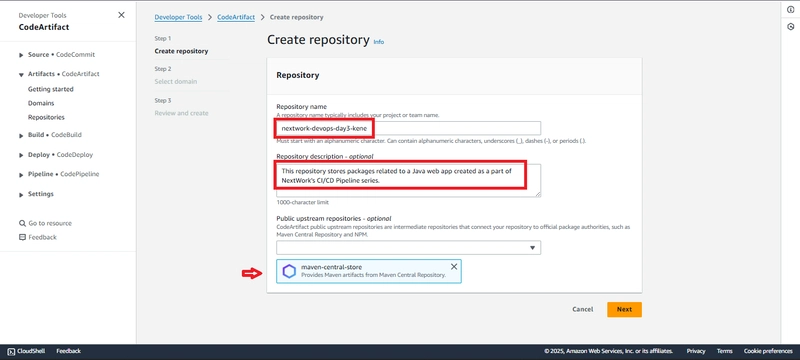
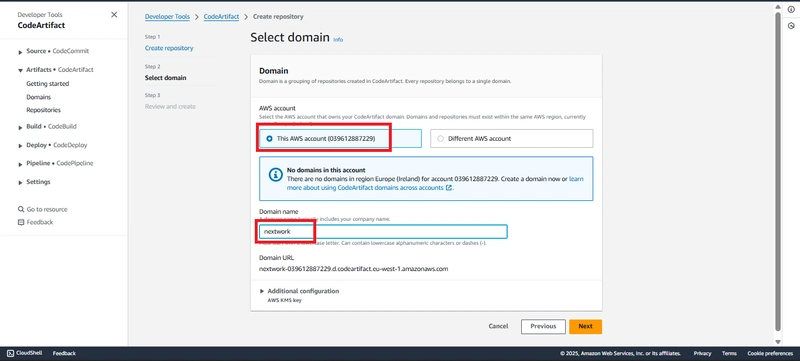
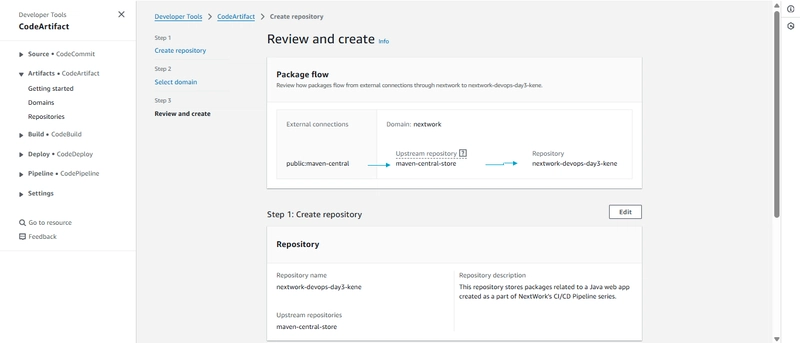
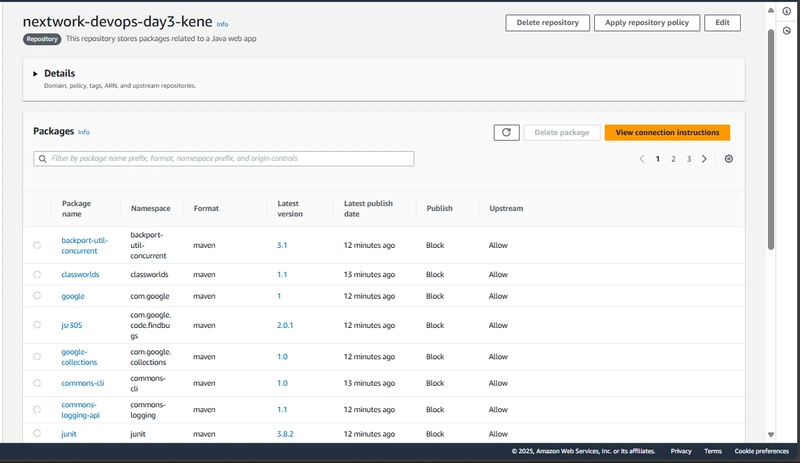
The first step was to create a new CodeArtifact repository in the AWS Management Console. I navigated to the CodeArtifact service and set up a repository named "nextwork-devops-day3-kene." I added a description to specify that this repository would store packages related to a Java web application used in NextWork’s CI/CD pipeline series. To ensure dependency management, I selected Maven Central Store as an upstream repository, which allows automatic pulling of public dependencies when needed. To organize my repositories, I created a domain. I named it "nextwork" to match my organization’s naming convention.
Step 2: Reviewing the Package Flow
After setting up the domain and repository, I reviewed the package flow diagram provided by AWS. This helped me understand how packages would be managed within the system:External packages from public:maven-central flow into maven-central-store. My repository retrieves packages from maven-central-store. This ensures that packages are cached and verified before being used in my application.
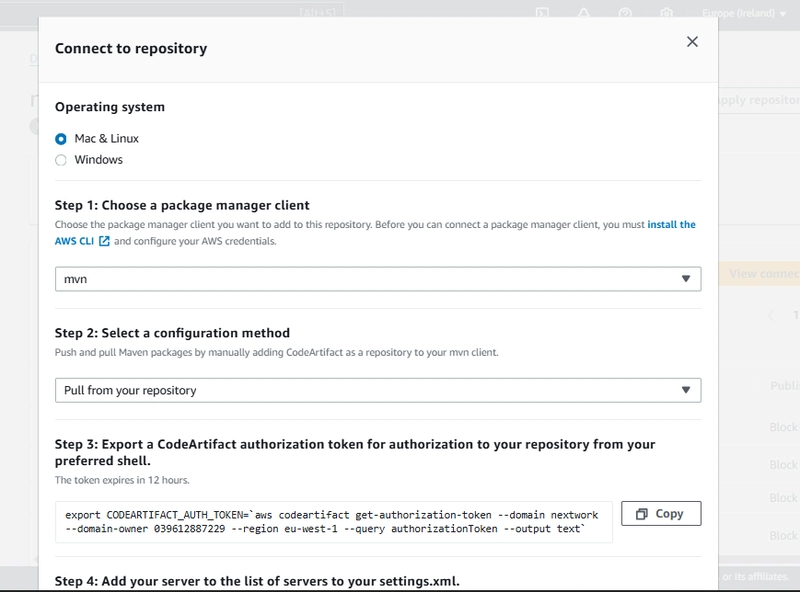
Step 3: Connecting to the Repository
Once the domain and repository were set up, I needed to connect my local or cloud environment to CodeArtifact. I clicked on "View connection instructions" in the AWS console to get the setup details. The instructions provided steps to configure my package manager and authentication method.
To authenticate and interact with the repository, I had to generate a CodeArtifact authorization token. The AWS console provided a command for exporting the token using the AWS CLI. However, I needed to ensure my AWS credentials were correctly configured on my system before running the command.

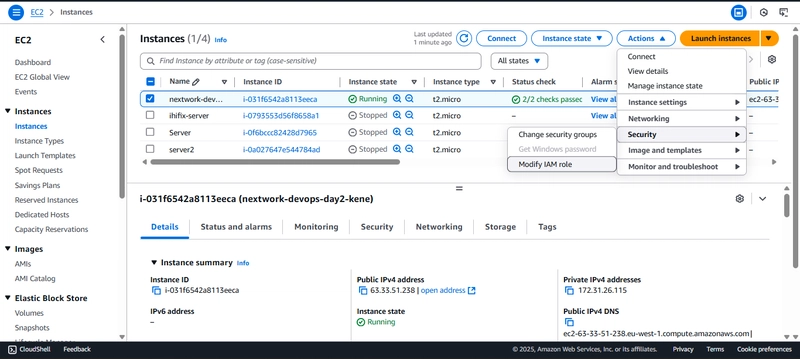
Step 4: Connecting to the EC2 Instance
To connect the ec2 instance I ran the following code on it in order to export the codeArtifact authorization token for authorization:
export CODEARTIFACT_AUTH_TOKEN=`aws codeartifact get-authorization-token --domain nextwork --domain-owner 039612887229 --region eu-west-1 --query authorizationToken --output text`
The code ran in an error because the ec2 instance didn't have the permission to interact with the Code Artifact.

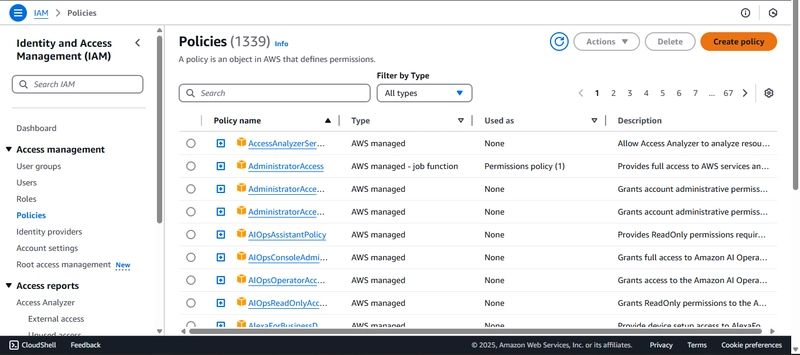
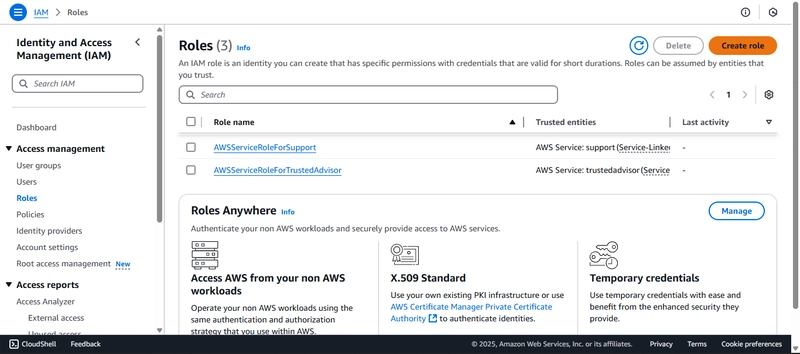
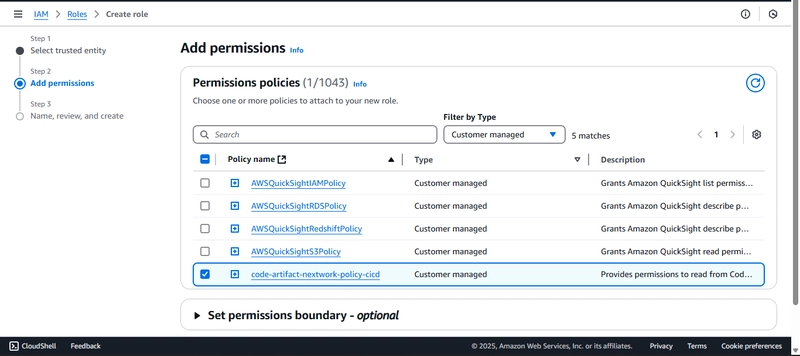
To solve this issue, I created an IAM role and policy for this purpose.
This role allowed my EC2 instance to authenticate with CodeArtifact securely.

Step 5: Creating of the Settings.xml
To store the credentials securely in Maven, I created a settings.xml file. This file included the repository credentials, referencing the AWS authorization token dynamically

Step 6: Compiling the Project with Maven
With authentication configured, I proceeded to compile my Java web application using Maven
mvn compile --settings settings.xml
This process successfully pulled dependencies from the CodeArtifact repository

Conclusion
Phase 3 of the Seven Days DevOps Challenge demonstrates how to use AWS CodeArtifact to secure and manage dependencies for a web application.This phase builds on the previous work of setting up an EC2 instance and implementing version control with GitHub, adding component to the DevOps pipeline.