.jpg)


![[Webinar] AI Is Already Inside Your SaaS Stack — Learn How to Prevent the Next Silent Breach](https://blogger.googleusercontent.com/img/b/R29vZ2xl/AVvXsEiOWn65wd33dg2uO99NrtKbpYLfcepwOLidQDMls0HXKlA91k6HURluRA4WXgJRAZldEe1VReMQZyyYt1PgnoAn5JPpILsWlXIzmrBSs_TBoyPwO7hZrWouBg2-O3mdeoeSGY-l9_bsZB7vbpKjTSvG93zNytjxgTaMPqo9iq9Z5pGa05CJOs9uXpwHFT4/s1600/ai-cyber.jpg?#)


![[The AI Show Episode 144]: ChatGPT’s New Memory, Shopify CEO’s Leaked “AI First” Memo, Google Cloud Next Releases, o3 and o4-mini Coming Soon & Llama 4’s Rocky Launch](https://www.marketingaiinstitute.com/hubfs/ep%20144%20cover.png)


![Rogue Company Elite tier list of best characters [April 2025]](https://media.pocketgamer.com/artwork/na-33136-1657102075/rogue-company-ios-android-tier-cover.jpg?#)


_Andreas_Prott_Alamy.jpg?width=1280&auto=webp&quality=80&disable=upscale#)


![What’s new in Android’s April 2025 Google System Updates [U: 4/18]](https://i0.wp.com/9to5google.com/wp-content/uploads/sites/4/2025/01/google-play-services-3.jpg?resize=1200%2C628&quality=82&strip=all&ssl=1)


![Apple Watch Series 10 Back On Sale for $299! [Lowest Price Ever]](https://www.iclarified.com/images/news/96657/96657/96657-640.jpg)
![EU Postpones Apple App Store Fines Amid Tariff Negotiations [Report]](https://www.iclarified.com/images/news/97068/97068/97068-640.jpg)
![Apple Slips to Fifth in China's Smartphone Market with 9% Decline [Report]](https://www.iclarified.com/images/news/97065/97065/97065-640.jpg)


Managing React State with Context and useReducer: A Practical Guide
Introduction State management is a critical aspect of React application development. As applications grow in complexity, managing state across multiple components can become challenging. While there are several state management libraries available, React's built-in Context API combined with the useReducer hook offers a powerful and elegant solution for managing application state without introducing external dependencies. This article explores how to implement a robust state management system using React's Context API and useReducer hook, based on a practical example from a customer management application. Understanding the Context API and useReducer React Context The Context API provides a way to share values like themes, user data, or other global states between components without explicitly passing props through each level of the component tree. This solves the "prop drilling" problem where data needs to be passed through many layers of components. useReducer Hook The useReducer hook is an alternative to useState that's particularly useful when: The next state depends on the previous state Complex state logic needs to be centralized Multiple state updates need to be coordinated It follows a pattern similar to how state management is implemented in other state management libraries, with actions and reducers. Implementation Example: Customer Management Let's examine a real-world implementation of Context and useReducer for managing customer data in a React application. Setting up the Types First, we define the types for our customer data and actions: export type Customer = { id: string; name: string; email: string; }; export type CustomerState = { customer: Customer | null; customers: Customer[]; loading: boolean; error: string | null; }; export type CustomerAction = | { type: "SET_CUSTOMER"; payload: Customer; } | { type: "SET_CUSTOMERS"; payload: Customer[]; } | { type: "SET_LOADING"; payload: boolean; } | { type: "SET_ERROR"; payload: string | null; } | { type: "REMOVE_CUSTOMER"; payload: string; }; This strongly-typed approach ensures our state management is type-safe and helps prevent runtime errors. Creating the Context Next, we create a context to hold our state and dispatch function: import { createContext, Dispatch } from "react"; import { CustomerAction, CustomerState } from "./types"; import { initialState } from "./reducer"; export const CustomerContext = createContext({ state: initialState, dispatch: () => null }); Implementing the Reducer The reducer function defines how our state should be updated in response to actions: import { Customer, CustomerAction, CustomerState } from "./types"; export const initialState = { customer: null, customers: [], loading: false, error: "", }; export const customerReducer = ( state: CustomerState, action: CustomerAction ) => { switch (action.type) { case "SET_CUSTOMER": return { ...state, customer: { ...action.payload, id: crypto.randomUUID() } as Customer, }; case "SET_CUSTOMERS": return { ...state, customers: [...state.customers, action.payload] as Customer[], }; case "SET_LOADING": return { ...state, loading: action.payload }; case "SET_ERROR": return { ...state, error: action.payload }; case "REMOVE_CUSTOMER": return { ...state, customers: (state.customers ?? []).filter( (customer) => customer.id !== action.payload ), }; default: return state; } }; Each action triggers a specific state update, following the principle of immutability by creating new state objects rather than modifying existing ones. Creating the Provider Component We then create a Provider component that will wrap our application or a part of it: import React, { useReducer, ReactNode } from "react"; import { customerReducer, initialState } from "./reducer"; import { CustomerContext } from "./context"; export const CustomerProvider: React.FC = ({ children, }) => { const [state, dispatch] = useReducer(customerReducer, initialState); return ( {children} ); }; Custom Hook for Using the Context To make our context easier to use throughout the application, we create a custom hook: import { useCallback, useContext } from "react"; import { CustomerContext } from "./context"; import { Customer } from "./types"; export const useCustomer = () => { const { state, dispatch } = useContext(CustomerContext); const setCustomer = useCallback( (customer: Customer) => { dispatch({ type: "SET_CUSTOMER", payload: customer }); }, [dispatch] ); const removeCustomer = useCallback( (customerId: string) => { dispatch({ type: "REMOV
Introduction
State management is a critical aspect of React application development. As applications grow in complexity, managing state across multiple components can become challenging. While there are several state management libraries available, React's built-in Context API combined with the useReducer hook offers a powerful and elegant solution for managing application state without introducing external dependencies.
This article explores how to implement a robust state management system using React's Context API and useReducer hook, based on a practical example from a customer management application.
Understanding the Context API and useReducer
React Context
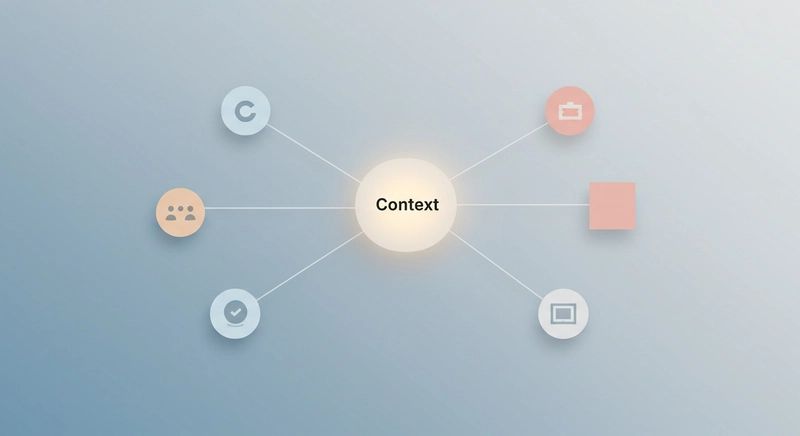
The Context API provides a way to share values like themes, user data, or other global states between components without explicitly passing props through each level of the component tree. This solves the "prop drilling" problem where data needs to be passed through many layers of components.
useReducer Hook
The useReducer hook is an alternative to useState that's particularly useful when:
- The next state depends on the previous state
- Complex state logic needs to be centralized
- Multiple state updates need to be coordinated
It follows a pattern similar to how state management is implemented in other state management libraries, with actions and reducers.
Implementation Example: Customer Management
Let's examine a real-world implementation of Context and useReducer for managing customer data in a React application.
Setting up the Types
First, we define the types for our customer data and actions:
export type Customer = {
  id: string;
  name: string;
  email: string;
};

export type CustomerState = {
  customer: Customer | null;
  customers: Customer[];
  loading: boolean;
  error: string | null;
};

export type CustomerAction =
  | {
      type: "SET_CUSTOMER";
      payload: Customer;
    }
  | {
      type: "SET_CUSTOMERS";
      payload: Customer[];
    }
  | {
      type: "SET_LOADING";
      payload: boolean;
    }
  | {
      type: "SET_ERROR";
      payload: string | null;
    }
  | {
      type: "REMOVE_CUSTOMER";
      payload: string;
    };
This strongly-typed approach ensures our state management is type-safe and helps prevent runtime errors.
Creating the Context
Next, we create a context to hold our state and dispatch function:
import { createContext, Dispatch } from "react";
import { CustomerAction, CustomerState } from "./types";
import { initialState } from "./reducer";

export const CustomerContext = createContext<{
  state: CustomerState;
  dispatch: Dispatch<CustomerAction>;
}>({ state: initialState, dispatch: () => null });
Implementing the Reducer
The reducer function defines how our state should be updated in response to actions:
import { Customer, CustomerAction, CustomerState } from "./types";

export const initialState = {
  customer: null,
  customers: [],
  loading: false,
  error: "",
};

export const customerReducer = (
  state: CustomerState,
  action: CustomerAction
) => {
  switch (action.type) {
    case "SET_CUSTOMER":
      return {
        ...state,
        customer: { ...action.payload, id: crypto.randomUUID() } as Customer,
      };
    case "SET_CUSTOMERS":
      return {
        ...state,
        customers: [...state.customers, action.payload] as Customer[],
      };
    case "SET_LOADING":
      return { ...state, loading: action.payload };
    case "SET_ERROR":
      return { ...state, error: action.payload };
    case "REMOVE_CUSTOMER":
      return {
        ...state,
        customers: (state.customers ?? []).filter(
          (customer) => customer.id !== action.payload
        ),
      };
    default:
      return state;
  }
};
Each action triggers a specific state update, following the principle of immutability by creating new state objects rather than modifying existing ones.
Creating the Provider Component
We then create a Provider component that will wrap our application or a part of it:
import React, { useReducer, ReactNode } from "react";
import { customerReducer, initialState } from "./reducer";
import { CustomerContext } from "./context";

export const CustomerProvider: React.FC<{ children: ReactNode }> = ({
  children,
}) => {
  const [state, dispatch] = useReducer(customerReducer, initialState);
  return (
    <CustomerContext.Provider value={{ state, dispatch }}>
      {children}
    </CustomerContext.Provider>
  );
};
Custom Hook for Using the Context
To make our context easier to use throughout the application, we create a custom hook:
import { useCallback, useContext } from "react";
import { CustomerContext } from "./context";
import { Customer } from "./types";

export const useCustomer = () => {
  const { state, dispatch } = useContext(CustomerContext);

  const setCustomer = useCallback(
    (customer: Customer) => {
      dispatch({ type: "SET_CUSTOMER", payload: customer });
    },
    [dispatch]
  );

  const removeCustomer = useCallback(
    (customerId: string) => {
      dispatch({ type: "REMOVE_CUSTOMER", payload: customerId });
    },
    [dispatch]
  );

  return { ...state, setCustomer, removeCustomer };
};
This hook not only provides access to the state but also offers convenient methods for common operations, abstracting away the dispatch mechanism from the components.
Using the Context in Components
With our context, reducer, and custom hook in place, we can now use them in our components:
import { Customer, useCustomer } from "./context/Customer";
import { useState } from "react";

export const CustomerForm = () => {
  const { customer, setCustomer } = useCustomer();
  const [formData, setFormData] = useState({
    id: "",
    name: "",
    email: "",
  });

  const handleSubmit = (e: React.FormEvent, formCustomerData: Customer) => {
    e.preventDefault();
    setCustomer(formCustomerData);
  };

  const handleChange = (e: React.ChangeEvent<HTMLInputElement>) => {
    setFormData({
      ...formData,
      [e.target.name]: e.target.value,
    });
  };

  return (
    <div className="flex flex-col items-center justify-center h-screen m-5">
      <h1 className="text-2xl font-bold mb-4">Customer Form</h1>
      <form
        onSubmit={(event) => handleSubmit(event, formData)}
        className="flex flex-col"
      >
        <input
          type="text"
          name="name"
          placeholder="Name"
          value={formData.name}
          onChange={handleChange}
          className="mb-2 border border-[#646cff] rounded p-2"
        />
        <input
          type="email"
          name="email"
          placeholder="Email"
          value={formData.email}
          onChange={handleChange}
          className="mb-2 border border-[#646cff] rounded p-2"
        />
        <button type="submit">Save Customer</button>
      </form>
      <div>
        <h2>Customer Details</h2>
        <p>ID: {customer?.id}</p>
        <p>Name: {customer?.name}</p>
        <p>Email: {customer?.email}</p>
      </div>
    </div>
  );
};
In this component, we use the useCustomer hook to access the customer data and the setCustomer function. When the form is submitted, we dispatch an action to update the customer in our global state.
Setting up the Provider in the Main Application
Finally, we need to wrap our application with the provider to make the context available to all components:
import { StrictMode } from "react";
import { createRoot } from "react-dom/client";
import "./index.css";
import App from "./App.tsx";
import { CounterProvider } from "./context/Counter/CounterProvider.tsx";
import { CustomerProvider } from "./context/Customer";

createRoot(document.getElementById("root")!).render(
  <StrictMode>
    <CounterProvider>
      <CustomerProvider>
        <App />
      </CustomerProvider>
    </CounterProvider>
  </StrictMode>
);
Benefits of the Context + useReducer Approach
Centralized State Logic: All state-related logic is contained in the reducer, making it easier to maintain and test.
Type Safety: With TypeScript, we get compile-time checks for our state and actions.
Predictable State Updates: The reducer pattern ensures that state transitions are predictable and follow a defined pattern.
Abstraction Through Custom Hooks: Custom hooks like
useCustomerabstract away the complexity of context and reducers, providing a clean API for components.No External Dependencies: This approach uses only React's built-in features, reducing bundle size and potential compatibility issues.
Scalability: The pattern scales well from small to large applications.
Considerations and Best Practices
Separate Concerns: Divide your state into logical domains (like customer management) and create separate contexts for each.
Performance Optimization: Consider using React's
useMemoanduseCallbackto prevent unnecessary renders.Error Handling: Include error states in your context and handle them appropriately in your UI.
Loading States: Manage loading states within your context to provide feedback during asynchronous operations.
Immutable Updates: Always create new state objects rather than modifying existing ones to ensure React detects changes correctly.
Conclusion
React's Context API combined with the useReducer hook provides a powerful, built-in solution for state management in React applications. This approach offers many of the benefits of dedicated state management libraries without introducing external dependencies.
By following the patterns demonstrated in this article, you can implement a robust state management system that is type-safe, maintainable, and scalable. The customer management example shows how this approach can be applied to real-world scenarios, providing a clean and effective way to manage application state.
Whether you're building a small application or a larger one, this approach provides a solid foundation for state management that grows with your needs.